Most of what we do is digital. Personal projects, work, school — we have files for everything, and the list goes on. Losing an entire NTFS partition can be rough, especially if you didn’t have a backup of your data.
Worry not, for this article will guide you through various methods you can use to recover an NTFS partition without losing data. We’ll also cover what you can do to protect your data from being lost in the future.
Can I Recover Data From a Deleted NTFS Partition?
Yes, recovering data from a deleted NTFS partition is possible. In some cases, the entire partition can be recovered. However, your chances of success will vary based on how long ago the partition was lost and what the drive has been used for since then. If you need to recover an accidentally deleted NTFS partition, you must act with haste.
When you lose data, it’s important that you stop using the drive until you can perform recovery. Continued use can result in your data being overwritten with new data, severely reducing the chances of recovery. Additionally, in cases where the partition was lost due to an issue like partition corruption, the data is in an even more vulnerable state. Therefore, if your NTFS partition has vanished, be sure to read the entirety of this article before attempting recovery.
| Symptoms | Scenarios | Solutions |
| Your NTFS partition was accidentally deleted, formatted, or it is unrecognized | Partition was mistakenly removed or reformatted. It now shows up as “Unallocated” or “Free Space.” |
|
| Your NTFS partition disappeared | You can still see your NTFS partition in Disk Management but it doesn’t appear in File Explorer |
|
| You can’t boot Windows because the system partition is corrupted | The computer won’t boot to Windows; you see “No Boot Device Found” or similar errors. |
|
How to Recover NTFS Partition Without Losing Data
We’ll show you multiple ways you can recover your NTFS partition without losing data. Since this is a somewhat complex problem, most methods will require the use of third-party tools.
Method 1: Fix NTFS Partition with CHKDSK
Damage to your disk’s boot sector could result in your NTFS partition showing up as RAW. You can confirm if this is the case by checking it in Disk Management (Right-click Start and click Disk Management). To fix an NTFS partition showing as RAW, you can use CHKDSK, a repair tool designed to fix file system-related problems.
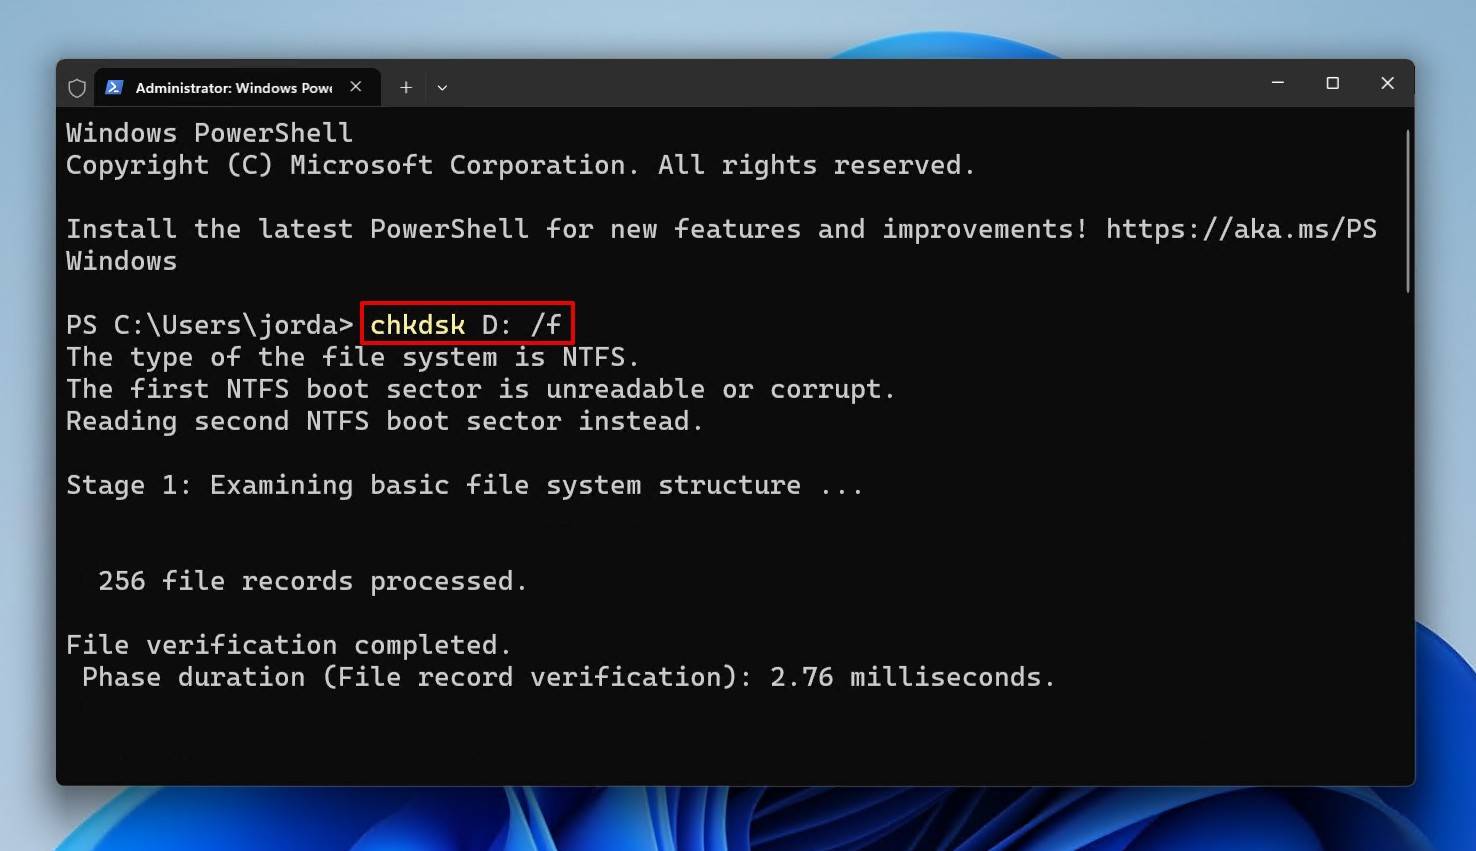
Follow these steps to recover an NTFS partition from RAW using CHKDSK:
- Right-click Start and click Terminal (Admin).

- Type the following CHKDSK command. Replace the * with your own drive letter, then press Enter.
chkdsk D: /f
Method 2: Recover Lost NTFS Partition Using Disk Drill
With data recovery software, you can recover all of the data from the lost NTFS partition. There is plenty of NTFS partition recovery software out there, but not all of them are the same. You want a recovery solution that gives you the best chance of recovering data from a missing NTFS partition.
Disk Drill is an excellent partition data recovery tool that excels in these situations. When a partition becomes lost, Disk Drill can utilize the remnants of data left in the partition table to locate where the partition resided on the disk. From there, it can recover the files using file system metadata. Even if you need to recover a formatted NTFS partition, which usually erases any usable remnants, Disk Drill can use its signature scanner to identify up to 400 different file types.
This is how you recover data from an NTFS partition using Disk Drill:
- Download Disk Drill and install it. Open it.
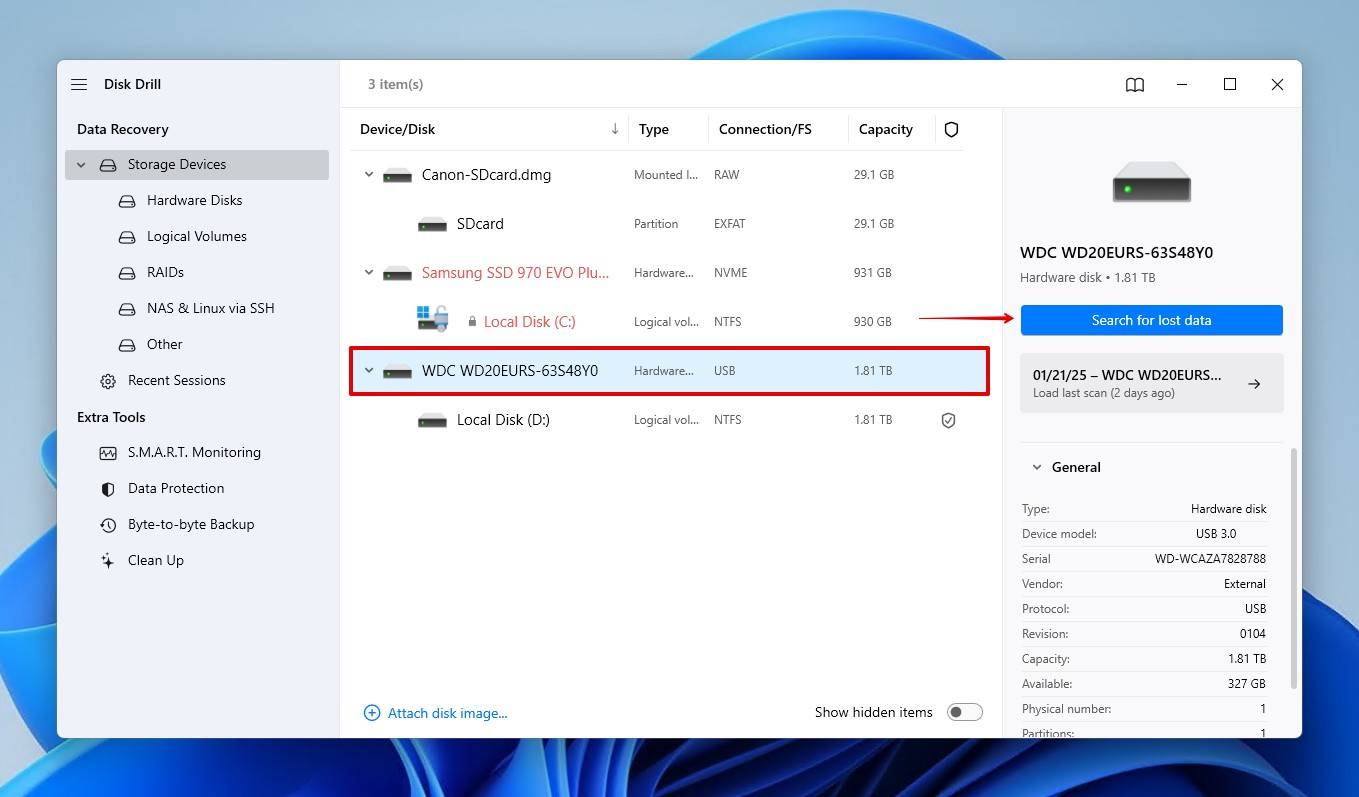
- Select your drive with the lost NTFS partition, then click Search for lost data to start the scan.
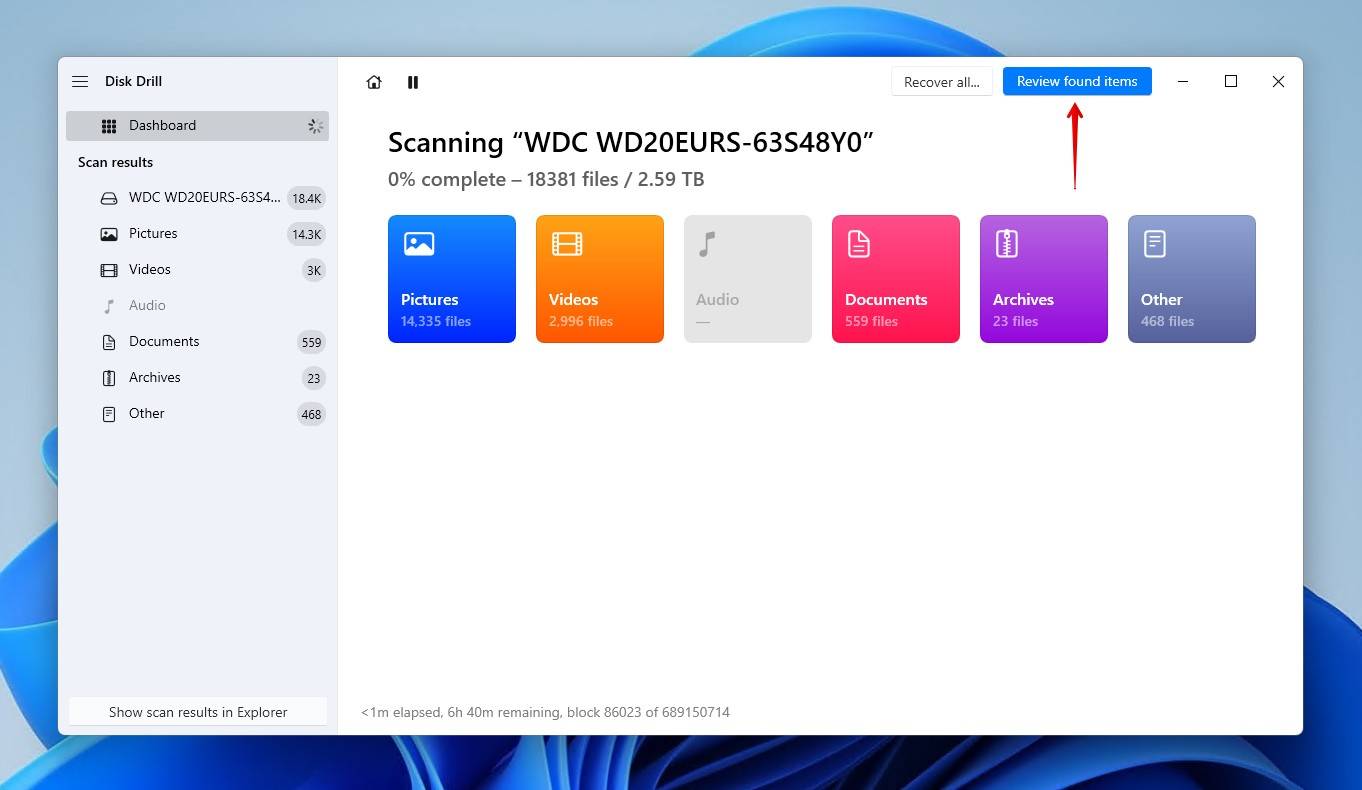
- Click Review found items when the scan has finished. Or, if you only want to see the recoverable data from the lost partition, click the lost partition at the bottom of the window.
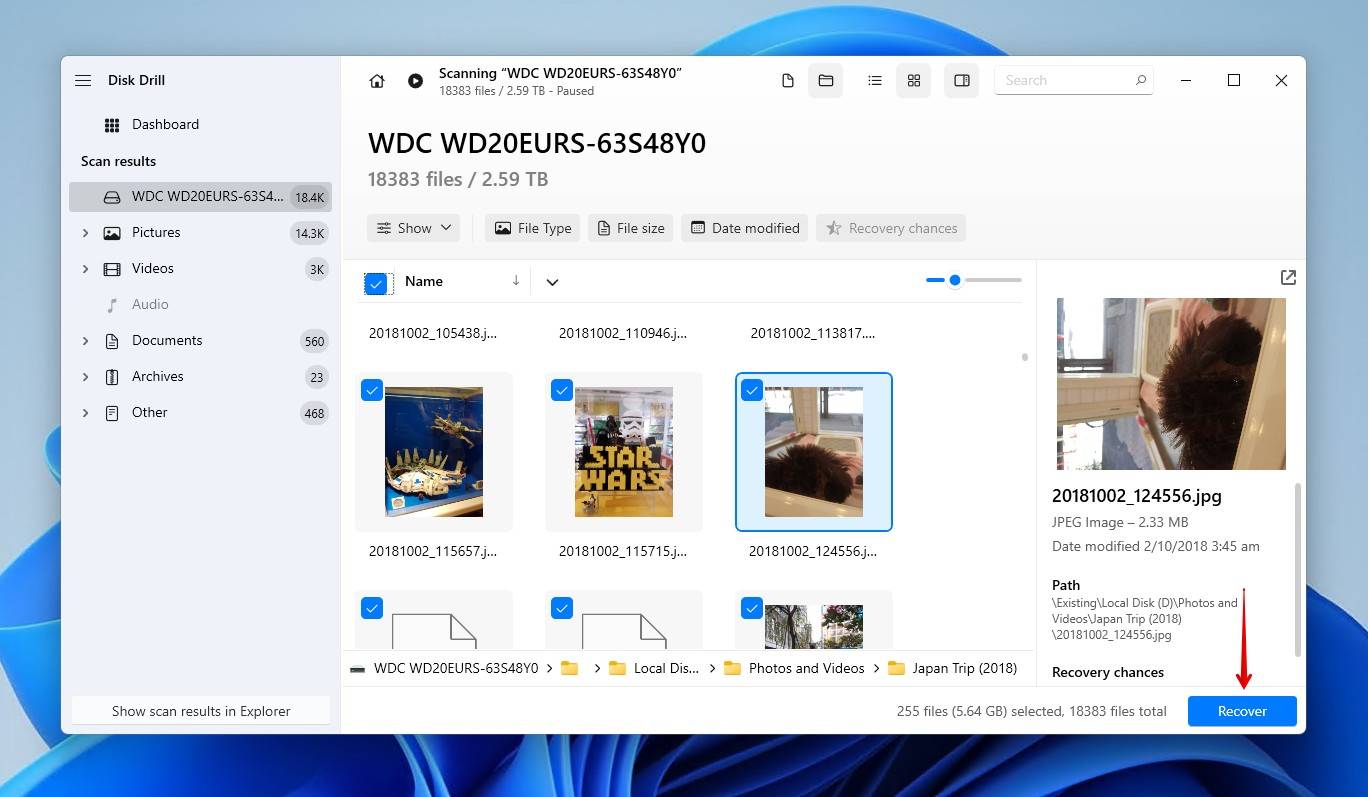
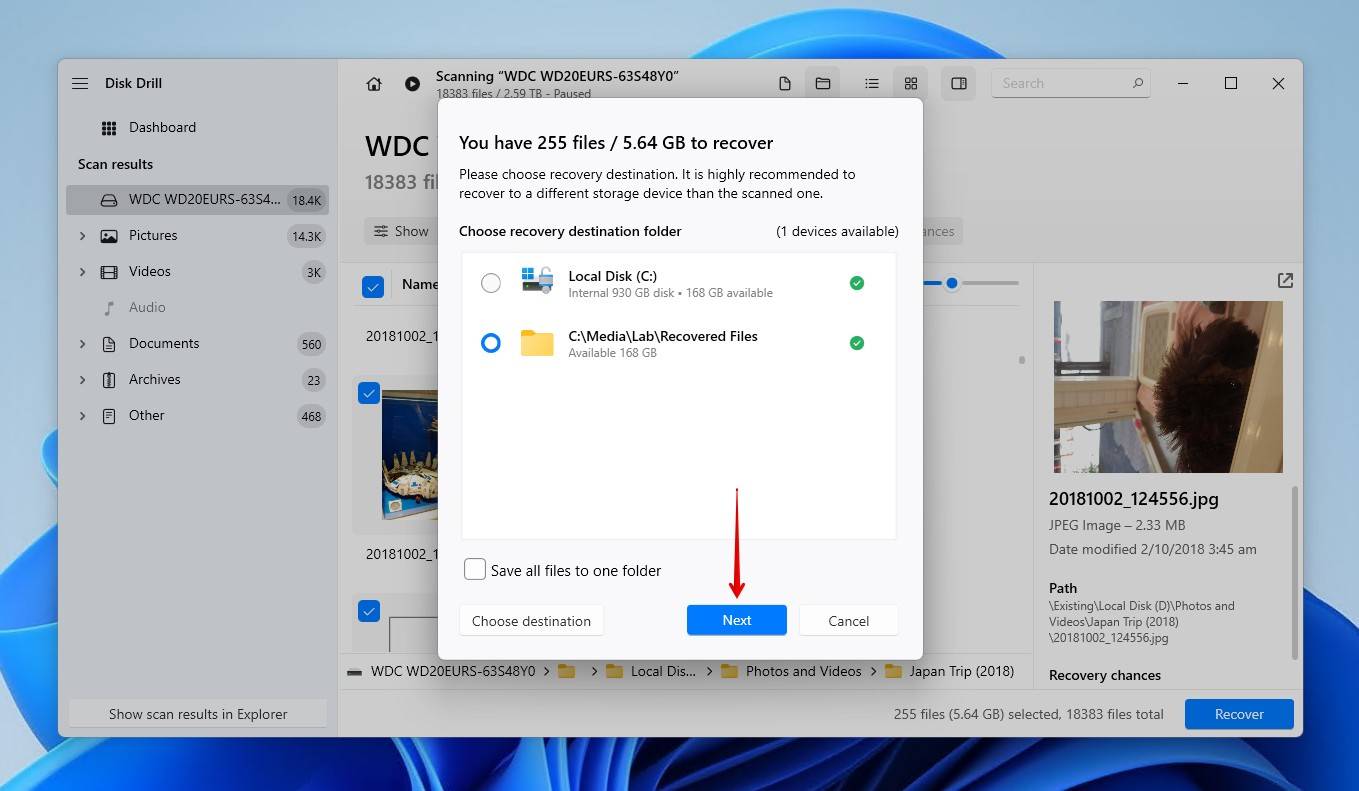
- Select the files you want to recover. Use the Recovery chances column to determine how recoverable each file is. You can also preview any files that are natively supported by Windows, as well as any files for which the default reader is installed. When ready, click Recover.
- Select your output location. It’s recommended you recover to a separate physical disk to avoid overwriting your data. Press Next.

Disk Drill can be used to recover data from almost any type of storage media, including RAW partition recovery. As demonstrated, it can even discover lost partitions and recover files from them.
Method 3: Restore NTFS Partition Using TestDisk
TestDisk is a partition recovery tool that can recover the NTFS partition for free, either by fixing the damage that caused it to disappear or restoring the deleted partition if another hasn’t already been made in its place. More specifically, it can rebuild the NTFS boot sector (or recover it from a backup) and fix the Master File Table (MFT) using an MFT mirror. In doing so, the partition will be restored in place with all of its data, a somewhat unique type of demonstrating NTFS file system recovery.
Follow these instructions to recover the lost NTFS partition with TestDisk:
- Download TestDisk and extract the contents of the zipped folder.
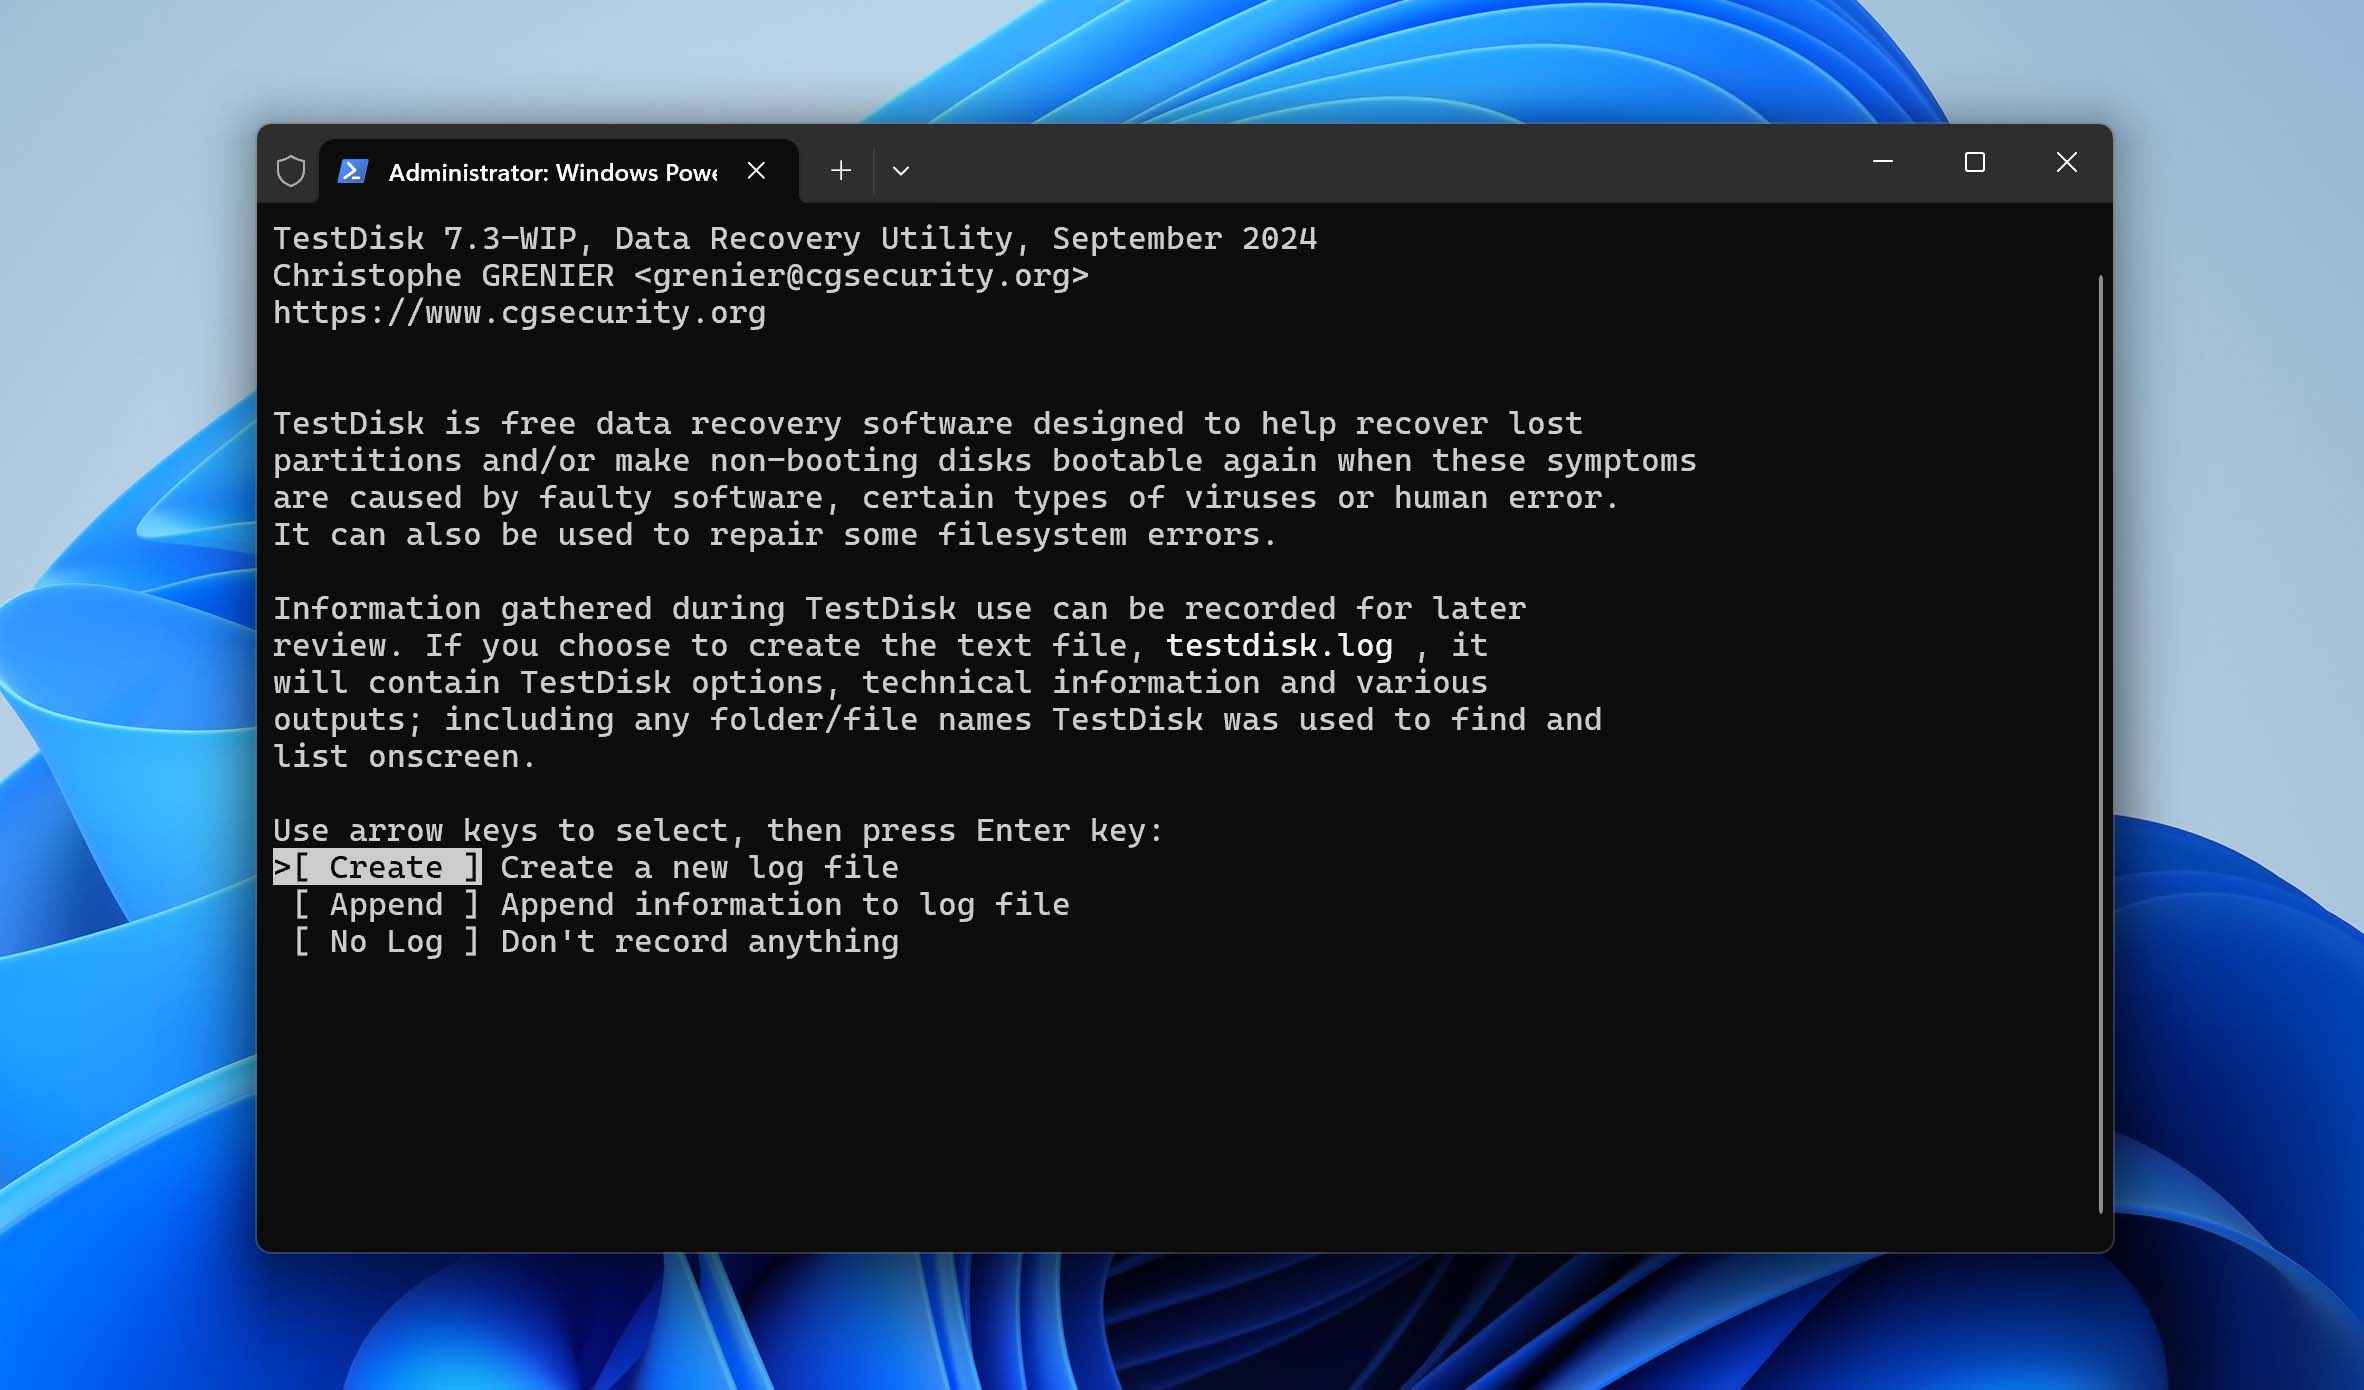
- Open testdisk_win. If Windows alerts you to potential risks, simply click More info then Run anyway as it’s a false positive.
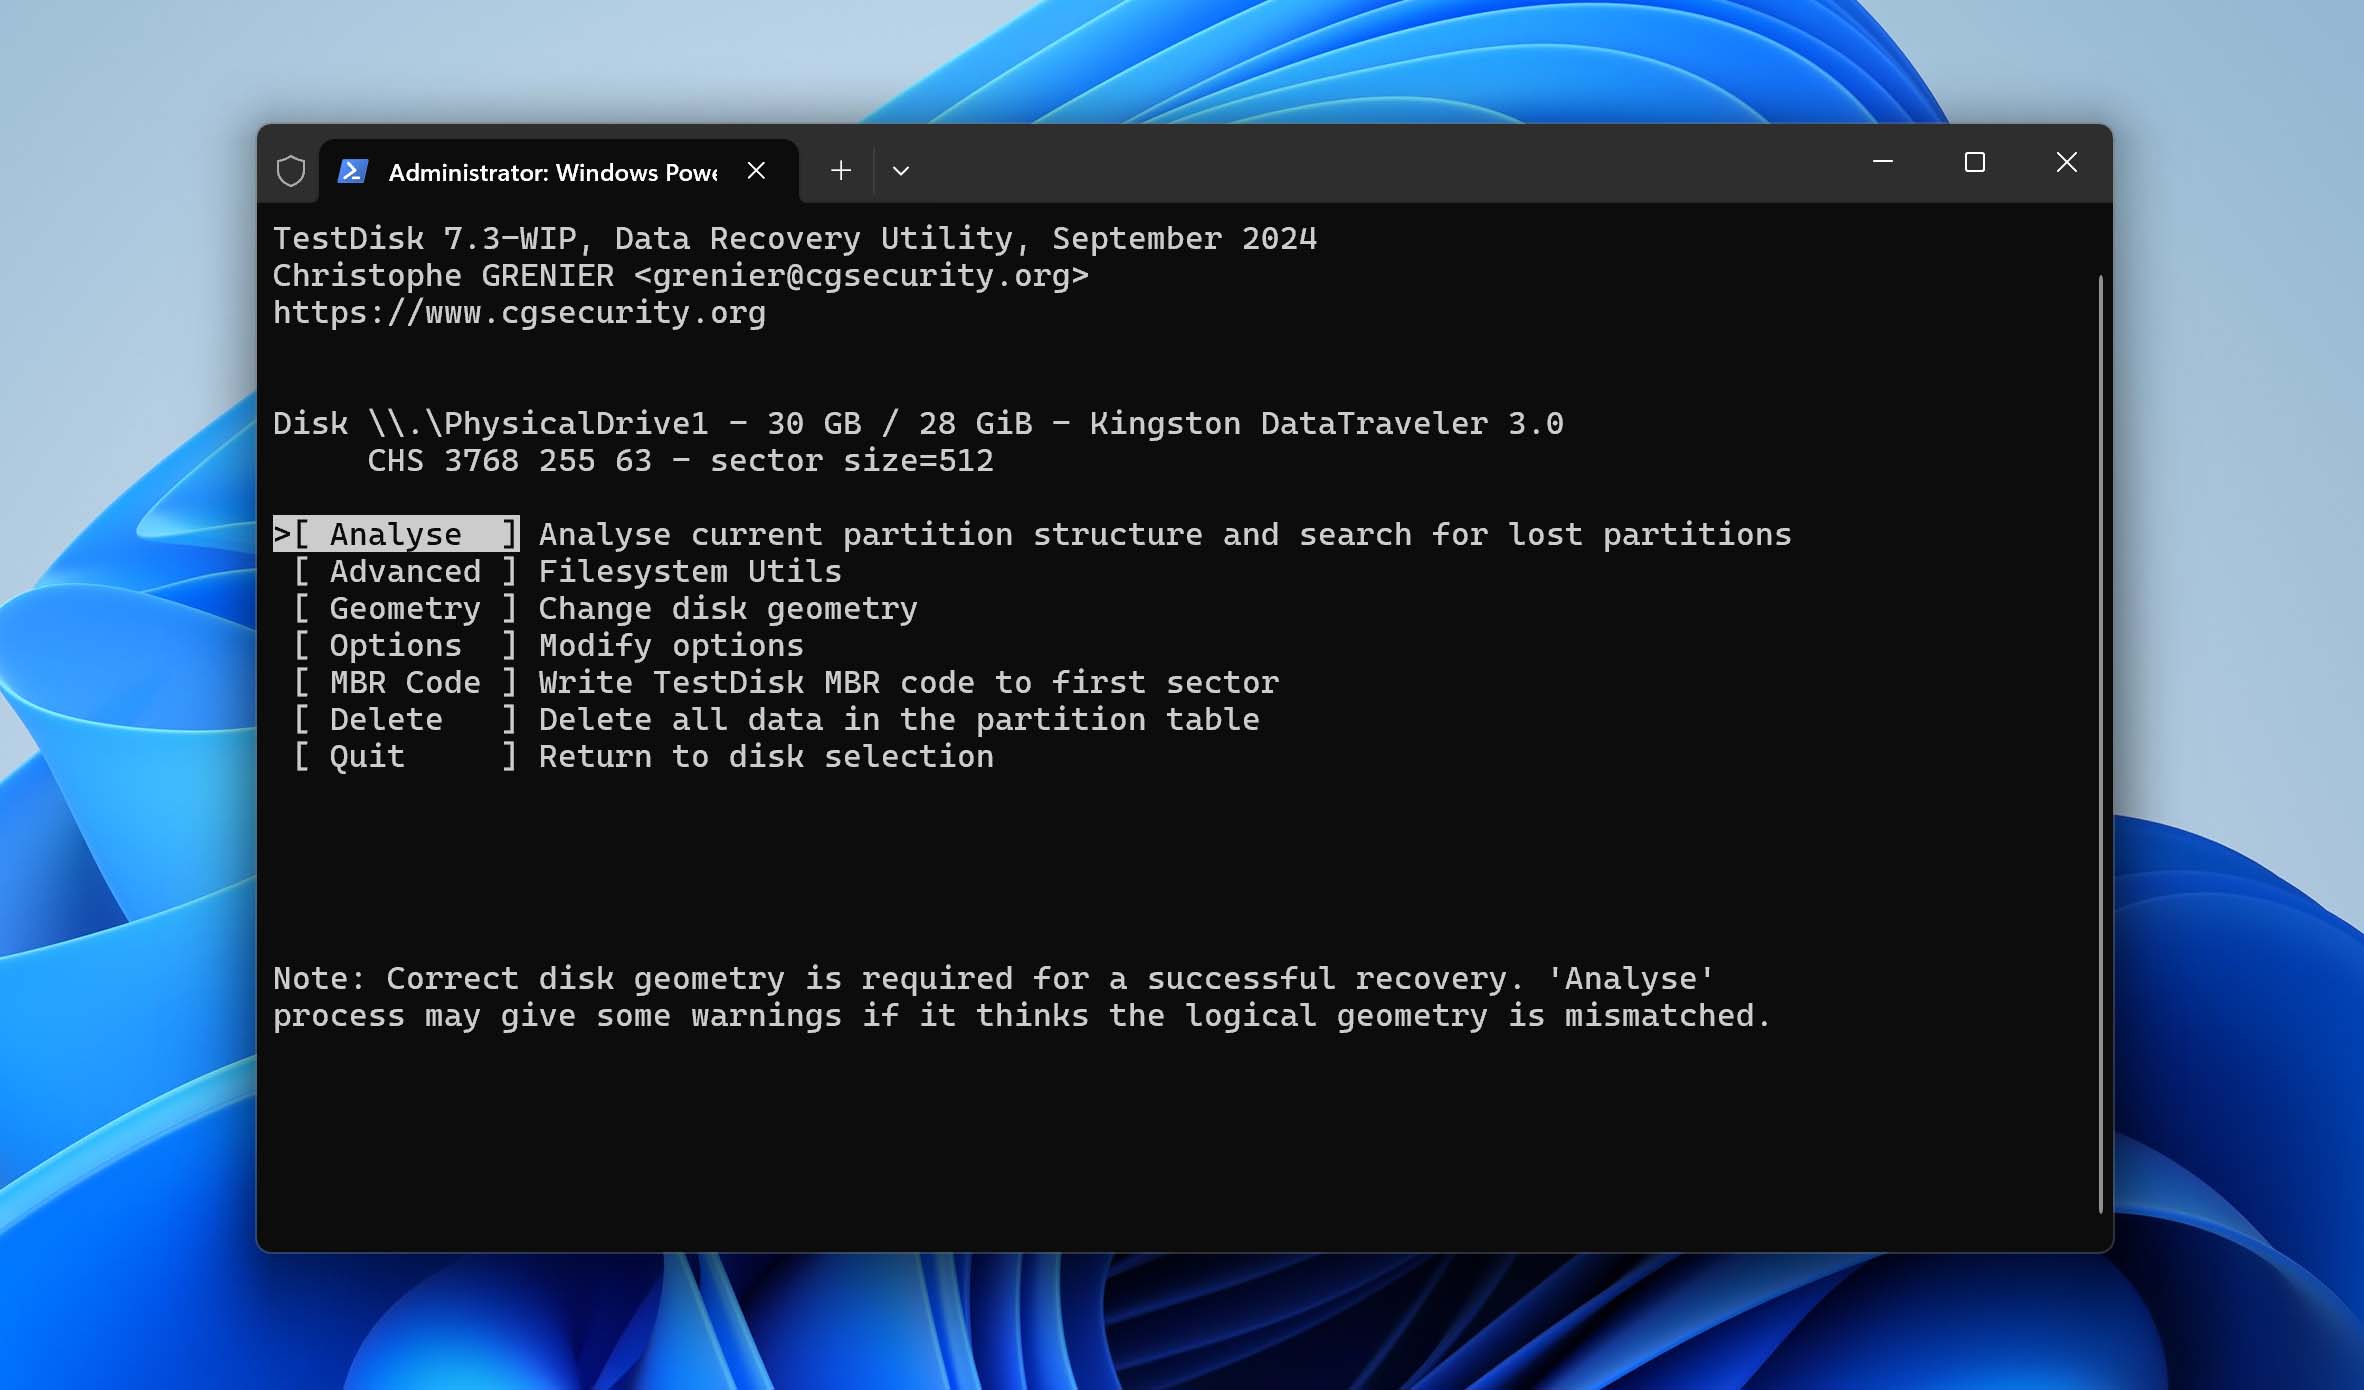
- Press Enter on the Create option.
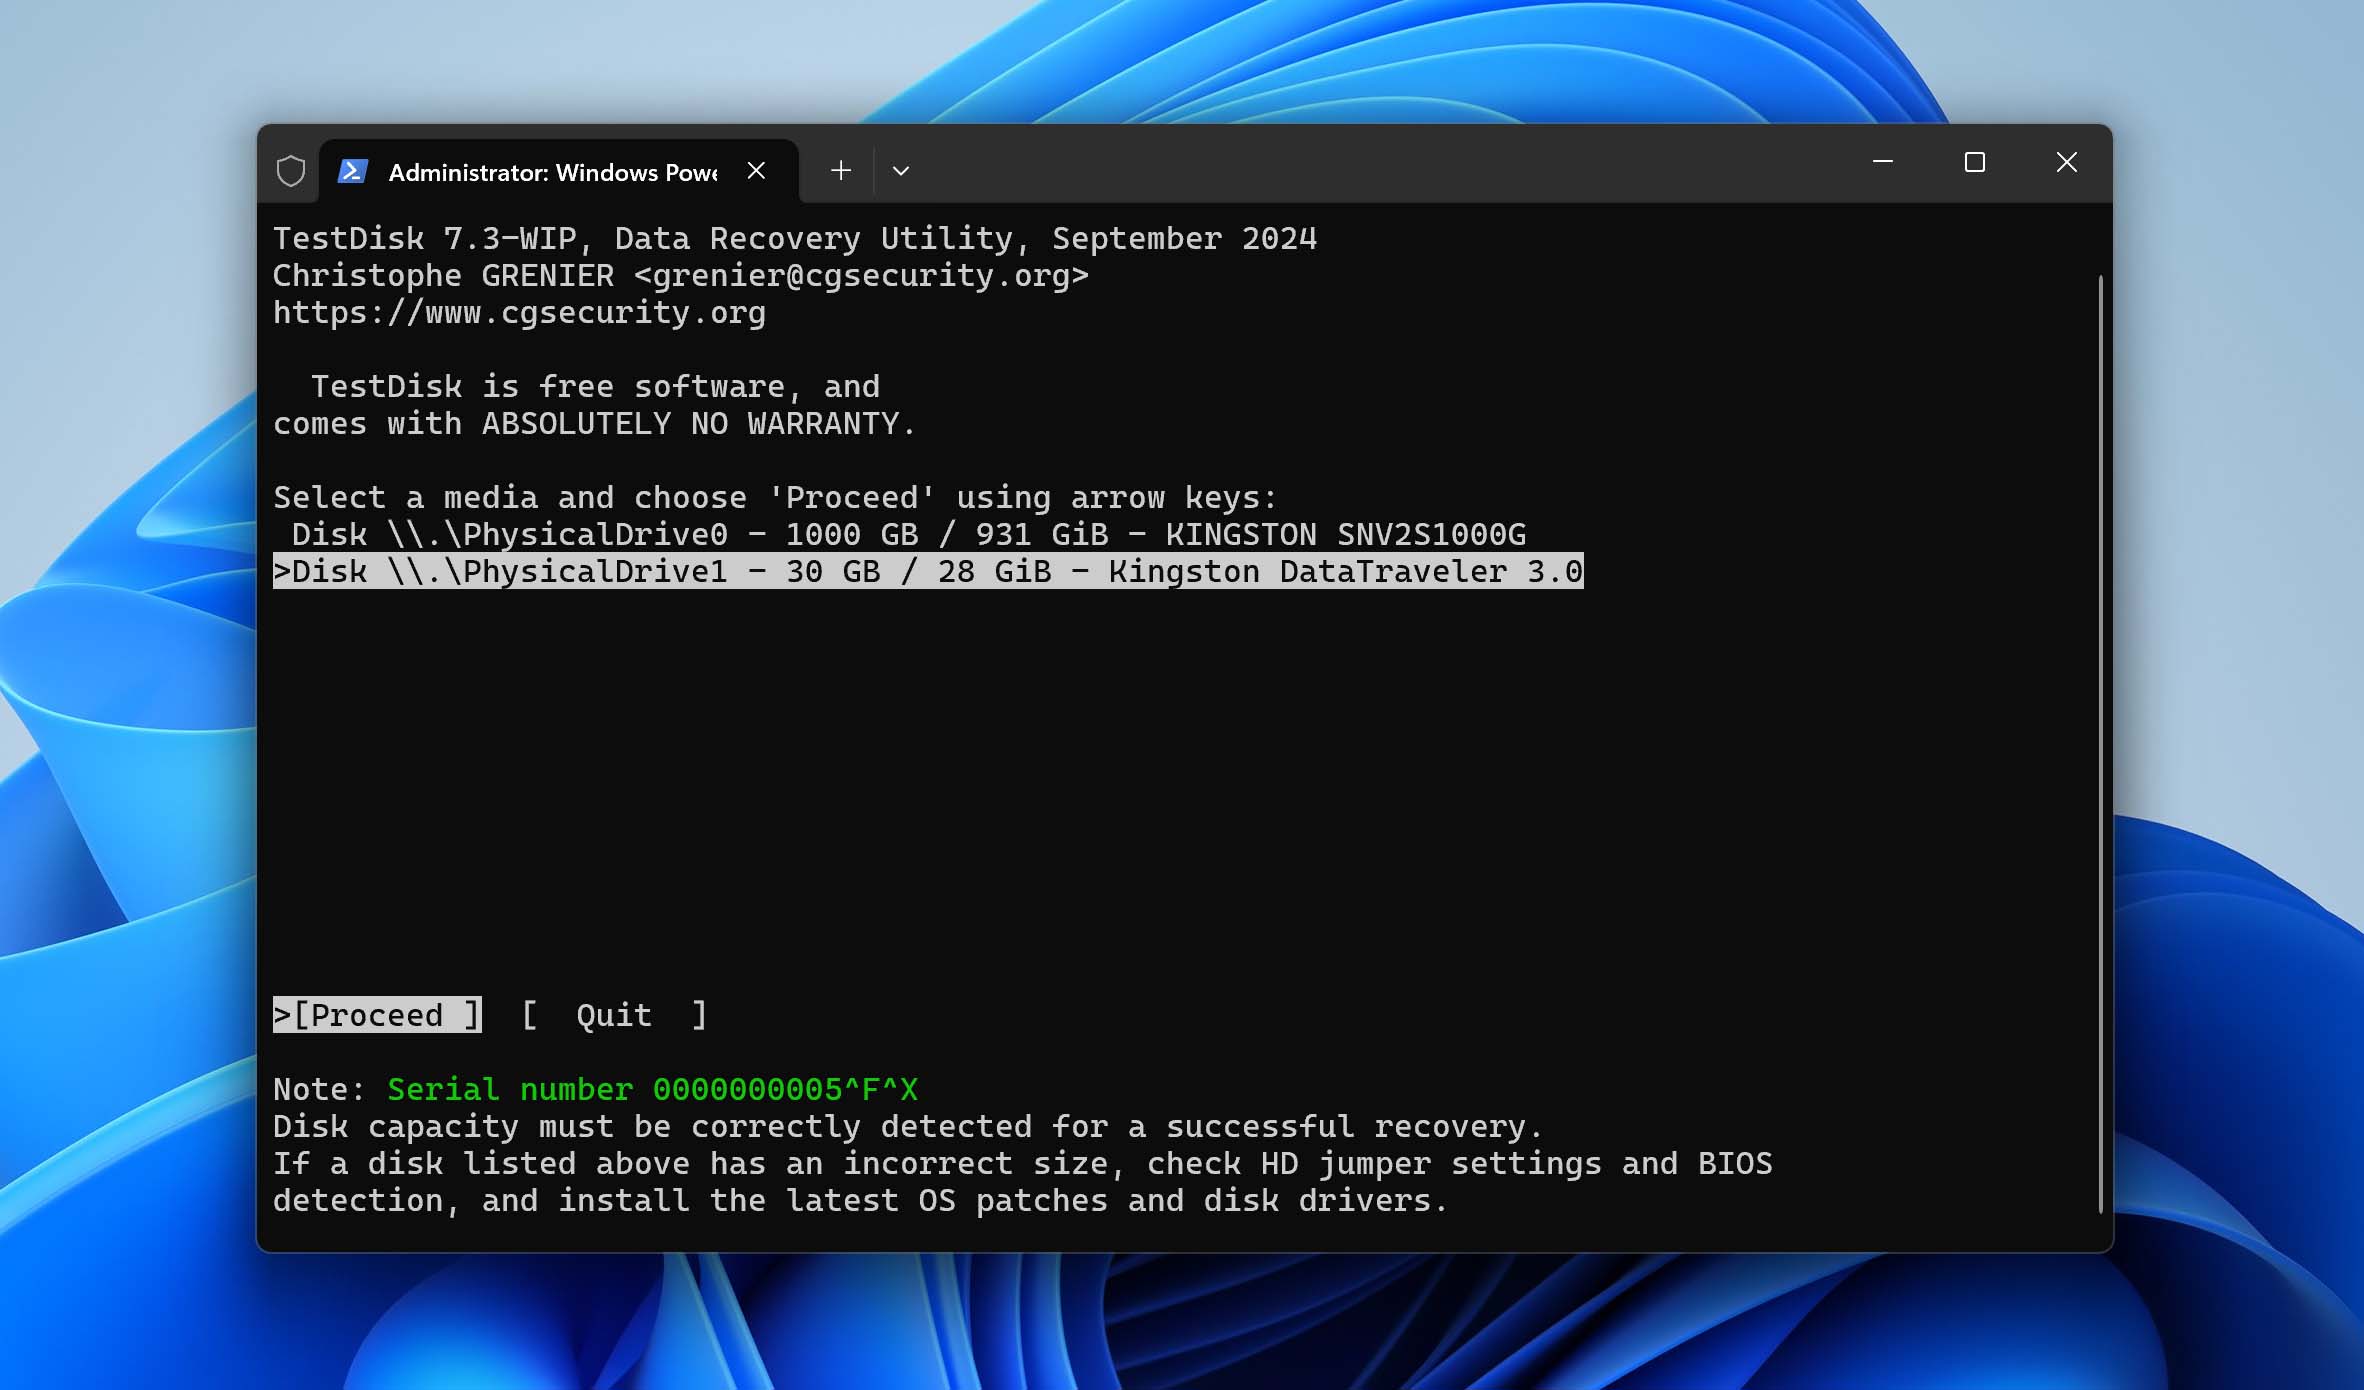
- Use the up and down arrow keys to choose the drive that the partition was located on. Press Enter to Proceed.
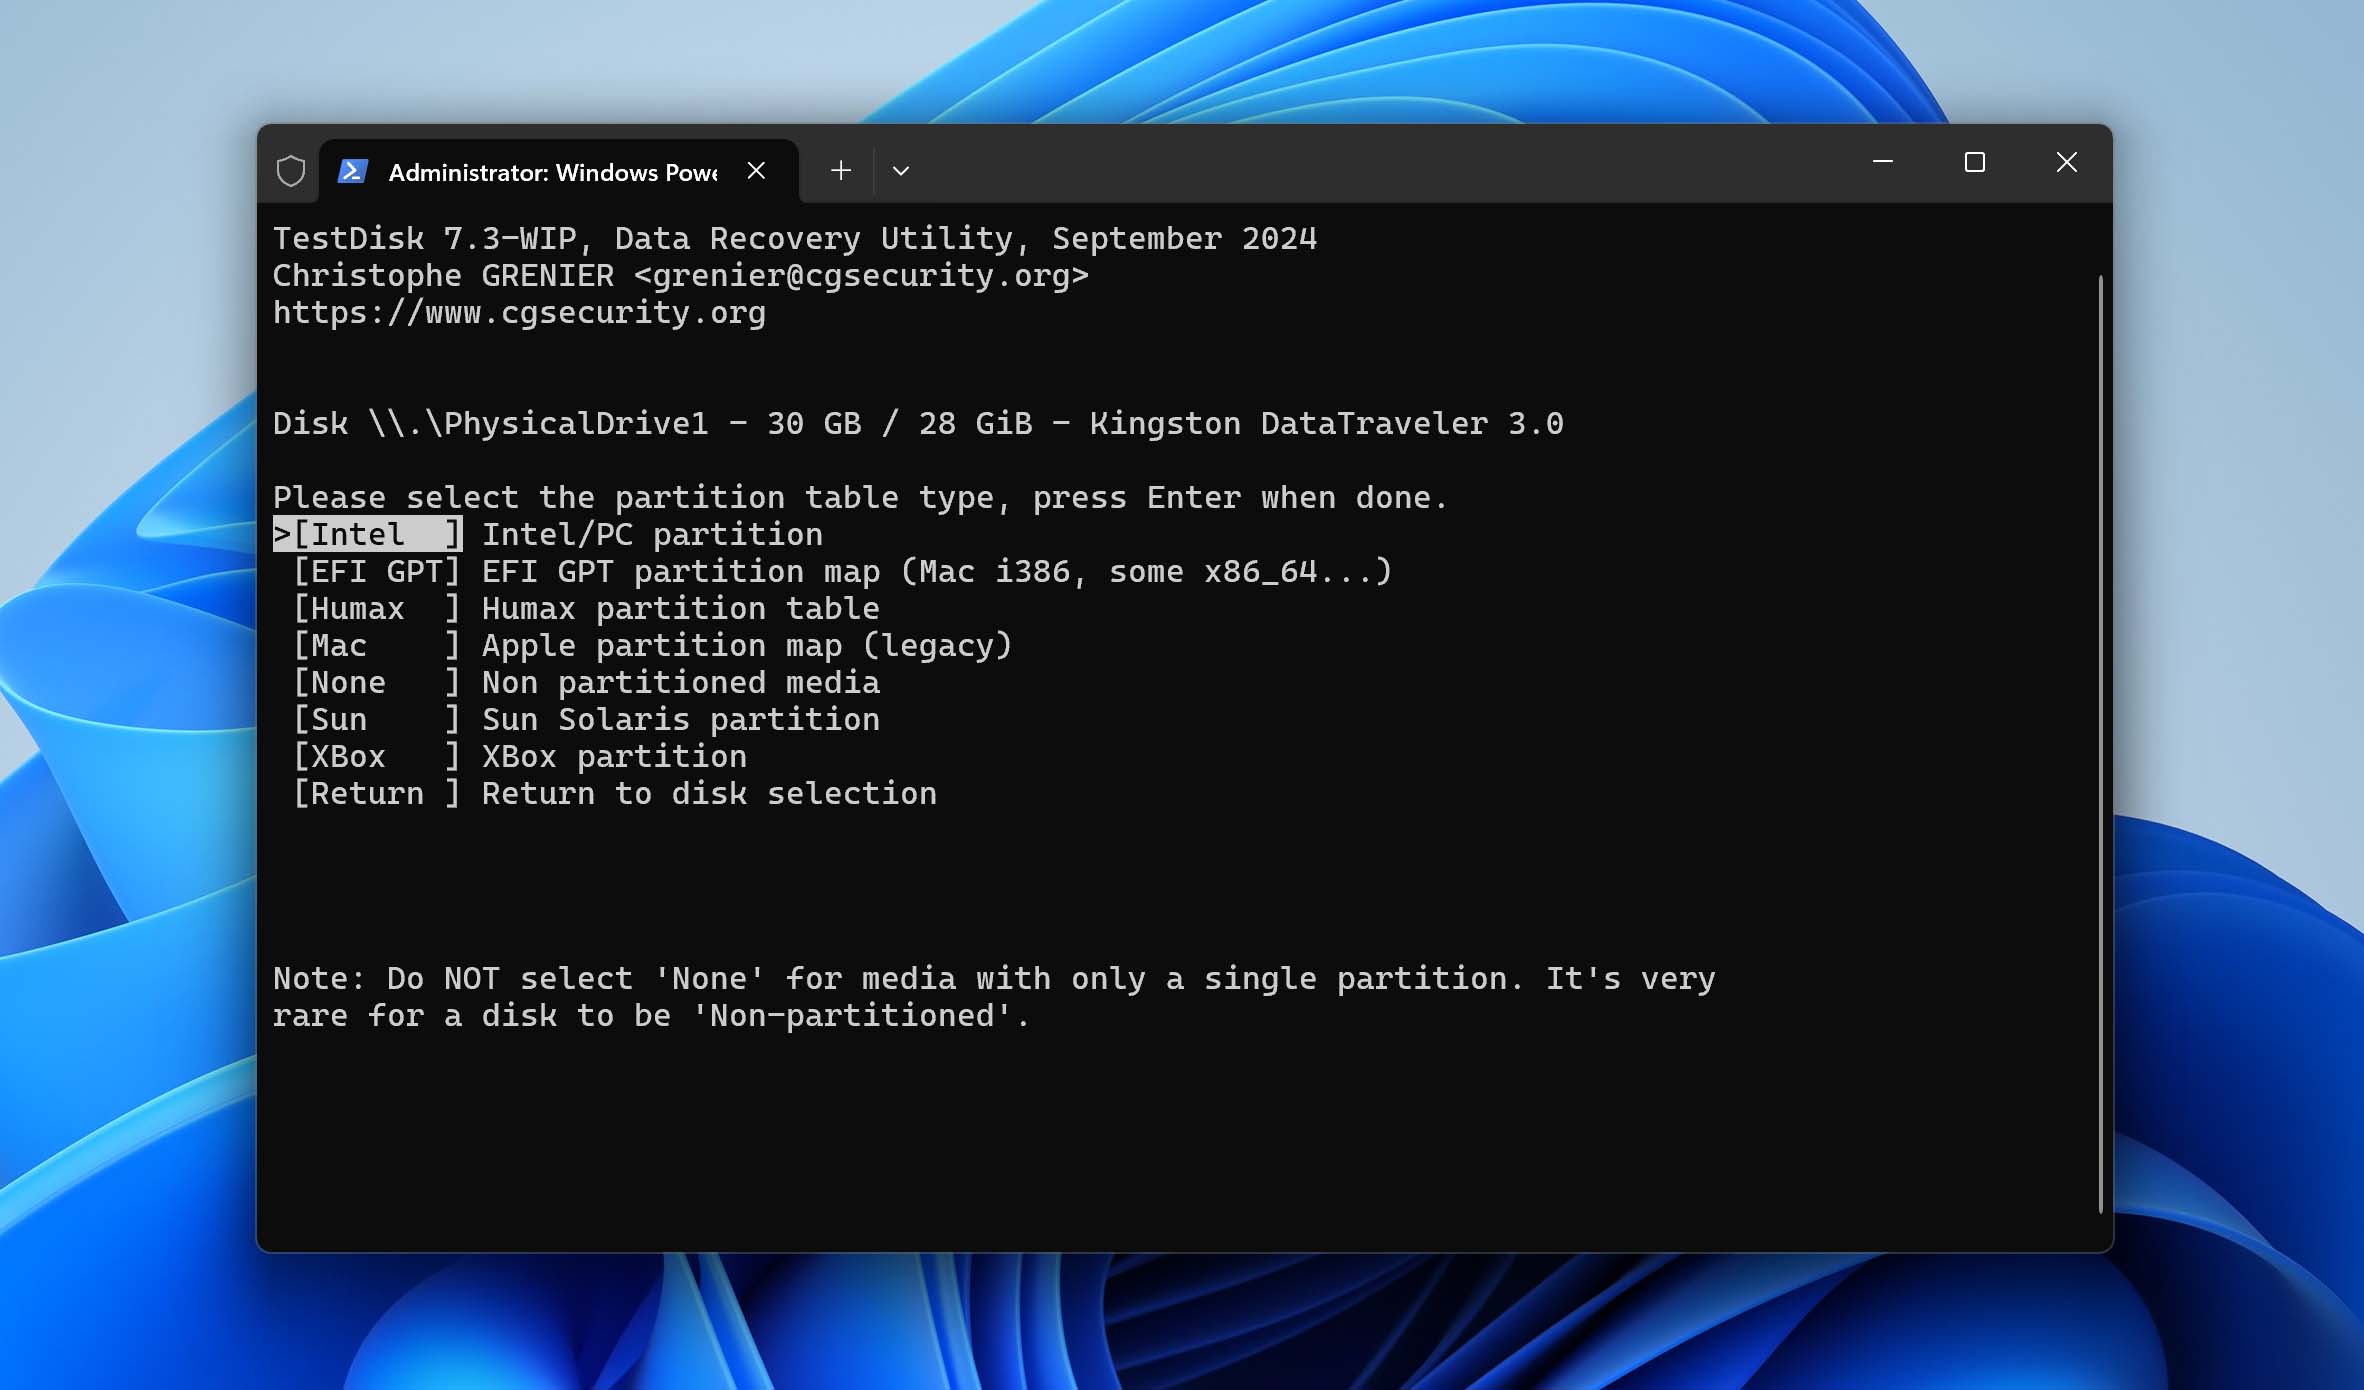
- Choose your partition table type. If you’re unsure, TestDisk automatically selects the partition table type it believes you have. Press Enter.
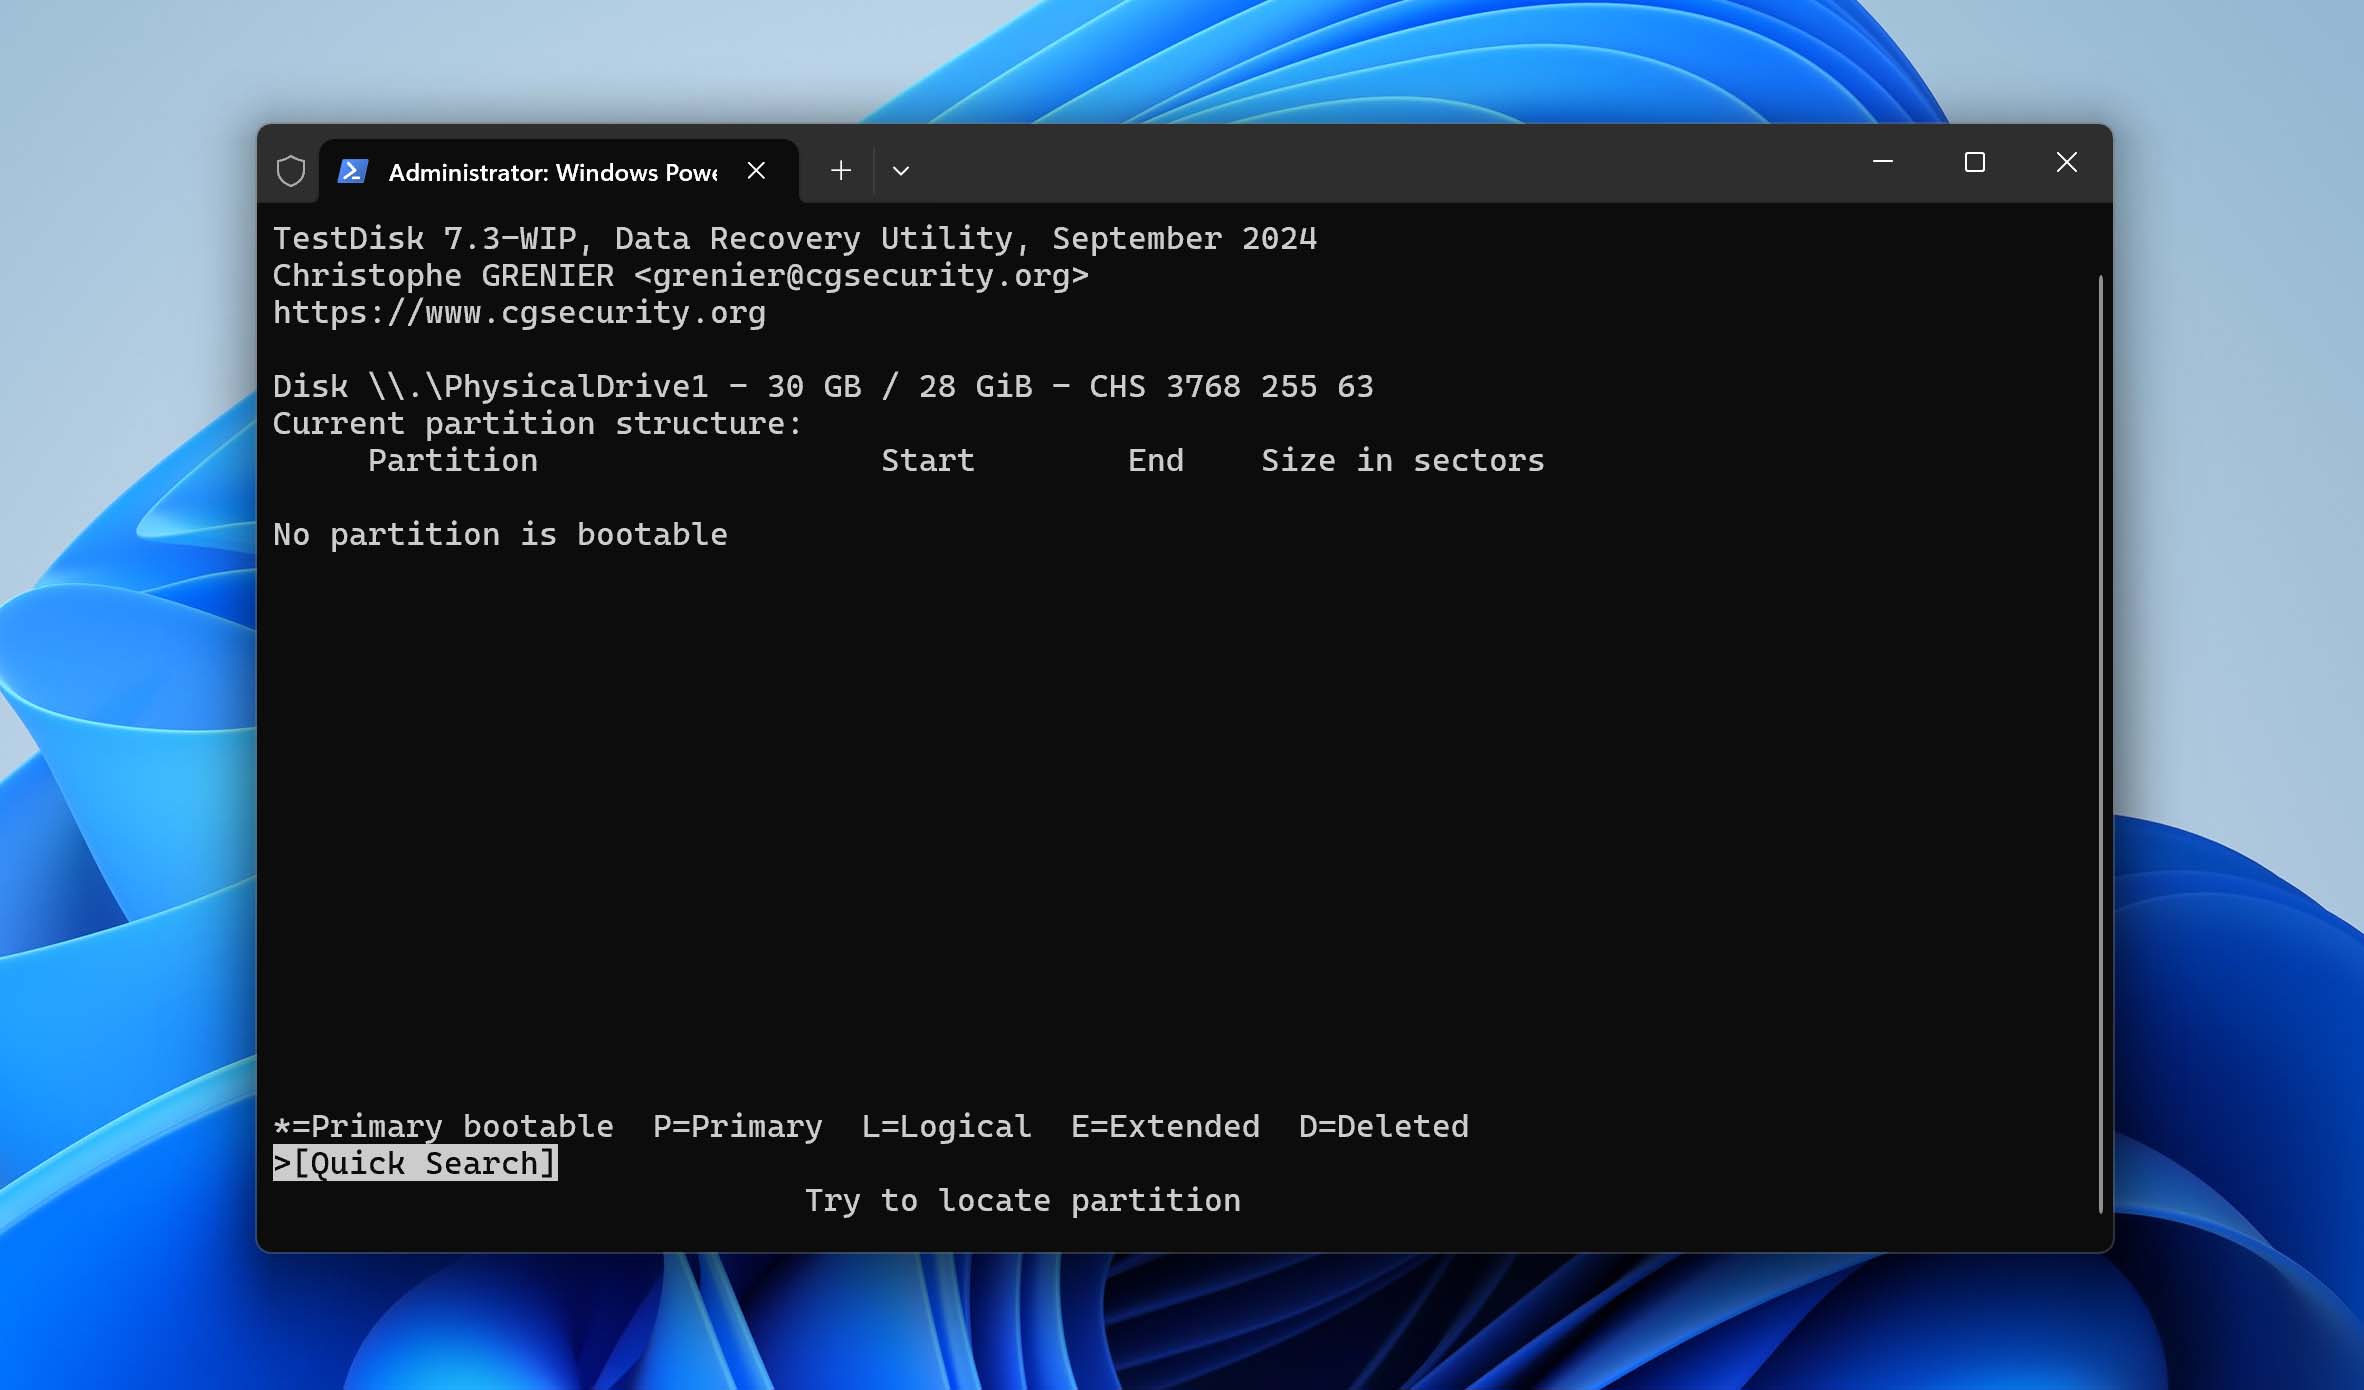
- Press Enter to Analyse.
- Press Enter again to begin the Quick Search.
- Select the missing partition and press Enter.
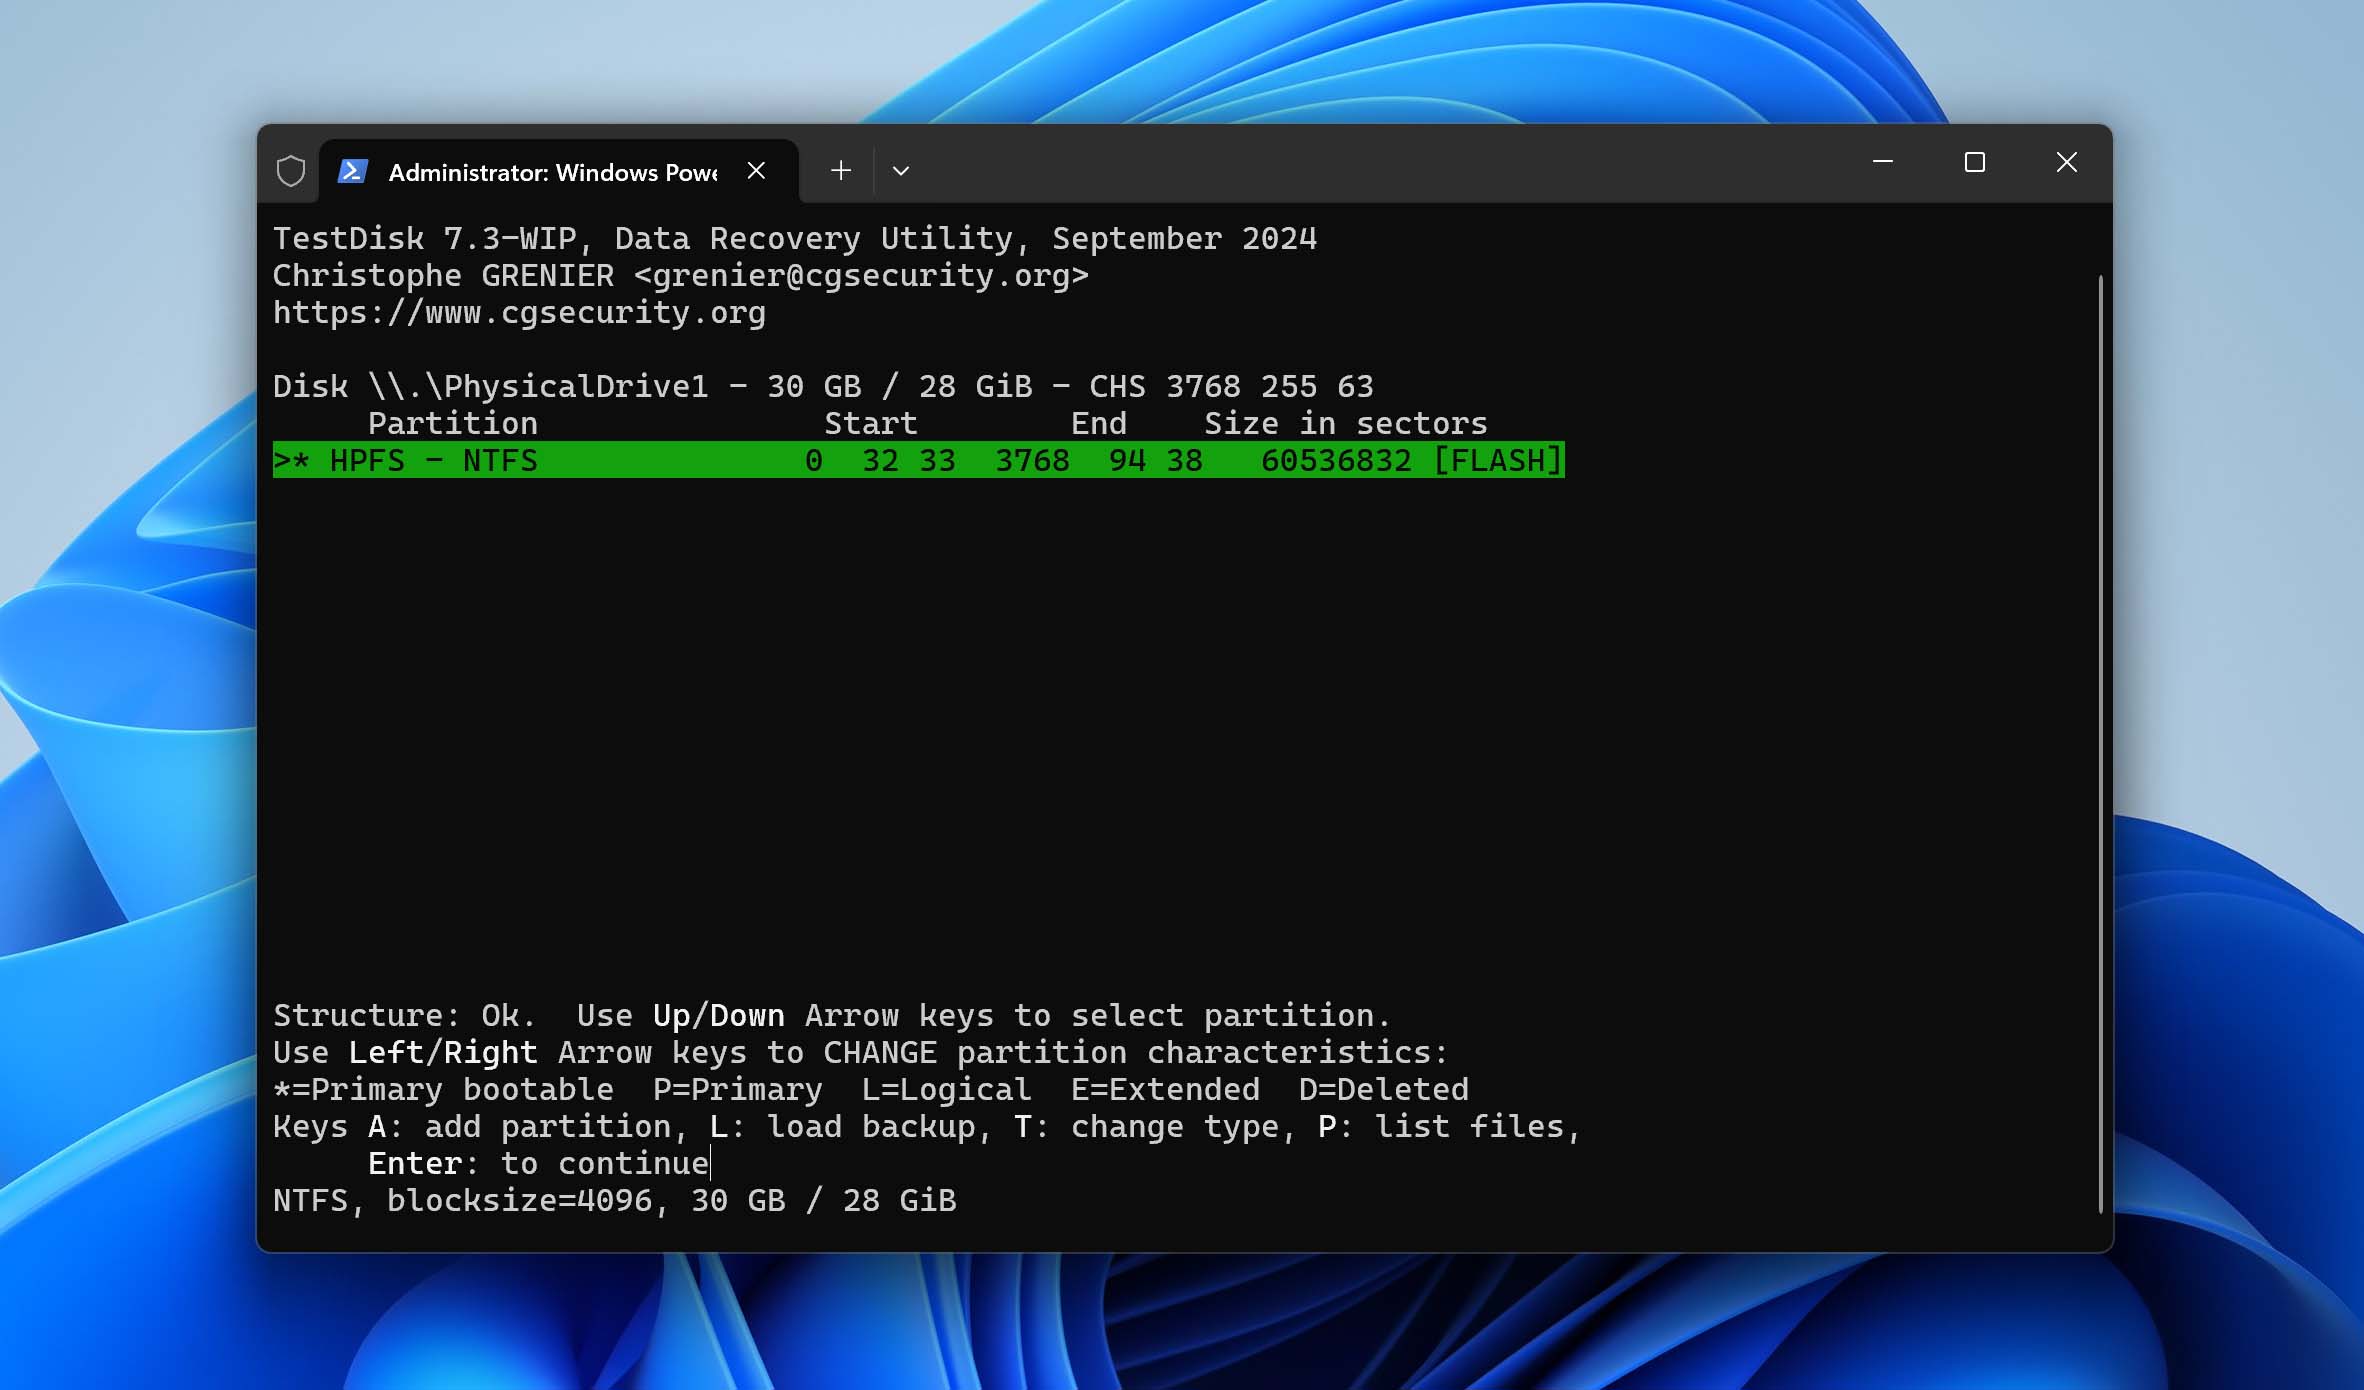
- If you’ve found your partition, move across to the Write option and press Enter. If not, choose Deeper Search.
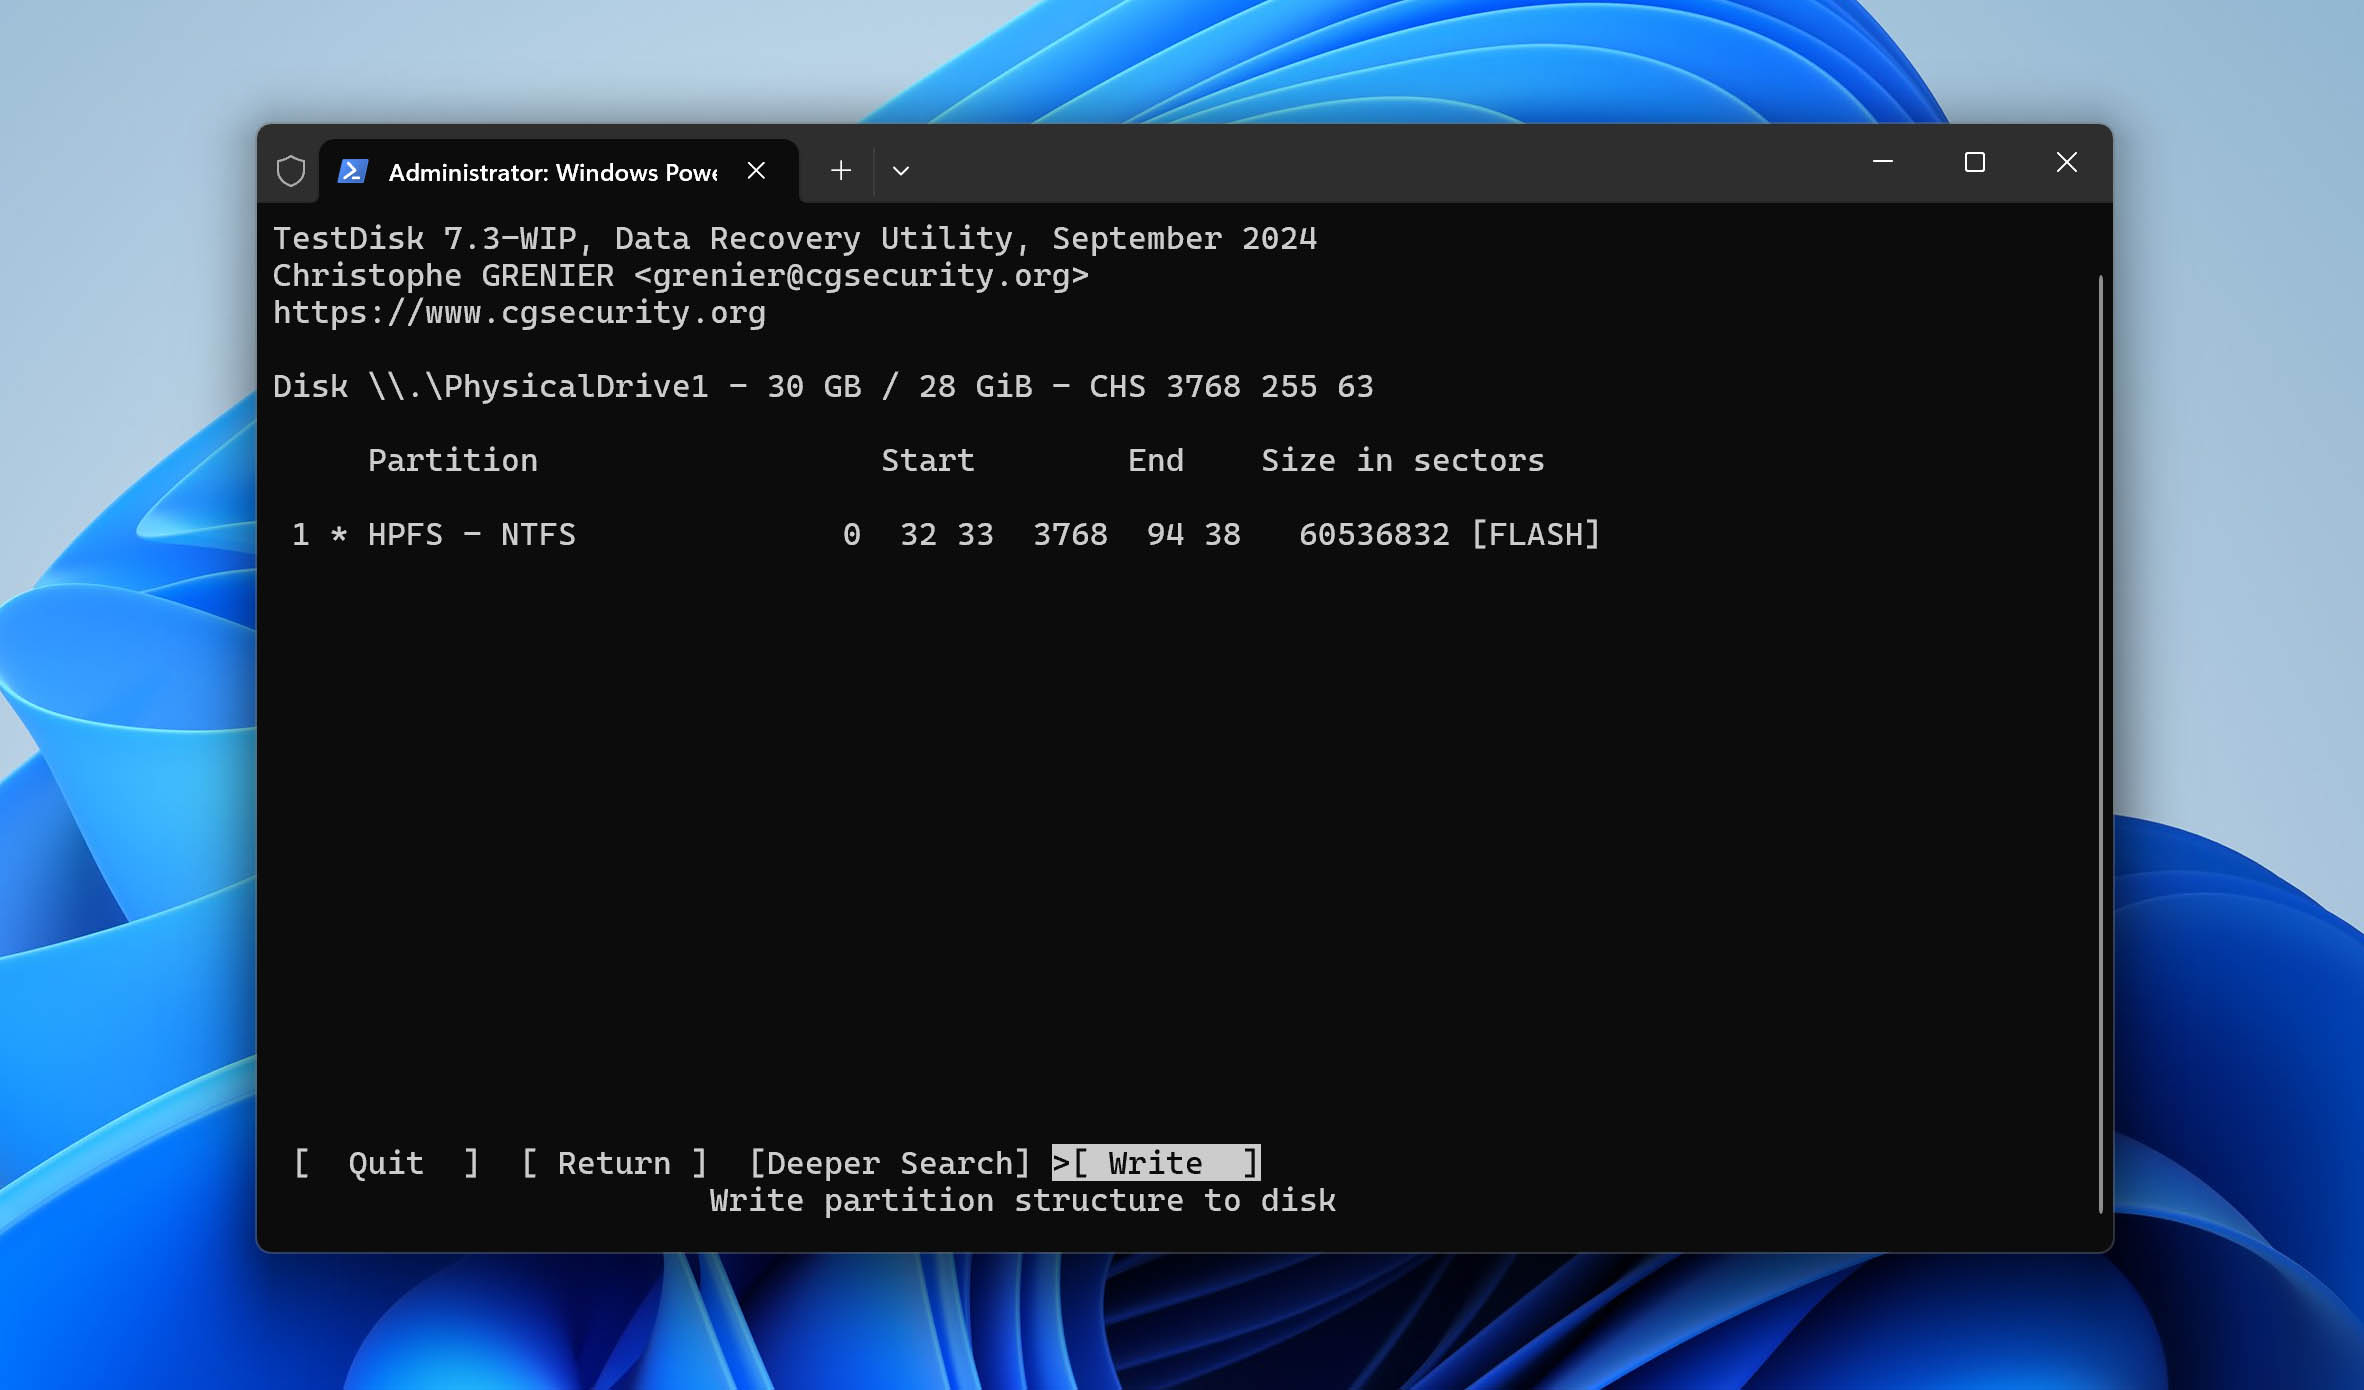
- Press Y to confirm.
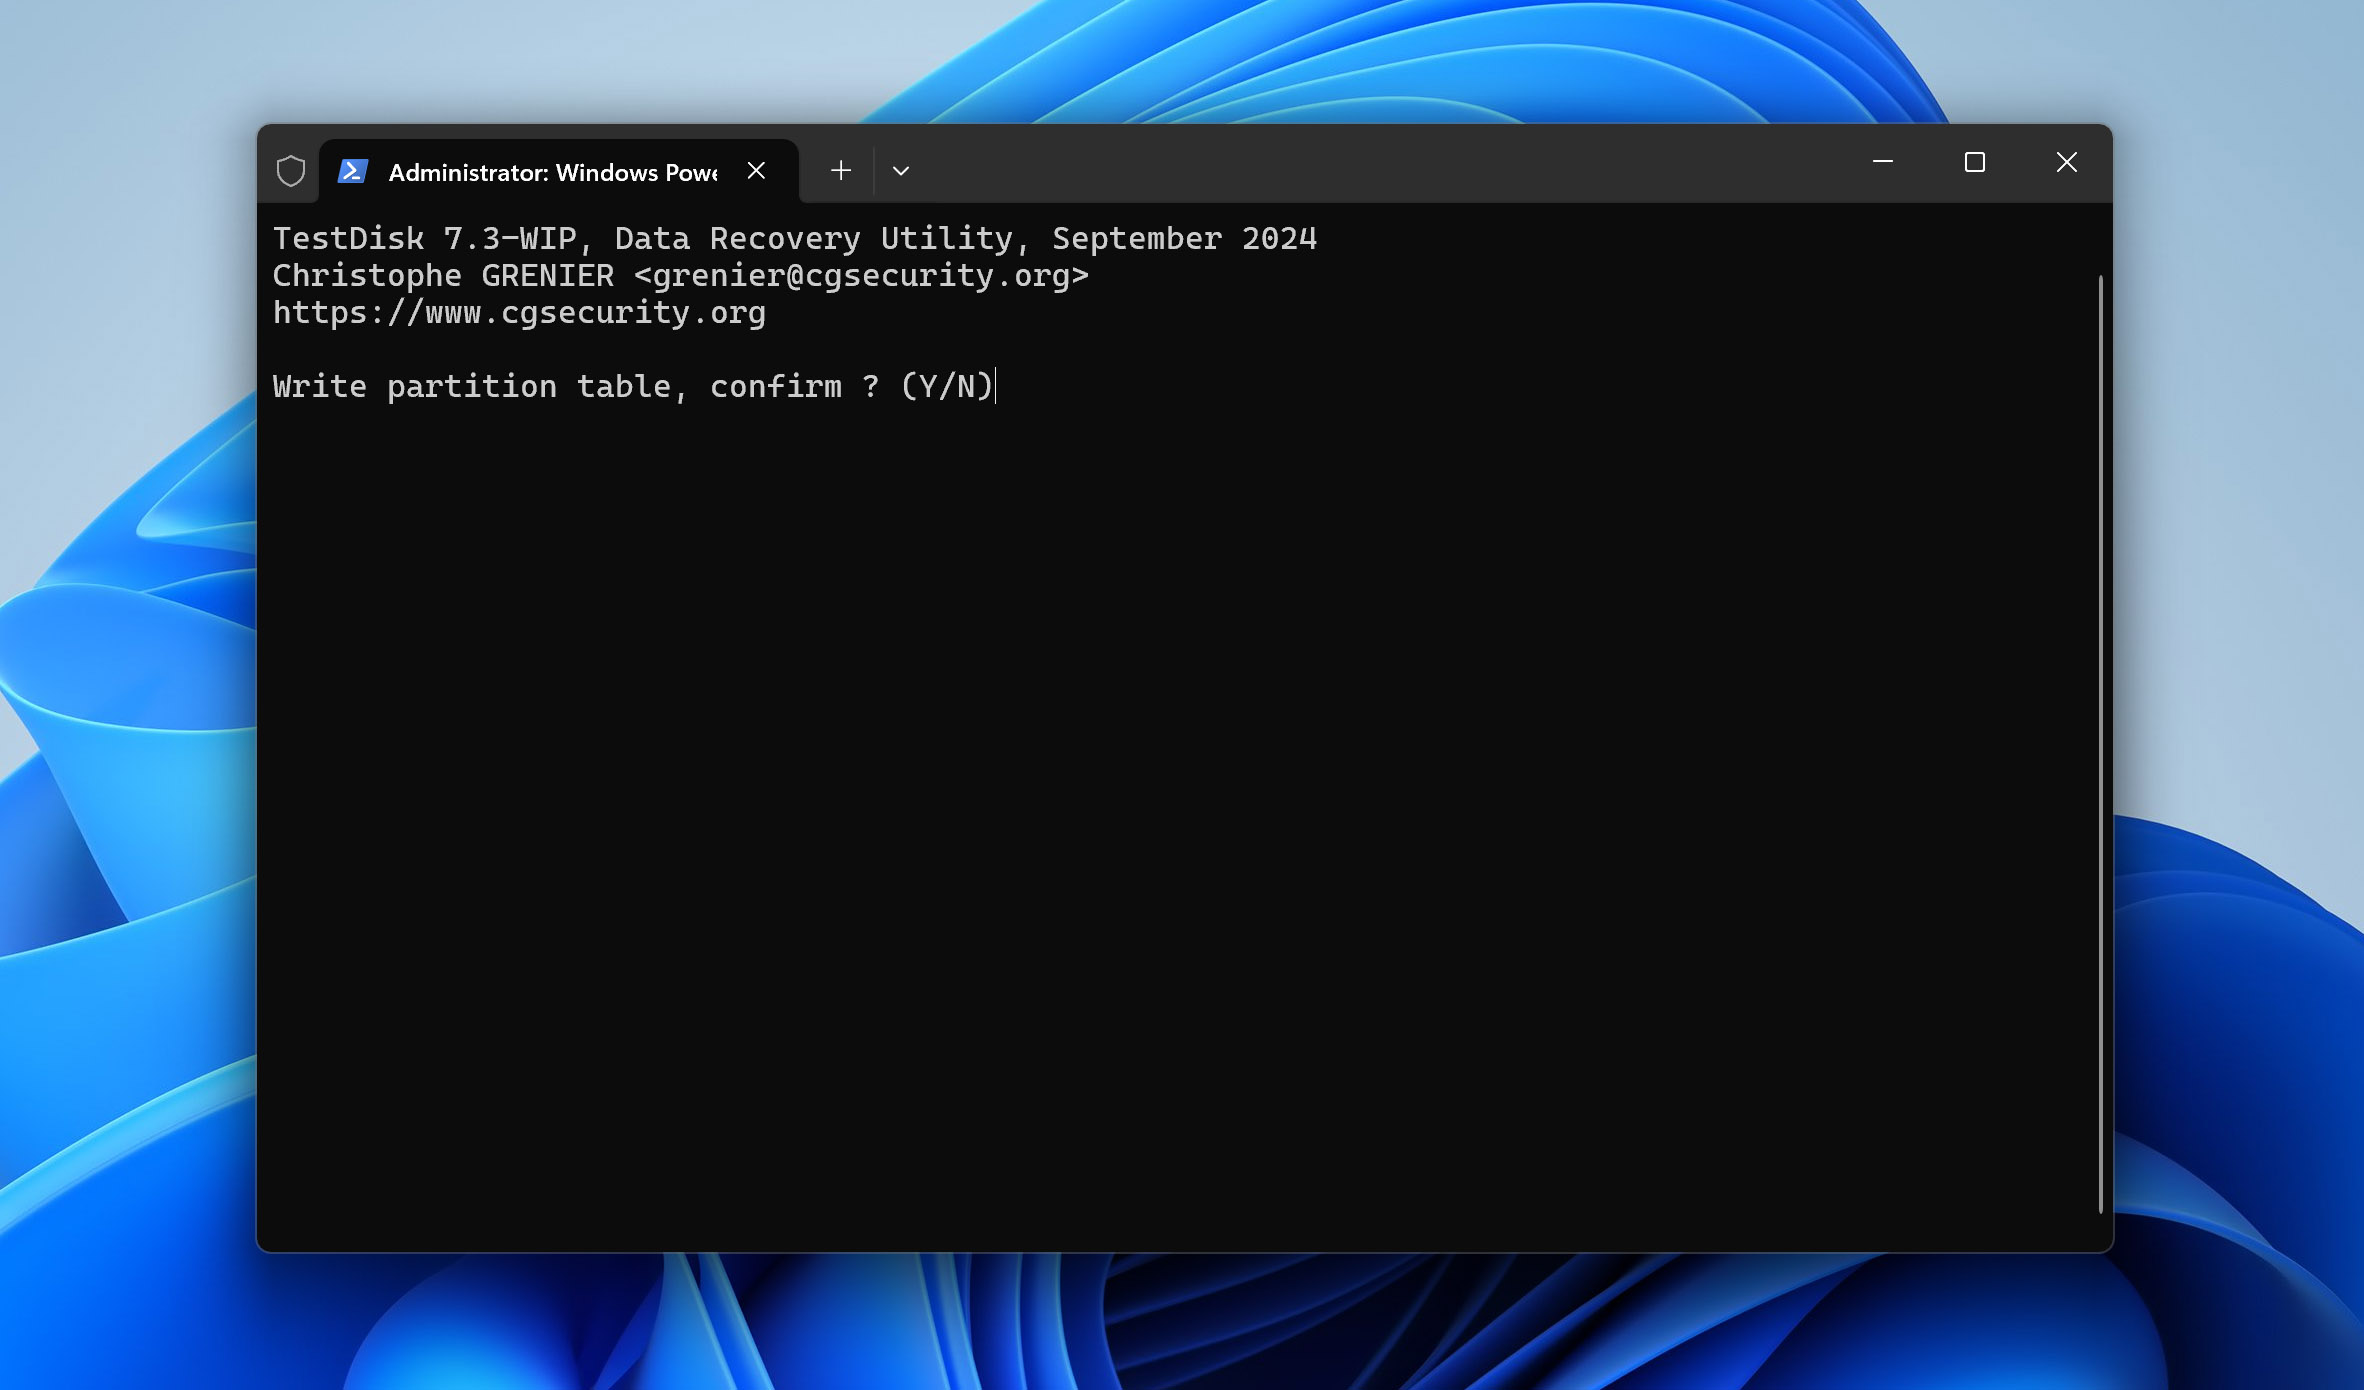
You will be prompted to restart your computer for the changes to take effect. Once you reboot, your partition should be restored.
Method 4: Assign Drive Letter in Disk Management
It could be that your partition isn’t appearing because it simply doesn’t have a drive letter. Without a drive letter, Windows may not be able to locate your data. You can fix this, quite easily in fact. Just assign a drive letter through Disk Management. This is one of the easier forms of NTFS data recovery because it simply re-establishes access to the data.
This is how you assign a drive letter using Disk Management:
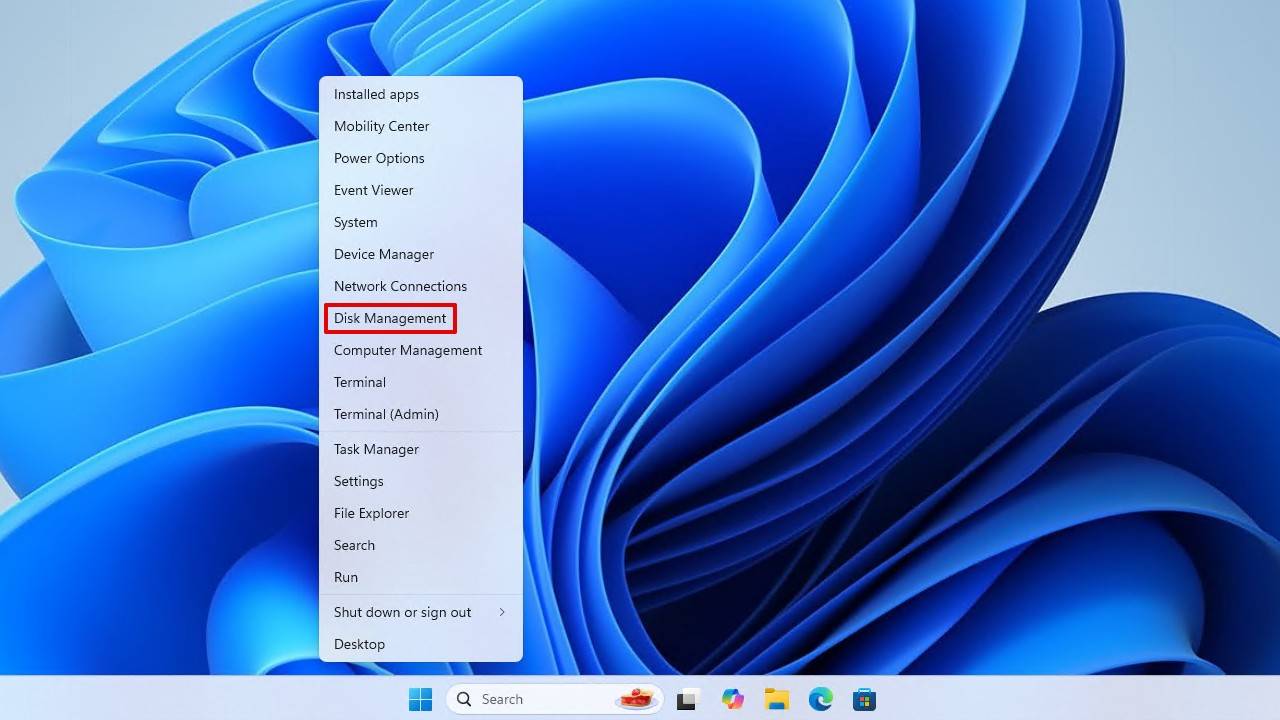
- Right-click Start and click Disk Management.
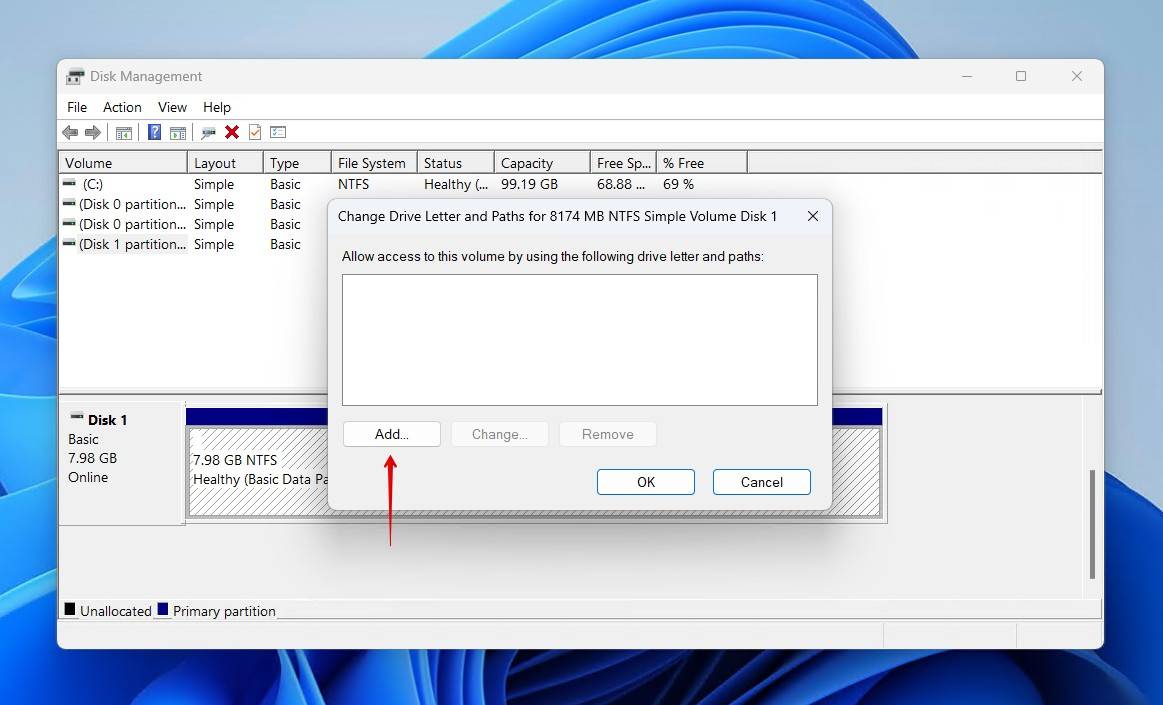
- Select the NTFS partition without a drive letter, then click Change Drive Letter and Paths.

- Click Add.
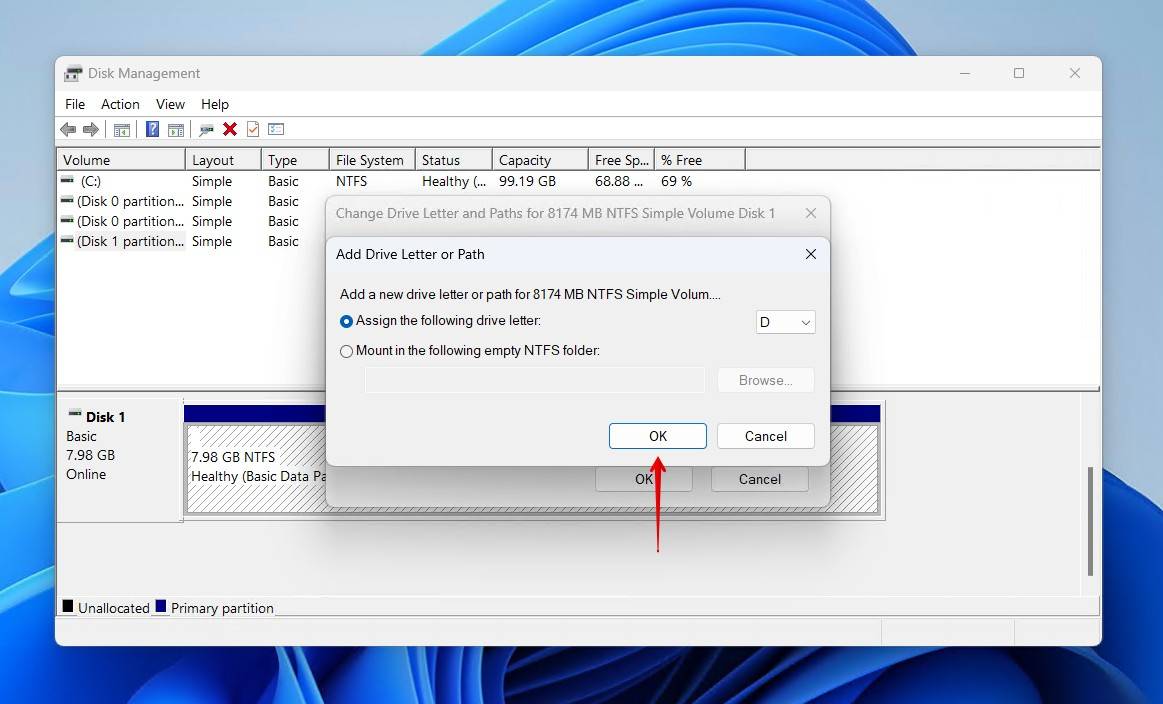
- Click OK after choosing a drive letter.
Method 5: Repair System Partition
Your partition table holds all information pertaining to your partition structure. It tells the operating system exactly where to find your data. This, along with the Master Boot Record (MBR), is essential for you to boot your computer and use it every day. But, if your system partition is corrupted, the files required to boot Windows may be compromised, preventing you from loading in and accessing your data.
To fix this, you can recreate system partition files, thereby fixing the NTFS partition. A copy of your Windows OS is required to repair the NTFS partition with a USB. Or, you can use your Windows installation disk if it’s available.
These steps will show you how to fix the partition table without losing data by restoring the Windows boot files:
- Insert your bootable media and boot into it as you start your computer.
- Click Next.

- Click Repair your computer.

- Click Troubleshoot.

- Click Command Prompt.

- Type diskpart and press Enter.

- Type list vol and press Enter. Make note of the volume associated with your system partition.

- Type exit and press Enter.

- Type bcdboot C:\Windows and press Enter.

- Exit the command prompt and click Continue.
Method 6: Data Recovery Service
If you haven’t had much success using the above methods, or if you feel these methods are too intimidating for you to attempt, you can always rely on a professional to take care of it for you.
As with data recovery software, there are plenty of data recovery services available to choose from. Unlike DIY software, however, the process is relatively simple. All you need to do is fill out some paperwork and send your drive away.
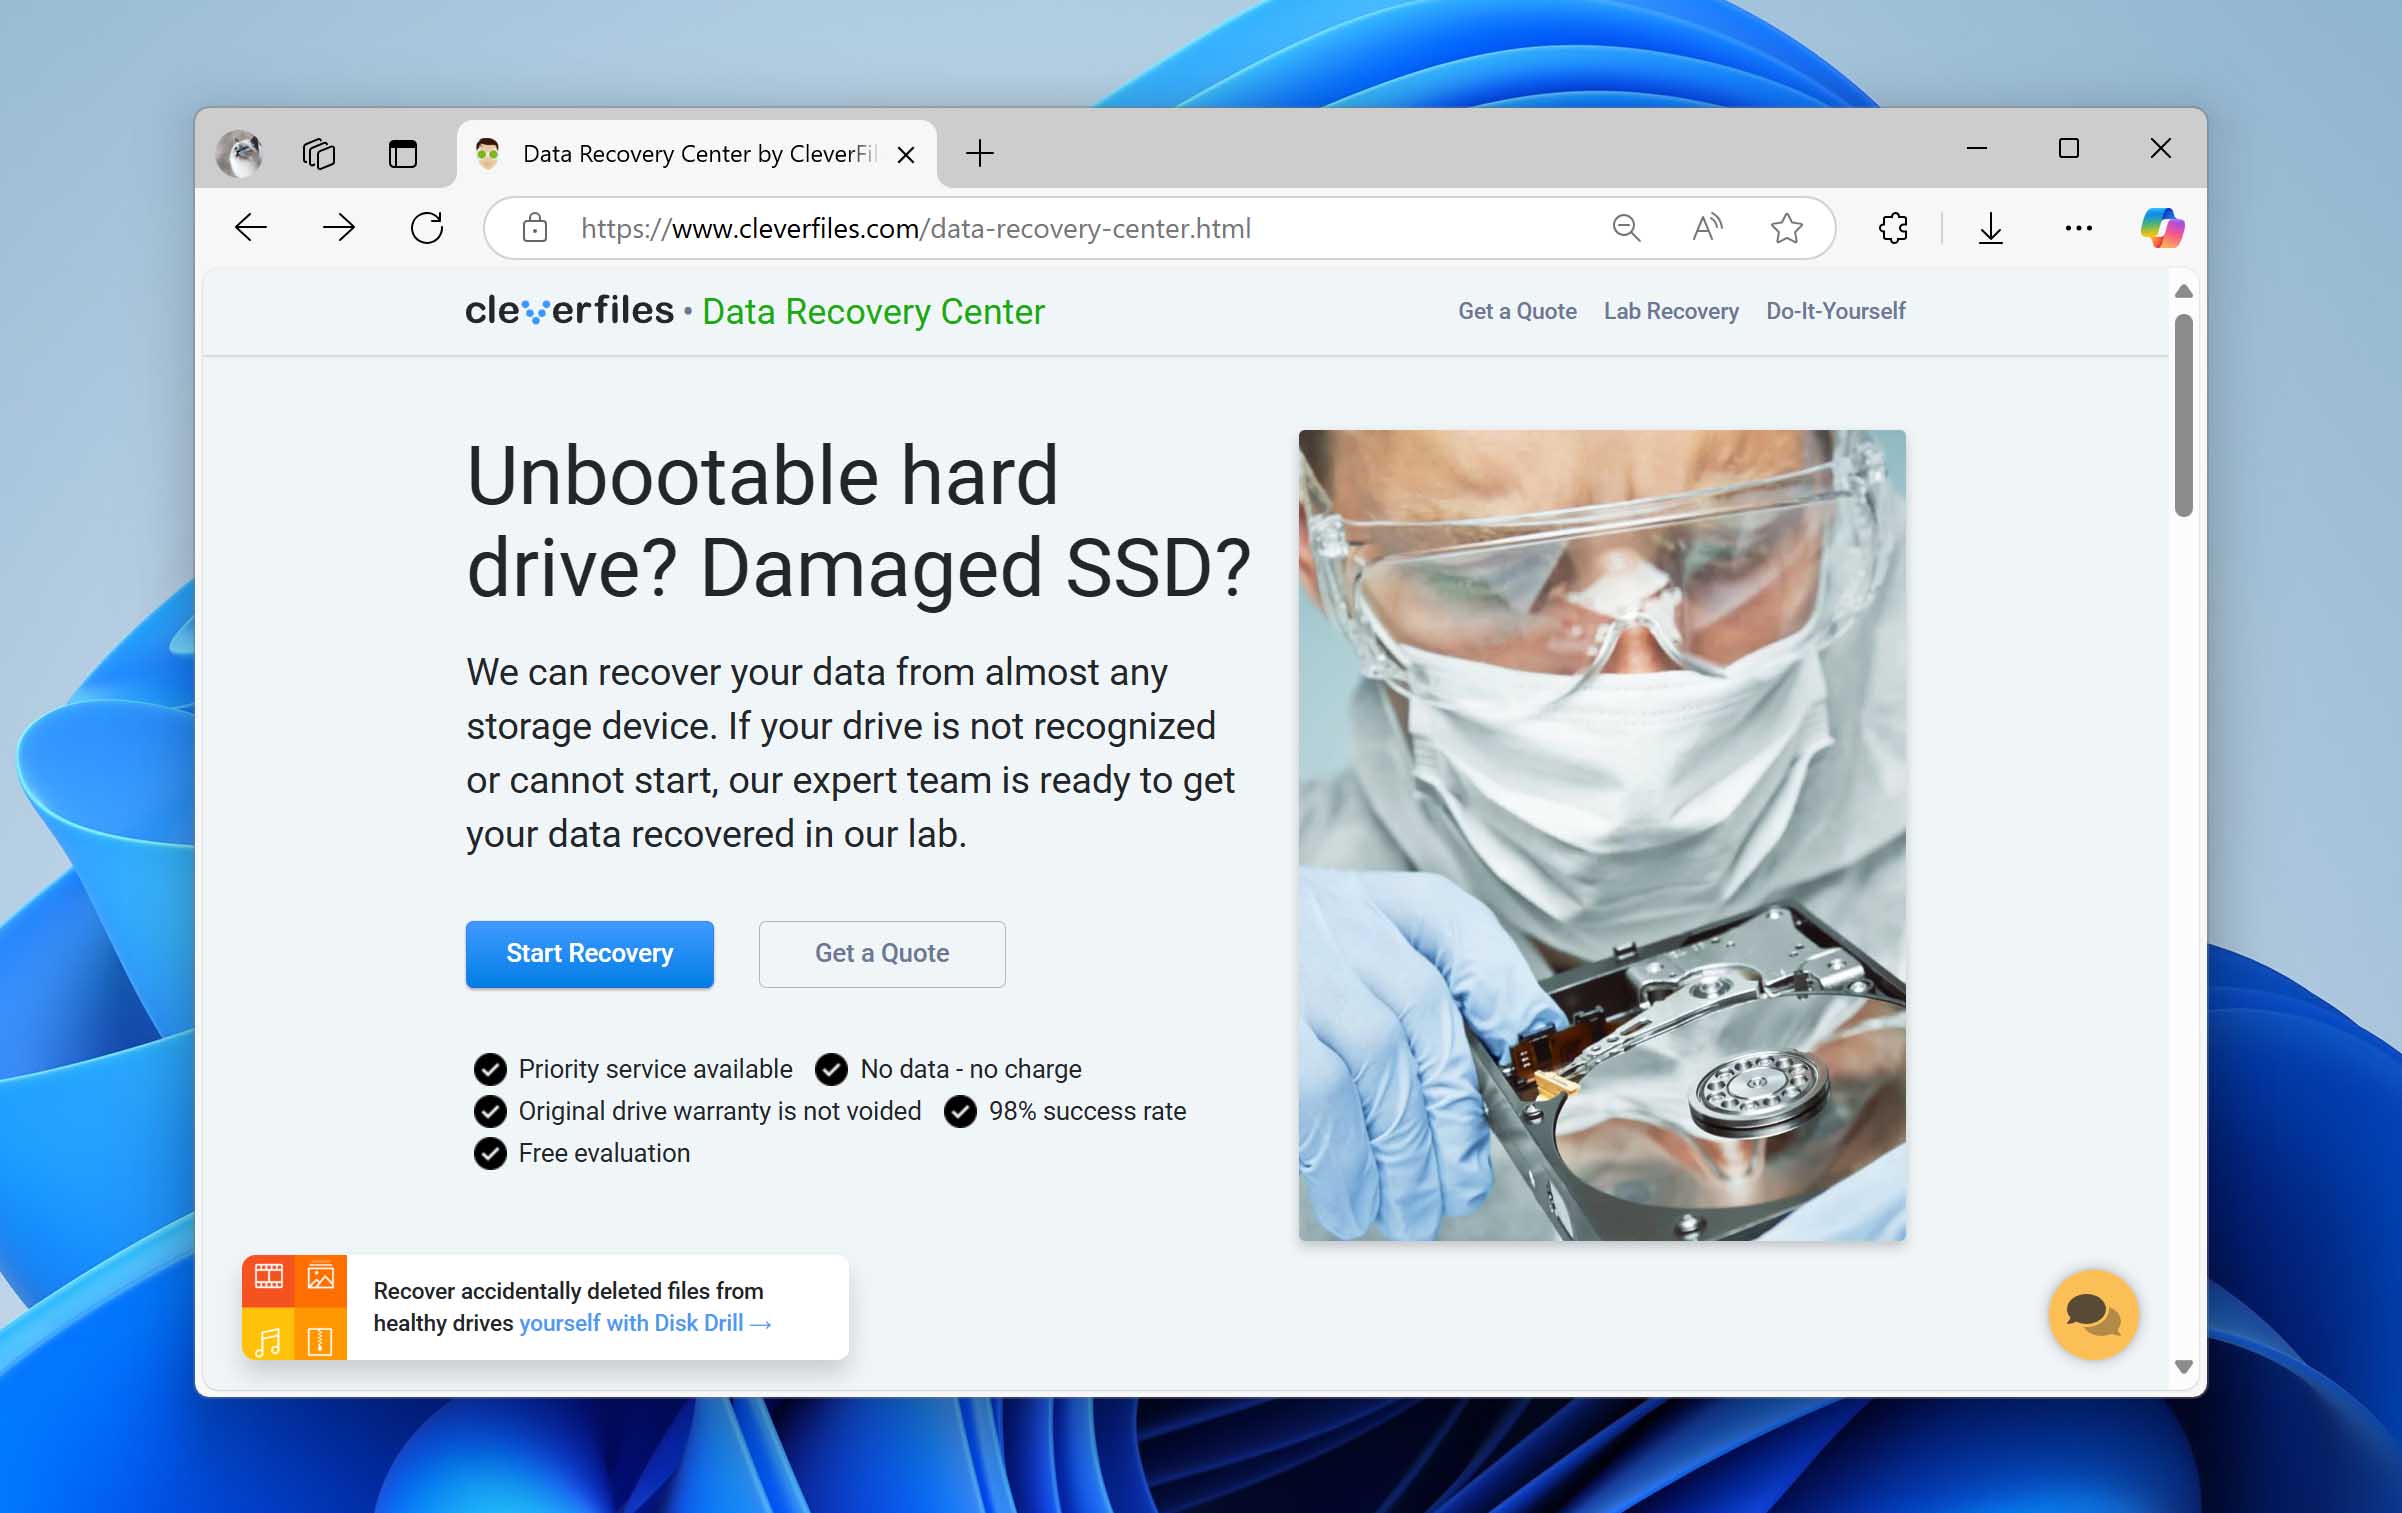
Here’s a preview of what it looks like to recover a damaged partition using the Clever Files Data Recovery Center:
- Go to the Data Recovery Center webpage. Click Start Recovery.
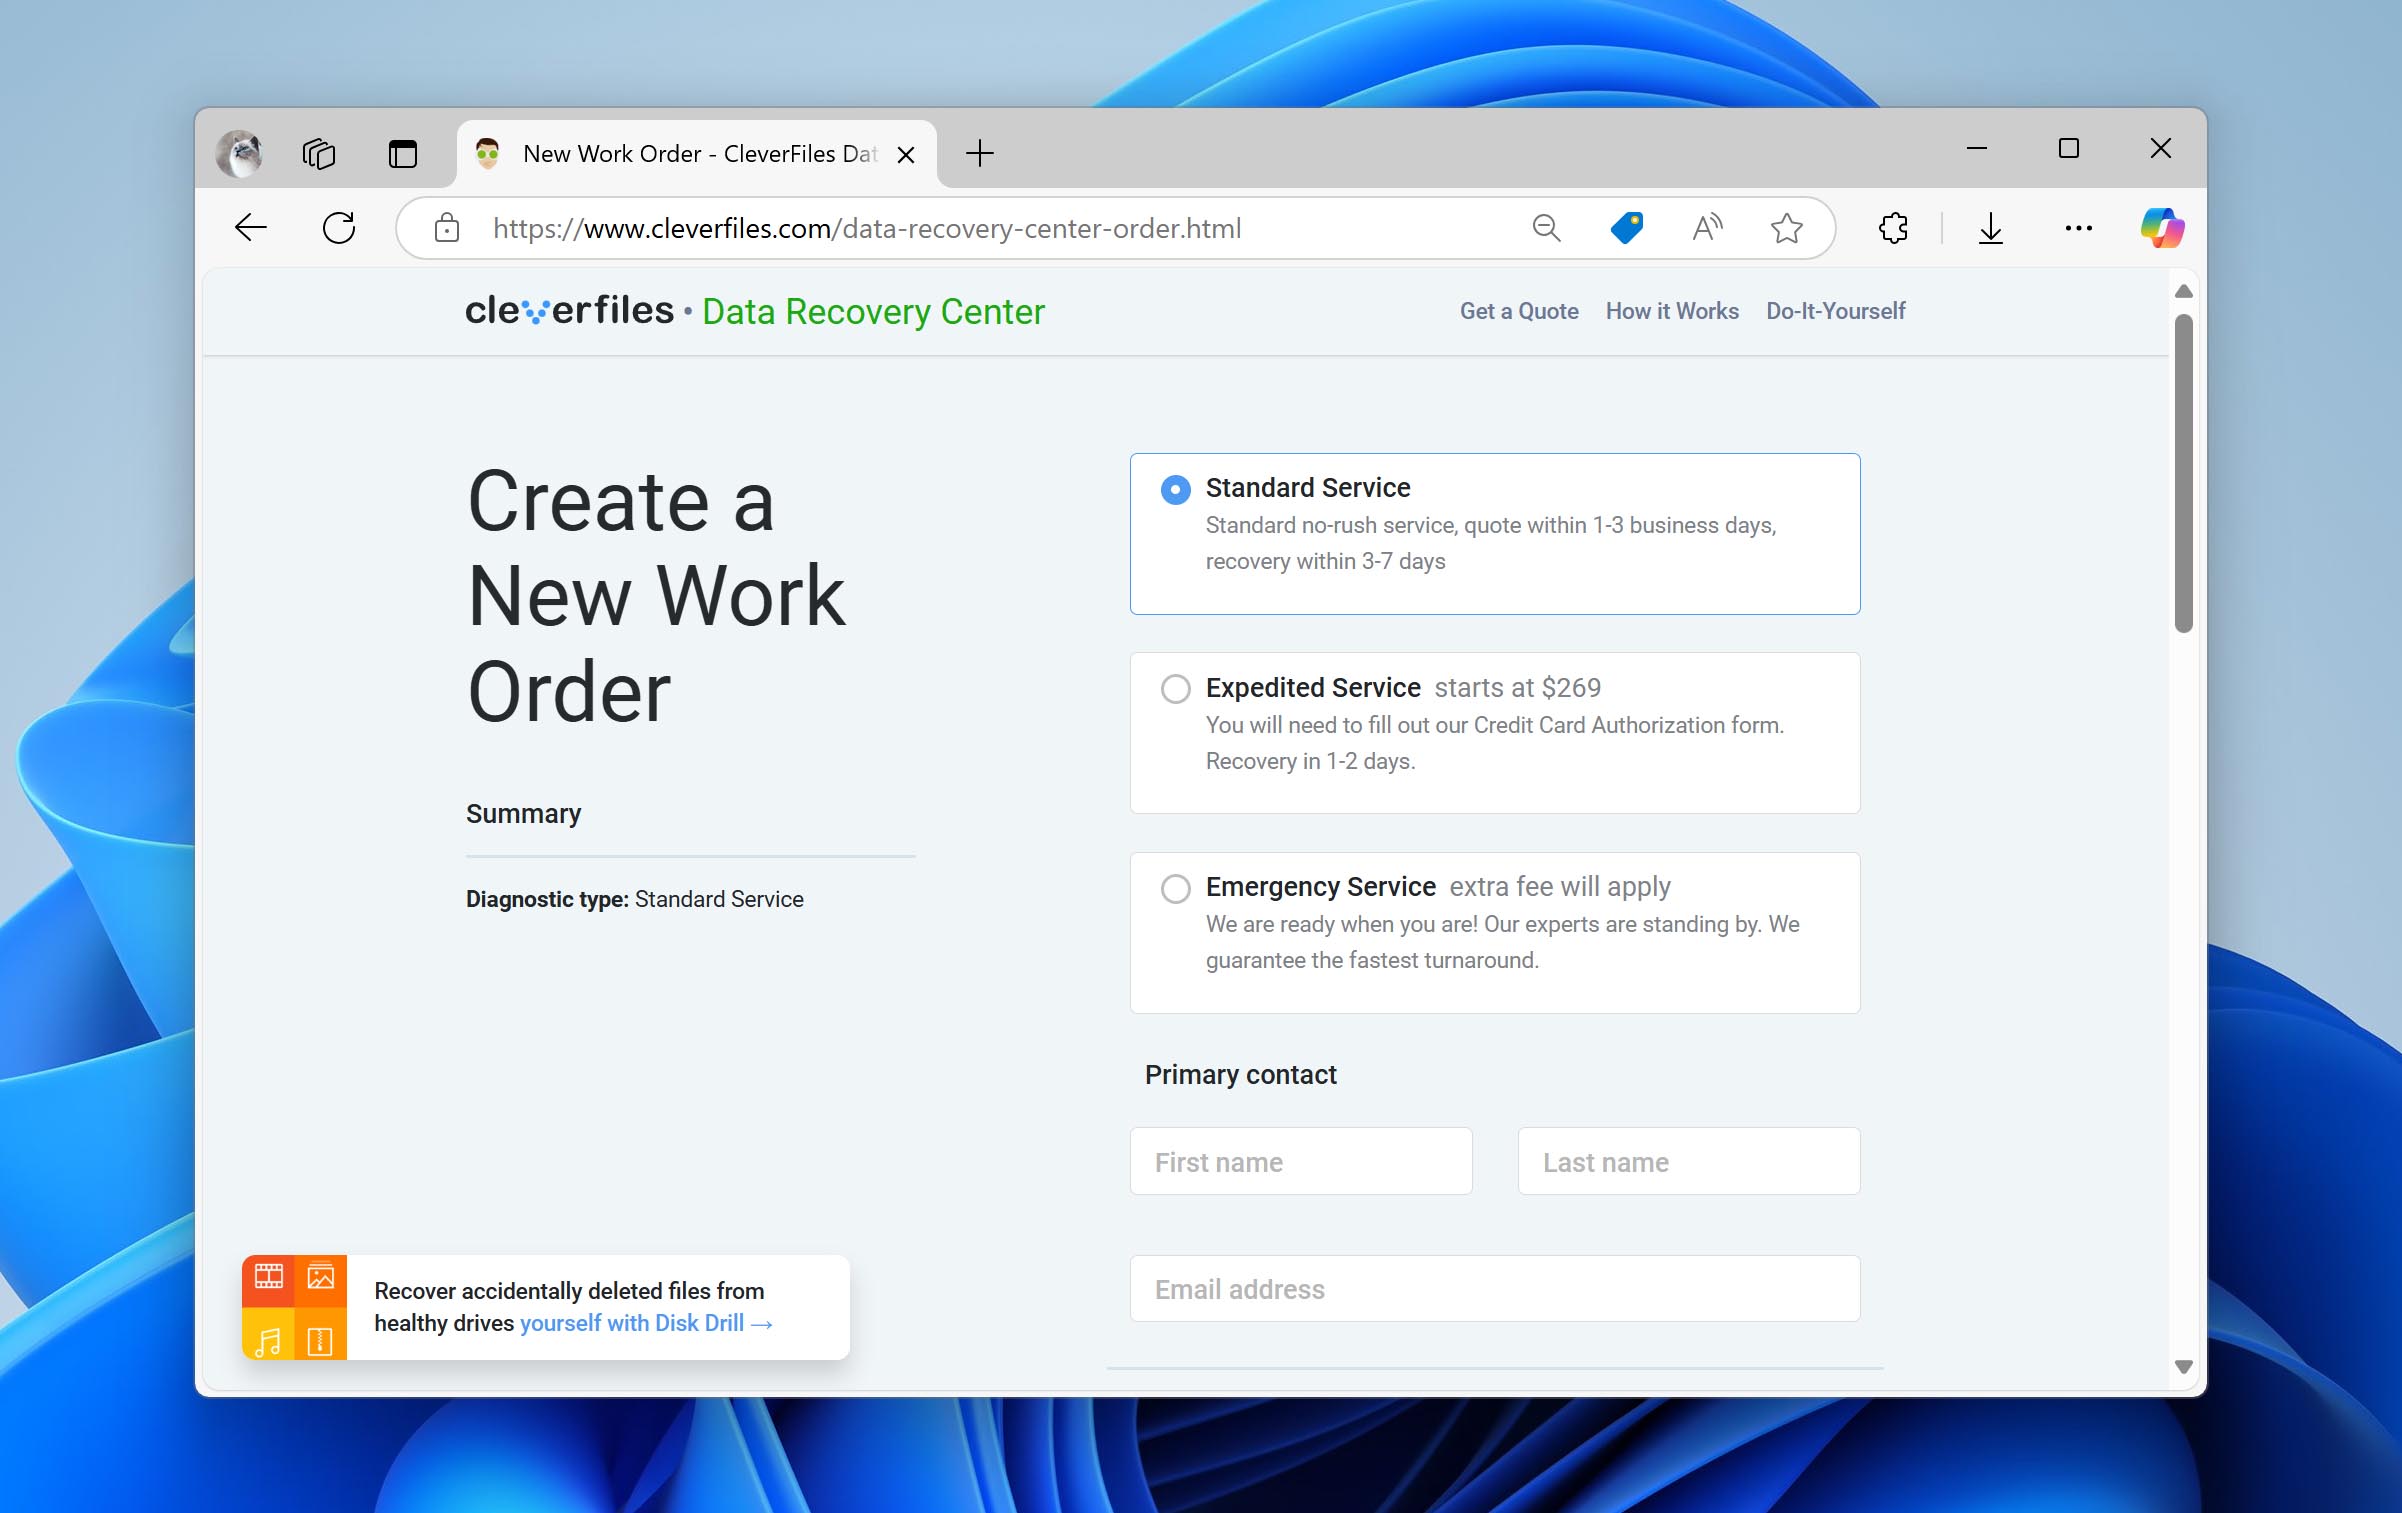
- Choose the type of service you want and fill in all of your details.
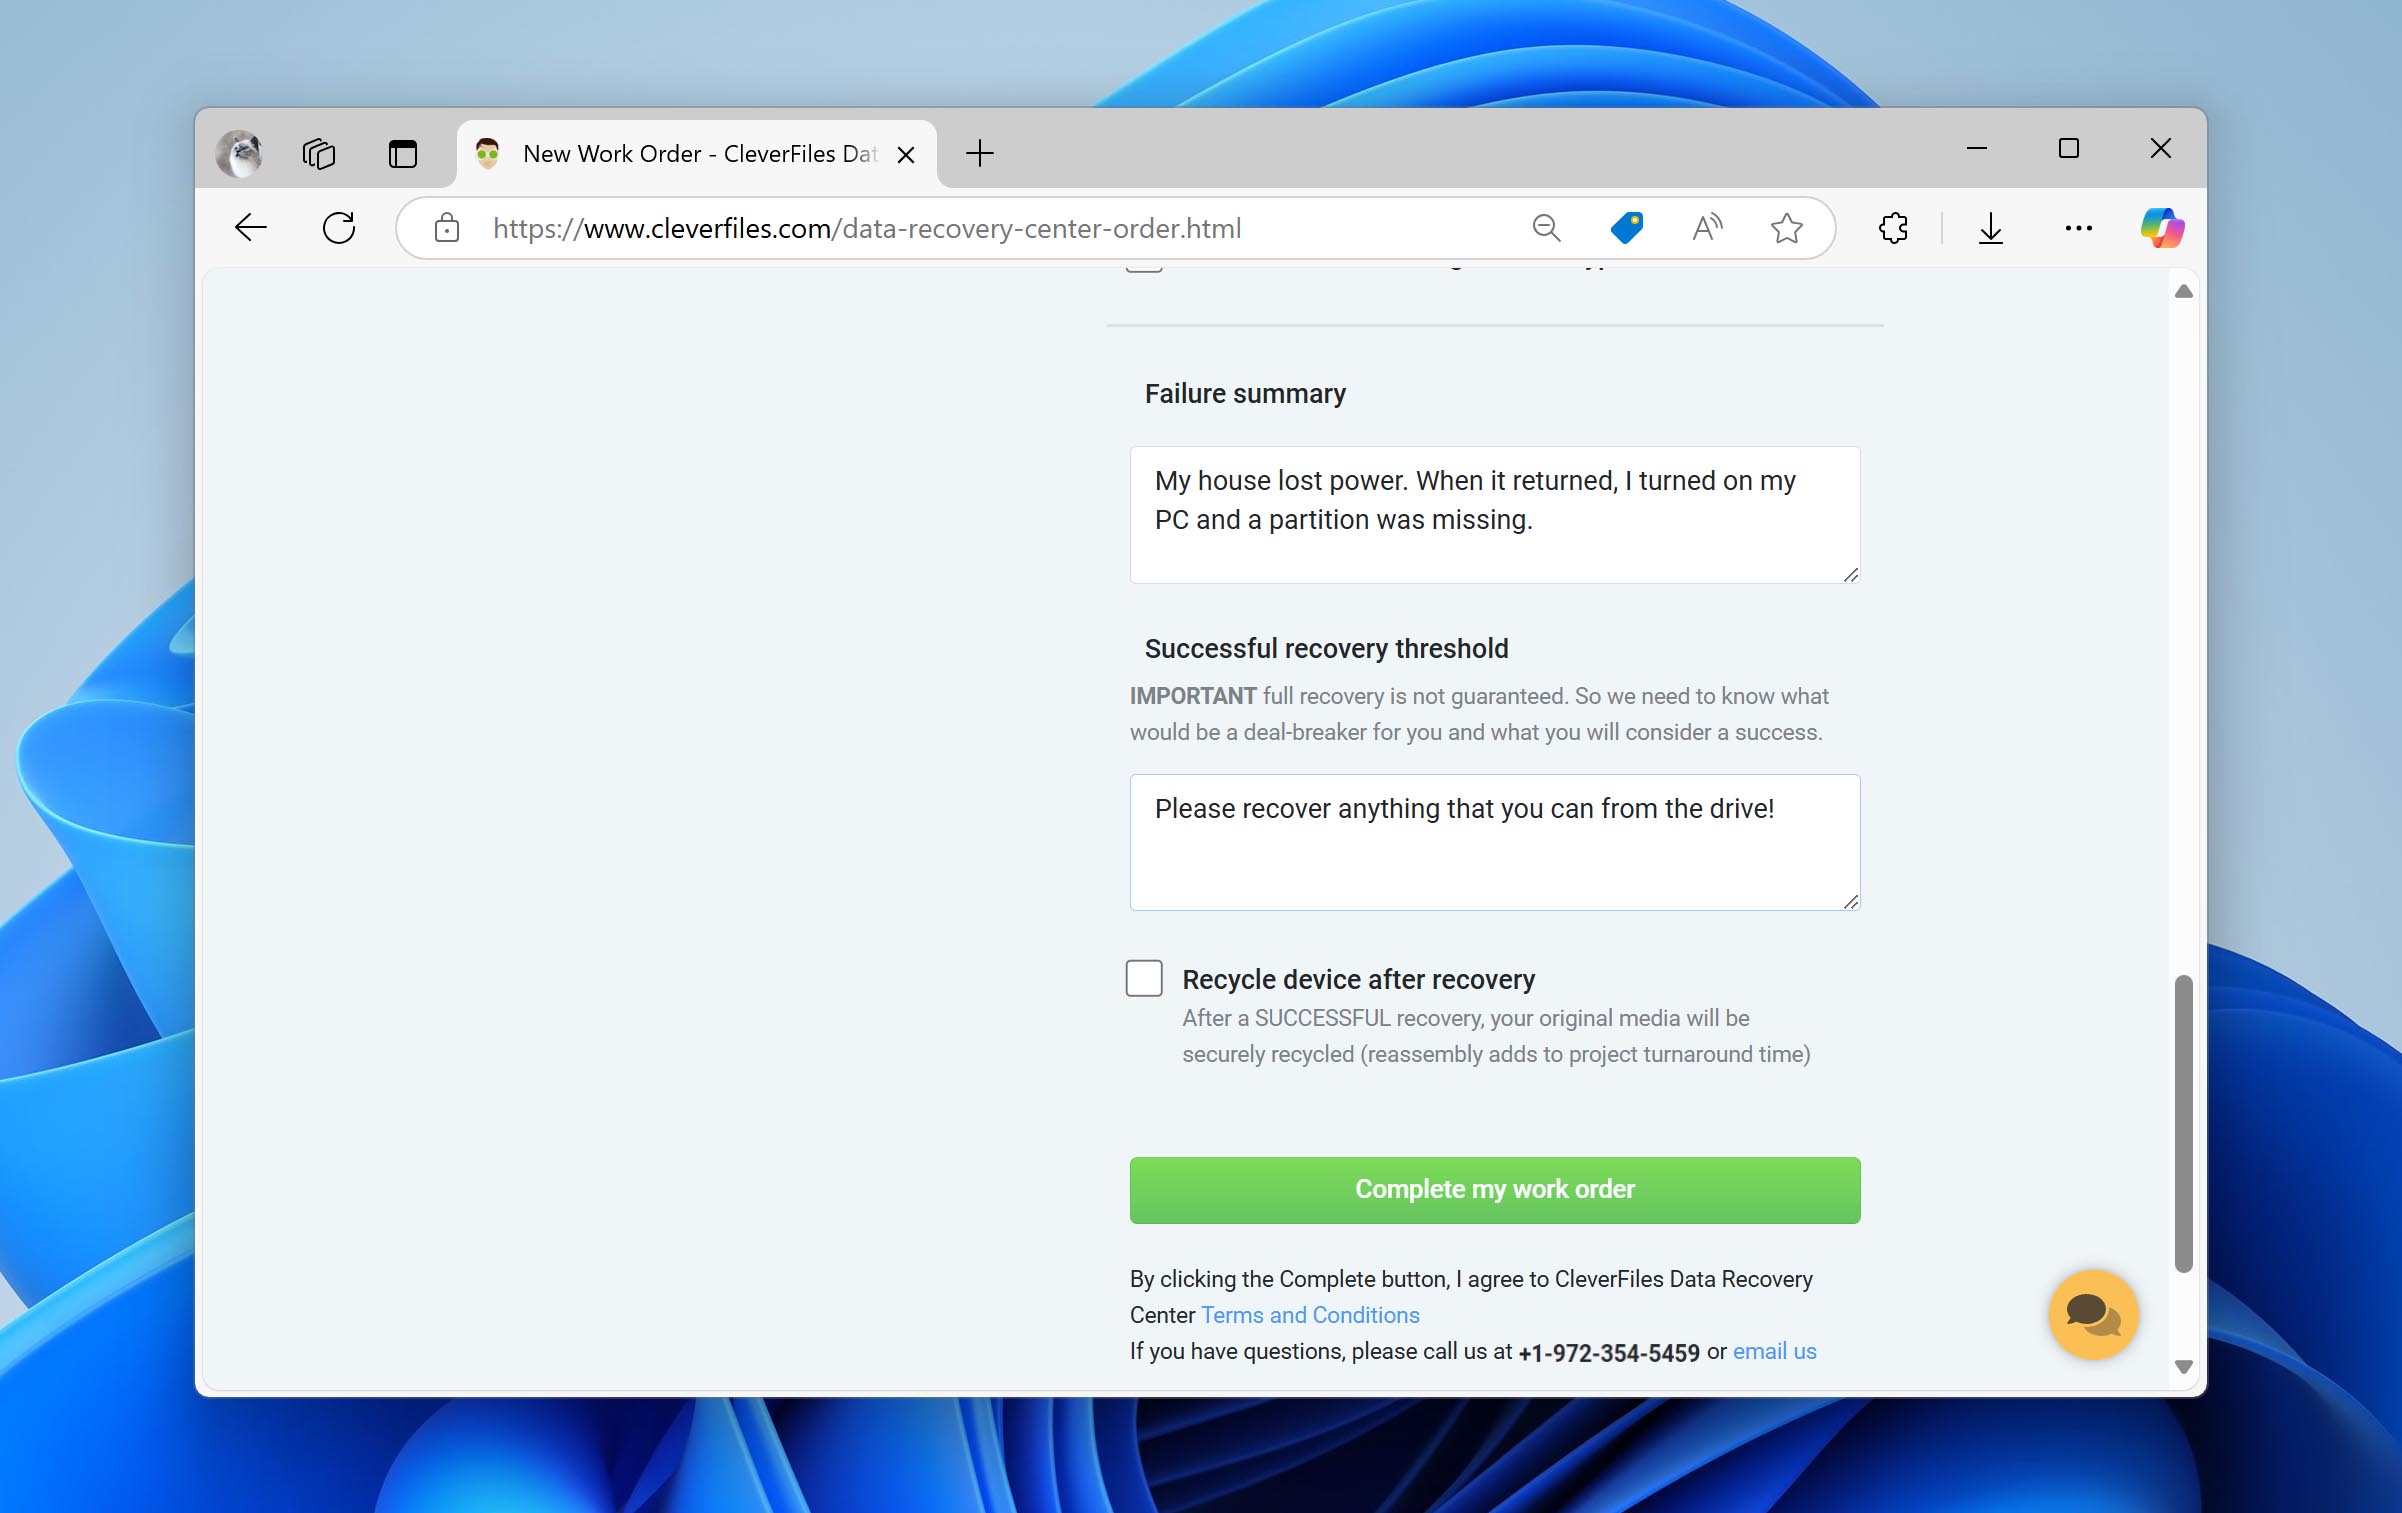
- When ready, click Complete my work order.
How to Repair a Damaged Partition
If your partition is visible, but you’re unable to access any files because you’re met with error messages, you can repair the broken NTFS partition instead.
We’re going to be using an error-checking feature that’s built in to Windows. This feature makes use of CheckDisk (CHKDSK) but doesn’t require you to open a terminal and run through a series of commands. Unlike before, where CHKDSK was used to fix the damaged partition that wasn’t showing properly, this time it will be fixing an NTFS partition that is present but won’t allow you to interact with any data it contains.
Here’s how you can repair the NTFS partition using the error-checking tool:
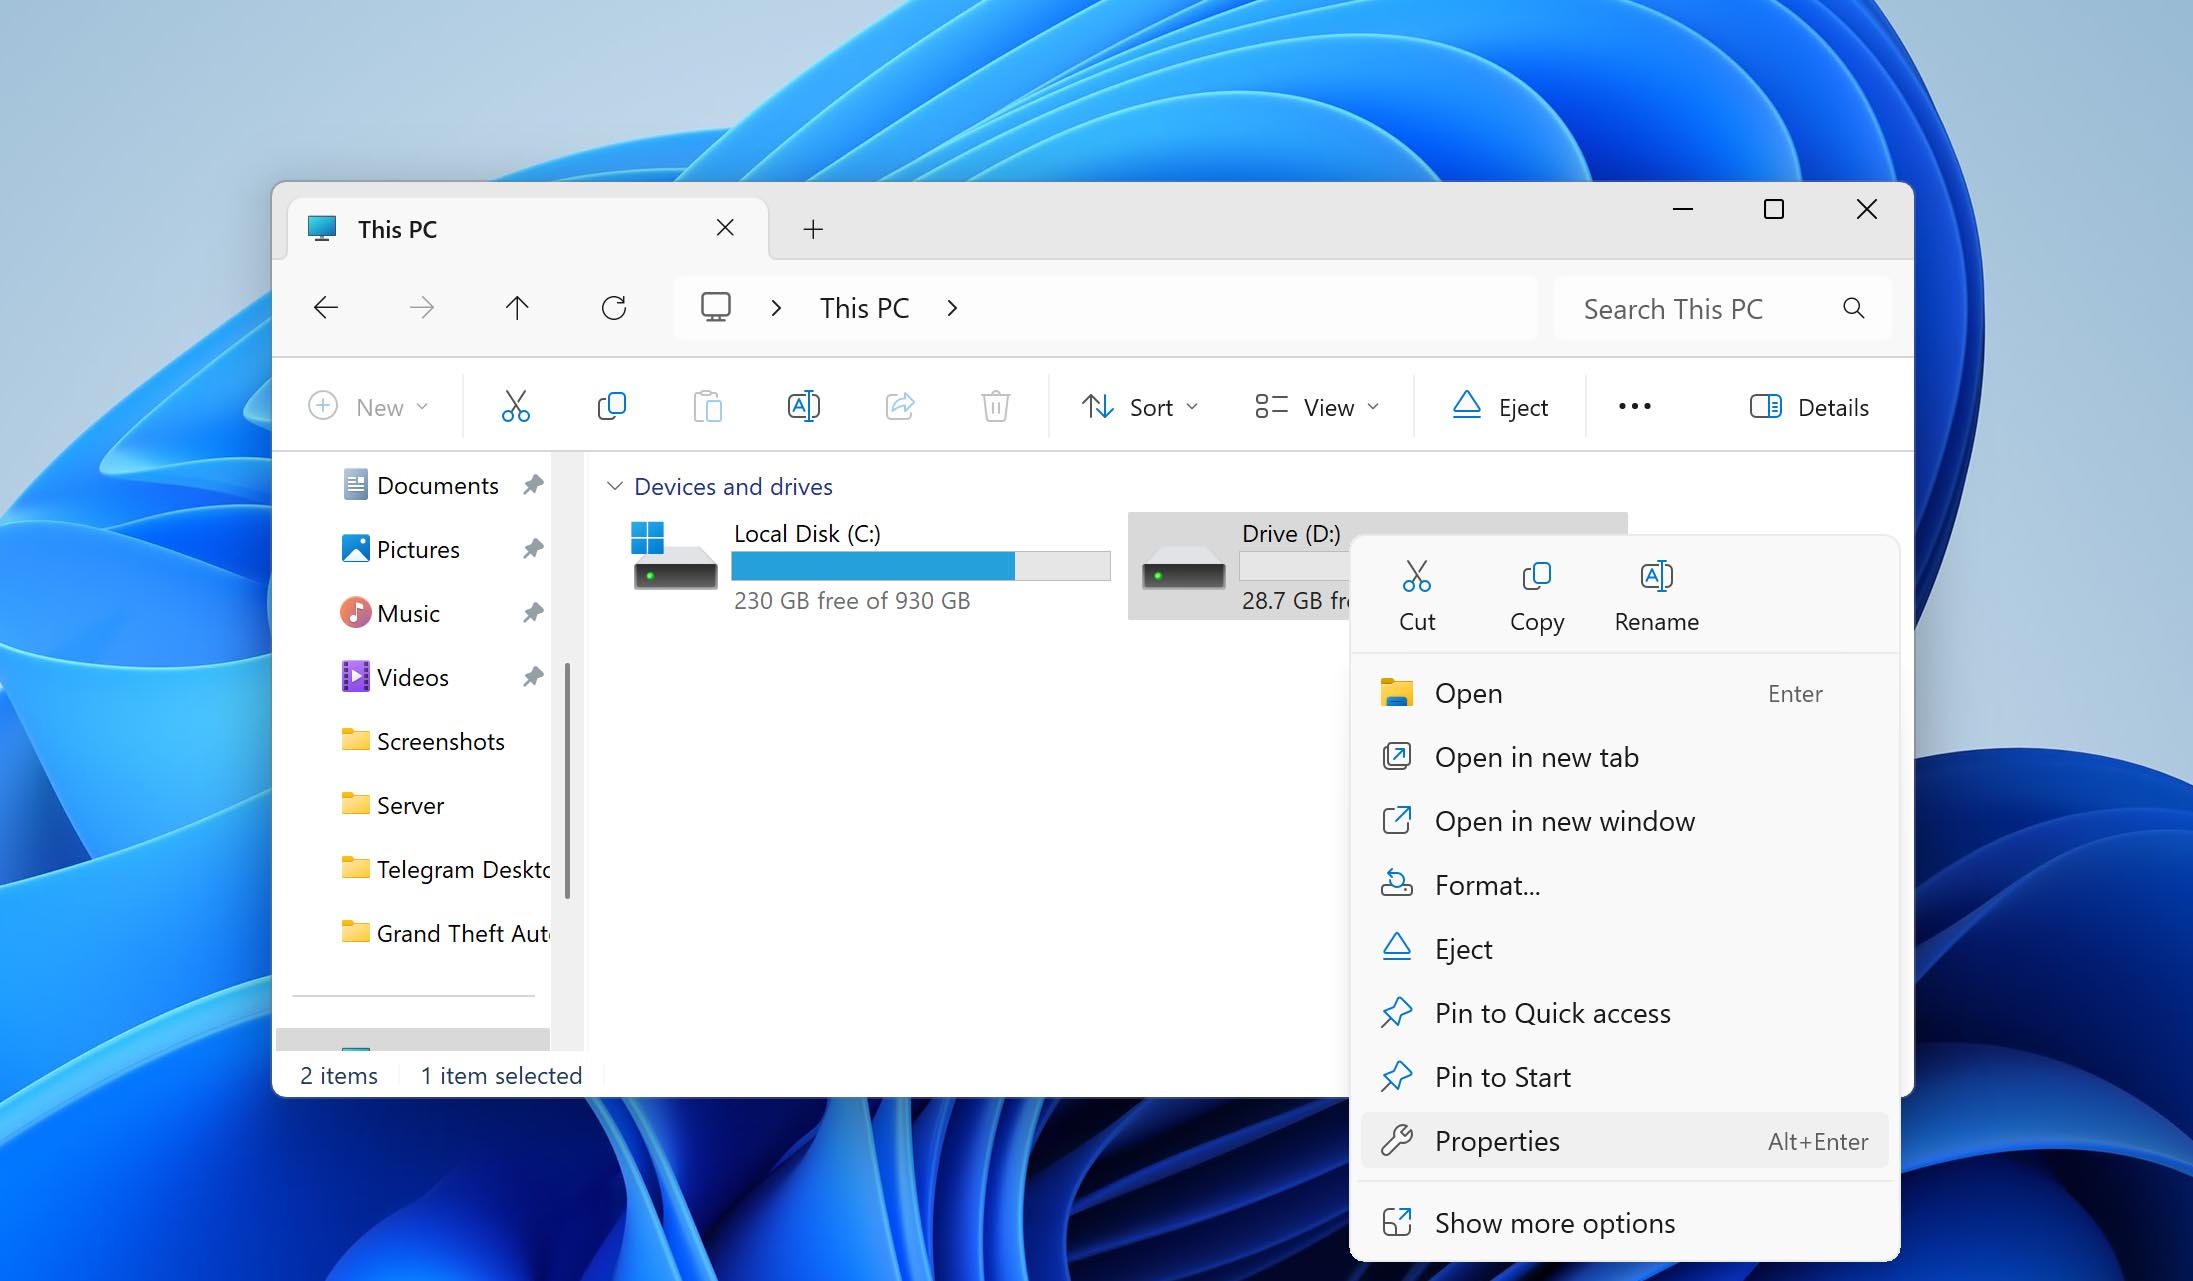
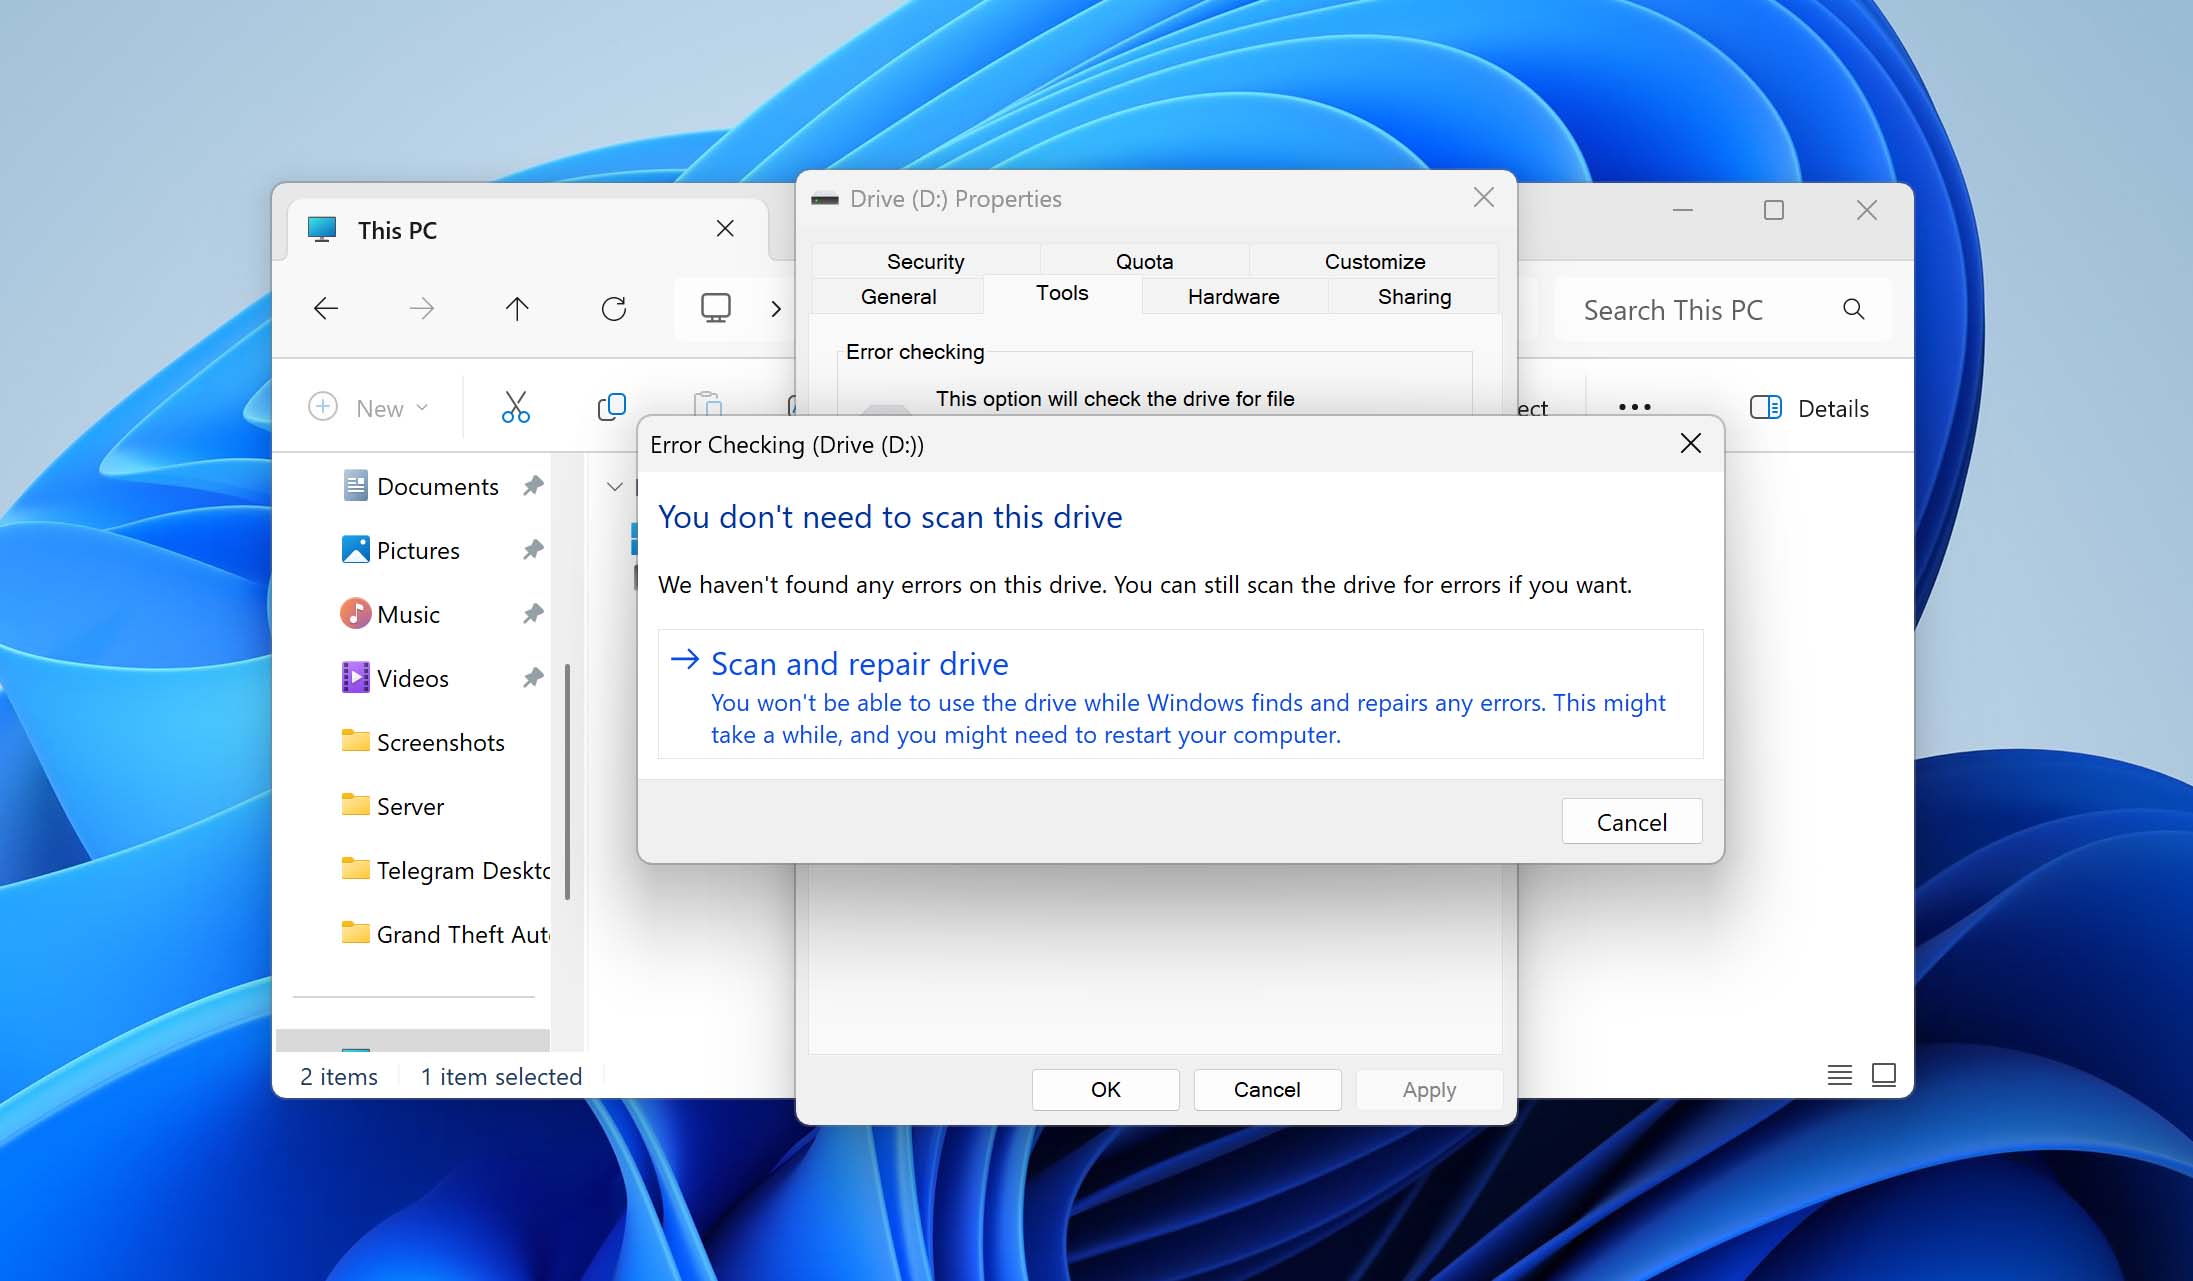
- Open File Explorer. Right-click the drive that has the damaged partition and click Properties.
- Click Tools, then Check in the ‘Error checking’ area.
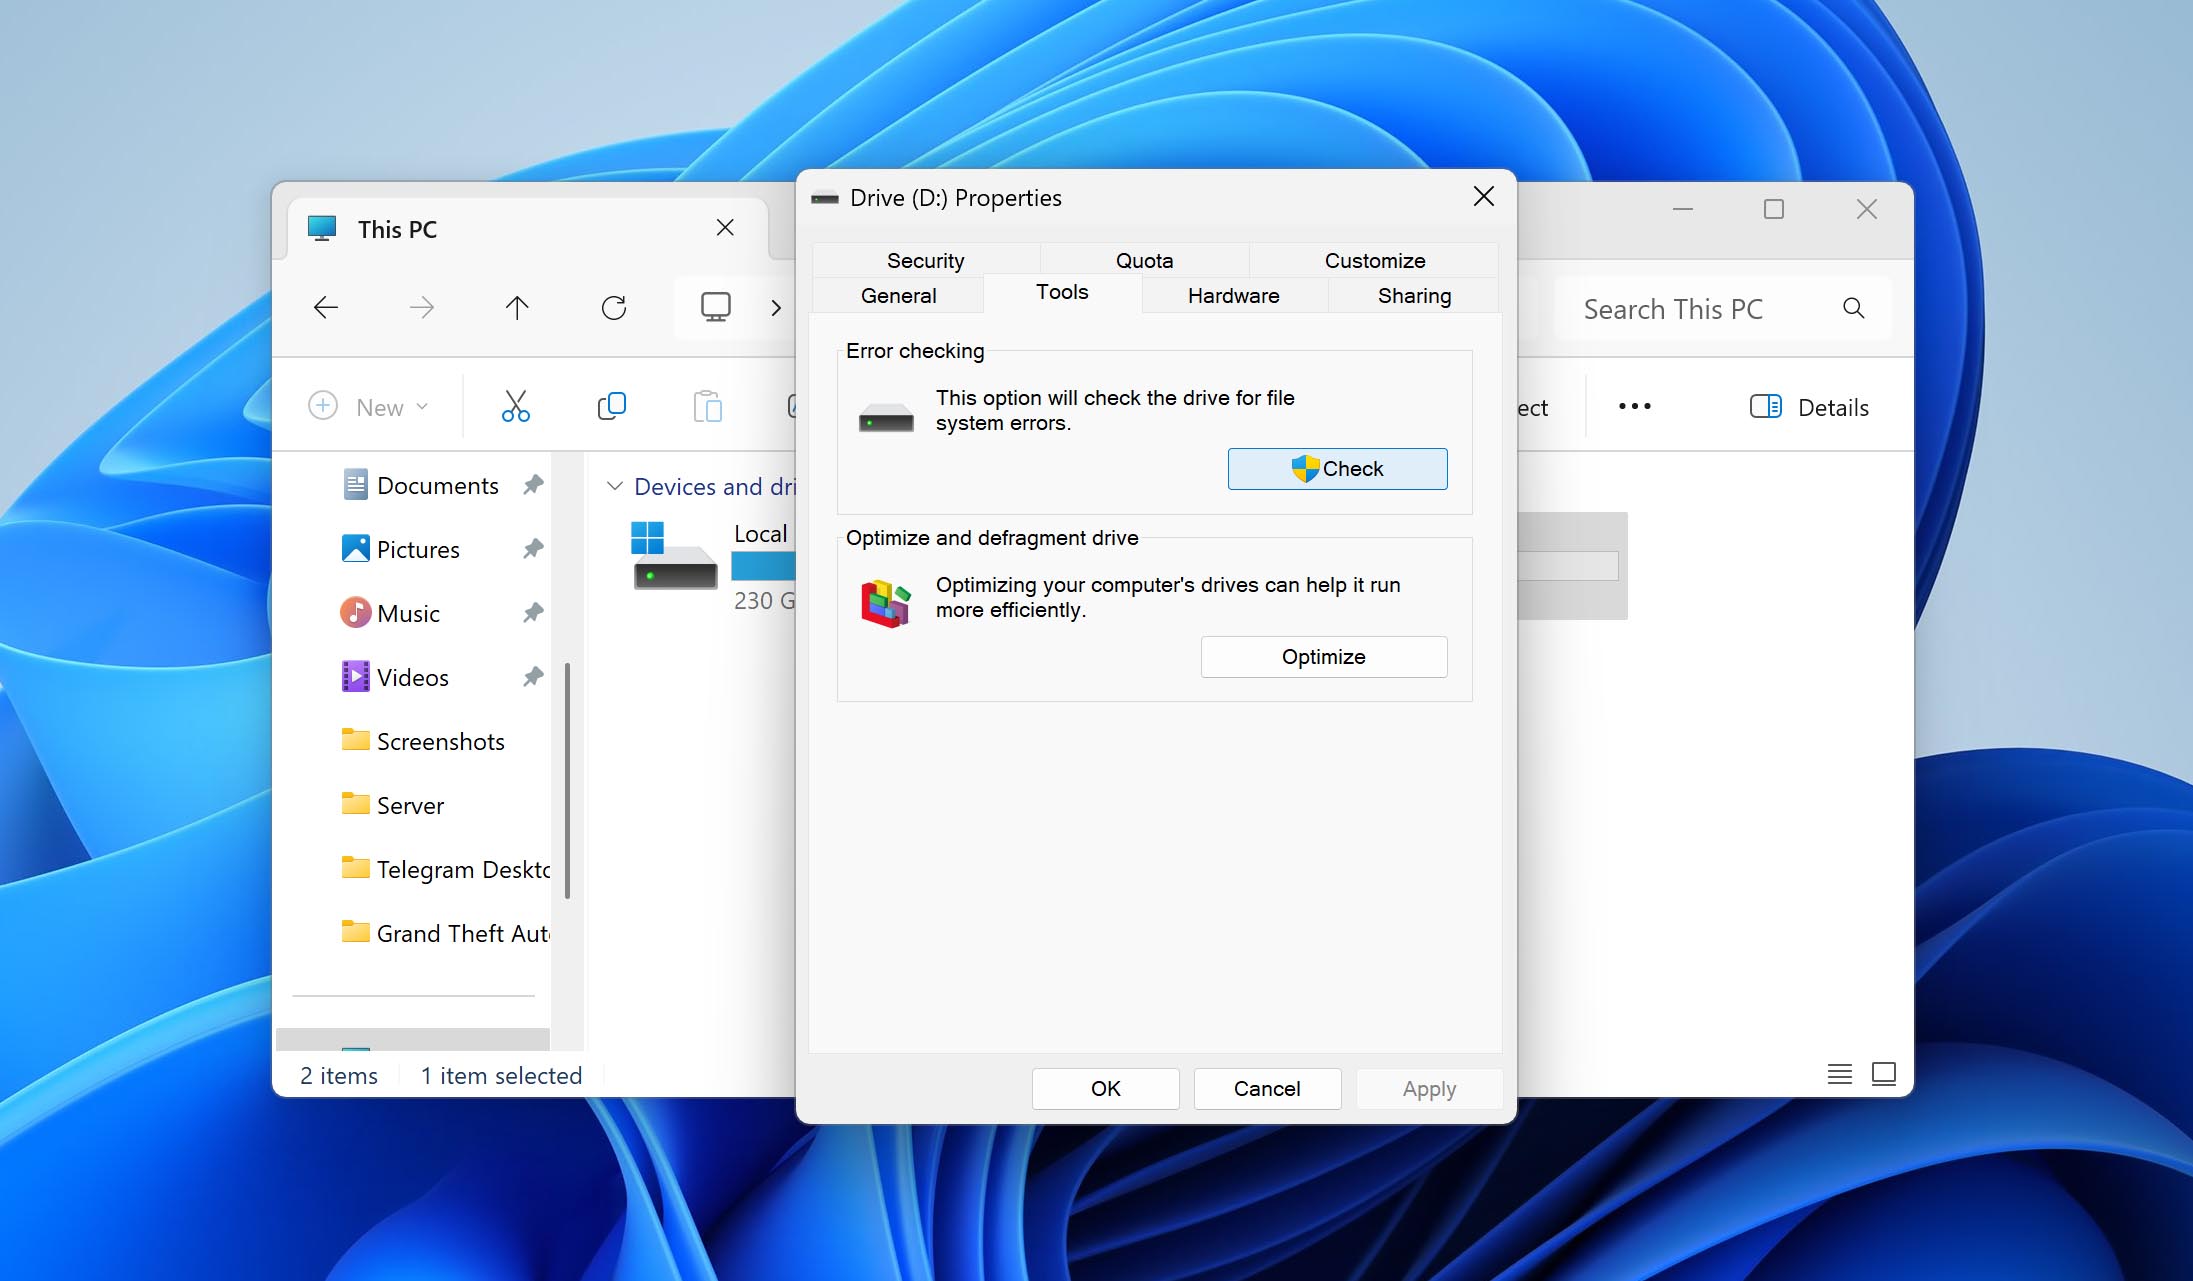
- Click Scan drive.
Repair Corrupted NTFS File System Using Format
If nothing has worked thus far, and the partition is still damaged or missing, the last resort is to repair the corrupted NTFS partition by reformatting it. Reformatting involves formatting the same space that the old NTFS partition occupied with a brand new, fresh file system. This will ‘repair’ the NTFS file system, allowing you to store data on it once again.
This is how you reformat a drive to repair a corrupted NTFS file system:
- Right-click Start and click Disk Management.
- Right-click the space that will become the NTFS partition, then click Format. If it’s currently unallocated space, you will need to click New Simple Volume instead and follow the prompts.
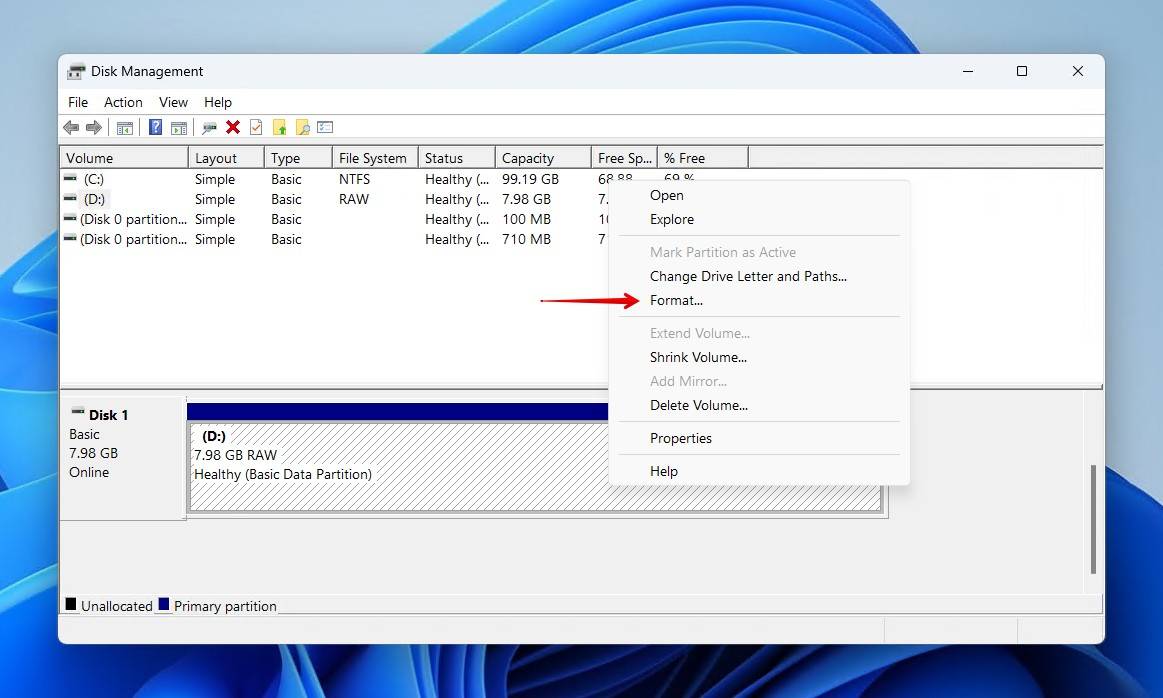
- Add a volume label, ensure Perform a quick format is ticked, then click OK.

- Click OK to confirm.
How to Prevent Partition Damage in the Future
So you don’t need to go through the hassle of recovering an NTFS partition again, take note of the below tips to help avoid a situation like this and prepare yourself in case it happens again.
- 🦠 Use antivirus software – Viruses can attack your file system and corrupt your data. Windows Security is a very reliable antimalware tool that’s built-in to Windows, but you can’t go wrong with a third-party solution like Trend Micro either.
- 🤔 Make careful decisions – Data loss is often the result of human error. This can happen by accident if you make a mistake when trying to delete the recovery partition on Windows. Think before making a decision and always do research before making changes.
- 💻 Monitor S.M.A.R.T. data – Disk Drill has a built-in function that monitors your drive’s S.M.A.R.T. data. With it, you can track critical S.M.A.R.T. values like your Reallocated Sectors Count, Reported Uncorrectable Errors, and Command Timeouts.
- ⏏️ Eject your drive safely – Safely removing your storage device is super important. It ensures all critical processes are stopped, as interrupting something like a file transfer could render the data corrupted and unusable.
- 👍 Make backups – Saving the most important tip for last. Backing up your files is a surefire way of protecting them from loss. The 3-2-1 backup rule is very popular. It involves keeping three copies of your data using two different types of storage media, keeping one off-site.
Conclusion
Losing an entire partition is rough. Thankfully, you can use a reliable recovery solution to recover the NTFS partition without losing data. Using one of the methods outlined in this article will help you recover your data and get you back up and running in no time.


FAQ
For recovering the entire partition, we recommend using TestDisk. It’s a free, open-source application that specializes in recovering lost or deleted partitions, as well as the data on them.
You can find step-by-step instructions on the application’s official website. Or, you can follow the guided steps we mentioned earlier in this article.
You can fix an NTFS partition that becomes RAW without losing data using CHKDSK:
- Right-click Start and click Terminal.
- Type chkdsk *: /f. Replace * with your drive letter.
- Press Enter.
Yes, if your partitioning setup has been damaged, corrupted, or lost, you have a chance to recover your data using data recovery software. Be warned that continued use of the drive while in a damaged state puts your data at a high risk of being lost, so recovery should be performed as early as possible.
An NTFS partition that has been deleted or disappeared due to some form of logical damage, it is possible to recover it.
TestDisk, a partition recovery tool, can find and restore your lost partition. However, bear in mind that this will not work for NTFS partitions that were formatted. Follow these instructions to do so:
- Download TestDisk and open testdisk_win.
- Press Enter on the Create option.
- Use the up and down arrow keys to choose the drive that the partition was located on. Press Enter.
- Choose your partition table type. Press Enter.
- Press Enter to Analyse.
- Press Enter again to begin the Quick Search.
- Select the missing partition and press Enter.
- If you’ve found your partition, move across to the Write option and press Enter. If not, choose Deeper Search.
- Press Y to confirm.
You can recover data from deleted partitions using data recovery software. Data recovery software, like Disk Drill, is able to scan and recover files that have been deleted, lost, and even formatted.
To recover files from an NTFS partition, follow these steps:
- Download and install Disk Drill.
- Select the drive that contained the NTFS partition and click Search for lost data.
- Click Review found items once the scan is complete.
- Mark the files you want to recover. Click Recover when ready.
- Choose where you want to recover your files.
Repairing the boot configuration data may be enough to fix your corrupted recovery partition. This process will rebuild the BCD and repair any issues your computer faces with startup:
- Boot your computer using Windows installation media.
- Click Next, then Repair your computer.
- Click Troubleshoot, then Advanced options.
- Click Commant Prompt.
- Type the following command: bcdboot C:\Windows /s *: /f ALL. Replace * with the drive letter assigned to the recovery partition.
- Restart your computer to see if the recovery partition is available and working.
Alternatively, you can reinstall Windows from scratch to create a fresh recovery partition. Before doing so, be sure to back up your data.
Recovery partitions are special partitions that hold important files that help restore functionality to your computer in the event of failure. Windows comes with a recovery partition by default, but manufacturers can also include their own recovery partitions that ship with the machines.