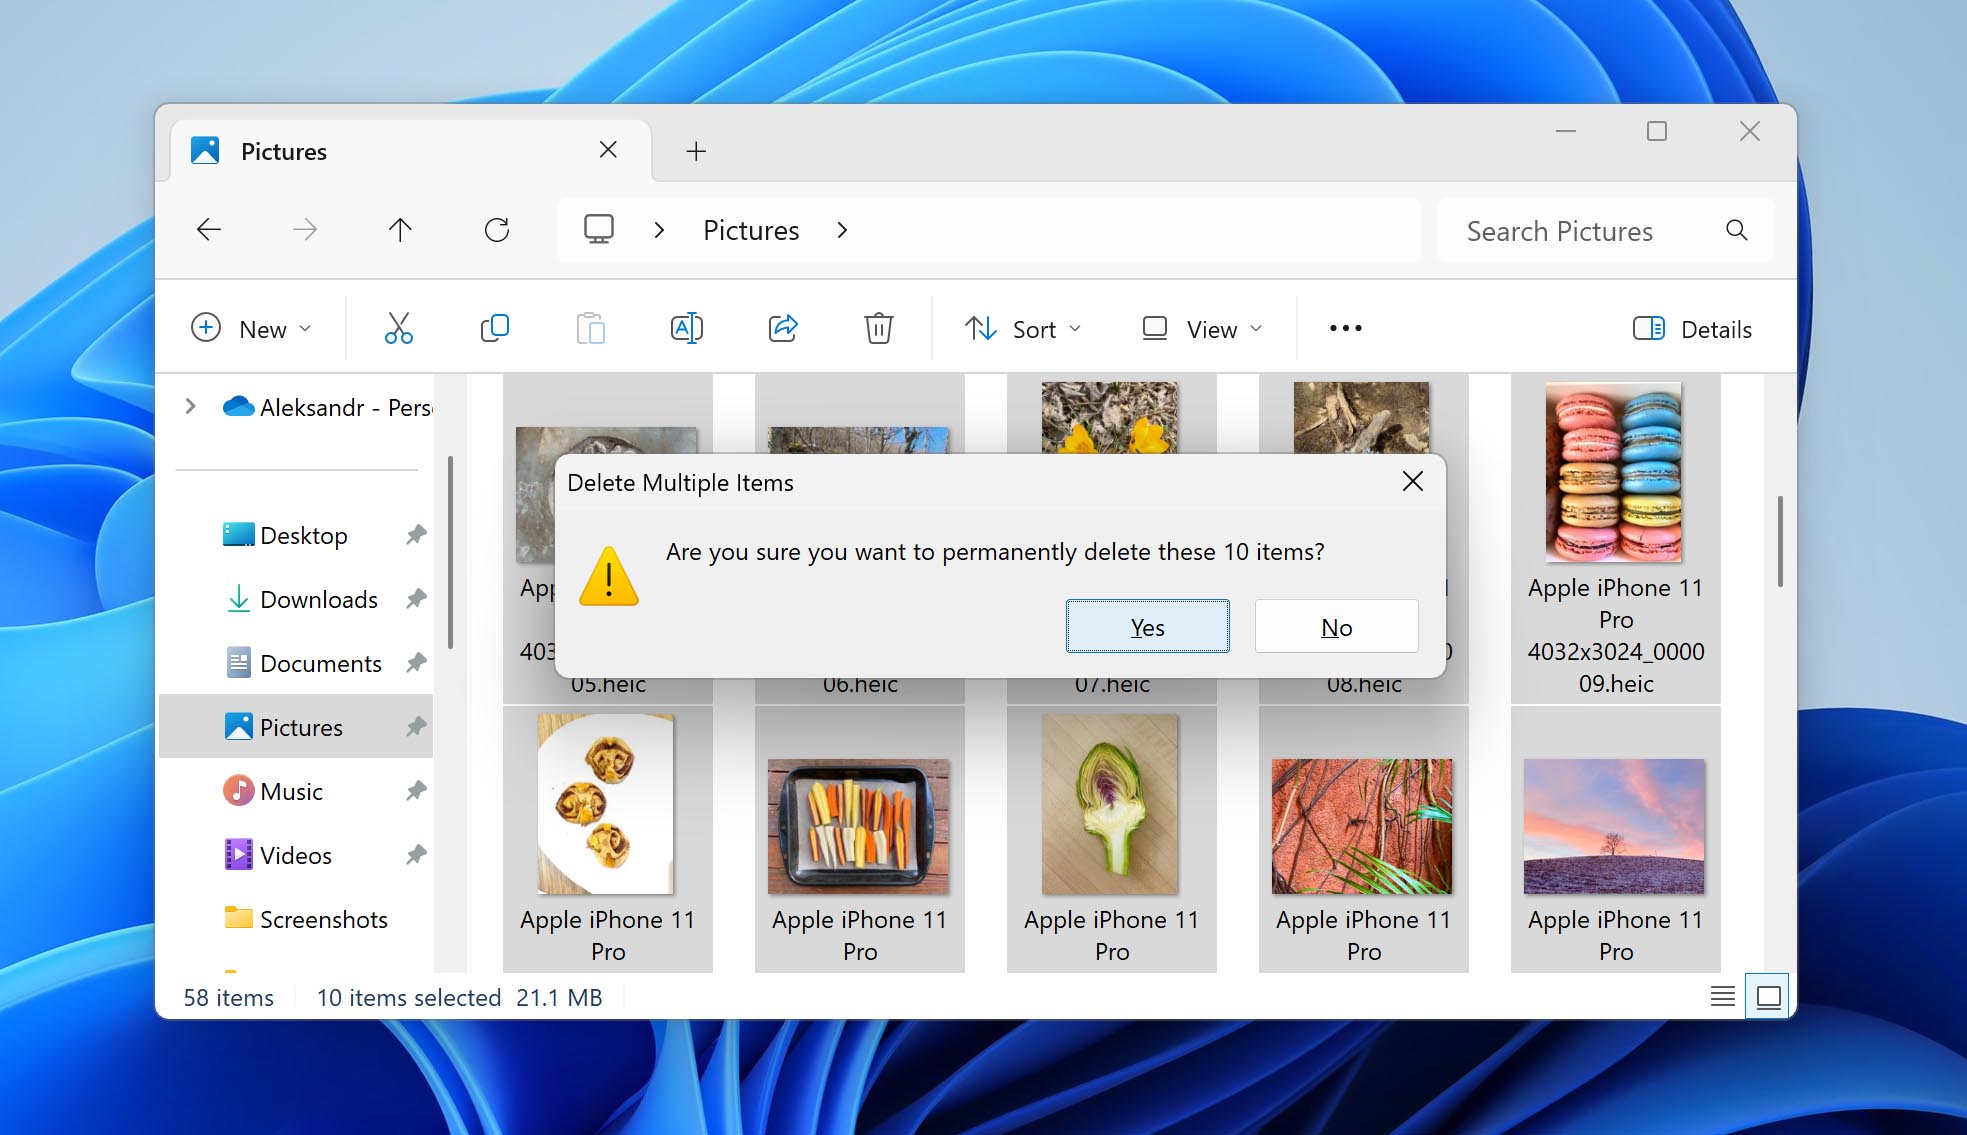
All it takes to delete a file in Windows is a single button press, and all it takes to delete a file permanently is a single keystroke combination: Shift + Delete. When pulling an all‐nighter to finish a school presentation or prepare documents for a business meeting, it’s very easy to make an honest mistake and accidentally delete a file using the Shift + Delete key combination. Fortunately, their recovery is still often possible.
In this article, we explain in detail what Shift + Delete does and provide you with several methods that you can use to recover shift deleted files.
If you’ve accidentally shift‐deleted files (documents, photos, or folders), here’s what to do:
- 🛑 Stop using the affected drive.
- 💽 Check available backups.
- 🧰 Install reliable recovery software on a different drive.
- 🔍 Scan the affected drive.
- 📂 Recover found files to a separate location.
What Does Shift + Delete Do?
To understand what Shift + Delete does, it’s useful to first review what happens when you press the Delete key on its own.
When you select a file and press the Delete key, the selected file is moved to the Recycle Bin, which is a temporary storage area for files that have been deleted by the user but have not yet been permanently erased from the file system.
When you purposefully or accidentally shift delete files by pressing Shift + Delete, the file isn’t moved to the Recycle Bin. Instead, Windows simply marks the storage area occupied by the file as being available for use by modifying the file table, a complete list of files with their various attributes. This applies to all file types in Windows 11, 10, and earlier, including documents (Word, Excel), photos, videos, and so on.
Is Shift Deleted File Recovery Possible?
When files are shift‐deleted in Windows, their recovery isn’t guaranteed but remains possible depending on the following interconnected factors:
- ⏳ Time is a key factor. A shift deleted file or folder remains recoverable until overwritten by new data. While an external storage device can simply be disconnected or ejected, the same can’t be done with the main system drive as normal system operations continue to write new data to the drive.
- 👆 But how intensely you use the device is just as important. It doesn’t matter if a few weeks have passed since deletion if the drive has seen minimal use—those files might still be recoverable. Conversely, just a few hours of heavy system activity like installing new software, downloading large files, or running Windows updates could permanently overwrite your deleted data.
- ✂️ The type of storage device also plays a role. Modern Solid State Drives (SSDs) use TRIM technology to improve performance by proactively erasing data storage blocks that have been marked as empty. Unfortunately, that’s exactly what happens when you shift delete a file, so SSD make file recovery more difficult.
Here are your available recovery options based on these factors:
| Possible approaches | Suggested solutions | When to Use |
| Recover shift-deleted files with data recovery software | Disk Drill 🌟 | Best tool for complicated data loss cases with an extended list of supported file types. |
| Recuva | Popular free data recovery software for simple data recovery cases. | |
| Windows File Recovery | A basic, lightweight CLI tool, suitable for the recovery of recently deleted documents, photos and audio files. | |
| Restore shift deleted files without data recovery software | File History Backups | The most common tool for backing up files. Allows you to choose between previous versions of files |
| Backup & Restore (Windows 7) | If you’re on older Windows versions (Windows 7 or 8) or the file you need is in an old backup. | |
| Cloud Backups | All the information you need on how to recover shift-deleted files from OneDrive, Google Drive, Dropbox backups. | |
| Shift delete recovery with the help of a professional data recovery service | Professional File Recovery Service | We suggest it when the hardware is damaged or you need expert assistance. |
Remember: To maximize recovery chances when recovering shift deleted files, stop using the affected drive immediately after discovering the deletion. Any new data written to the drive could overwrite your deleted files permanently.
How to Recover Shift-Deleted Files With Recovery Tools
Data recovery tools can deliver excellent results when recovering shift deleted files, but the window of opportunity to use them can be relatively small, especially if the files were stored on your system drive. That’s why you shouldn’t waste any time and begin the recovery process using the best tool available.
Method 1: Use Disk Drill
Among the many data recovery software tools available, Disk Drill stands out thanks to its ability to effortlessly undo shift delete performed on around 400 different file formats across all commonly used Windows file systems, such as exFAT, FAT32, and NTFS.
To recover shift deleted files using Disk Drill:
- Download and install Disk Drill on a different drive than the one containing your deleted files. This prevents overwriting the deleted data you’re trying to recover.

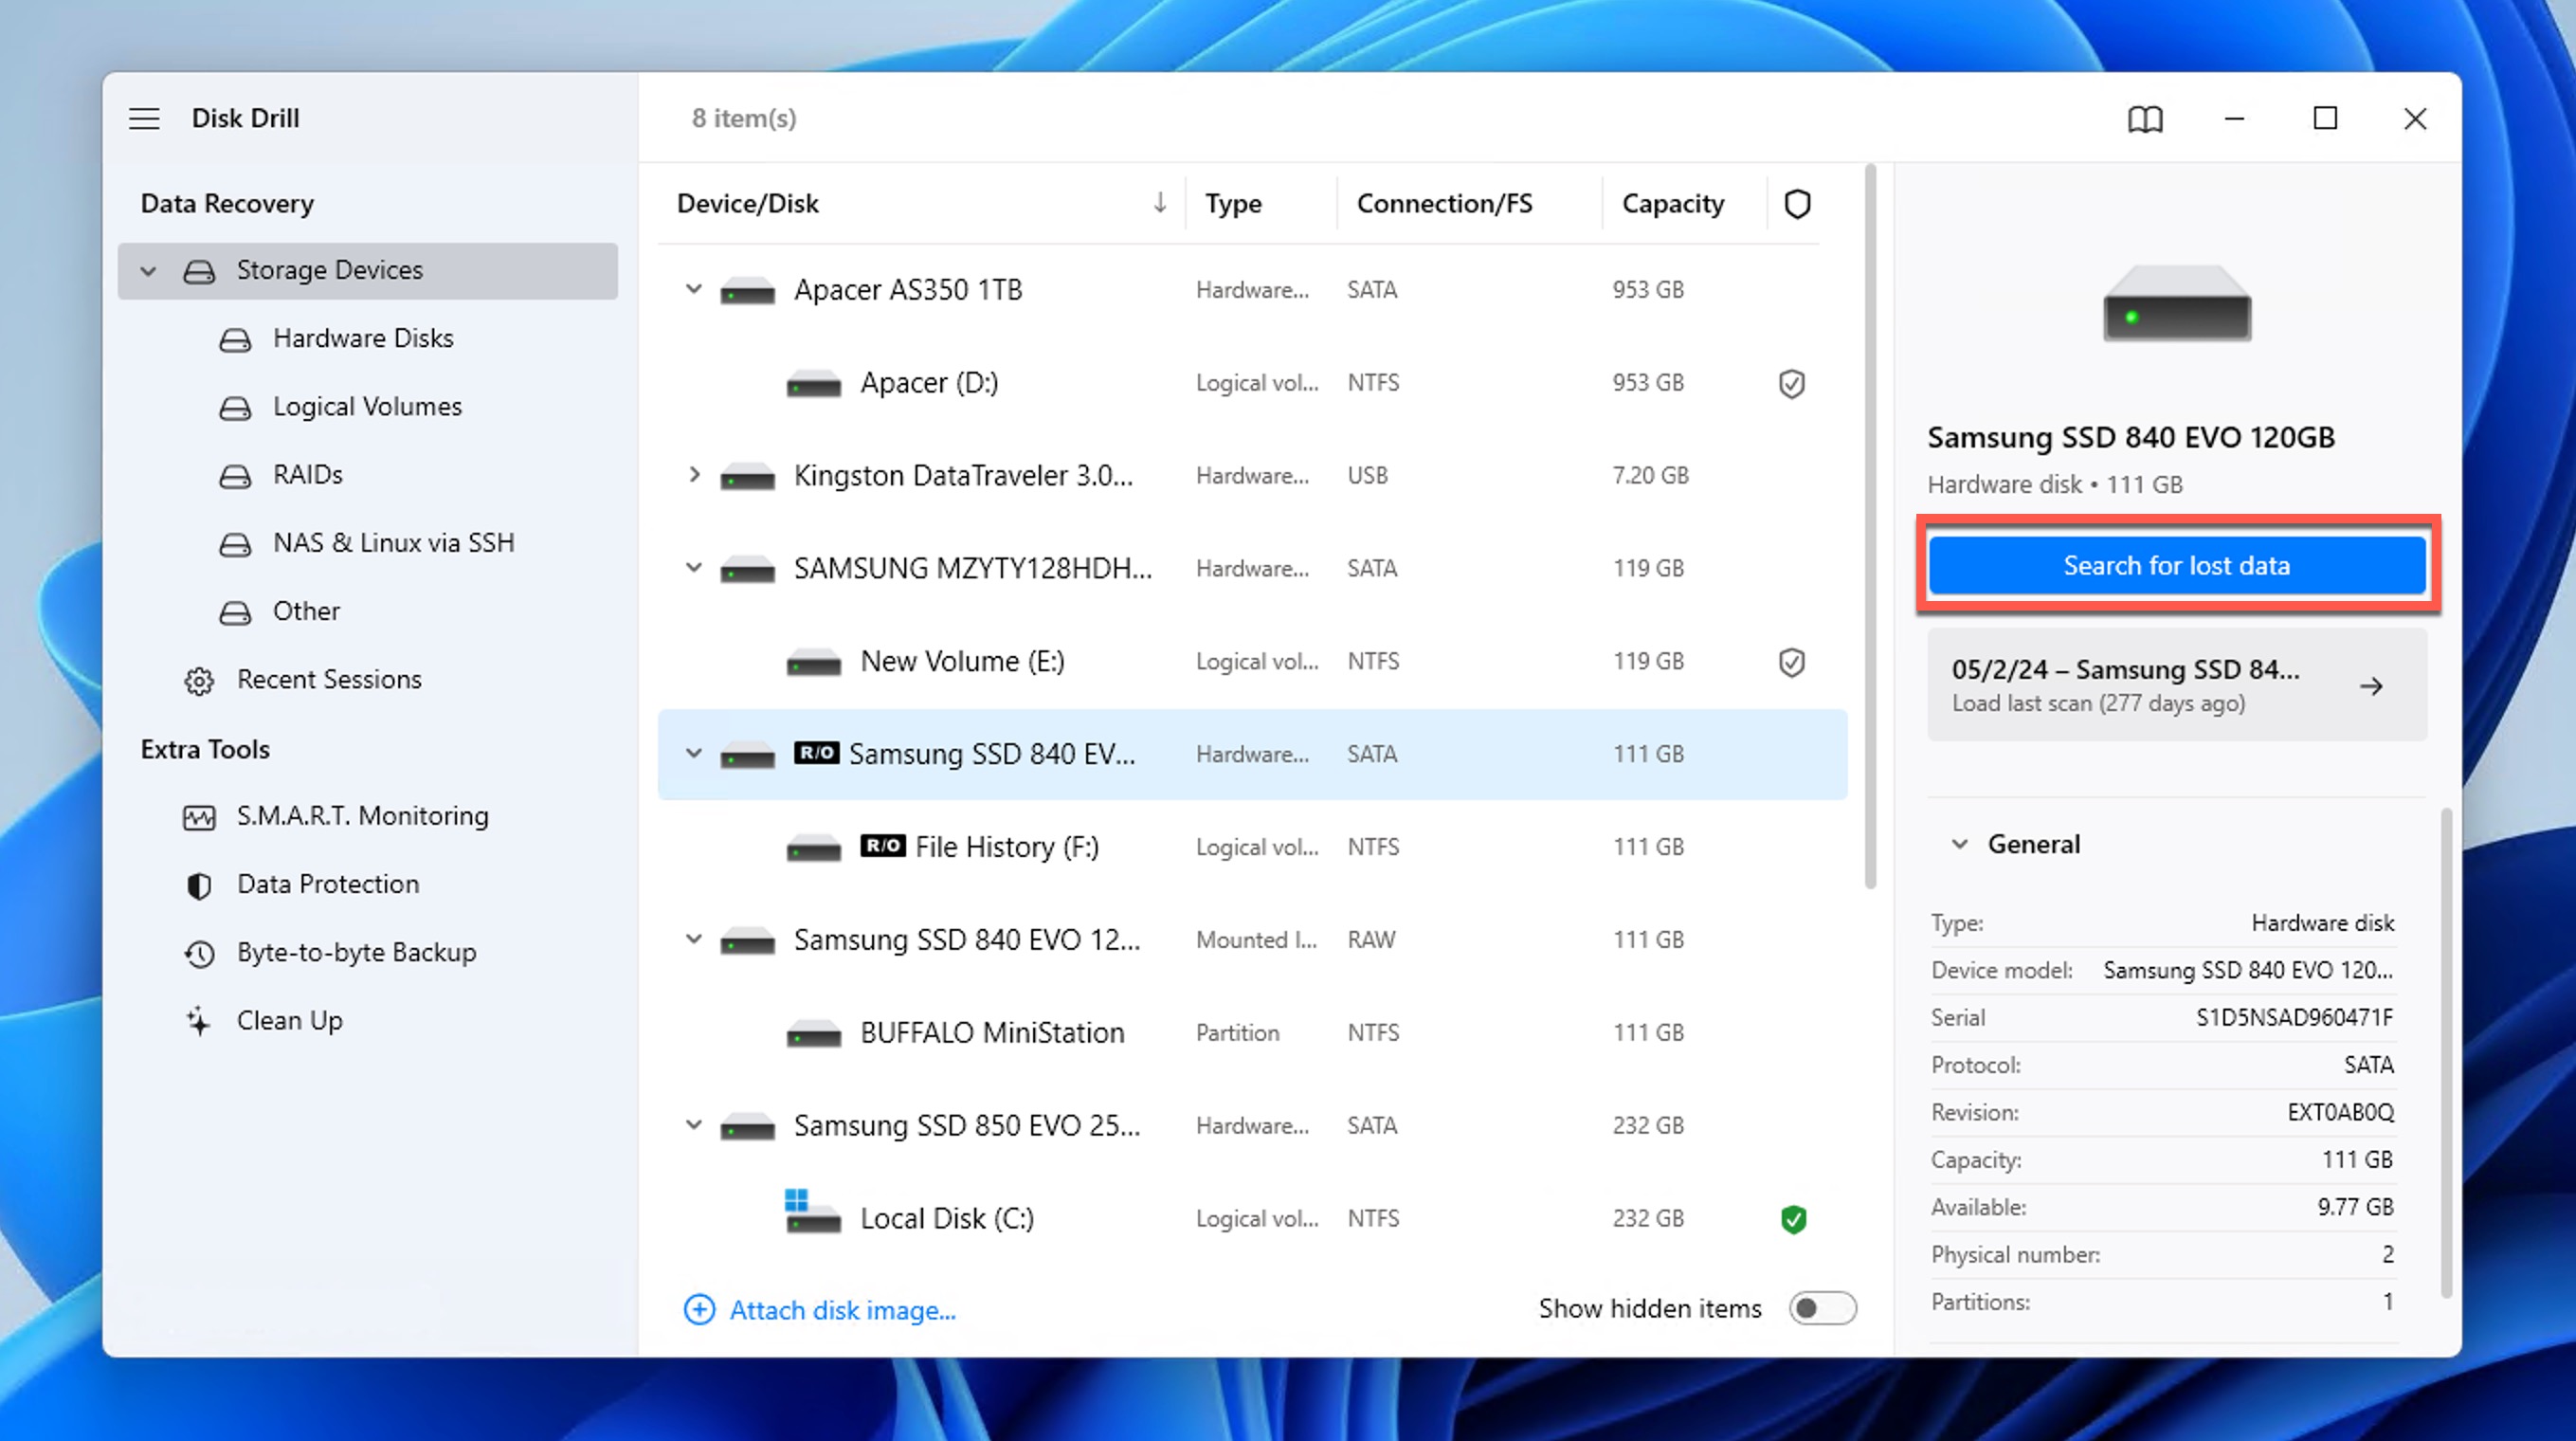
- Launch Disk Drill and select the drive containing your lost files. Then, click Search for lost data to begin scanning. Disk Drill automatically employs multiple recovery methods to maximize success, and it keeps you informed about the progress.
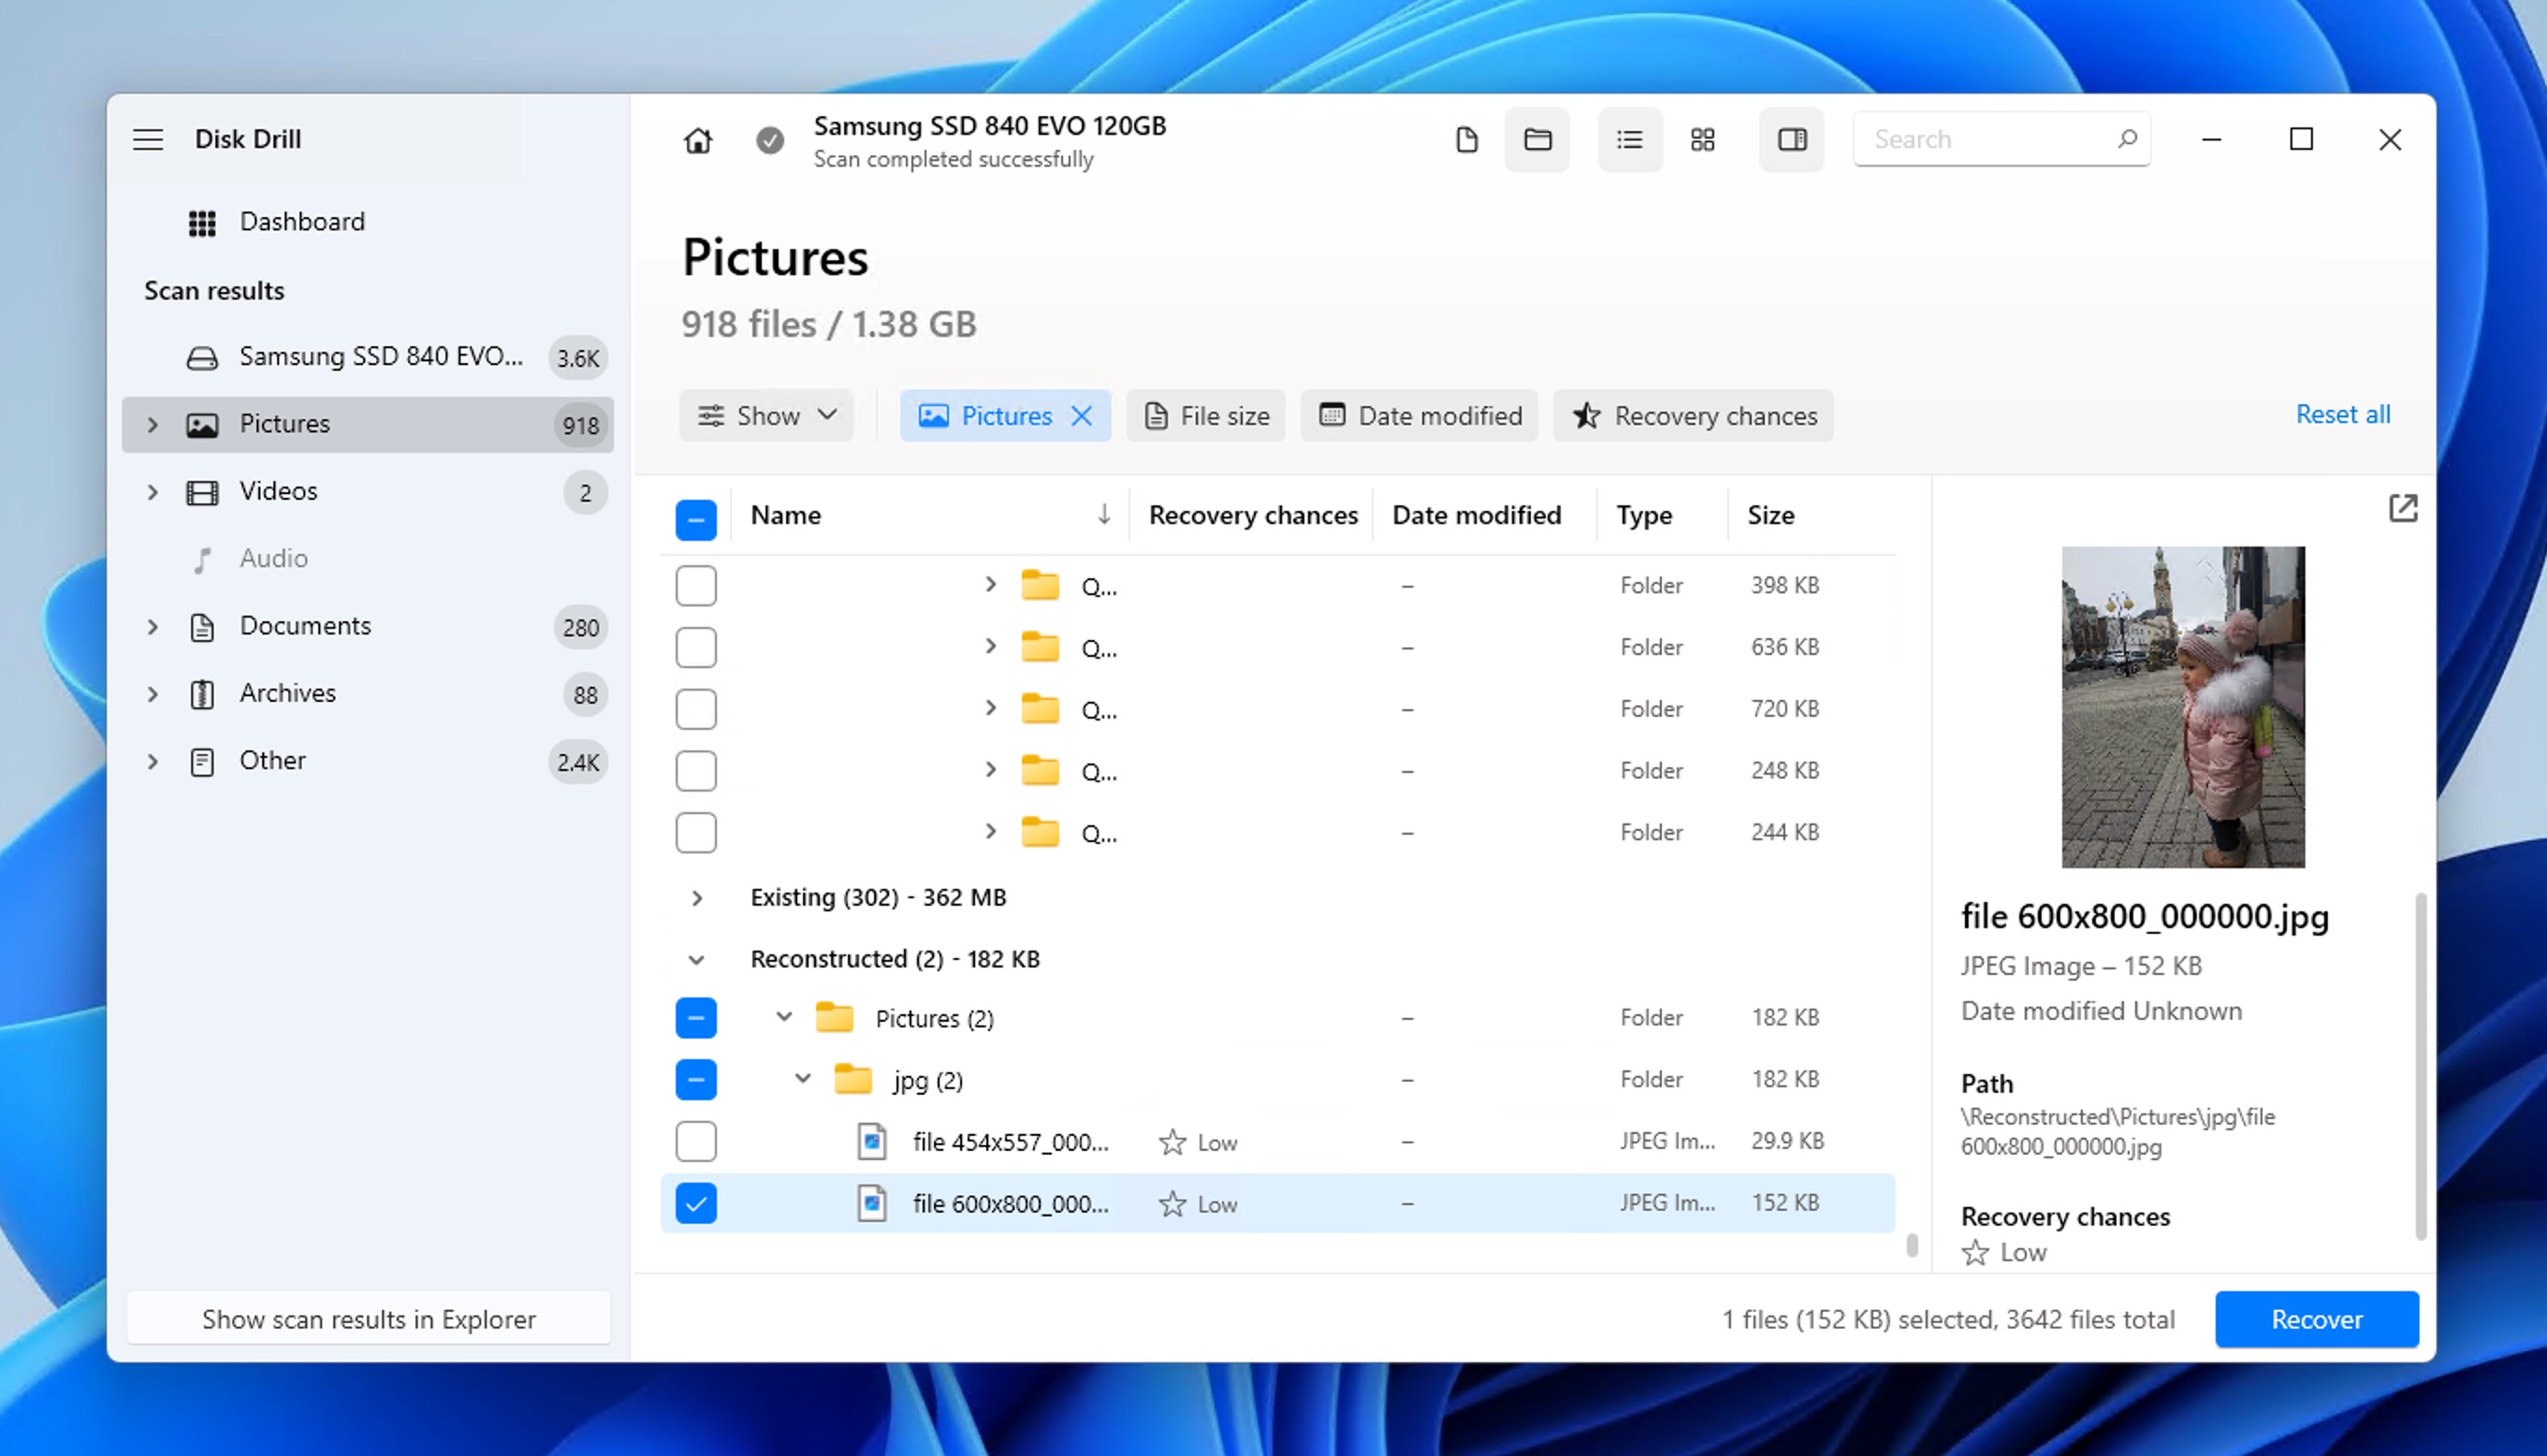
- Next, select the files you want to recover. You can use the preview feature to verify file contents before recovery and filter results by date, size, or type to find specific files quickly.
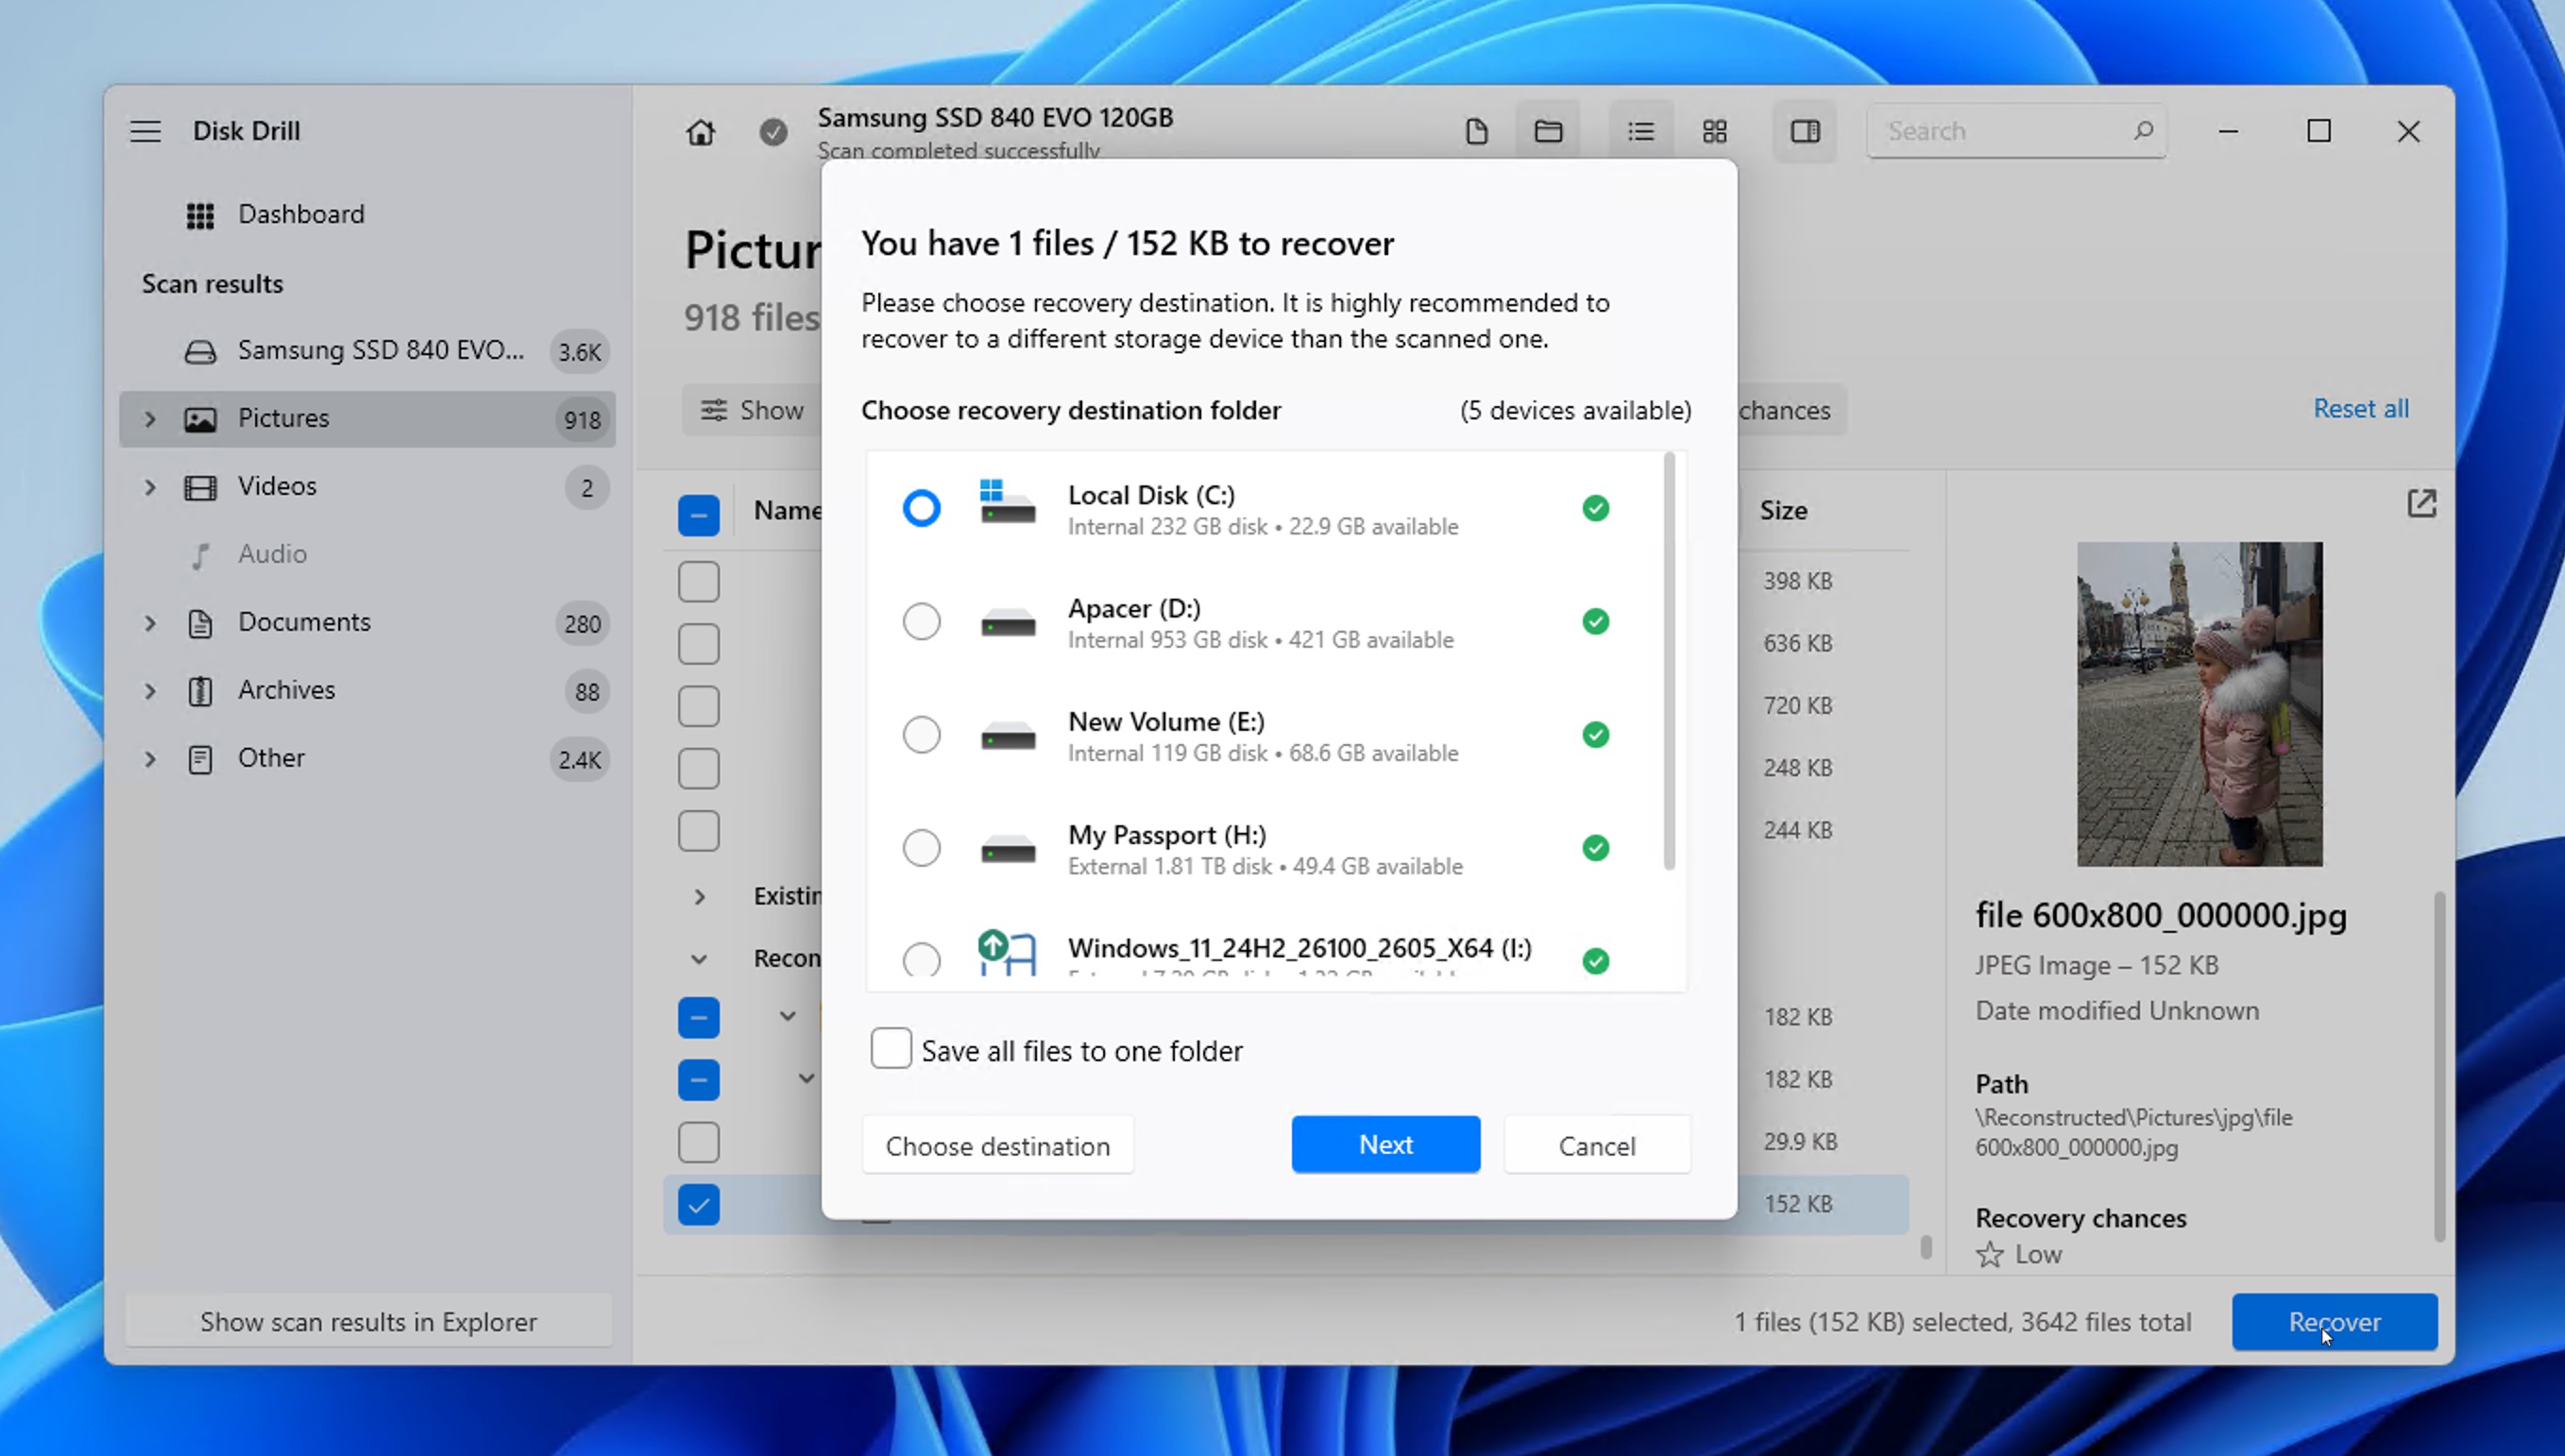
- Click the Recover button and select a different drive to save recovered files.
- Open the recovery destination folder in File Explorer and check the recovered files.
As you can see, anyone can recover shift-deleted files using Disk Drill in just a couple of minutes and without any expert knowledge! That’s because Disk Drill is designed with the average user in mind, unlike many other Windows data recovery tools, which often seem incomprehensible without a lengthy manual.
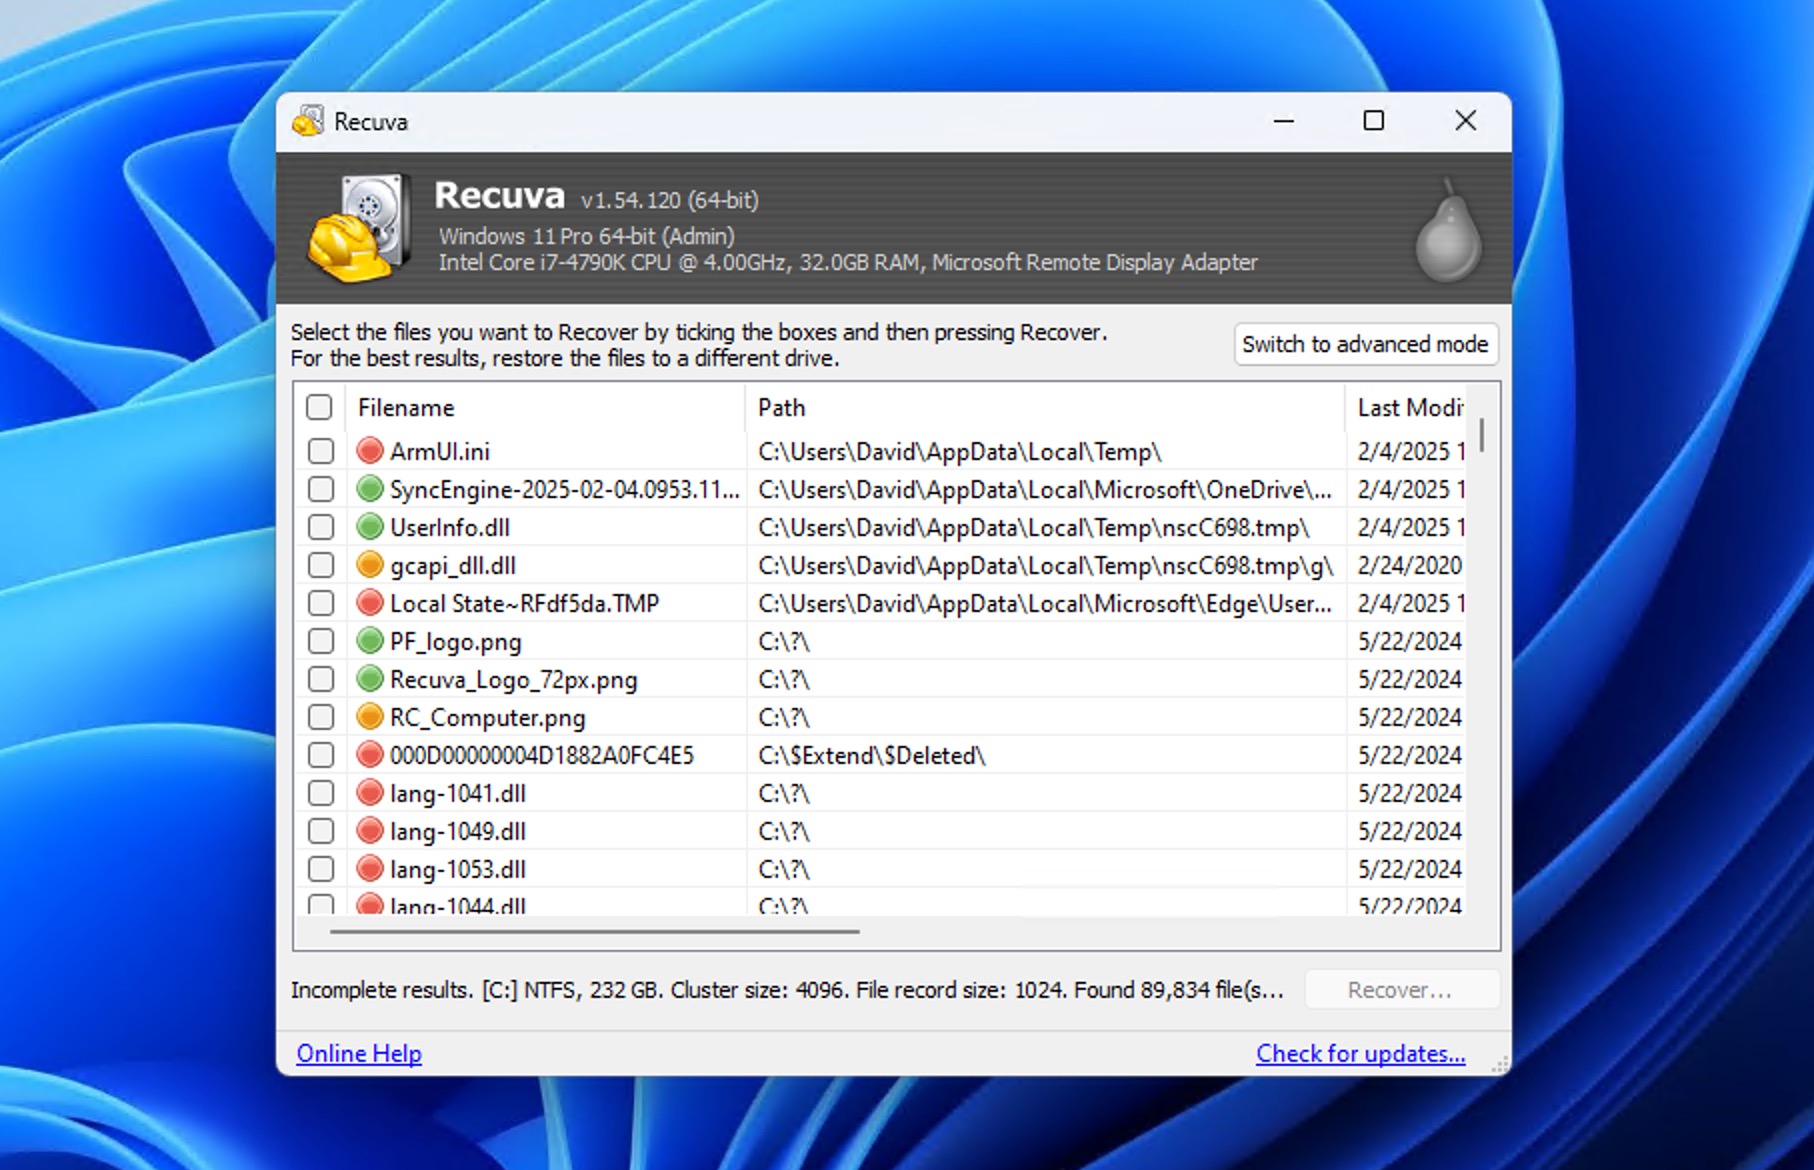
Method 2: Recuva
When you need to restore shift deleted files but aren’t ready to invest in commercial data recovery software, Recuva offers a completely free solution that can help in basic data loss scenarios.
The application’s step-by-step approach guides you to locate the files you’re looking for (documents, images, videos, etc.), but you can also tell Recuva to identify all recoverable files, which is the recommended option because not many file formats are supported to begin with so the recovery results are seldom overwhelming. For the same reason, it doesn’t matter much that Recuva doesn’t offer the same comprehensive scan result filtering options as Disk Drill.
To restore shift deleted files using Recuva:
- Download Recuva from the official website, run the installer, and launch the program.
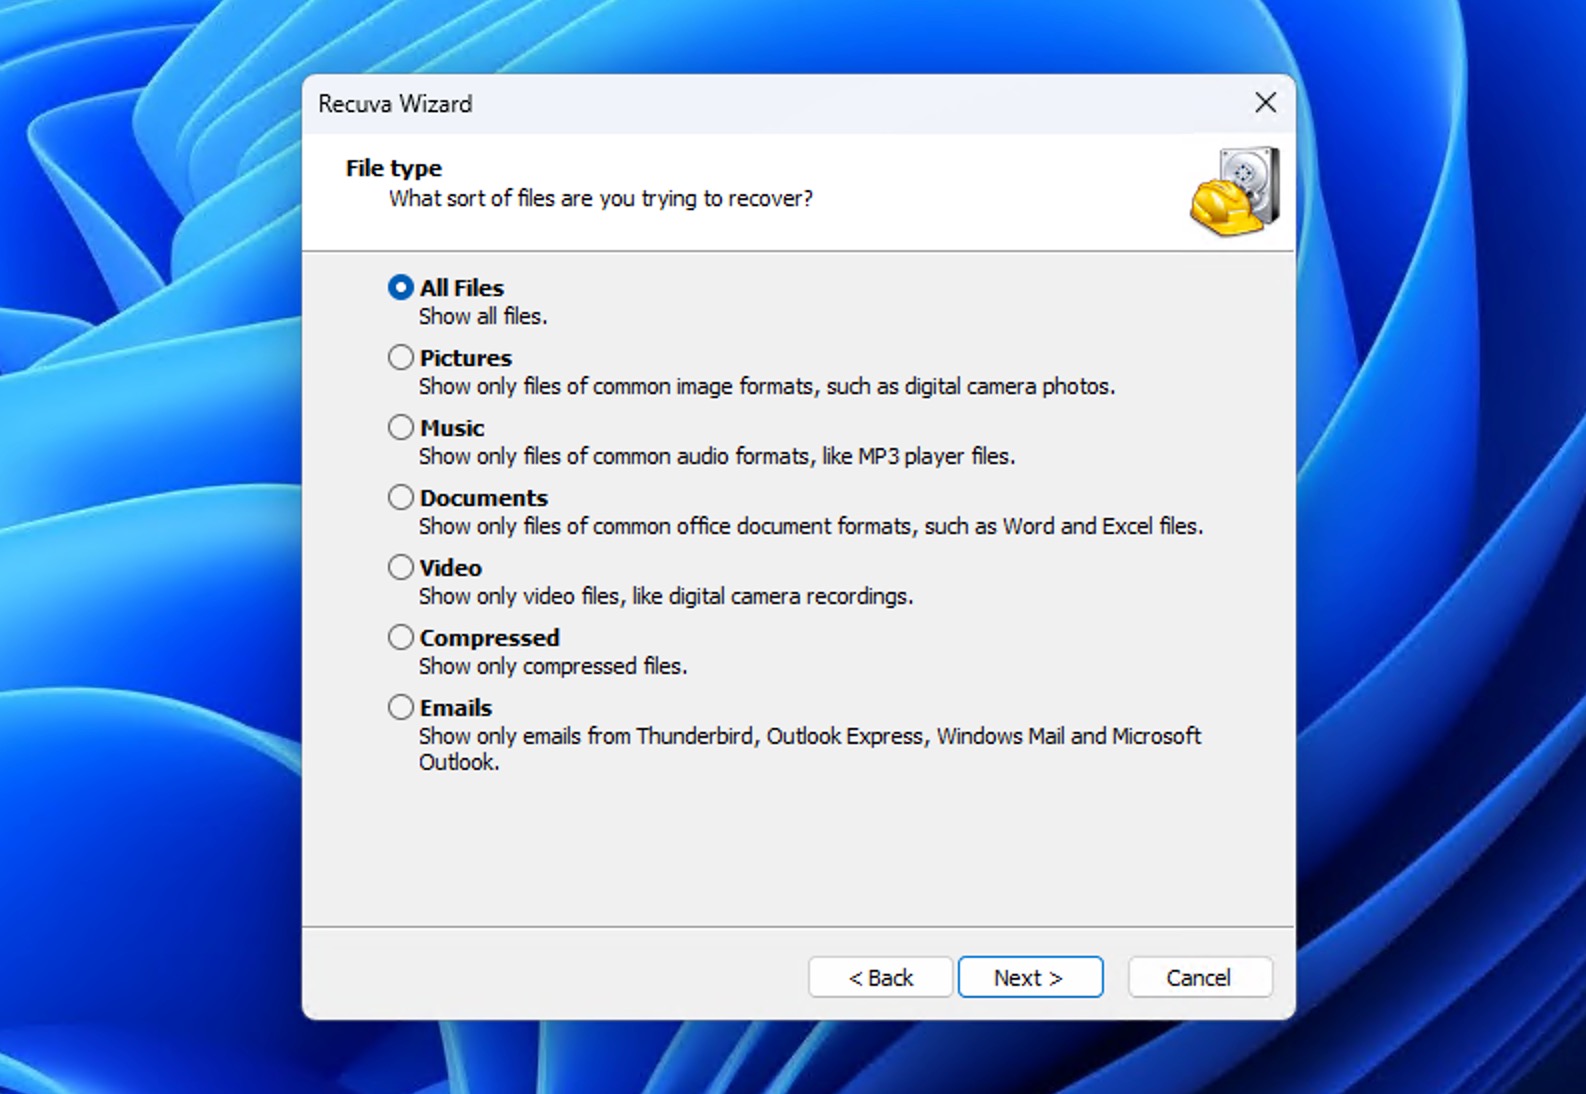
- When prompted, specify what type of data you want to recover (all, pictures, documents, etc.) or choose to look for All Files.
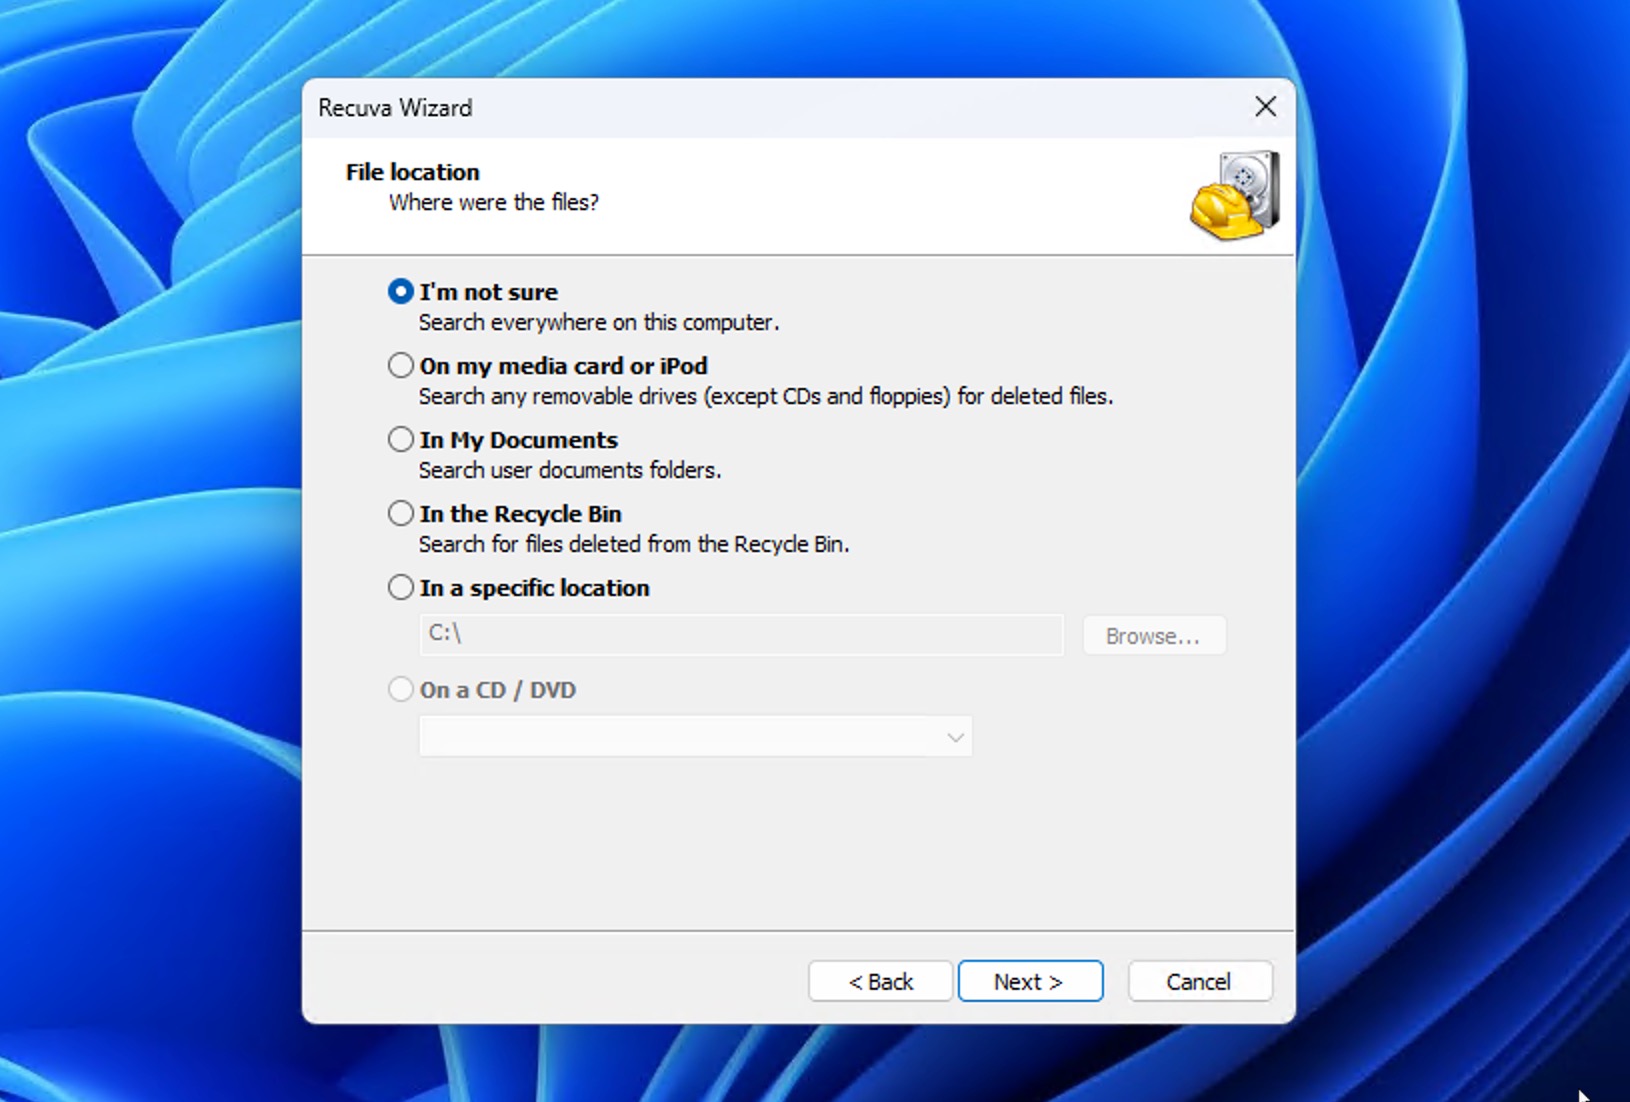
- If you know where your files were located, point Recuva to that location to improve its ability to get back shift deleted files. If not, select the I’m not sure option.
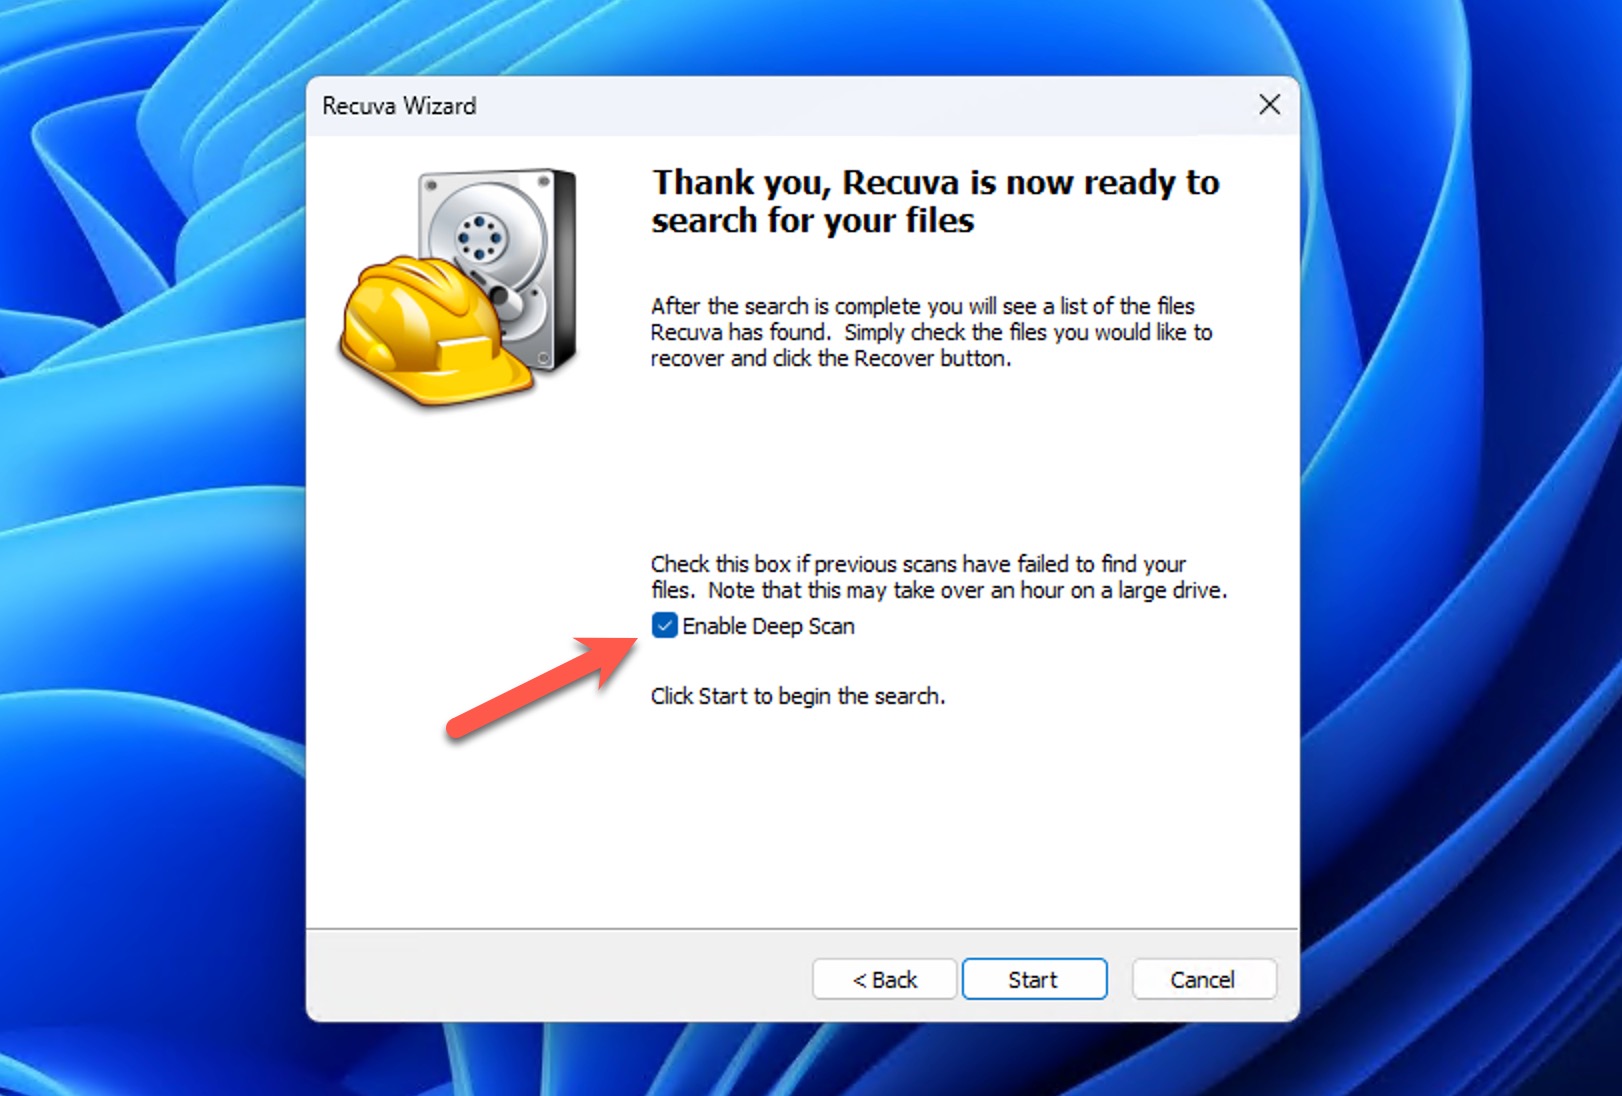
- For stubborn files that don’t appear on a standard pass, check the Deep Scan box on the final wizard screen. Be prepared for a longer wait.
- Once Recuva lists your files, select the ones you want, choose a recovery destination on a different drive (to avoid overwriting), and hit Recover.
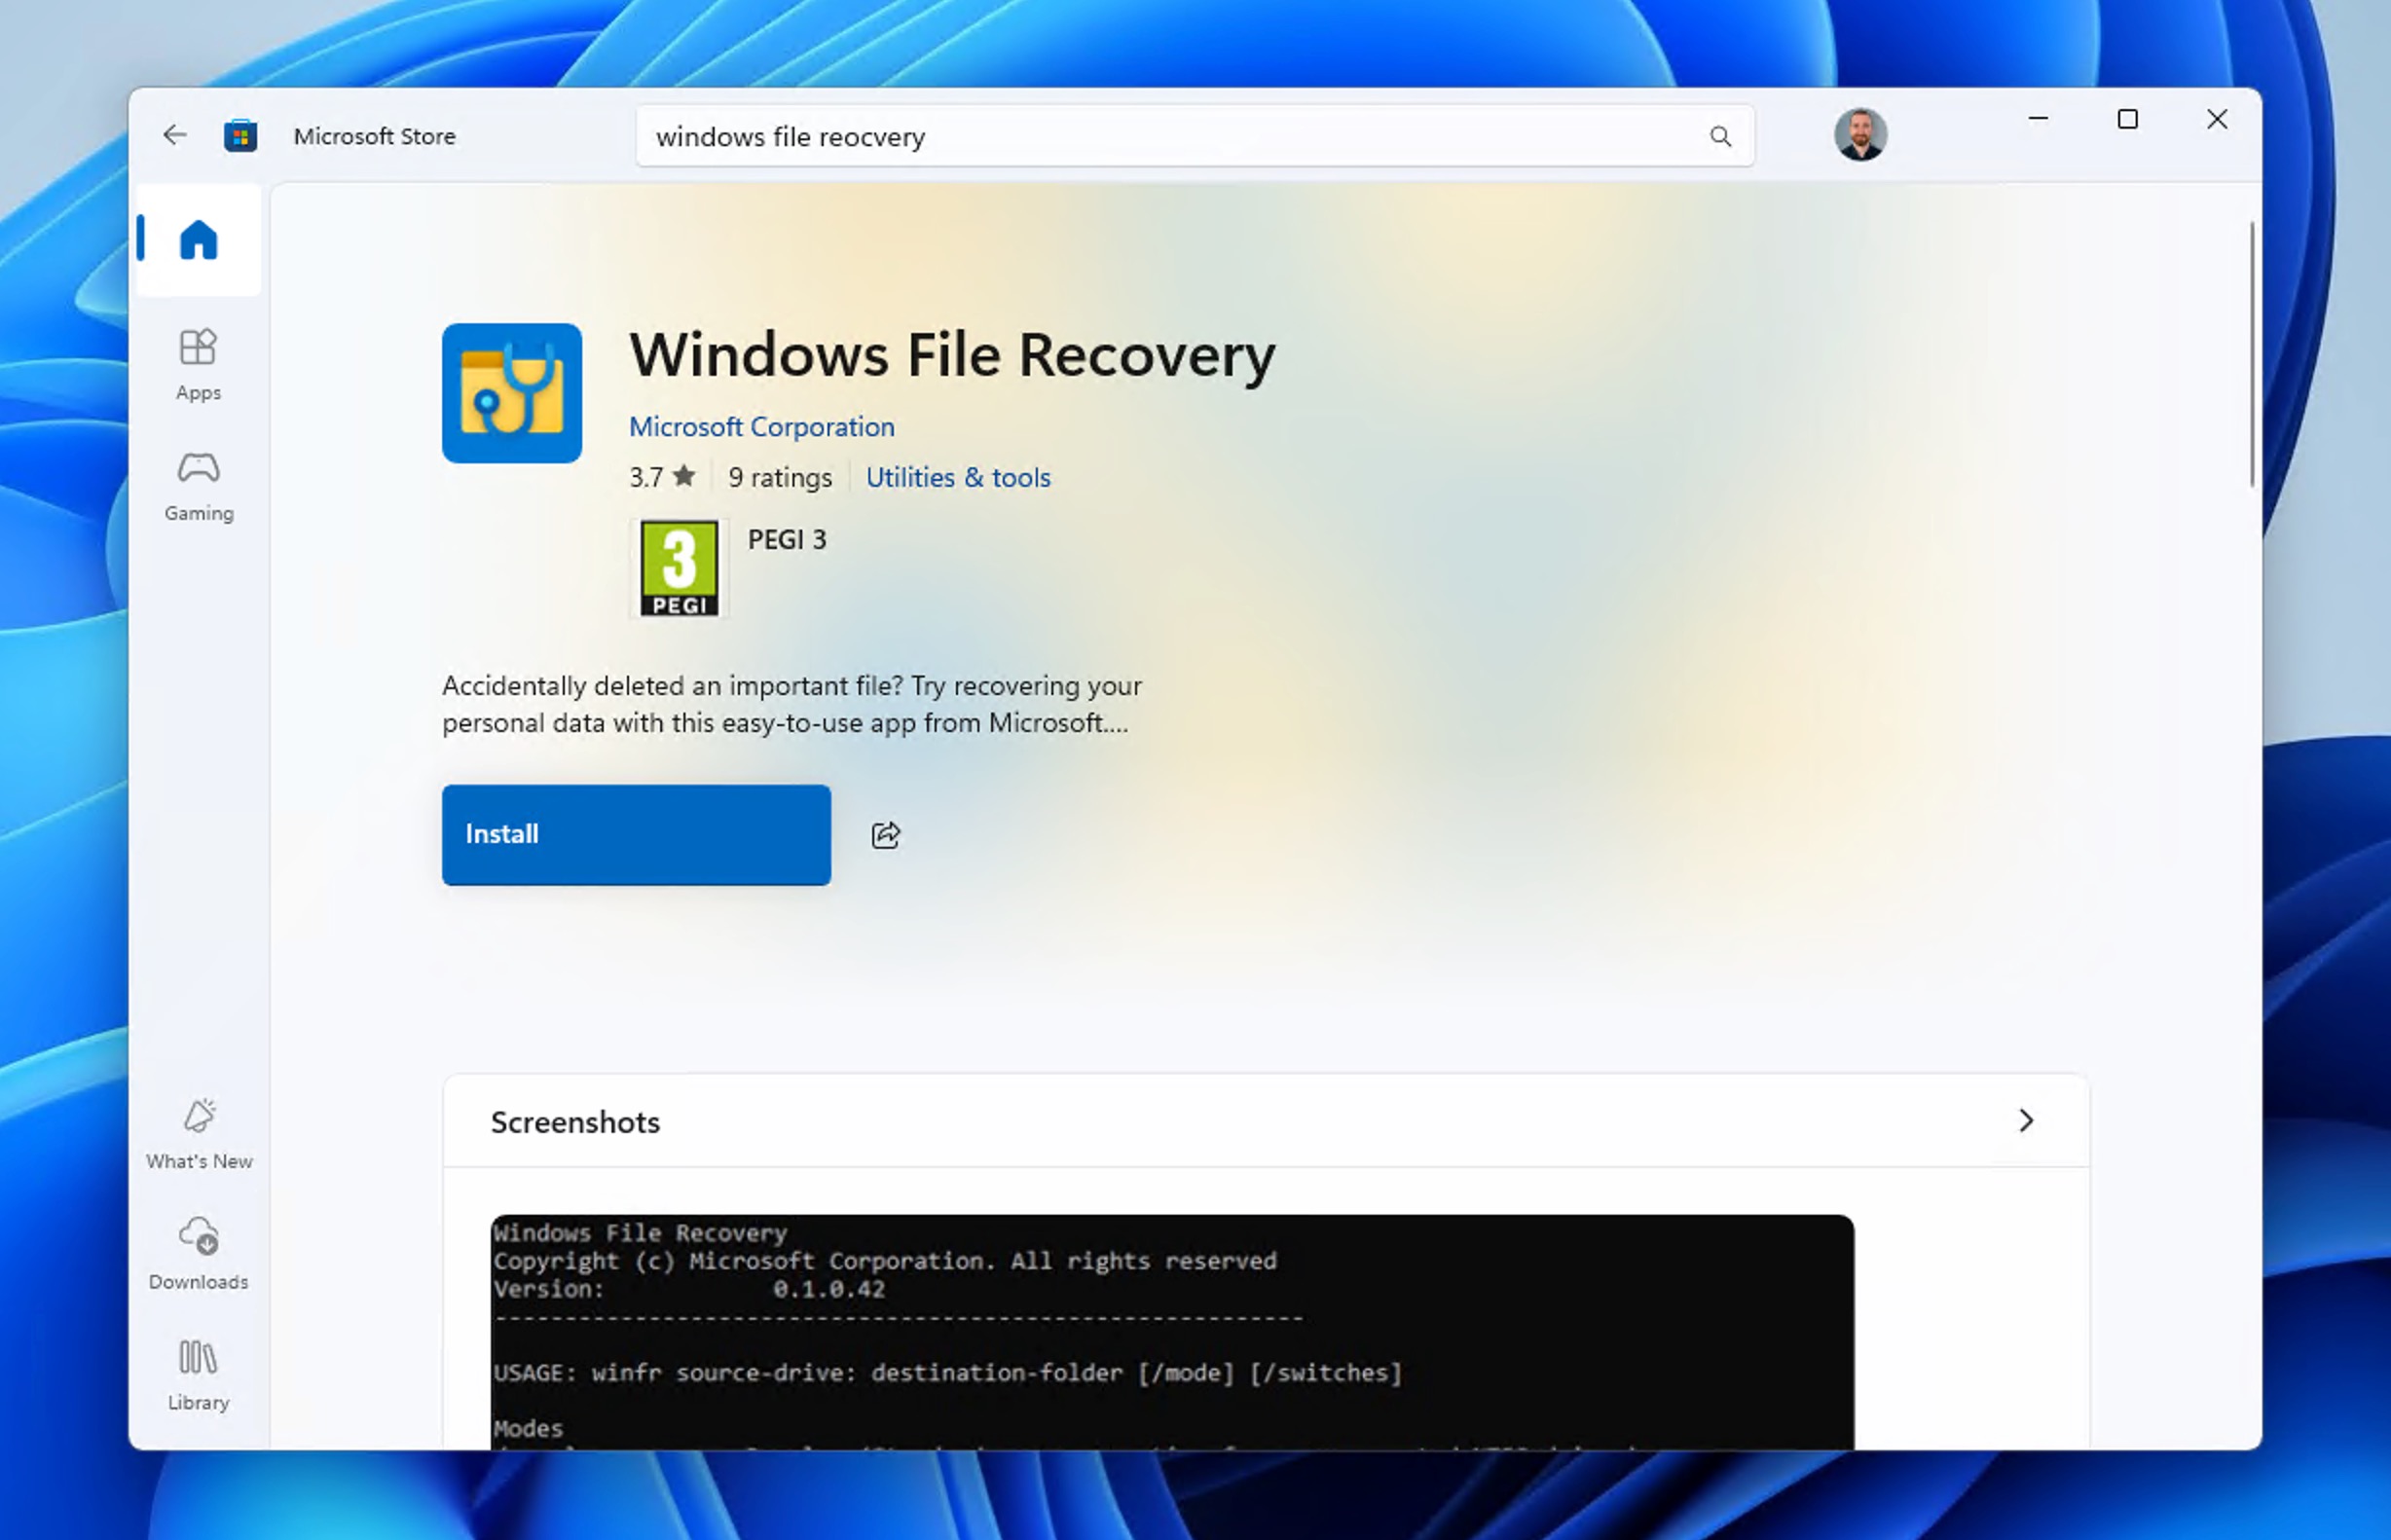
Method 3: Windows File Recovery
Windows File Recovery is Microsoft’s official Command Prompt-based tool for shift delete recovery without software installation from third parties.
While Windows File Recovery lacks a graphical interface and requires some technical knowledge, this solution can help you recover many common file formats based on their signatures, including documents (PDF, Word, Excel) and multimedia files (JPEG, PNG, MP4). The tool can also recover any file whose file system pointers are still available.
Here’s how to use this shift delete recovery app:
- Find Windows File Recovery in the Microsoft Store and install it.
- Press the Windows key and type Windows File Recovery, then run the corresponding app as administrator. A Command Prompt window will open with the recovery tool.
- Enter the desired recovery command in the following format:
winfr source-drive: destination-drive: [/mode] [/switches]
- For example, you can use the following command to recover the main Documents folder on drive C to a recovery folder on drive G:
winfr C: G: /regular /n \Users\'username'\Documents\
- For detailed instructions on how to use Windows File Recovery to its full potential, visit Microsoft’s support page.
How to Recover Shift Deleted Files in Windows Without Software
Windows offers several recovery options that can help you recover shift deleted folders and files even without installing additional software. These built‐in features are completely free, but they’ll be useful only if they were enabled before the data loss incident.
Method 1: Check File History Backups
File History is a built‐in backup feature in Windows that automatically saves copies of your files so that you can restore them if they’re lost, damaged, or accidentally deleted.
Follow these steps to restore shift deleted files from your File History backups:
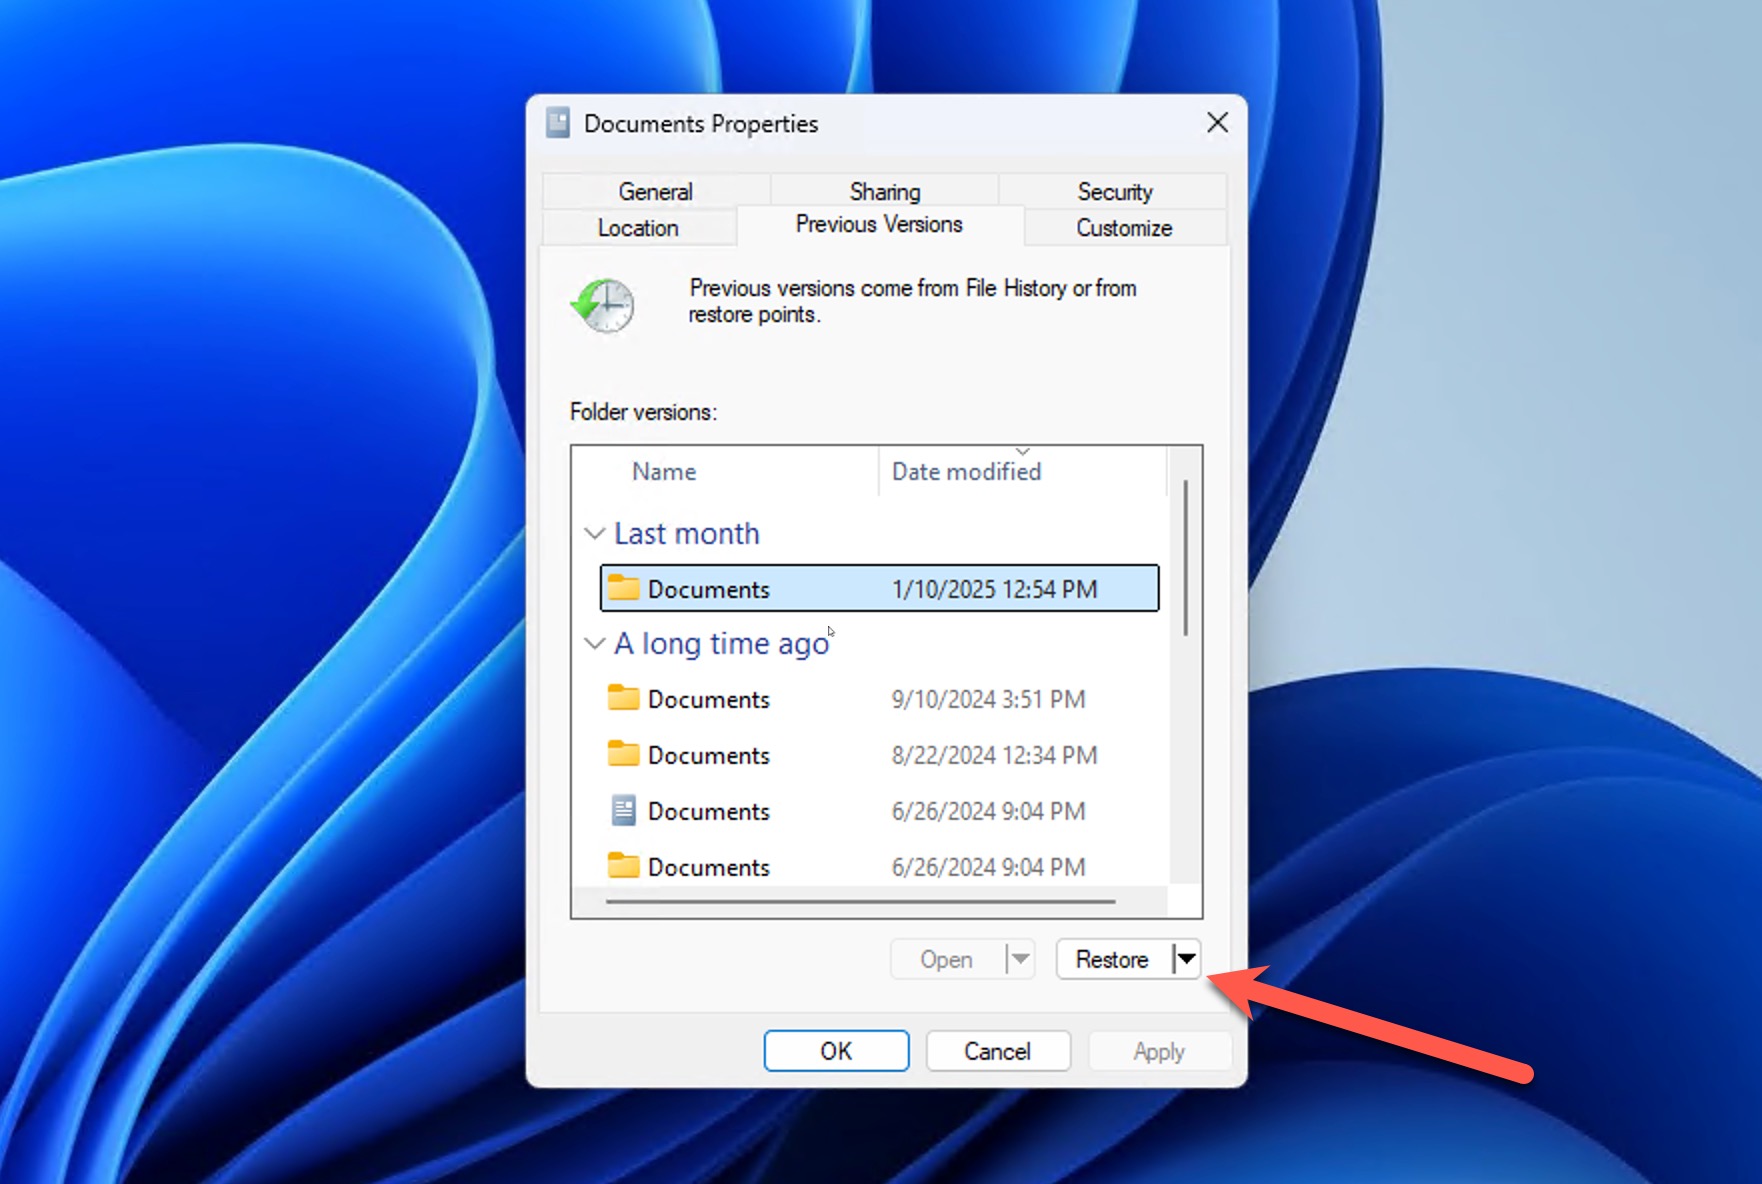
- Right‐click the folder that previously contained the deleted file.
- Select Restore previous versions from the context menu. On Windows 11, click Show more options first.
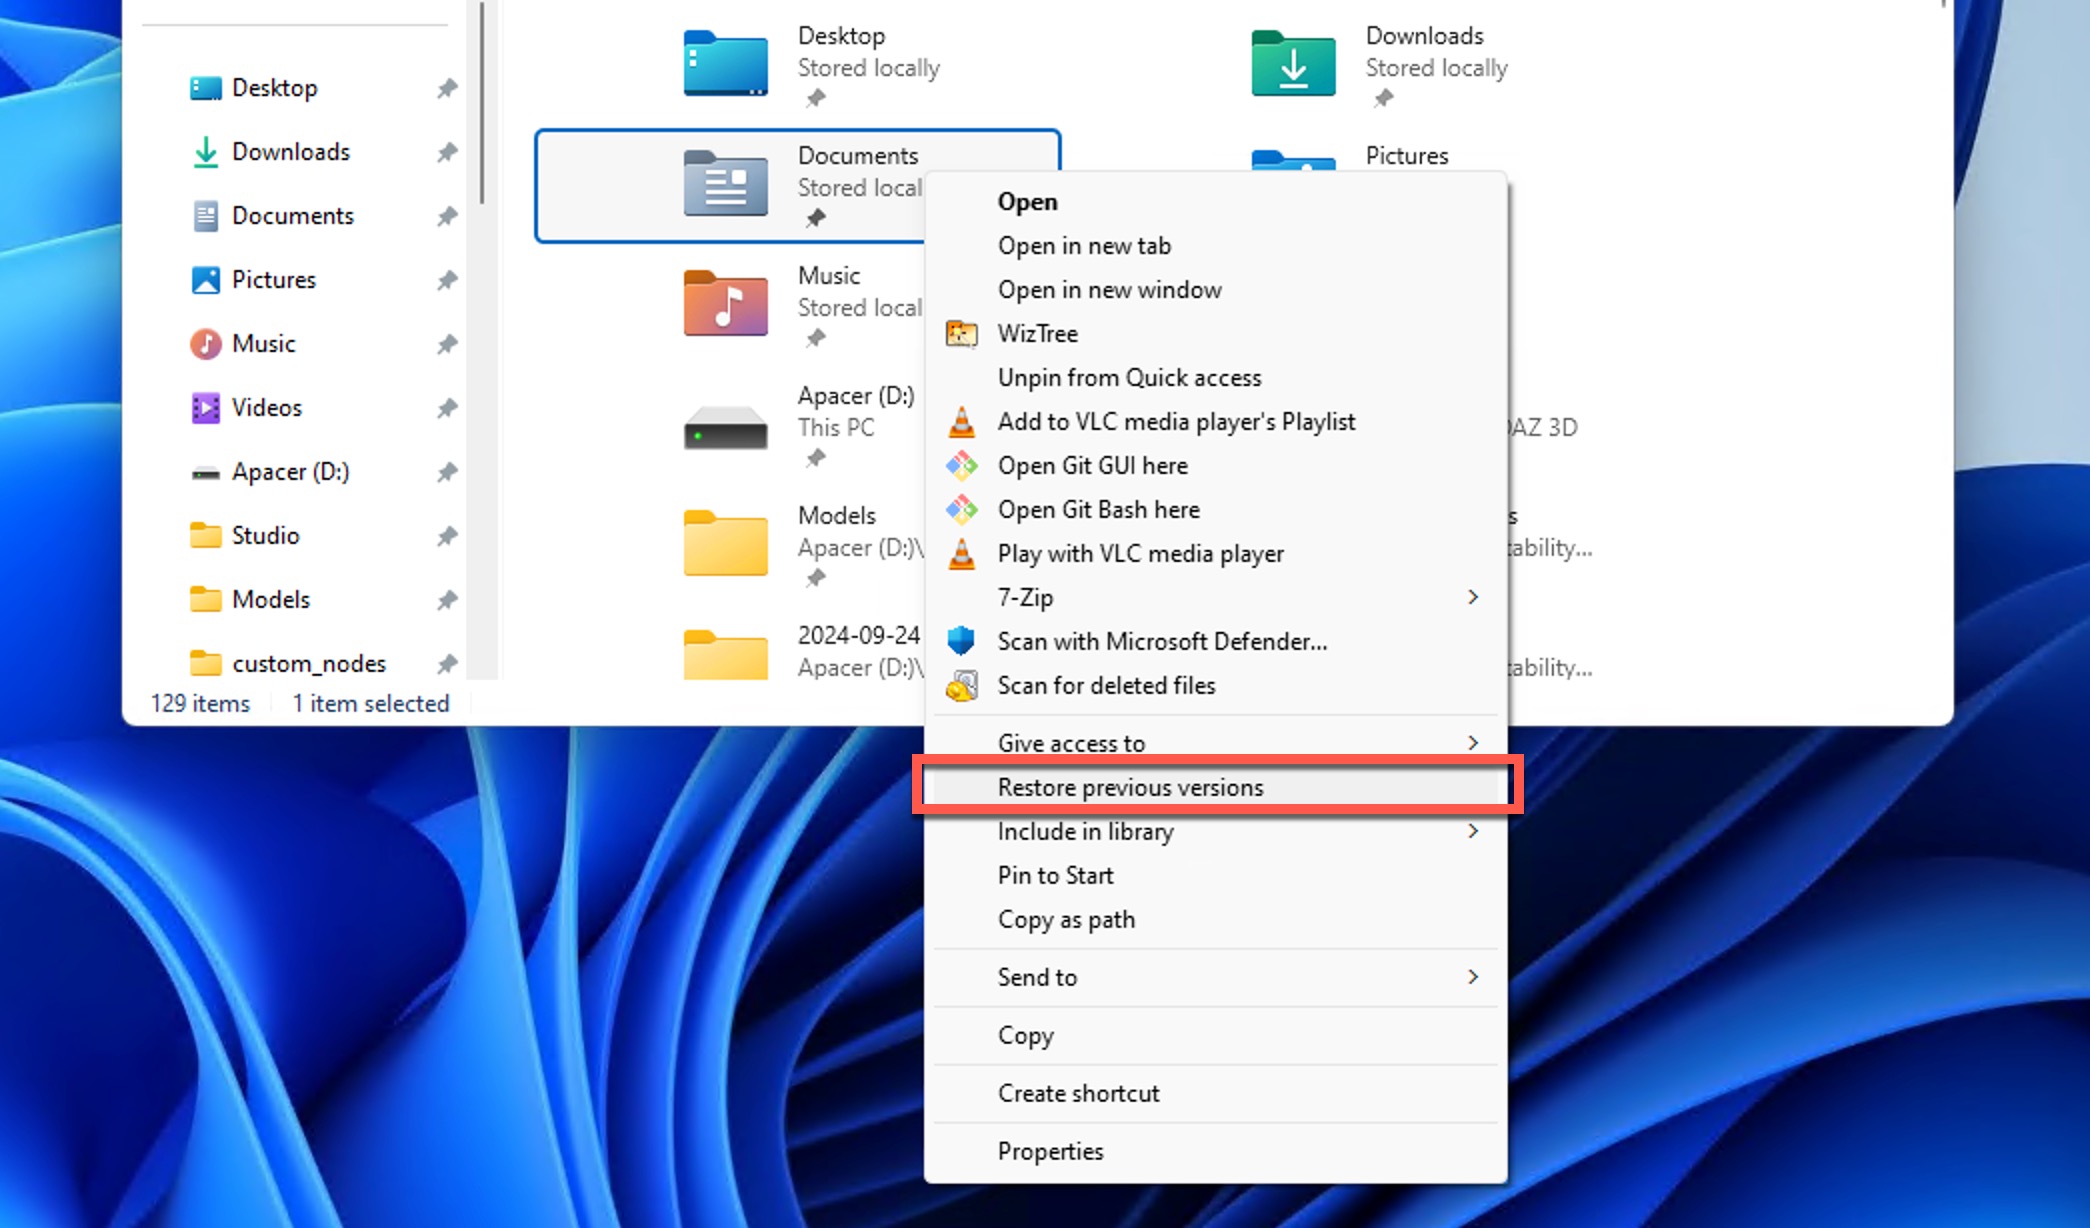
- Choose the version of the folder that contains the file you want to restore and click Restore.
By default, File History backs up your User folder locations (Documents, Pictures, Desktop, etc.). To protect files in other locations, users need to add those folders manually using the Include in Library option. For more details on configuring and using File History, visit the official Microsoft support page.
Method 2: Use Backup and Restore
Backup and Restore (Windows 7) isn’t just for older Windows versions—it remains a viable option in Windows 10 and 11 for users who need to recover lost files and have set up the feature before the data loss incident.
If you’re among the Windows users who rely on Backup and Restore (Windows 7), then you can follow these steps to recover shift deleted files:
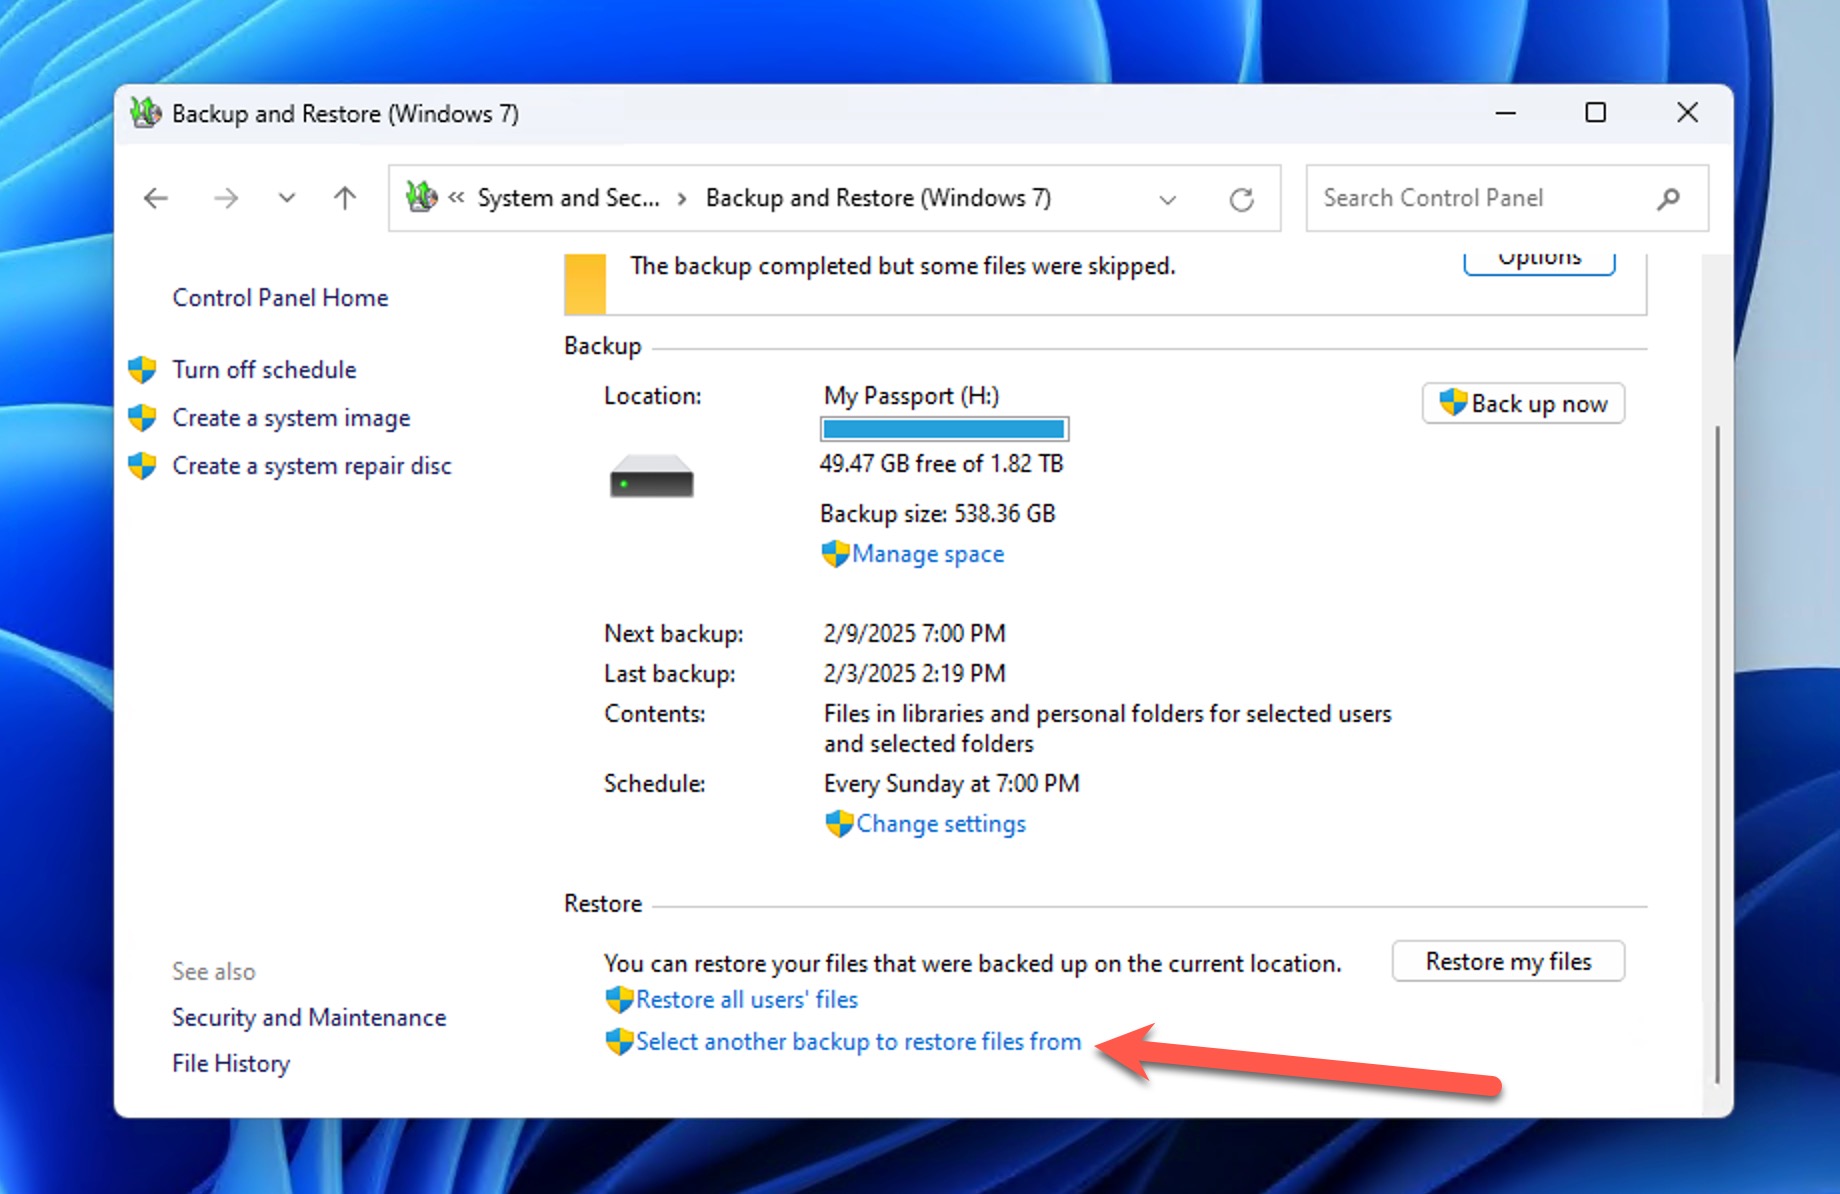
- Open Control Panel.
- Go to System and Security > Backup and Restore (Windows 7).
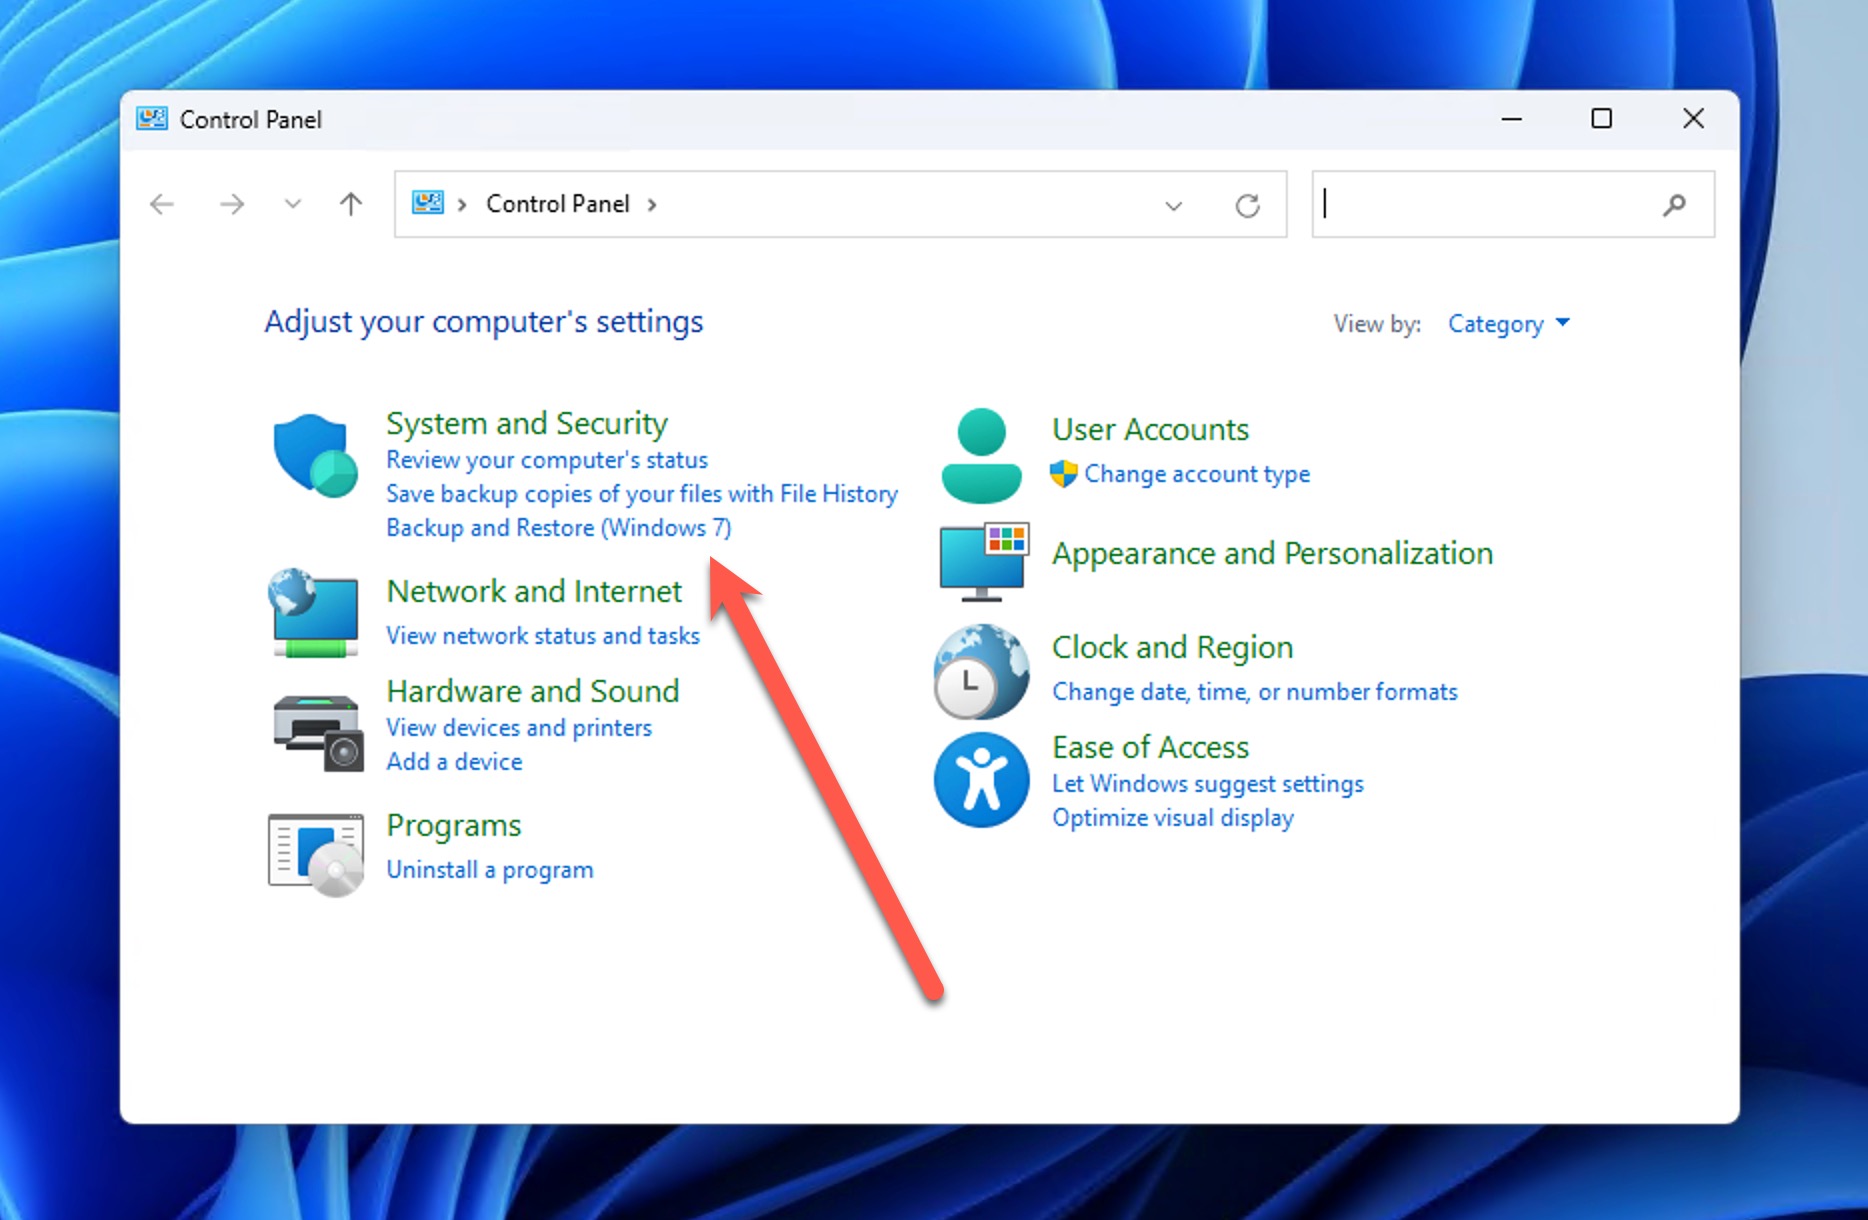
- Select an available backup in the Restore section or click the Select another backup to restore files from option if no backup is listed.
Method 3: Cloud Backups
The latest versions of the Windows operating system integrate Microsoft’s cloud backup service, OneDrive, which is designed to automatically back up your files to the cloud to provide an additional layer of protection against accidental deletion, including shift delete.
If you’ve enabled OneDrive backups, you can easily recover shift deleted folders or files from the cloud:
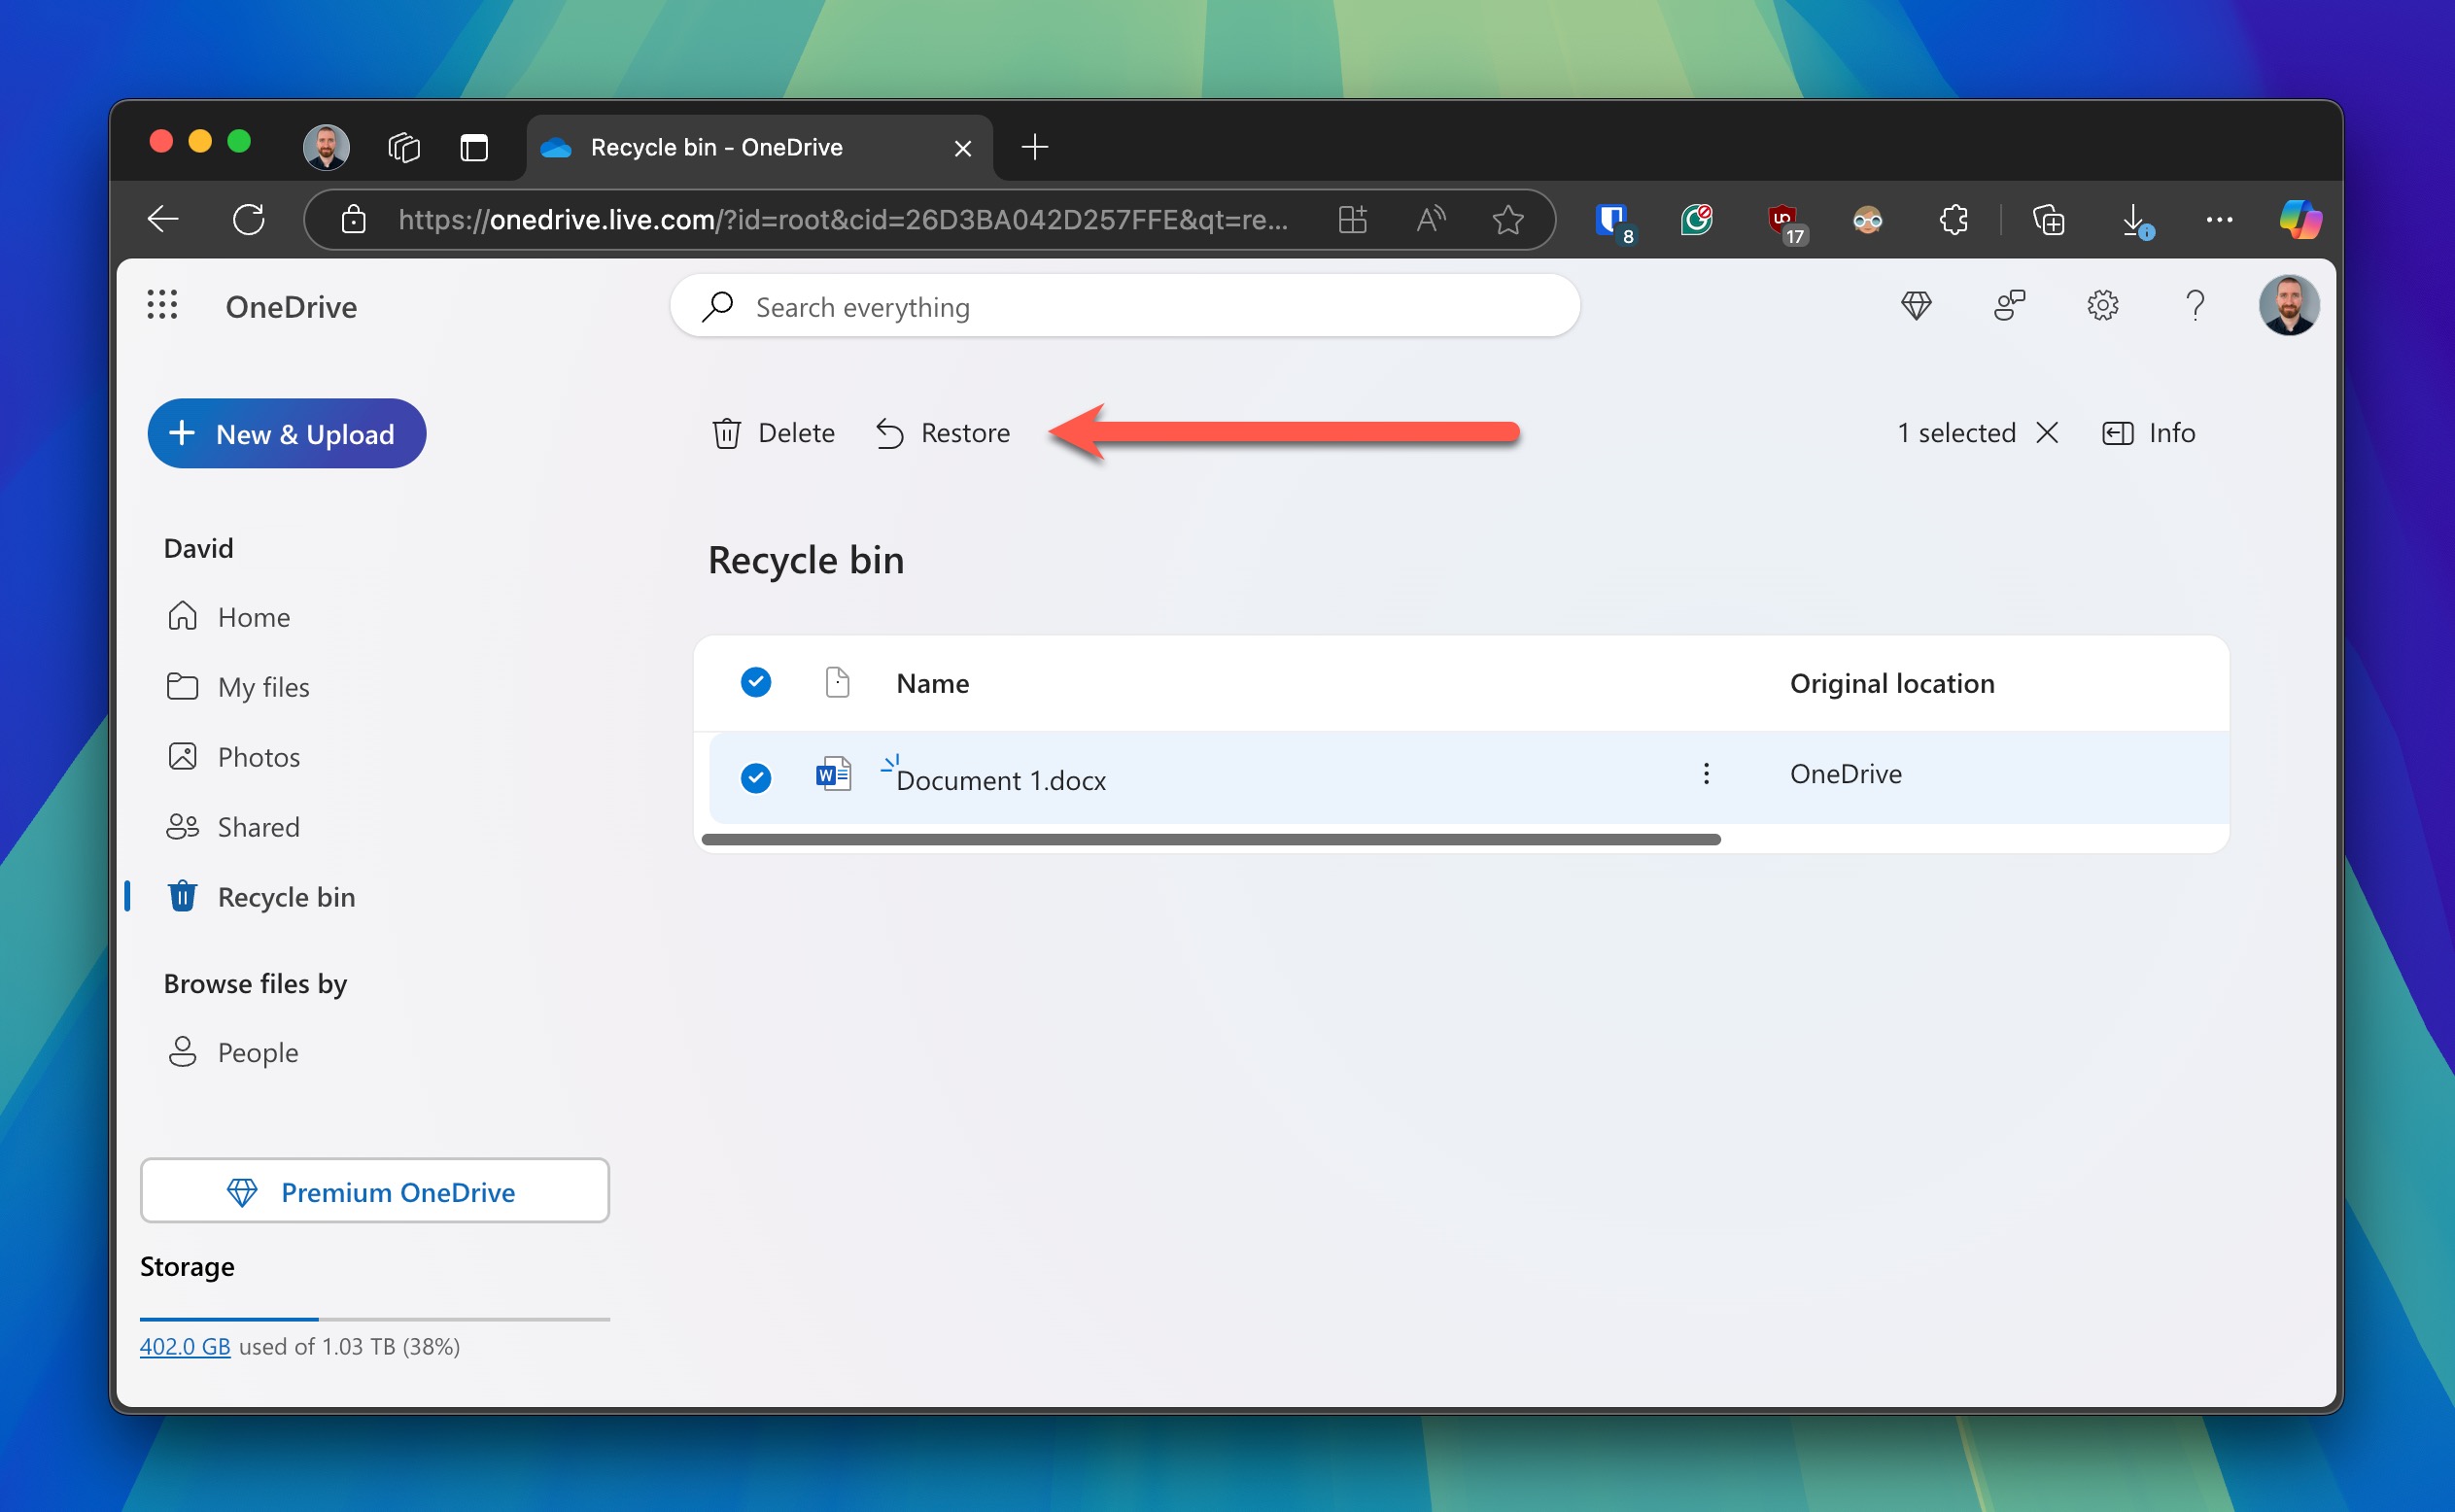
- Go to the OneDrive website and sign in with your Microsoft account.
- Navigate to the Recycle Bin in the left-hand menu.
- Locate the deleted file or folder, select it, and click Restore to recover it to its original location.
If you use other cloud backup services like Google Drive, Dropbox, or Mega, the process is similar. These services also store deleted files in a Recycle Bin or Trash folder for a limited time, allowing you to restore them.
Have you just found out that OneDrive (or some other cloud backup service) isn’t enabled on your machine? Then consider this to be a good opportunity to enable it.
Bonus: Professional File Recovery Service
If you don’t feel that you have the skills or time necessary to recover shift deleted files yourself, you can always take advantage of professional data recovery services. However, you should be prepared to pay quite a lot of money to get your files back, and some professional data recovery places don’t even guarantee successful recovery. There’s also the issue of privacy since you wouldn’t be the first person in the world to have his or her personal data stolen by an employee working for a professional data recovery place.
If you’re looking for a reliable data recovery service, Clever Files Data Recovery Center offers professional recovery with a No Data – No Charge guarantee, meaning you only pay if they successfully recover your files. They maintain high security standards to protect your data and provide a free evaluation of your case before proceeding with recovery.
🔰 Considering how simple and cost-effective it is to recover shift deleted files with Disk Drill, we highly recommend you give it a try before you spend your hard‐earned money on professional data recovery services.
Conclusion
When you accidentally shift‐delete a crucial file, that heart‐stopping moment doesn’t have to be the end of the story because you have multiple paths to potentially retrieve your data. The key is acting quickly and choosing the right approach for your situation. If you had backups enabled, start there. They’re your safest bet. If not, pause what you’re doing (to avoid overwriting deleted data) and use a data recovery tool to locate and recover the file.
FAQ
Shift+Delete bypasses the Recycle Bin and marks the file space as available for use, but it doesn’t immediately overwrite the data. The files remain recoverable using data recovery software until that space is used for new data.
Yes, Outlook provides several recovery options for shift-deleted items, including the Recoverable Items folder (Deleted Items > Recover Deleted Items) and Exchange Server backups, which can be used for recovery purposes by administrators.
Yes, you can use Microsoft’s Windows File Recovery tool. This Command Prompt-based data recovery software can help recover shift-deleted files using commands like winfr source-drive: destination-drive: /regular /n \path\to\files\.
When you press the Shift and Delete keys at the same time in Windows with a file selected, you delete the file permanently without moving it to the Recycle Bin first. This shortcut can save you time, but it can also cause you a lot of issues, so use it carefully.
Even though Shift-deleted files can’t be easily retrieved from the Recycle Bin, they can still be recovered using a data recovery software application like Disk Drill:
- Download and install Disk Drill on your Windows 10 computer.
- Launch Disk Drill and scan the drive on which the Shift-deleted files were located.
- Go through the list of recoverable files and select the lost files.
- Click the Recover button and specify a suitable recovery directory.
- Verify that the files have been successfully recovered.
Shift + Delete in Excel does something completely different than Shift + Delete in File Explorer. Instead of permanently deleting the selected cell, the shortcut lets you move the content of the cell to another cell.
That depends on where you use it. In Adobe Premiere Pro, for example, you can use it to insert a registered symbol. Chromebook users use this shortcut to reset their devices.