Have you ever inserted a USB stick into your PC or laptop, only to find it unreadable by your system? USB problems are common, but also messy. A flash drive can fail for many different reasons. That’s why we decided to put together a dedicated repair guide on how to fix a USB flash drive that is corrupted and unreadable without guessing your way through it. We’ll cover the whole process: how to save your data, how to figure out what kind of problem you’re dealing with, and which fixes make sense.

Broken Flash Drive Symptoms and the Right Fixes
We tried to make this guide easy to navigate because a “broken USB flash drive” can mean 10 different things. Sometimes the damage is obvious: the connector is bent, the casing is cracked. Other times, the drive looks physically fine, but Windows treats it like something is wrong. It asks you to format it, shows it as RAW, or says the disk is write-protected.
That’s why the right fix depends on what you see on your screen (and what happened to the drive before the problem started).
So, start with the table below. Find the symptom that matches your case, then jump to the methods that make the most sense. There may be more than one method that applies. That’s normal. USB problems often overlap.
⚠️ One important rule before you try any repair: if the drive contains files you care about, recover the data first. Some fixes are safe and non-destructive (like assigning a drive letter). But others may erase the data. When in doubt, get your files off it before you start fixing anything.
| Symptom | What It Usually Means | Methods That May Help |
| USB connector is bent, loose, cracked, or physically broken | The drive may have a damaged connector or internal board. DIY fixes can make things worse if the data matters. | Method 10: Send a Damaged USB Drive to a Data Recovery Center |
| USB drive was exposed to water, heat, or physical impact | Physical damage can affect the connector, controller, memory chip, or solder joints. Software fixes won’t help if the hardware can’t communicate properly. | Method 10: Send a Damaged USB Drive to a Data Recovery Center |
| USB drive gets hot, disconnects, freezes the computer, or appears only for a few seconds | The drive may be unstable because of failing hardware, a damaged connector, degraded flash memory. Repeated scan attempts can make the situation worse. | Recover data first with Byte-to-byte Backup. If it keeps falling, stop DIY attempts and consider Method 10: Send a Damaged USB Drive to a Data Recovery Center. |
| USB drive appears in Disk Management but not in File Explorer | Windows can see the device, but it may not have a valid drive letter. This is one of the cleaner problems to fix. | Method 2: Fix a USB Flash Drive Not Showing Up Due to a Missing Drive Letter |
| USB drive doesn’t appear when plugged into one port, but works in another | The port may be dirty, damaged, disabled, or unable to provide stable power. USB hubs can also cause this. | Method 1: Fix a Broken or Dirty USB Port Before Blaming the Drive; Method 3: Fix Disabled USB Ports in Windows Power Settings |
| USB drive is detected, but Windows says it needs to be scanned or repaired | The file system likely has errors. This often happens after unsafe removal, power loss, or interrupted file transfers. | Recover your data first; then: Method 7: Fix a Corrupted USB Drive With Windows Error Checking |
| USB drive shows as RAW | Windows can no longer read the file system (or the drive uses a file system Windows doesn’t support). Your files may be recoverable, but formatting should come after recovery. | Recover your data first; then: Method 4: Fix an Unreadable USB Drive Using TestDisk; Method 9: Fix a RAW USB Drive by Formatting It |
| USB drive asks to be formatted every time you open it | The file system is damaged or unreadable. Windows is offering the easiest repair, but that repair deletes the current file structure. | Recover your data first; then use Method 9 |
| USB drive appears in Device Manager but not in File Explorer | Windows detects the hardware, but the driver, partition, or drive letter may be the problem. | Method 1: Fix a Broken or Dirty USB Port Before Blaming the Drive; Method 5: Fix an Undetected USB Drive by Reinstalling Drivers; |
| USB drive is completely undetected on this computer | The issue may sit with the USB port, drivers, power settings, or the drive itself. Test another port and another computer before you assume the drive is dead. | Method 1: Fix a Broken or Dirty USB Port Before Blaming the Drive; Method 10: Send a Damaged USB Drive to a Data Recovery Center |
| USB drive says “The disk is write-protected” | The drive is in read-only mode. Some USB drives have a physical lock switch, but Windows can also mark the disk as read-only. | Method 8: Fix a Read-Only USB Drive Using DiskPart |
| USB drive reports a huge capacity, but files corrupt after you copy data to it | The drive may be fake or modified. Cheap “2 TB” or “8 TB” flash drives are common examples. They show a fake size, then overwrite or corrupt data once the real capacity runs out. | Method 6: Check and Fix a Fake USB Drive With FakeFlashTest |
The safest path is usually this: first check whether the USB drive appears in Disk Management (with the correct size). If it does, try to recover the data before repair. After that, move through the relevant fixes from the table. If the drive doesn’t show up anywhere, especially after you test it on another computer, don’t keep forcing it. At that point, a data recovery center may be the only realistic option.
How to Recover Data from a USB Flash Drive That’s Not Recognized
Before we get into data recovery, let’s separate two very different cases.
If your USB flash drive is physically damaged to the point where your computer doesn’t detect it even in Disk Management, there isn’t a practical DIY recovery path here. If the data on that drive is important, your safest option is a professional recovery lab.
But if the USB drive is detected (even with all kinds of problems we covered in the previous section) you have a chance to recover the files yourself – you’ll need a special type of software: a USB data recovery tool. These tools can scan drives, even if Windows can’t normally recognize them.
Disk Drill is our go-to recovery solution when dealing with unreadable, or not recognized broken USB drives. It’s designed to work directly with the drive, meaning it can scan it when it’s corrupted, RAW, or constantly displaying error messages or requesting you to format. The same is true if it’s not appearing in most places, like File Explorer. Basically, as long as the USB drive is showing in Disk Management with the correct size, it will be scannable.
Considering we’re working with a broken USB drive, the unstable state that it’s in could worsen at any time. We recommend creating a backup of the drive and scanning that instead. Disk Drill includes a byte-to-byte backup feature, but you can use any other tool as well.
Here’s how you create a backup of your broken USB drive with Disk Drill, then scan it for recoverable data:
- Download and install Disk Drill.
- Insert the USB device into your PC or laptop.
- Open Disk Drill and click on Byte-to-byte Backup.
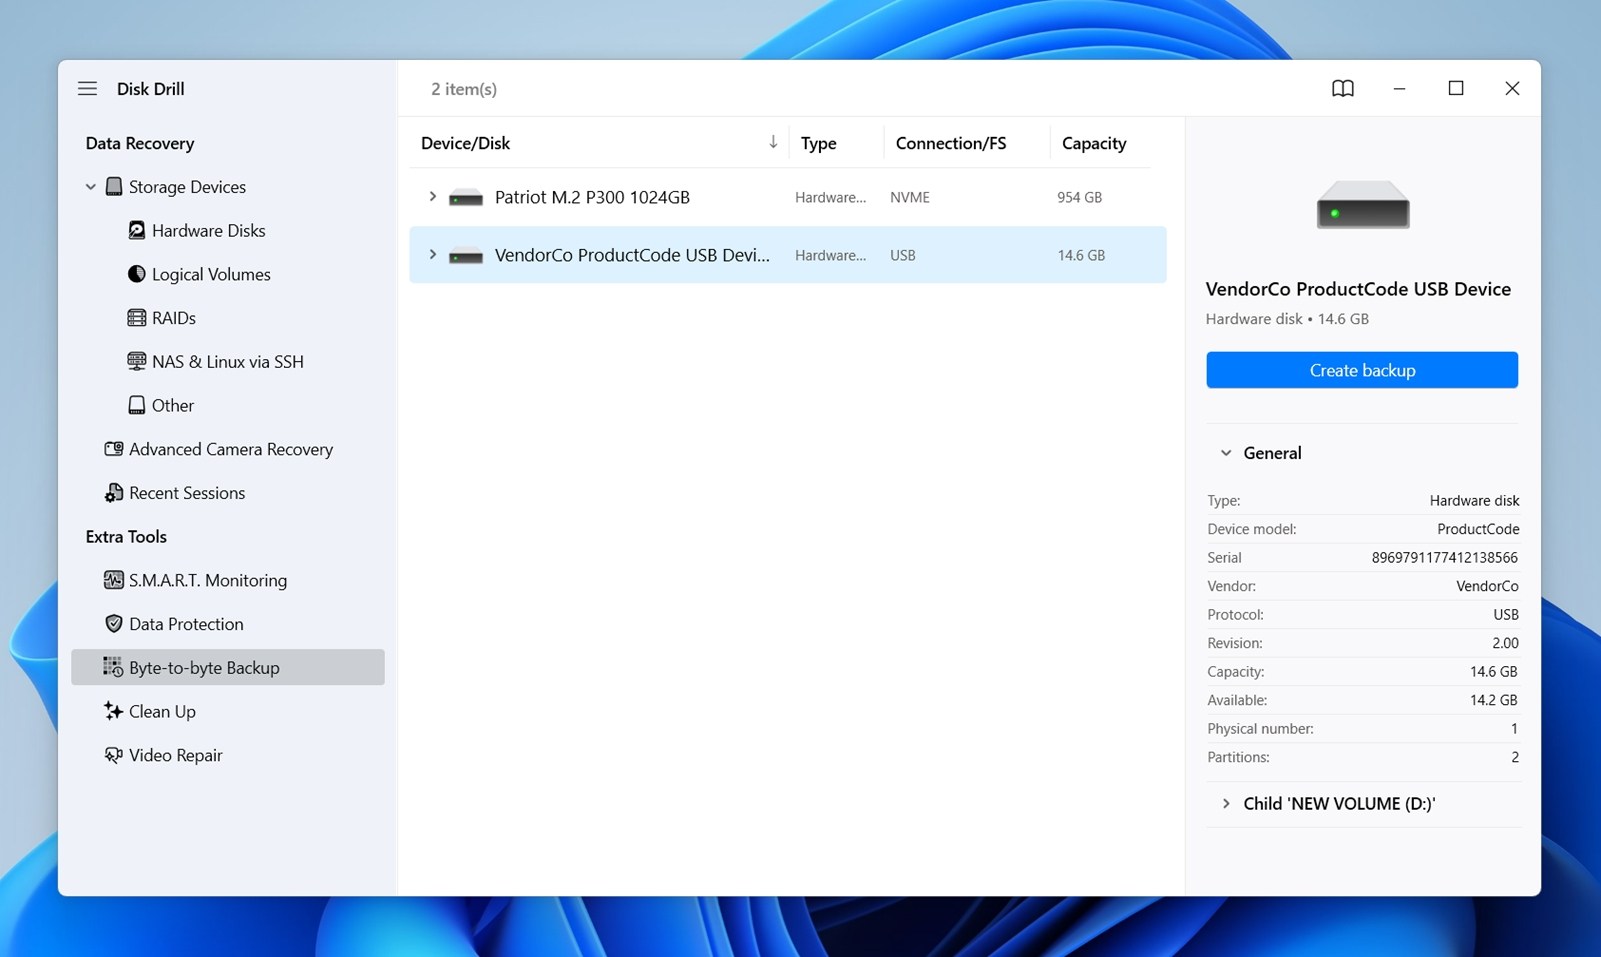
- Select the damaged or unrecognized USB device, then click Create backup.
- Give your backup a name and choose where you want to store it.
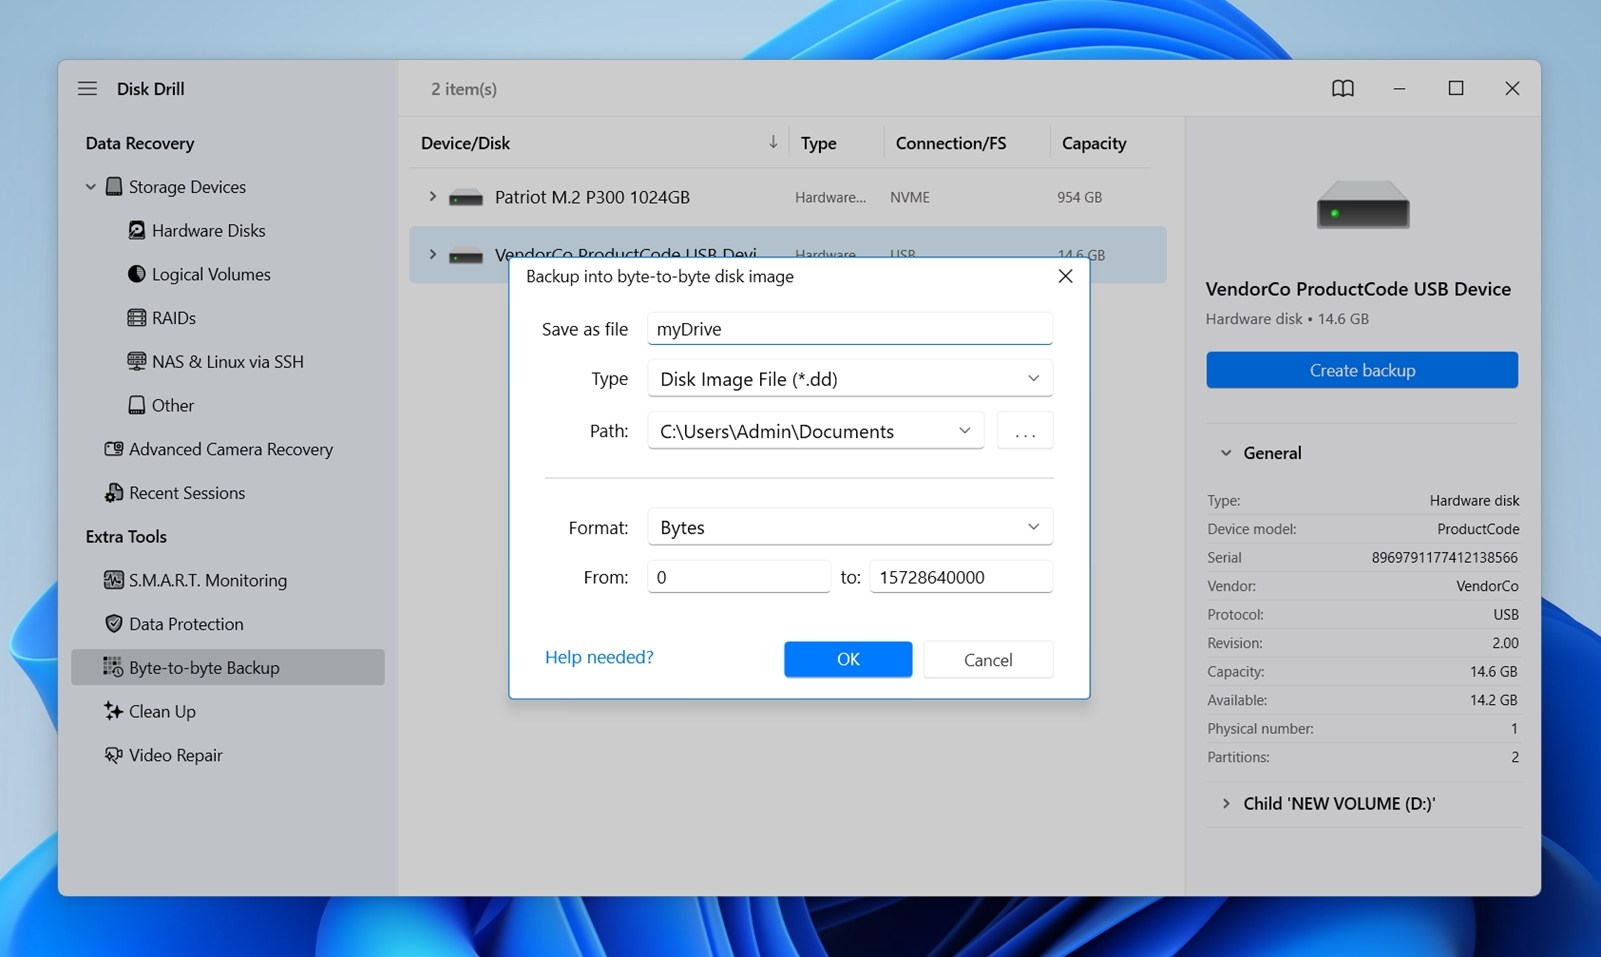
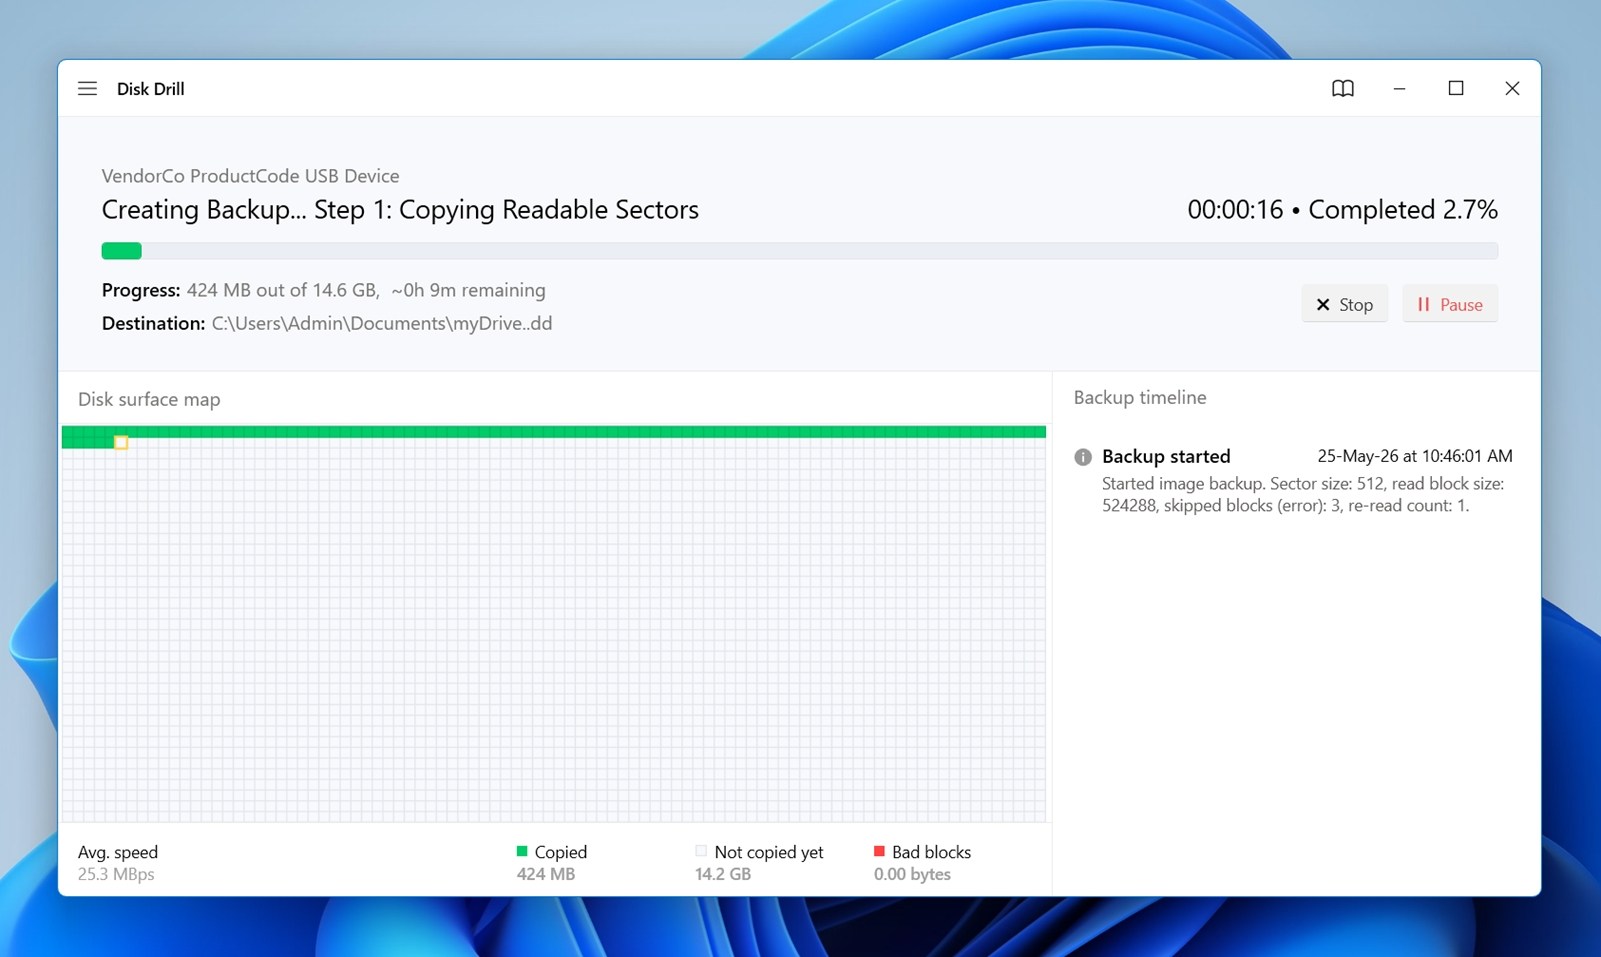
- Click OK and wait while Disk Drill creates the backup image.
- Return to Storage Devices.
- At the bottom of the screen, find the text that says Attach disk image and click it.
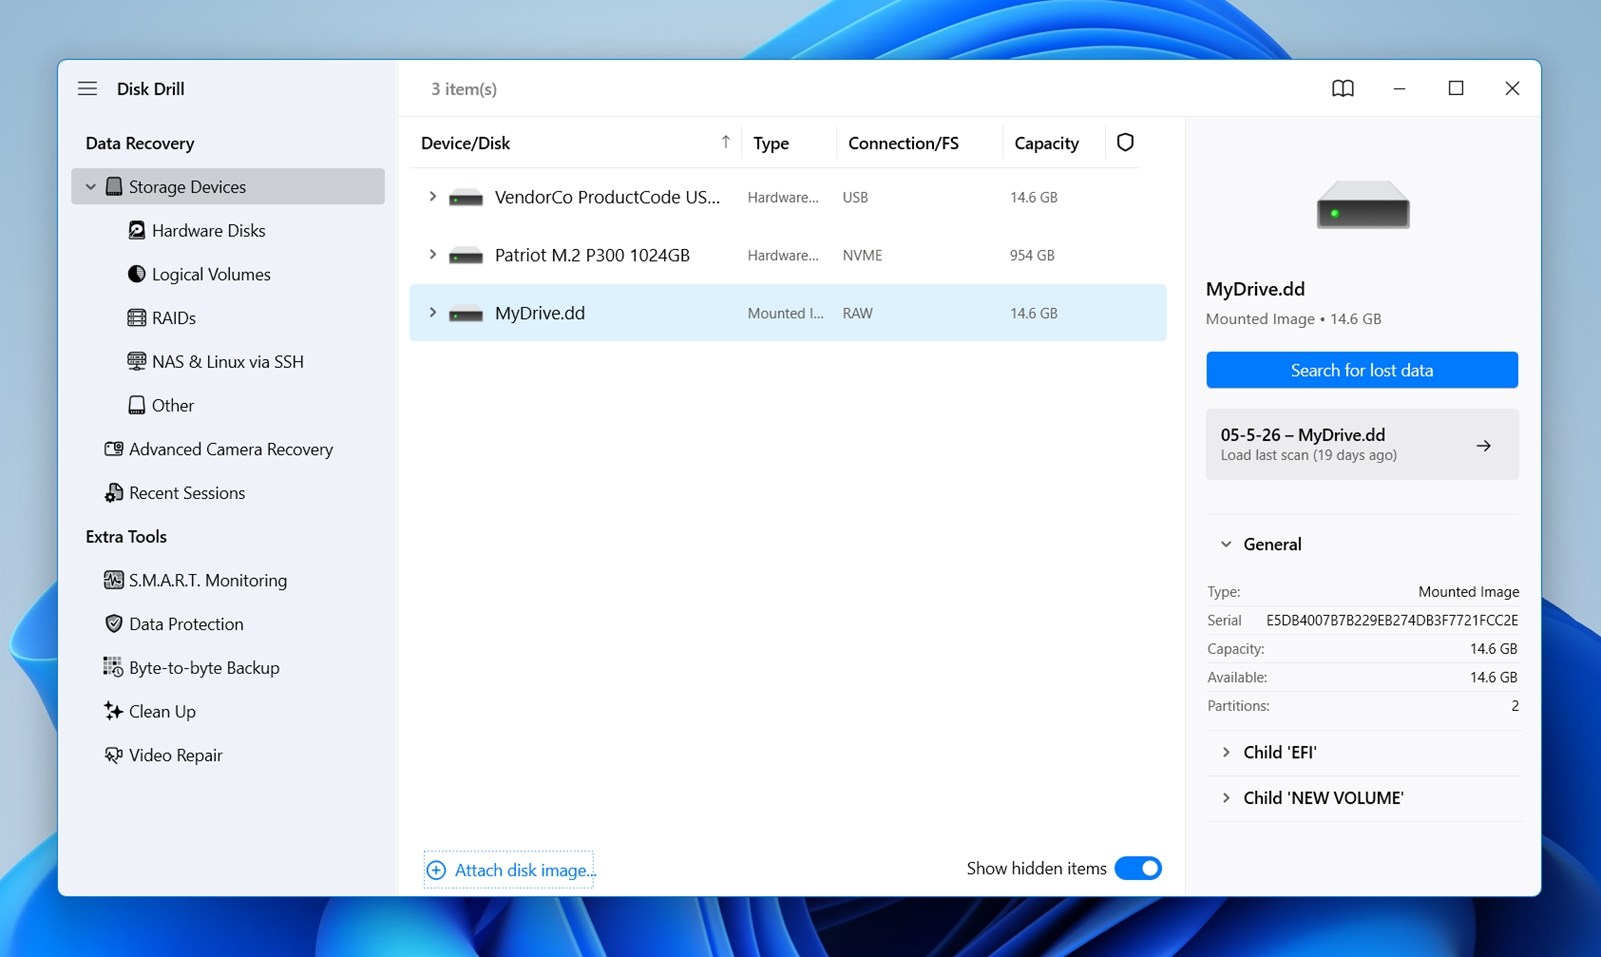
- Select the image of your USB drive, then click Search for lost data. (When Disk Drill asks which scan type to use, select Universal Scan.)
 ✅ If your USB drive has lost a partition, Disk Drill will identify it during the scan and allow you to search it for data.
 - Click Review found items. You can also click on one of the colored file type icons to filter the results or recover everything at once by clicking Recover all.
 Preview and select the files you wish to recover.
 Preview is the easiest way to understand what you’re looking at, and it’s also one of the best signs that the data survived. Disk Drill looks for data that is still physically present on the flash drive, including files you may have deleted yourself some time ago. Treat this screen as a second chance. You may find the files you came for, plus a few older ones you forgot you needed.
 - Once you’ve checked the files you need, click Recover.
- Choose where you want to store the recovered files.
 You should choose a location on a separate physical drive to avoid corrupting the data. Click Next to complete the recovery process.

Congratulations, you’ve successfully recovered files from a broken or unreadable USB device.
How to Repair a USB Drive Using Various Methods
After you’re done with recovering your data from the broken USB drive, it’s time to focus on fixing it. Again, you should only attempt these fixes once your data is safe and sound, as some of these fixes are guaranteed to delete your data. Here are several ways to fix a broken USB device.
Method 1: Fix a Broken or Dirty USB Port Before Blaming the Drive
If your USB port is not working, there are a few steps you can take that may be enough to get it working again. Figuring out if it’s your USB ports is a fairly painless process and only requires some very basic checks.
- Blow the USB port to clear it of any dust or debris that could be preventing proper contact.
- If the port is visibly dirty, power off your system and clean the port using a cotton swab with a little bit of isopropyl alcohol (90% or higher). Wait for the port to dry before turning your system on again.
- Inspect the connection point for visible damage, such as bent connector pins.
The problem could just as easily reside with the USB flash drive too. Here are a few actions you can take to set yourself up for success:
- Blow on the metal USB connector to clear any dust or debris.
- Connect the USB drive to a USB 3.0 port. The USB 2.0 port may not be able to output enough power. Likewise, avoid using USB hubs.
- Use a port directly connected to your motherboard. The ports on your computer case may not be working properly.
- Test it on another computer.
Method 2: Fix a USB Flash Drive Not Showing Up Due to a Missing Drive Letter
The good news is that this fix doesn’t require formatting, and it shouldn’t touch your data. You can do it in a couple of clicks through Disk Management.
To fix a USB drive that’s not showing up:
- Right-click Start and click Disk Management.

- Right-click on the USB stick entry.
- Click Change Drive Letter and Paths.

- Click Add.

- Click the drop-down associated with Assign the following drive letter.
- Select the desired drive letter.
- Click OK to save the changes.

Method 3: Fix Disabled USB Ports in Power Settings
To conserve power, Windows comes preconfigured to turn off the power supplied to USB ports that aren’t in use. While this is a good idea most of the time, sometimes it can lead to a problem where the USB port doesn’t work when you connect something to it.
Thankfully, this setting can be turned off and on at your convenience. If your USB isn’t showing up when you connect it, try following these steps:
- Open Control Panel.

- Click Hardware and Sound.

- Click Power Options.

- Click Change plan settings.

- Click Change advanced power settings.

- Expand USB settings, then USB selective suspend setting. Turn the options for On battery and Plugged in to Disabled. Click Apply then OK.

Method 4: Fix an Unreadable USB Drive Using TestDisk
TestDisk is free and open source, which is great, but it’s far from user-friendly. The app runs in a text-based window, and the screens can feel a little too much if you’ve never used it before. But we’ll walk through the exact steps below, so you don’t have to guess which option to choose.
This is how to fix a USB device that’s not recognized as readable with TestDisk:
- Download and extract TestDisk. Open testdisk_win.exe.
- Press Enter to create a new log file.
- Select your USB drive, then press Enter.

- Choose your partition table type and press Enter.

- Press Enter to select the analyze option.

- Press Enter to begin the quick search.

- Select the lost partition and press Enter.

- Select the Write option and press Enter if your partition was found. If it wasn’t, you may need to perform a deeper search.

- Press Y to confirm.
Once TestDisk is done, you can either restart your PC or safely remove and reconnect the USB drive.
Method 5: Fix an Undetected USB Drive by Reinstalling Drivers
We sometimes see cases like this on support forums: someone uses a random driver updater from Google and suddenly the USB stop working. That’s Windows using a bad or broken USB driver. The good thing is that you can force Windows to reinstall it.
The idea is simple: uninstall the current USB device entry, and Windows should detect it again and load a fresh driver automatically. If the issue came from a bad driver state rather than the USB drive itself, this can be enough to make the drive appear normally again.
Here’s how to fix a USB flash drive that’s not detected by updating or re-installing your USB device’s drivers:
- Right-click Start and click Device Manager.

- Click on the Disk drives dropdown. From there, right-click your USB drive and click Update driver.

- Click Search automatically for drivers. If you downloaded the drivers instead, click Browse my computer for drivers and select the file.

- If you need to re-install your drivers instead, right-click your USB drive and click Uninstall device.

- Click Uninstall. Eject your USB drive and reconnect it to the PC so the drivers automatically reinstall.
Method 6: Check a Fake USB Drive With FakeFlashTest
Honestly, the only way to ‘fix’ a fake USB drive is to use it within its actual limits. But in most cases, the better move is to forget you ever trusted that drive and buy a normal USB flash drive from a reputable place.
Before you throw it out, though, let’s confirm what you’re dealing with. Here’s how to check whether your USB drive is fake with FakeFlashTest.
- Download FakeFlashTest and open it.
- Open the dropdown menu near the top and choose your drive.
- Click Quick Size Test (Destructive). This test writes data to the drive, so it will erase existing files. Use it only after you recover your data.
Wait for FakeFlashTest to finish the test. If the tool reports that the real capacity is much smaller than the advertised size, the drive is fake (or modified).
If the drive fails the test, stop using it for anything important. Recover whatever you can, then replace it.
Method 7: Fix a Corrupted USB Drive With Error Checking
Error Checking is the friendlier Windows repair option. (You can also run CHKDSK in CMD, but we’ll take the simpler route here.) This tool looks for file system errors and tries to fix them without making you type commands into Terminal.
Use it only after you’ve copied or recovered your important files. In most cases, Error Checking is safe, but in some damaged-drive scenarios, it may lead to data loss. So don’t treat it as a first move when the USB contains files you care about. Save the data first, then use Error Checking to repair the drive.
Here’s how to fix corrupted USB drive using disk error-checking:
- Open File Explorer.
- Go to This PC.
- Right-click the corrupted USB flash drive and choose the Properties option.

- Navigate to the Tools tab.
- Click Check.

- Select the Scan and repair drive option.
- Wait for the Error Checking tool to repair your drive.
To avoid similar problems with USB drive corruption in the future, we recommend you always safely remove your drive before physically disconnecting it from your computer.
Method 8: Fix a Read-Only USB Drive Using DiskPart
When a USB is in read-only mode, you won’t be able to store any new data on it. Any attempt to write data to it will be met with a message stating “The disk is write-protected”.
In cases where your USB has a physical write-protection switch, you can simply move it to the unlocked position. However, if there is no physical switch you can toggle off, you must instead remove the “read-only” attribute (also known as “attrib”) currently associated with the USB device. Follow these steps:
- Right-click Start and click Windows PowerShell (Admin). For Windows 11 users, click Terminal (Admin).
- Type diskpart and press Enter.

- Type list disk and press Enter. Make note of your disk number.

- Type select disk *. Replace * with your disk number.

- Type attributes disk clear readonly and press Enter.

Once you do this, your USB will no longer be read-only and you can once again start storing files on it.
Method 9: Fix a USB Drive by Formatting It
If you remove the checkmark, Windows will perform a full format. That takes much longer and writes across the drive more thoroughly, which is bad news if you forgot to recover your files first. After a full format, your chances of getting data back can drop to zero.
To format a USB drive, the simplest option is right inside File Explorer. You don’t need Disk Management, DiskPart, or any extra tools for this basic version:
- Insert the USB device into the PC or laptop.
- Open File Explorer.
- Right-click the entry for the RAW USB flash drive.
- Click Format.

- Select your desired file system, typically FAT32 or exFAT.
- Give the device a name (label).
- Click Start.

Of course, if the USB drive doesn’t appear in File Explorer, you’ll need to format it through Disk Management instead. This usually applies when Windows detects the drive at the system level, but it has no drive letter or shows as RAW.
Here’s how to do it in Disk Management:
- Right-click Start and choose Disk Management.
- Find your USB flash drive in the lower section of the window.
- Right-click the USB partition or unallocated space.
- Choose Format if there’s already a partition, or New Simple Volume if the space is unallocated.
- Follow the wizard, choose a file system like exFAT, and keep Perform a quick format enabled.
- Finish the process and wait for Windows to create the new file system.
Method 10: Send a Damaged USB Drive to a Data Recovery Center
When this method helps: this is the only non-DIY method in our guide, and it exists for a reason. Sometimes a USB drive is physically damaged. The connector may be bent, loose, or broken off completely, like the kind of cases you often see in data recovery communities.
At that point, repair attempts at home can make things worse. For example, bending the connector back too hard can snap the board. Plugging in a wet or shorted USB drive can damage the chips. Running recovery software on a drive that keeps disconnecting can stress it until it stops responding completely.
Data recovery specialists are remarkably adept at salvaging data, even from disks and devices that might seem too far gone for recovery. If you don’t have anyone in your city who specializes in data recovery, you can also take the task to an online service. There are quite a few such services, such as the CleverFiles Data Recovery Center, that can help you recover data from a seemingly impossible situation.
Here’s a quick look at what it’s like to use a data recovery service:
- Click Start Recovery.

- Choose the level of service you’d like, which determines the turnaround time for recovery.

- Fill in the rest of the work order with your contact information and any relevant information pertaining to the drive and its status. When ready, click Complete my work order.

Once the work order is submitted, you’ll receive further instructions on how to package and send away your broken USB flash drive.
Final Takeaway
If we had to simplify this guide even further and leave only the absolute must-have tools & methods, the whole USB repair process would come down to this:
- Recover data first. In many cases, people still have recoverable data on unreadable USB drives. So before you run repairs, before you click format, before you try CHKDSK or TestDisk, think about the files. Use a USB data recovery tool like Disk Drill to scan the drive, preview what it finds, and recover the files to a safe location on another disk. Once the data is somewhere safe, everything gets less stressful.
- After that, if the USB drive is physically fine, formatting is often the cleanest (and simplest) fix. It solves most logical problems, and you don’t need to tinker with TestDisk, CHKDSK, or advanced repair steps. In most everyday cases we see, a quick format gives the flash drive a fresh file system and gets it working again.
- Fake drives are a different story. If your 4 TB USB stick cost suspiciously little, files disappear after large transfers, or videos and archives break after you reconnect the drive, check it with FakeFlashTest. Sadly, online stores don’t always catch bad sellers fast enough, and fake flash drives still slip through.
- And if we’re talking about physical damage, the answer changes – it is not a suitable DIY job if the files matter. Stop plugging it in, don’t keep forcing it, and contact a data recovery center.


FAQ
Yes, broken USB flash drive data recovery is possible using the data recovery tool Disk Drill:
- Insert the USB device into your computer.
- Start Disk Drill.
- Select the USB device.
- Click Search for Lost Data.
- When Disk Drill completes, select your files and click Recover.
Yes, in many cases you can recover files from a broken flash drive, as long as the drive is still detected by your computer. If the USB drive appears in Disk Management with the correct size, recovery software can scan it. All you need is a tool like Disk Drill:
- Open the app, select your USB flash drive.
- Click Search for lost data.
- Then select Universal Scan, wait for the scan to finish.
- Preview and recover the files to another drive. Don’t save recovered files back to the same broken USB stick.
If we’re talking about a slightly bent USB connector, you may be able to fix it yourself by carefully bending it back into shape. Go slow, use gentle pressure, and don’t keep testing it over and over if it feels loose or unstable. One bad move can snap the connector or damage the board inside.
But if the flash drive is cracked, wet, broken into pieces, smells burnt, gets hot when plugged in, or doesn’t show up anywhere in Windows, don’t treat it like a DIY repair. Take it to a data recovery center if the files matter. A USB stick is cheap to replace. The data on it might not be.
That depends on the extent of the damage. This can cost you anywhere from $150.00 to reattach broken pads to a connector to $300-$500 for “chip-off” recovery.
The question already gives you half the answer: if the USB flash drive works on another computer, the drive itself is probably fine. The problem is likely on that one PC – a bad USB port, a driver, a USB controller, power-saving settings.
- Start simple. Try a different USB port, preferably one on the back of the PC that connects directly to the motherboard. Avoid USB hubs and extension cables.
- Then open Device Manager and reinstall the USB drive driver: right-click the device, choose Uninstall device, unplug the flash drive, and plug it back in so Windows can detect it again.
- If that doesn’t help, check Disk Management. If the drive appears there but not in File Explorer, assign it a new drive letter.
- You can also disable USB selective suspend in Power Options, since Windows sometimes cuts power to USB ports too aggressively.