While you can format any external hard drive on a Mac in just a few clicks using built-in tools, there’s more to it than simply hitting the Erase button. Ideally, you want to align your formatting settings with how you plan to use your storage device. That can be tricky depending on several different factors, which we cover in this article, along with easy-to-follow steps on how to format an external hard drive on a Mac.

How to Choose the Best File System Format for an External Hard Drive on a Mac
When formatting a hard drive for Mac (or just on Mac), one of the most vital decisions you’ll face is selecting the right file system. Mac users have access to a variety of file system options through Disk Utility:
Here’s a quick guide to choosing the right file system based on your needs:
| Goal | Recommendation | Justification |
| For exclusive use with Mac computers | APFS or APFS (Encrypted) | Optimized for macOS and SSDs on High Sierra (10.13) or later. |
| For Time Machine backups | APFS or Mac OS Extended (Journaled) | APFS works with Big Sur and later; HFS+ is needed for older macOS versions. |
| For drives shared between Mac and Windows | ExFAT | Best for cross-platform compatibility with virtually no size limits. |
| For maximum device compatibility | MS-DOS (FAT) | Compatible with older devices but has a 4GB file size cap. |
| For repairing a corrupted drive | The same format it was using before unless you have a reason to change it | Formatting will erase all data but can fix file system corruption. |
If you’re interested in learning more about these file systems, such as their features, limitations, or compatibility, then continue reading for detailed explanations of each format and additional considerations that might affect your choice. If not, and you’ve already made your choice using the table above, you can skip to the instructions on how to format an external drive on Mac.
APFS (Apple File System)
Apple File System (APFS) was introduced in macOS High Sierra (10.13) and is now the default file system for Mac computers with SSDs. According to Apple’s official documentation, APFS was designed with all-flash storage devices in mind and optimizes performance while maintaining strong data integrity.
APFS comes in four variants:
- APFS: The standard version.
- APFS (Encrypted): Adds full-disk encryption for enhanced security.
- APFS (Case-sensitive): Treats files with the same name but different case as distinct files (e.g., “Document.txt” and “document.txt” are considered different files).
- APFS (Case-sensitive, Encrypted): Combines case sensitivity with encryption.
While APFS works excellently with SSDs, it may not perform optimally with traditional mechanical hard drives. It’s also not readable by Windows and Linux computers without third-party software.
Mac OS Extended (HFS+)
HFS+ (Hierarchical File System Plus), also known as Mac OS Extended, was the standard file system for Mac OS from 1998 until the introduction of APFS. As explained in detail on Wikipedia, HFS+ addressed many of the limitations of the original HFS format, including improved support for larger files and more efficient storage allocation.
HFS+ variants include:
- Mac OS Extended (Journaled): The standard version with journaling, which helps protect the file system structure from corruption during power outages.
- Mac OS Extended (Case-sensitive, Journaled): Adds case sensitivity to distinguish between files with names that differ only in capitalization.
HFS+ remains compatible with all versions of macOS and works well with traditional hard drives. However, it lacks some of the modern features and optimizations of APFS, and it isn’t readable by Windows and Linux computers without third-party software.
ExFAT (Extended File Allocation Table)
ExFAT was developed by Microsoft as an extension of the FAT file system to handle large files and volumes, particularly on modern high-capacity flash drives and SD cards.
This file system is an excellent choice when you need to share files between Mac, Windows, and Linux systems regularly because each of the three major operating systems supports it flawlessly right out of the box.
Because the ExFAT file system is designed to be simple and have less overhead than file systems like APFS or NTFS (Windows), it doesn’t have built-in support for file encryption or compression, so users have to rely solely on third-party solutions.
MS-DOS (FAT)
FAT (File Allocation Table) is one of the oldest file systems still in use today. When you select MS-DOS (FAT) in Disk Utility, you’re actually formatting the drive with FAT32, which has been around since Windows 95.
Due to its age, FAT32 suffers from quite a few serious limitations, including the maximum file size of 4GB and the maximum volume size of 2 TB. It also doesn’t natively support compression or encryption, nor does it implement journaling to protect against corruption.
Despite these and other limitations, FAT32 offers the broadest compatibility across operating systems, devices, and equipment like car stereos, cameras, and gaming consoles.
Additional Considerations When Formatting External Drives on Mac
Sometimes, the Mac format external drive options in Disk Utility don’t contain all of the above-described file systems.
That’s because the file system you choose must align with the drive’s partition scheme. A partition scheme, or partition map, defines how the drive’s storage space is organized and accessed by the operating system.
Apple outlines the three available schemes in Disk Utility on its support page, so here’s just a quick overview:
- GUID Partition Map: The modern standard for all Mac computers running Intel processors or Apple Silicon. This partition scheme is also supported by most newer Windows computers.
- Master Boot Record (MBR): An older scheme designed for compatibility with all Windows-based systems. It’s less feature-rich than GPT but works well if you’re reformatting an external hard drive on a Mac for Windows use with a file system like exFAT or FAT32.
- Apple Partition Map (APM): An older scheme designed for PowerPC-based Macs that predated the Intel transition. It’s rarely needed for modern external drives unless you’re working with very old Mac hardware.
Beyond partition schemes, you might also spot a Security Options button in Disk Utility when formatting a drive.
This feature lets you decide how thoroughly you want to erase the drive’s data. The options range from fastest to most secure. The basic setting simply erases the file directory, leaving data potentially recoverable with specialized software. One step above it is basic overwriting, which writes random data followed by zeros over the entire drive. For stricter standards, there’s a DOE-compliant 3-pass erase, which uses two random passes and one known data pass, overwriting the drive three times. Finally, the most thorough option performs seven passes.
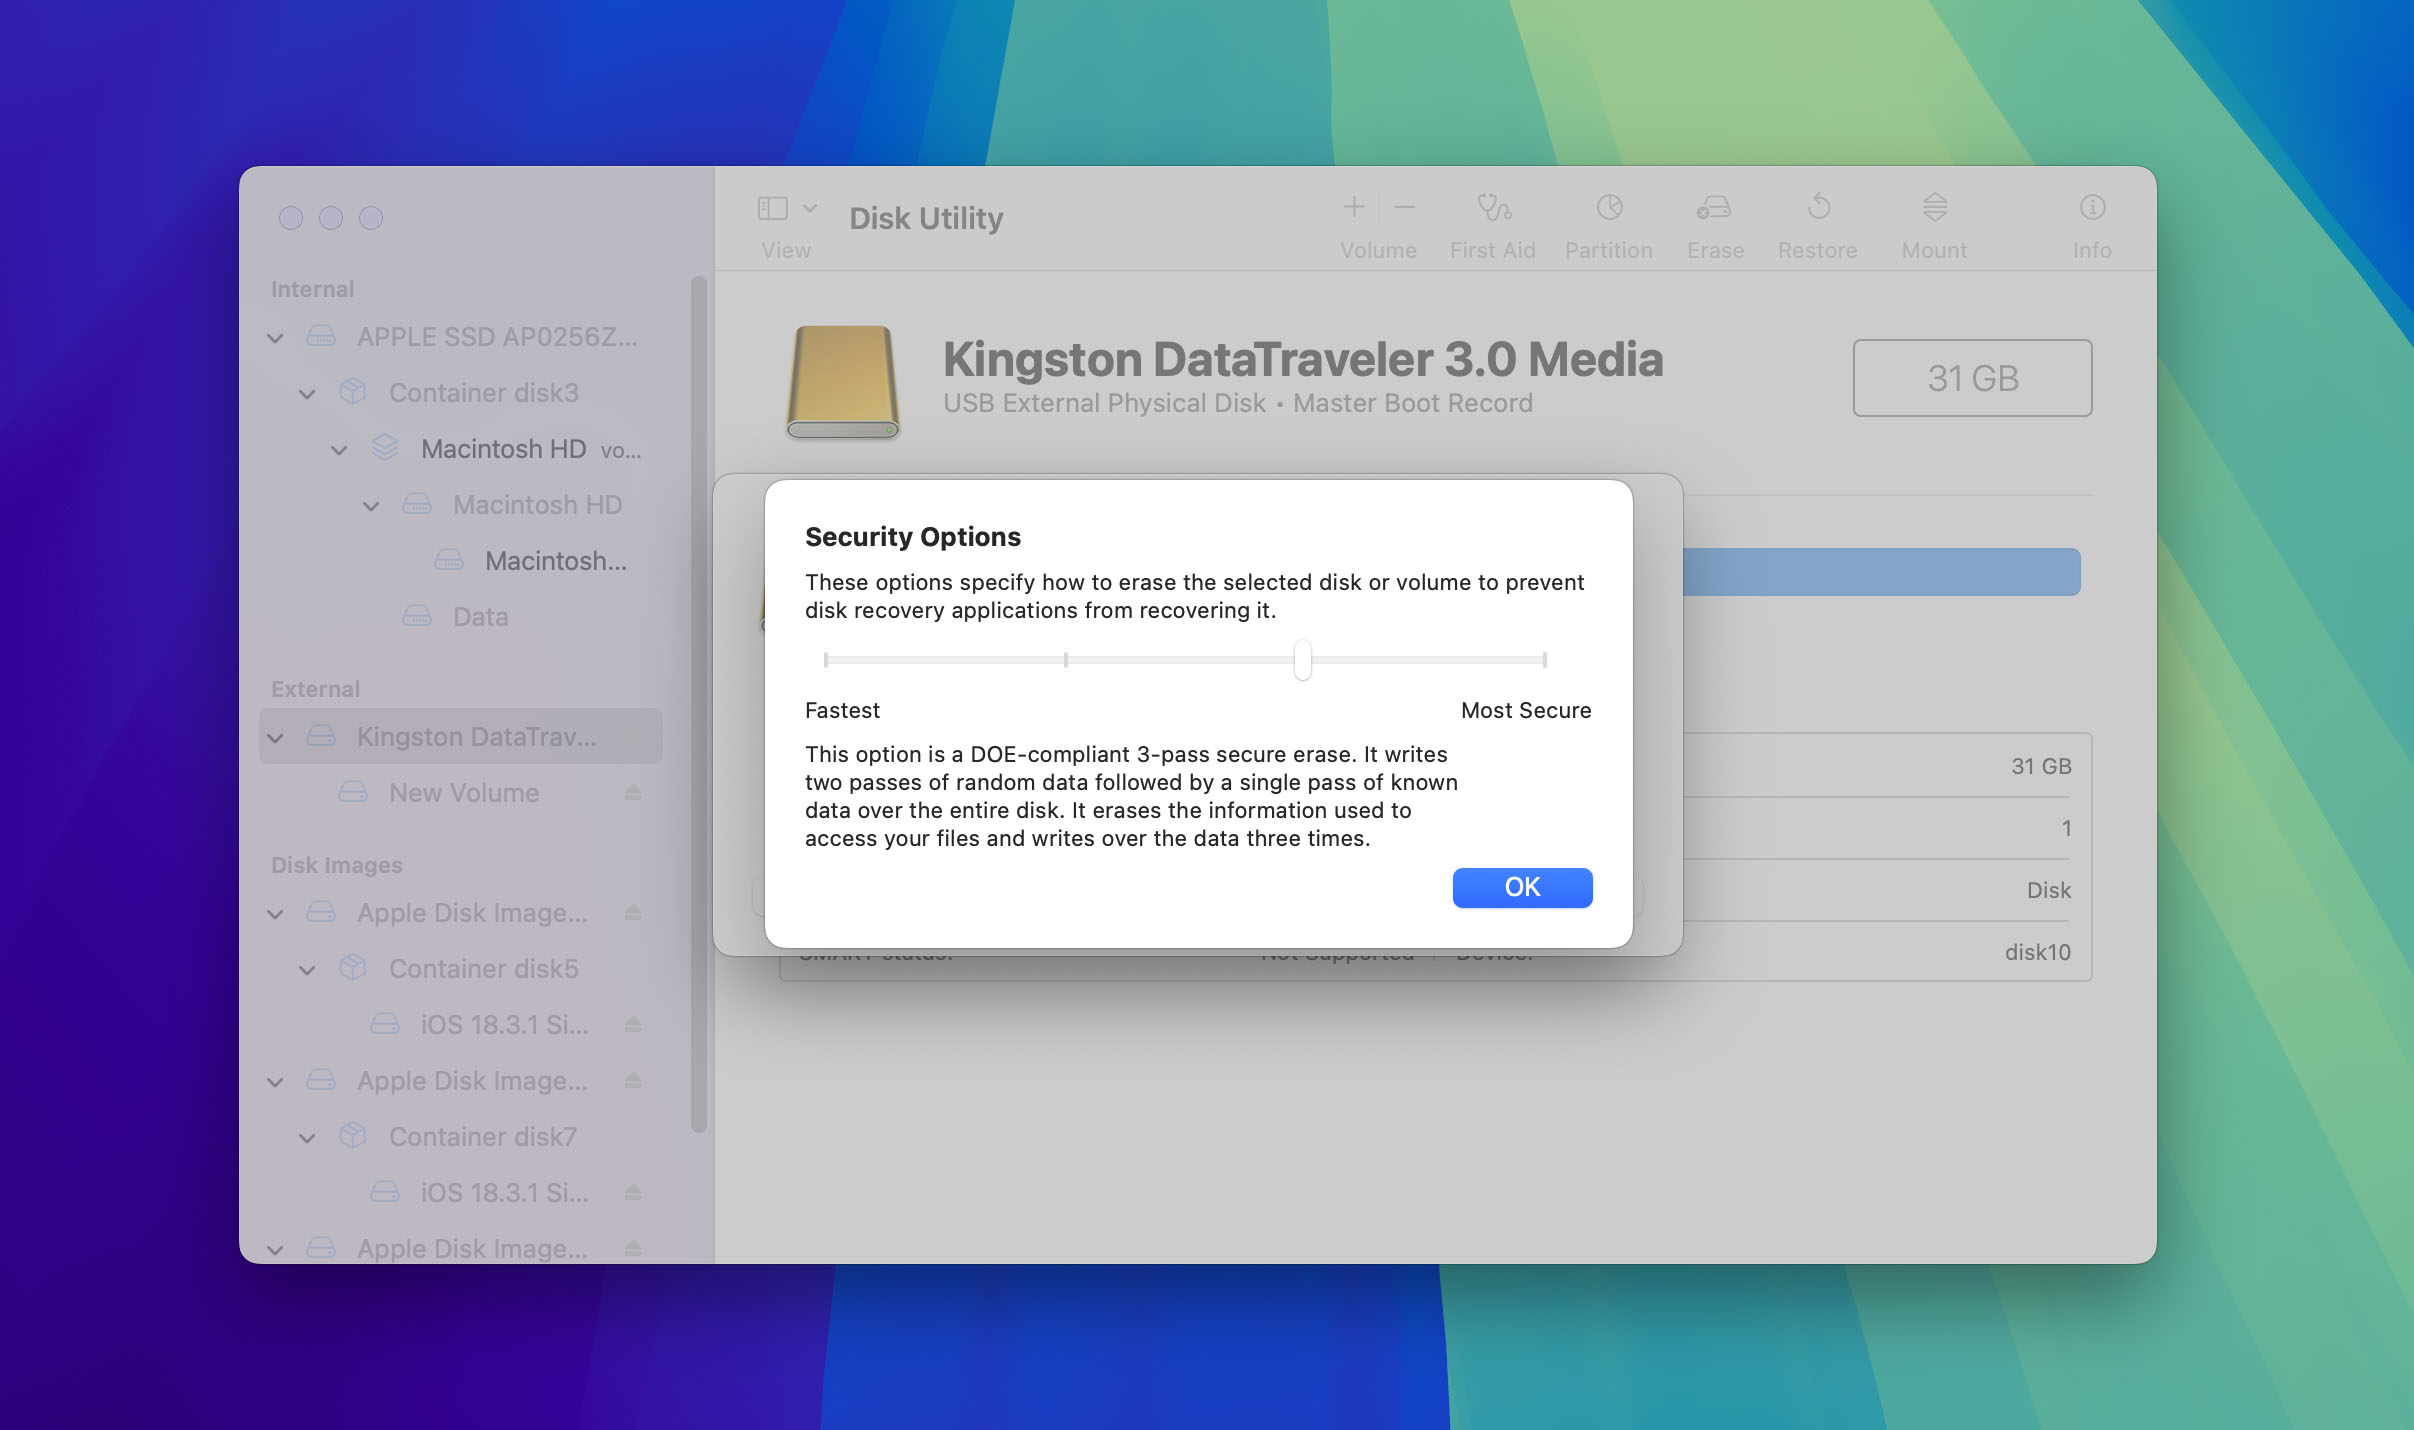
For everyday use, like setting up a WD, Seagate, or, for example, LaCie drive for Time Machine or reformatting an external hard drive on Mac for personal storage, a secure wipe isn’t necessary—just a standard erase will do. However, if you’re preparing to sell, donate, or discard a drive, then it certainly doesn’t hurt to overwrite the drive with random data and/or zeroes, but anything more than that is almost certainly overkill, as this How-To Geek article explains.
How to Format an External Hard Drive on a Mac
Formatting an external hard drive on a Mac is a straightforward task thanks to Disk Utility, a built-in tool that simplifies the process to just a few clicks.
Important: Since it’s not possible to reformat an external hard drive on a Mac without erasing it during the process, you need to back up all important data before you begin. You can either manually copy (or move) the files from the drive to a safe destination (such as your Mac’s internal drive), or you can create a complete byte-to-byte backup of the entire drive using the backup feature in Disk Drill or some other similar tool.
Here are the steps to format an external hard drive on Mac:
- Connect your external hard drive to your Mac using the appropriate cable. Make sure the connection is solid and that your Mac recognizes the drive. Some external hard drive require a dedicated power supply, so don’t forget to plug it in as well.

- Launch Disk Utility by:
- Going to Applications → Utilities → Disk Utility.
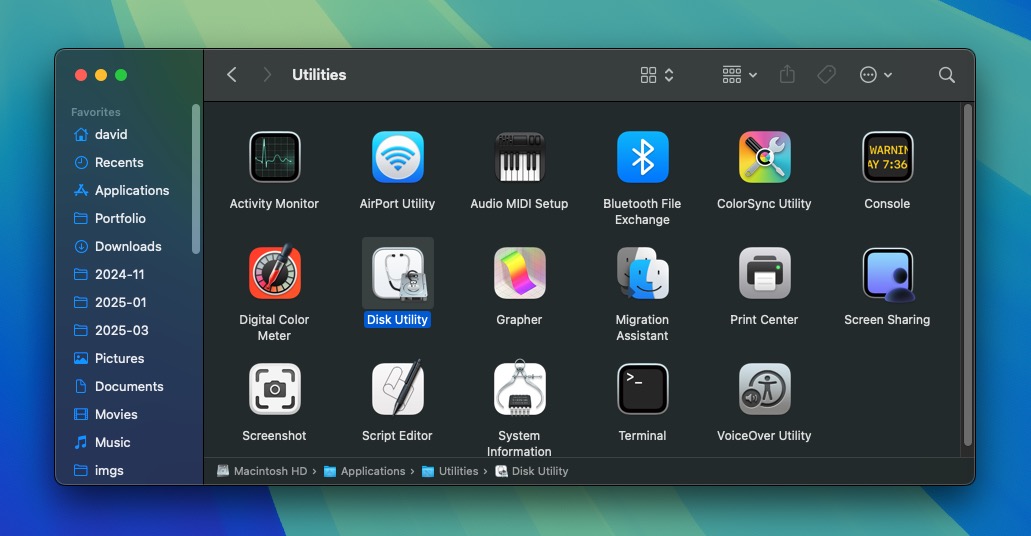
- Using Spotlight (press Cmd+Space) and typing “Disk Utility.”
- Opening Launchpad, finding the Other folder, and selecting Disk Utility.
- Going to Applications → Utilities → Disk Utility.
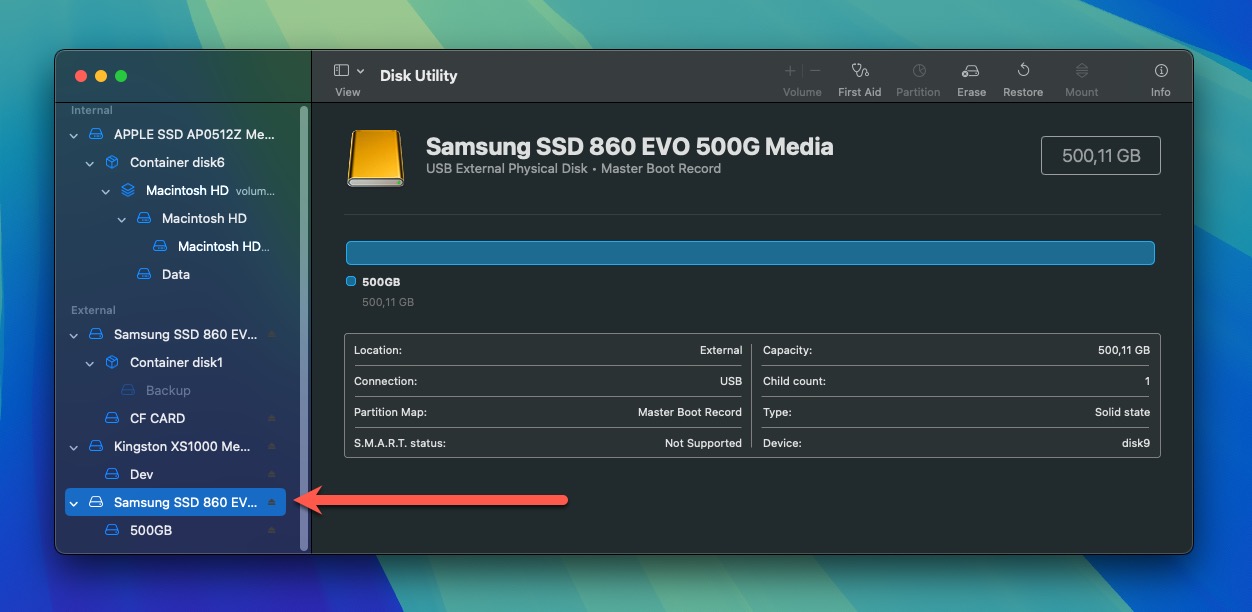
- Select the external drive you want to format in the sidebar (BE EXTREMELY CAREFUL TO SELECT THE CORRECT DRIVE!). Make sure to select the parent device (the top-level entry for your drive) rather than any existing volumes if you want to reformat the entire drive. On the other hand, choose only a single volume if that’s what you want to format. You can take a look at the detailed drive information at the bottom of the window to verify that you have selected the correct drive/volume.
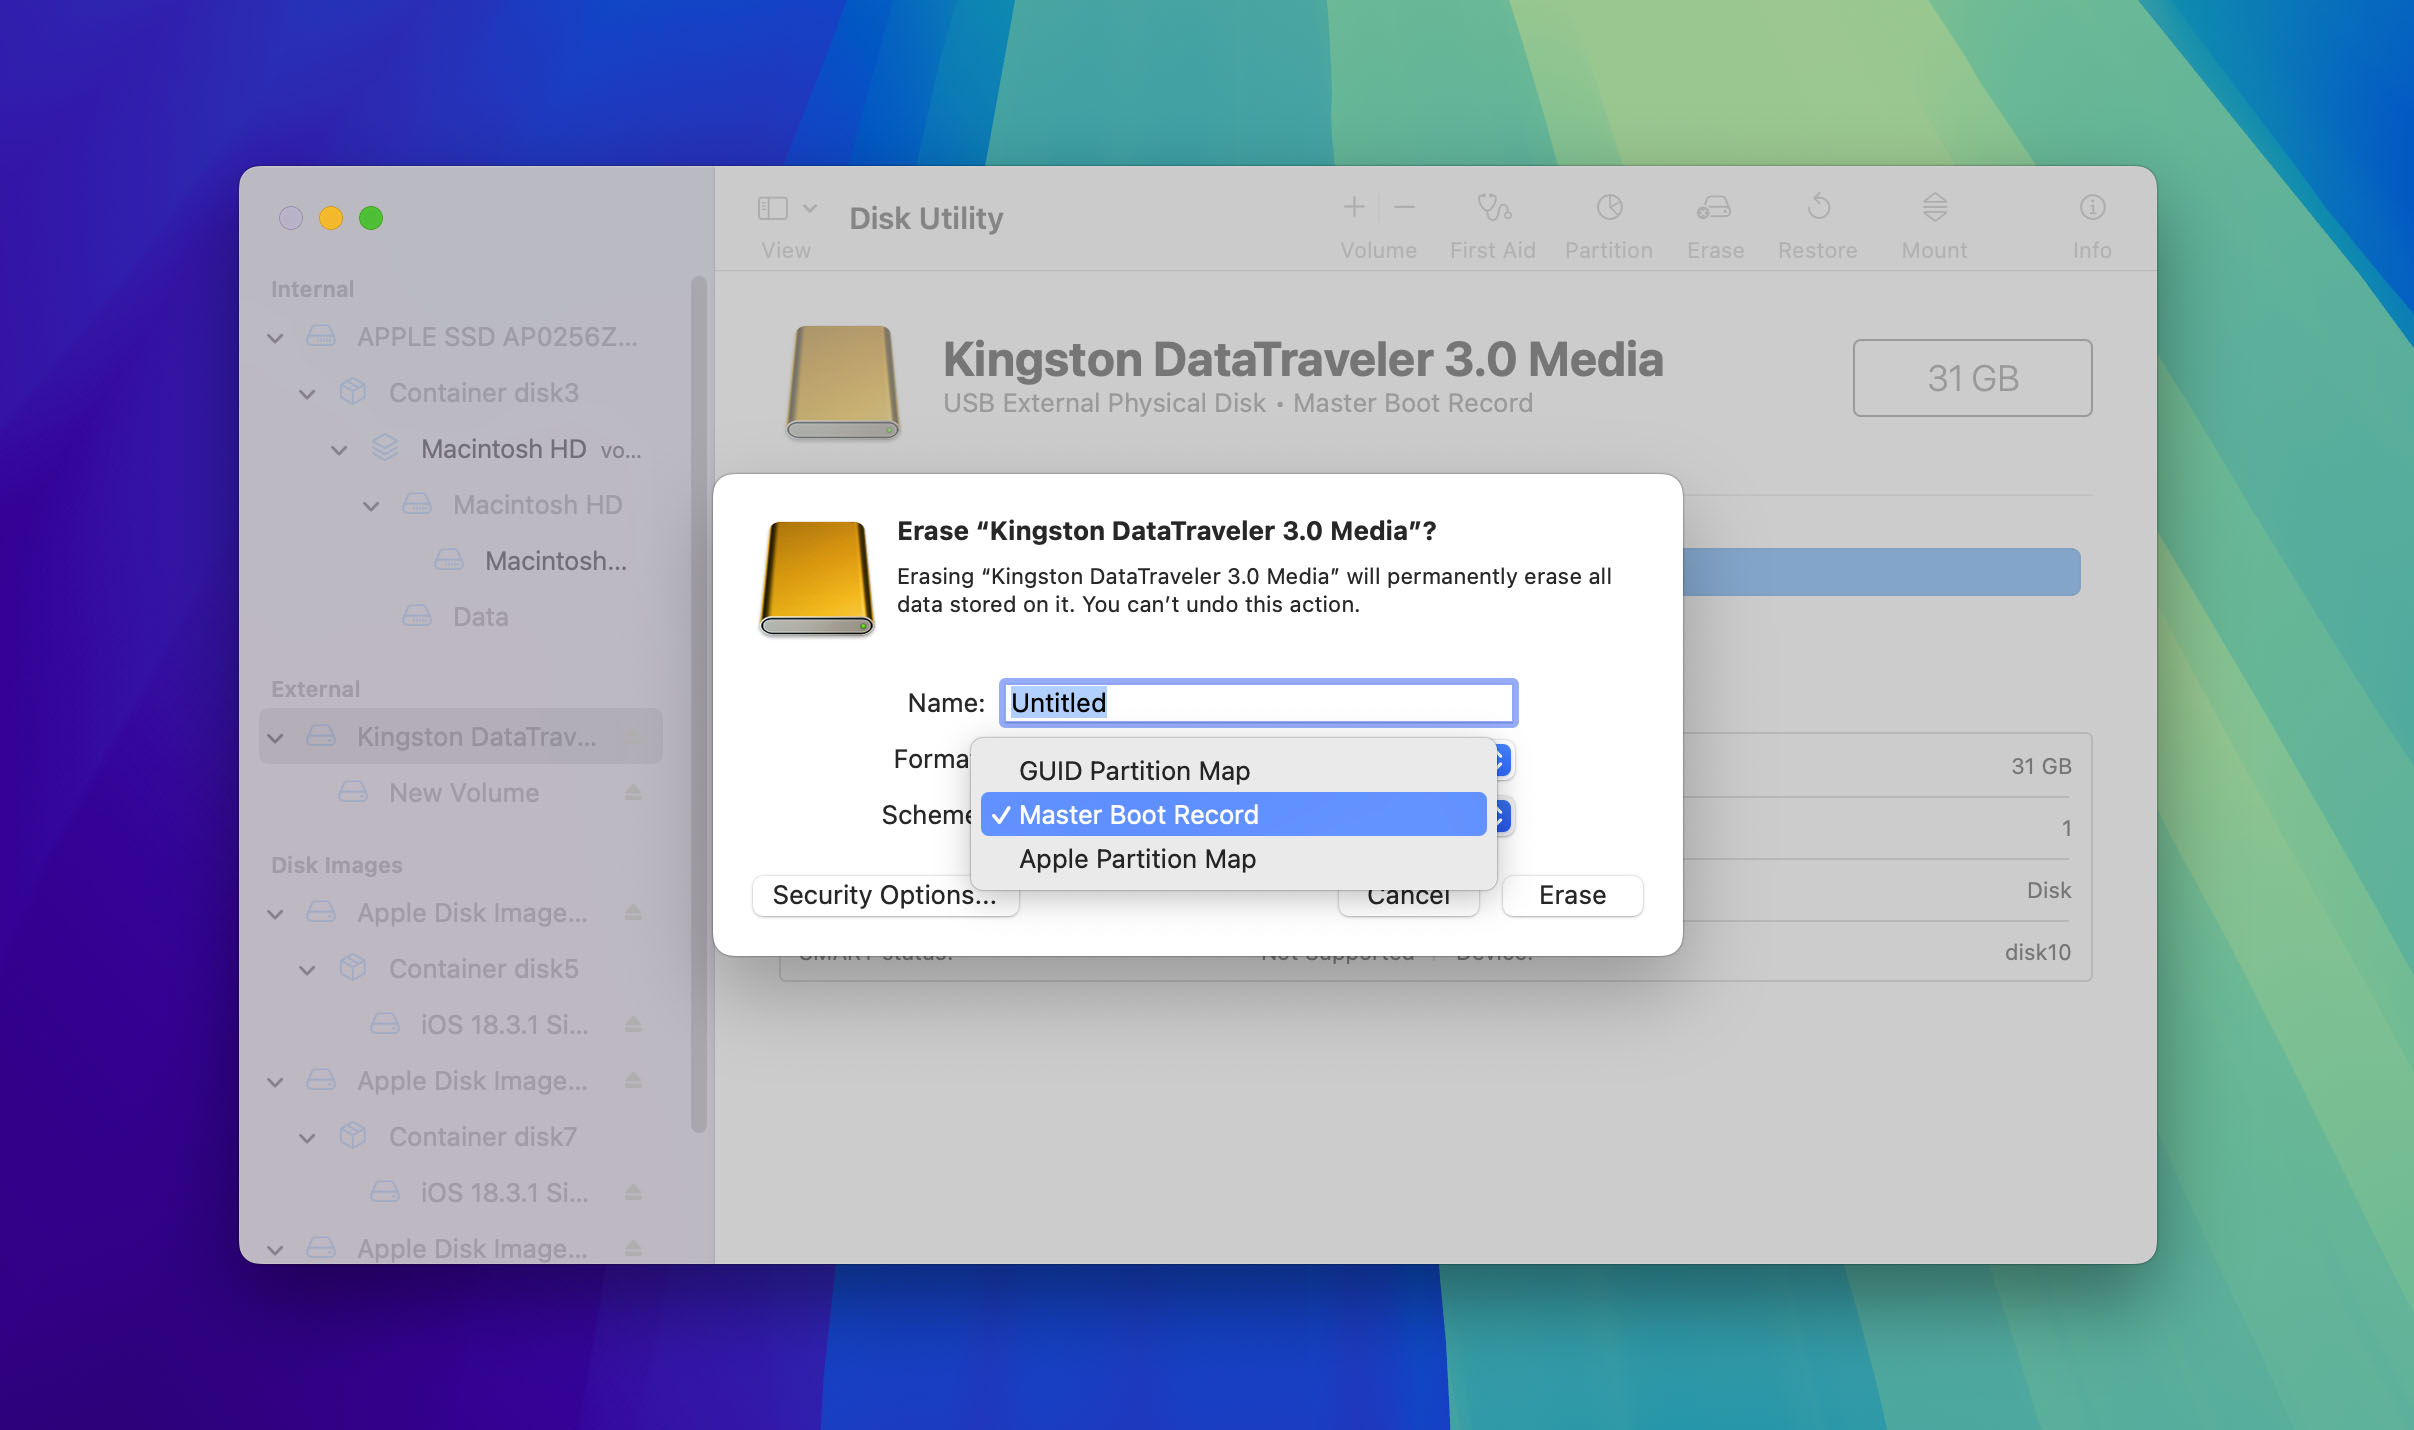
- Click the Erase button in the toolbar and then:
- Enter a name for your drive.
- Select the file system format.
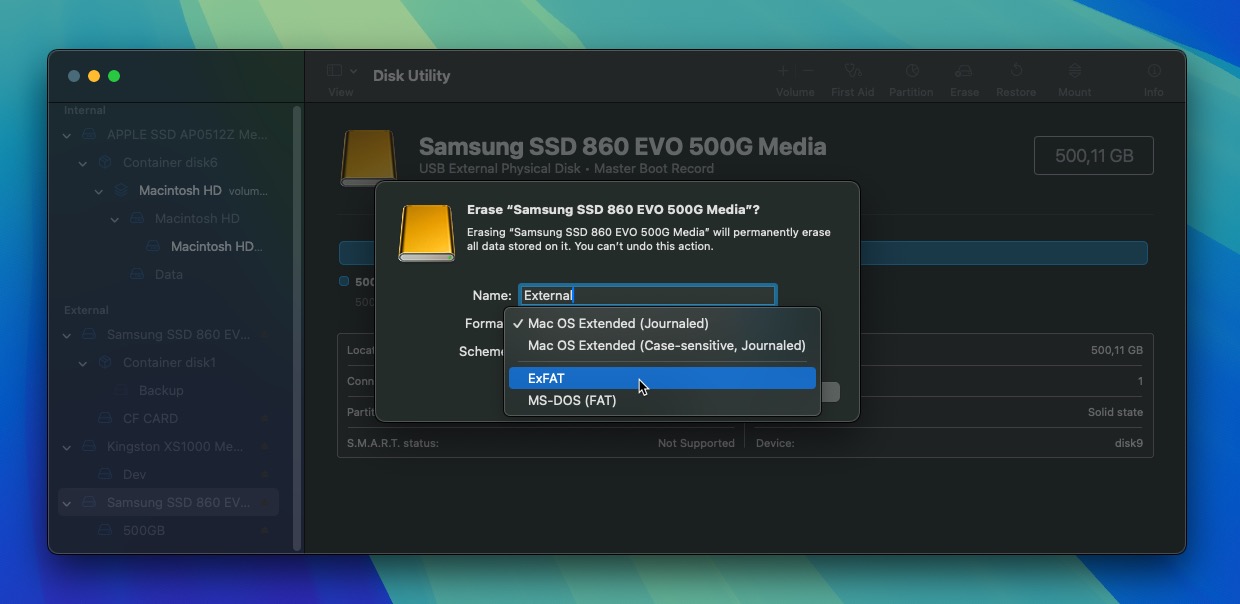
- Choose a partition scheme (unless you’re formatting a single volume only).
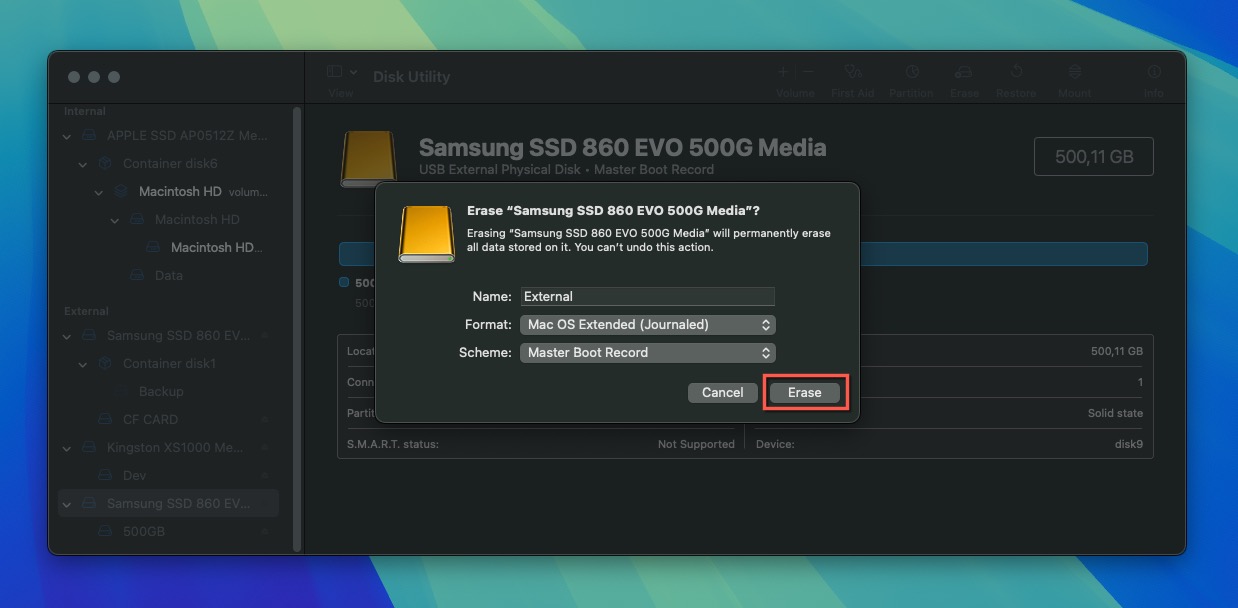
- (Optional) Click the Security Options button and choose to overwrite existing data during the formatting process.
- Click the Erase button to start. Depending on your settings, the process can take anywhere from a few seconds to a few hours.
Once formatting is complete, your external drive should appear in the Disk Utility sidebar with its new name and format. You can now use it to store files, set up as a Time Machine backup, or for any other purpose.
How to Recover Data From a Formatted Hard Drive on a Mac
Formatting an external hard drive on a Mac comes with a catch: it wipes all data on the drive. That’s not a problem when formatting is intentional, such as when you want to reformat an external hard drive on a Mac for Time Machine or switch it to a new file system like APFS. However, it can be disastrous when formatting is accidental (maybe you accidentally formatted the wrong drive or forgot to back up critical files beforehand).
The good news is that data recovery software can recover data from a formatted hard drive unless:
- The formatted data has been overwritten with new data (you’ve been using the drive extensively since the formatting).
- The external hard drive has been formatted using a secure format method.
The best data recovery software for recovering data from a formatted external hard drive on Mac is Disk Drill because it’s exceptionally easy to use and capable of recovering data based on existing file system information and file signatures (often the only thing that’s available after a format combined with partitioning).
Here’s how to recover data from a formatted external drive using Disk Drill:
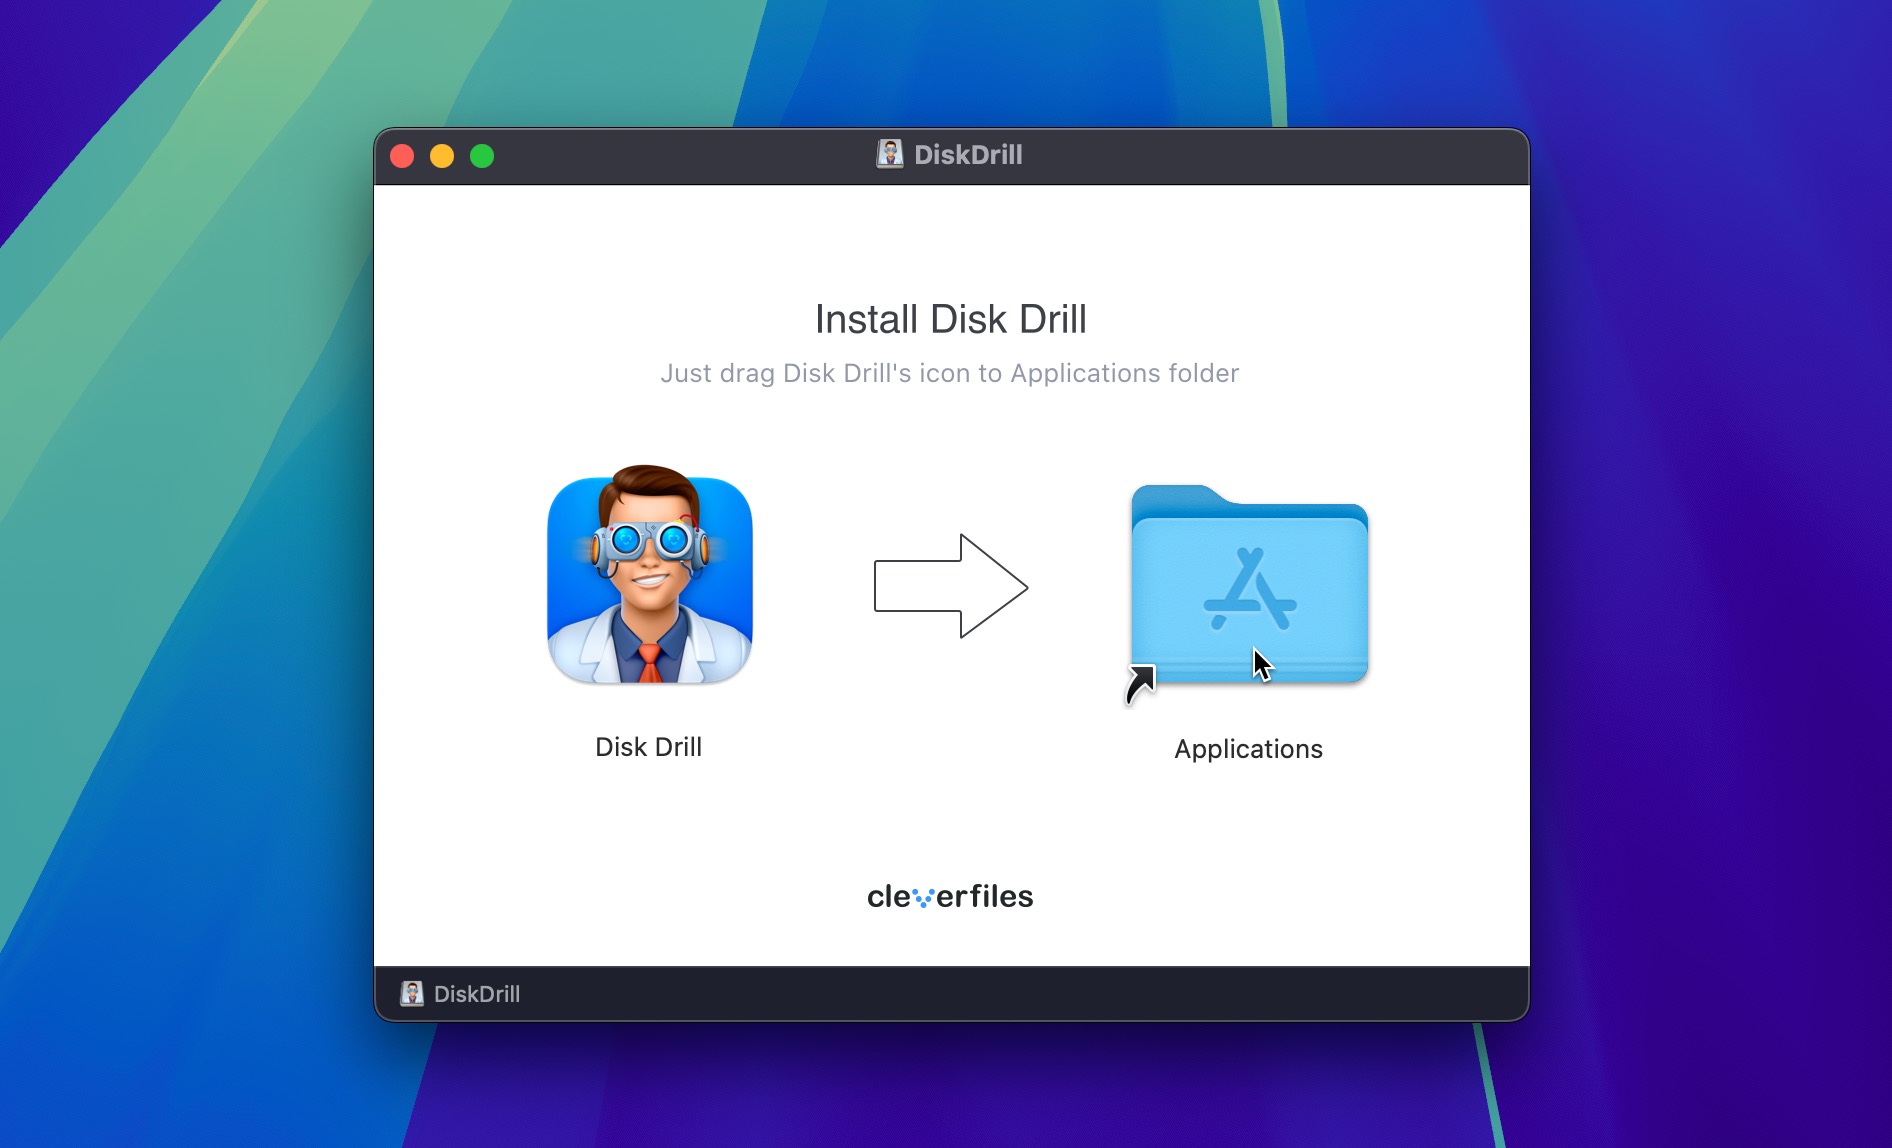
- Download and install Disk Drill on your Mac (avoid installing the software on the formatted drive so that you don’t overwrite the files you want to recover).
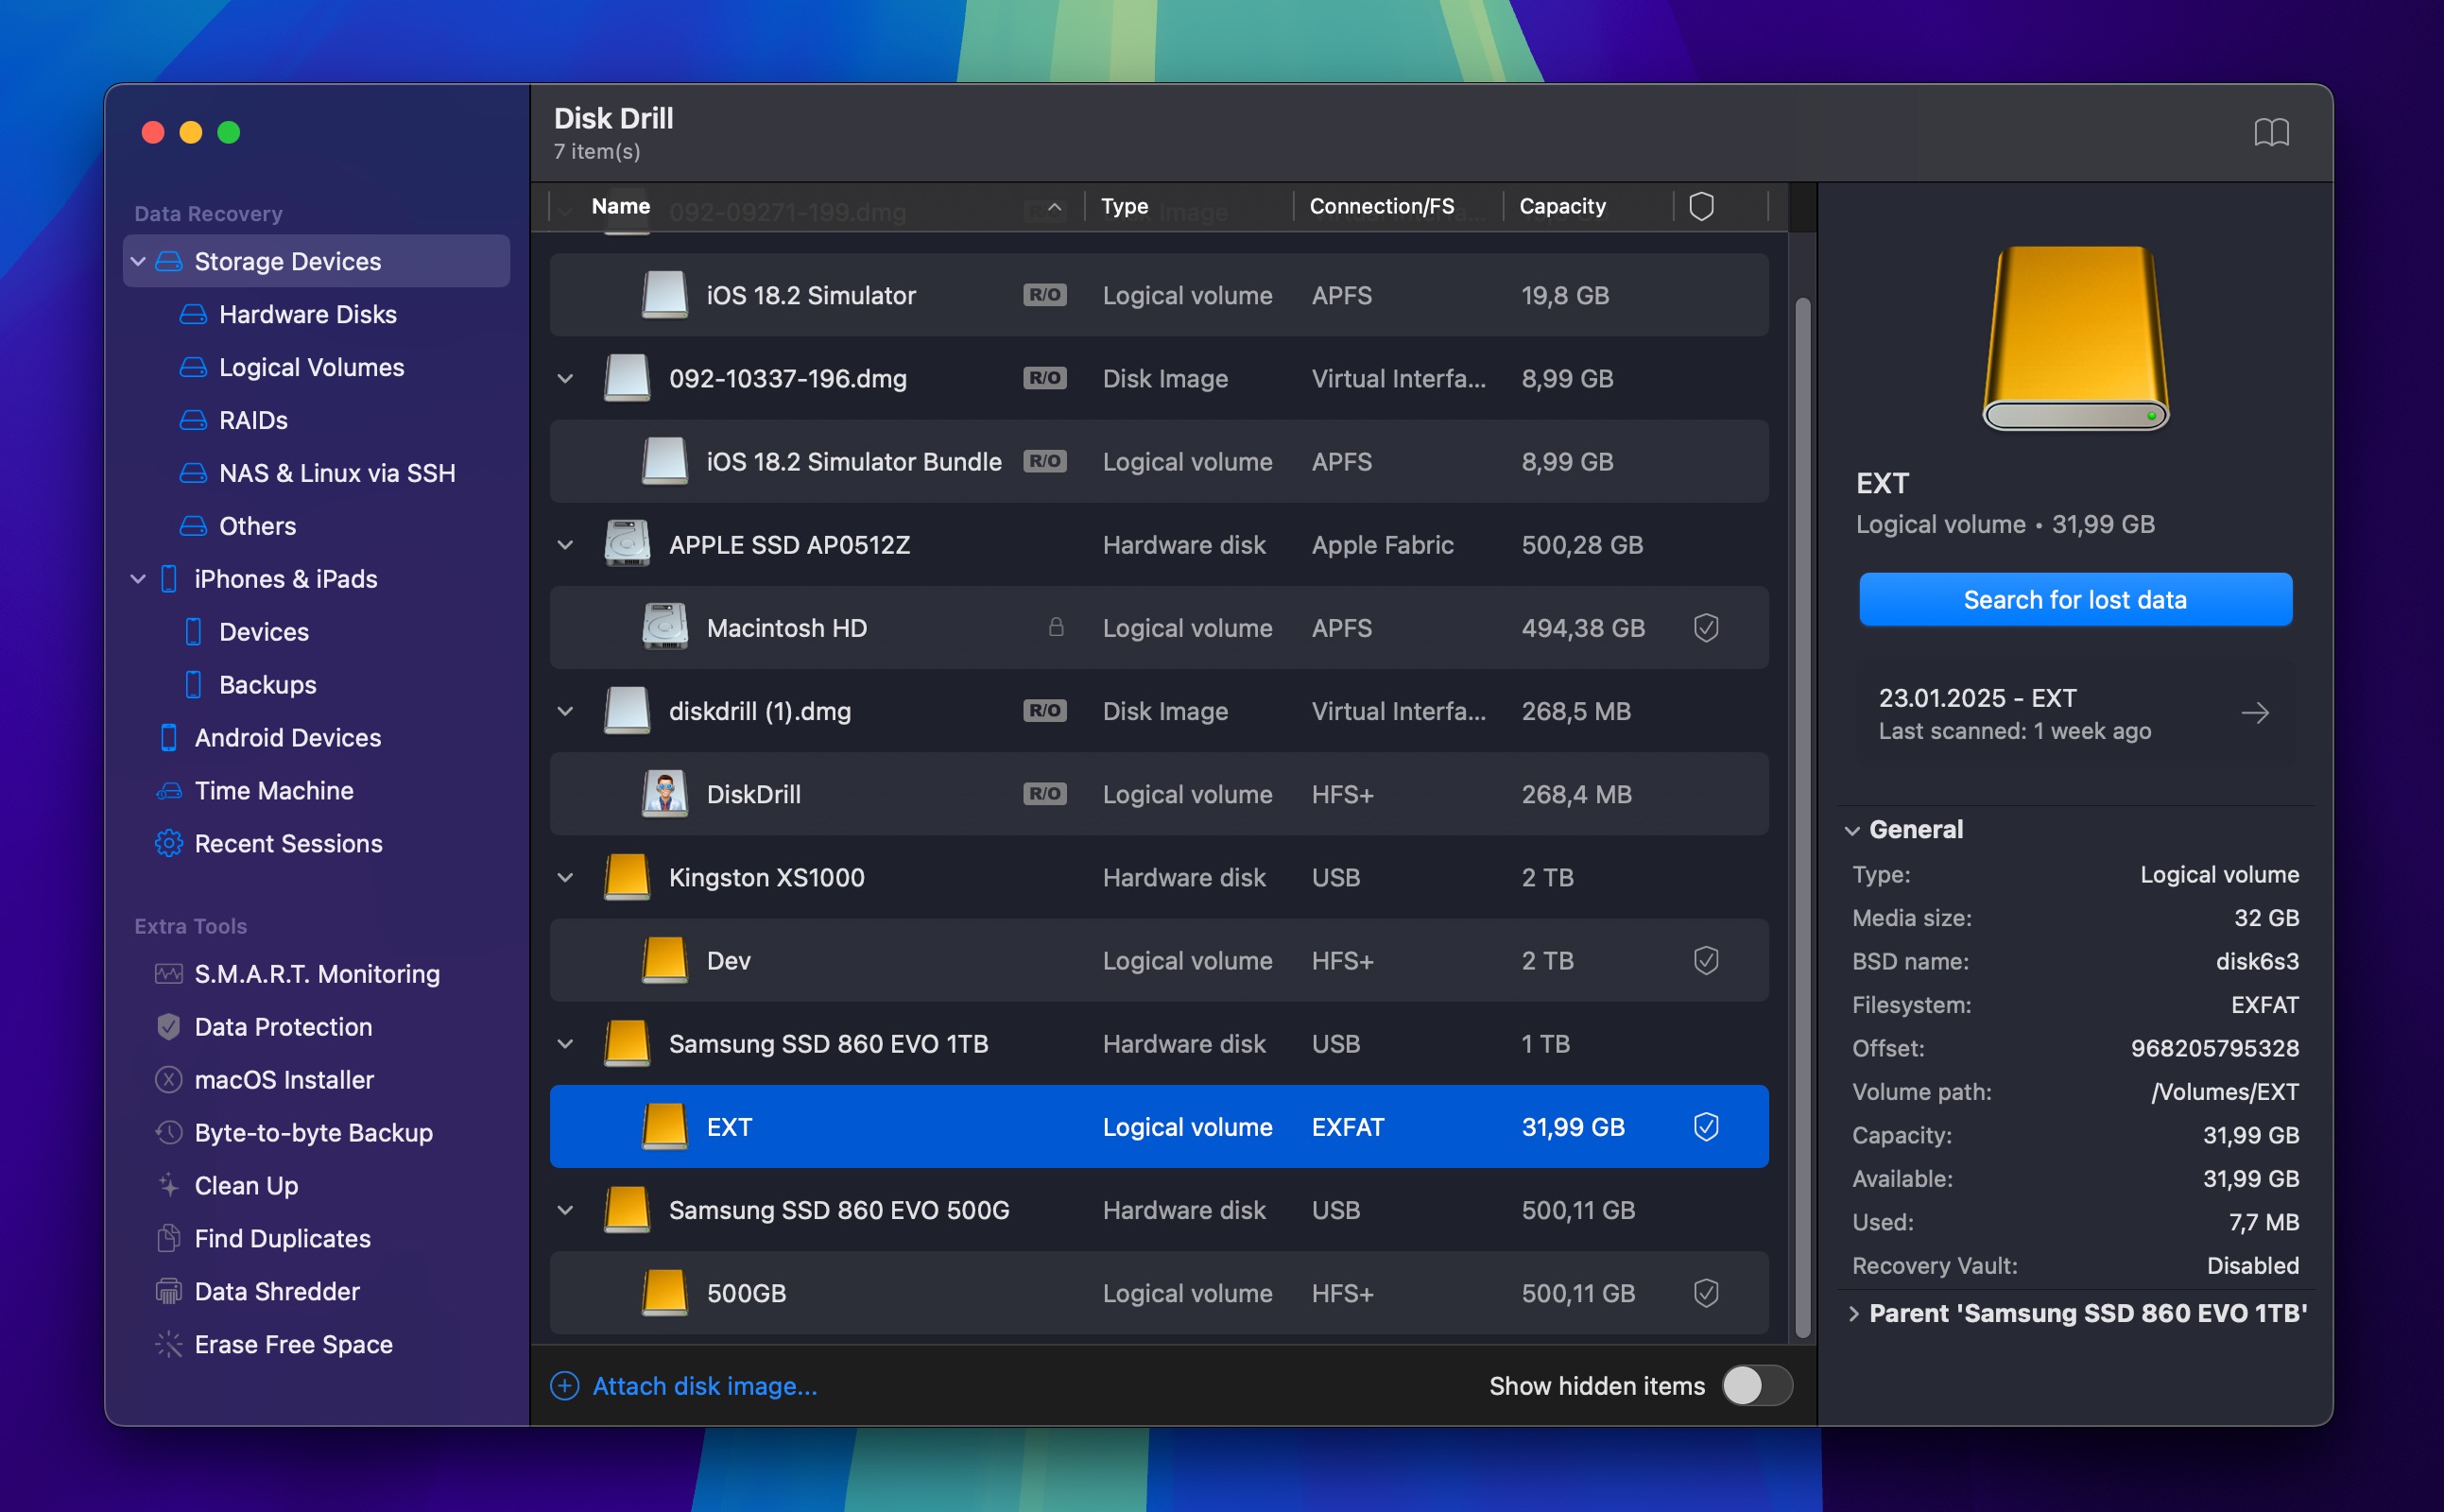
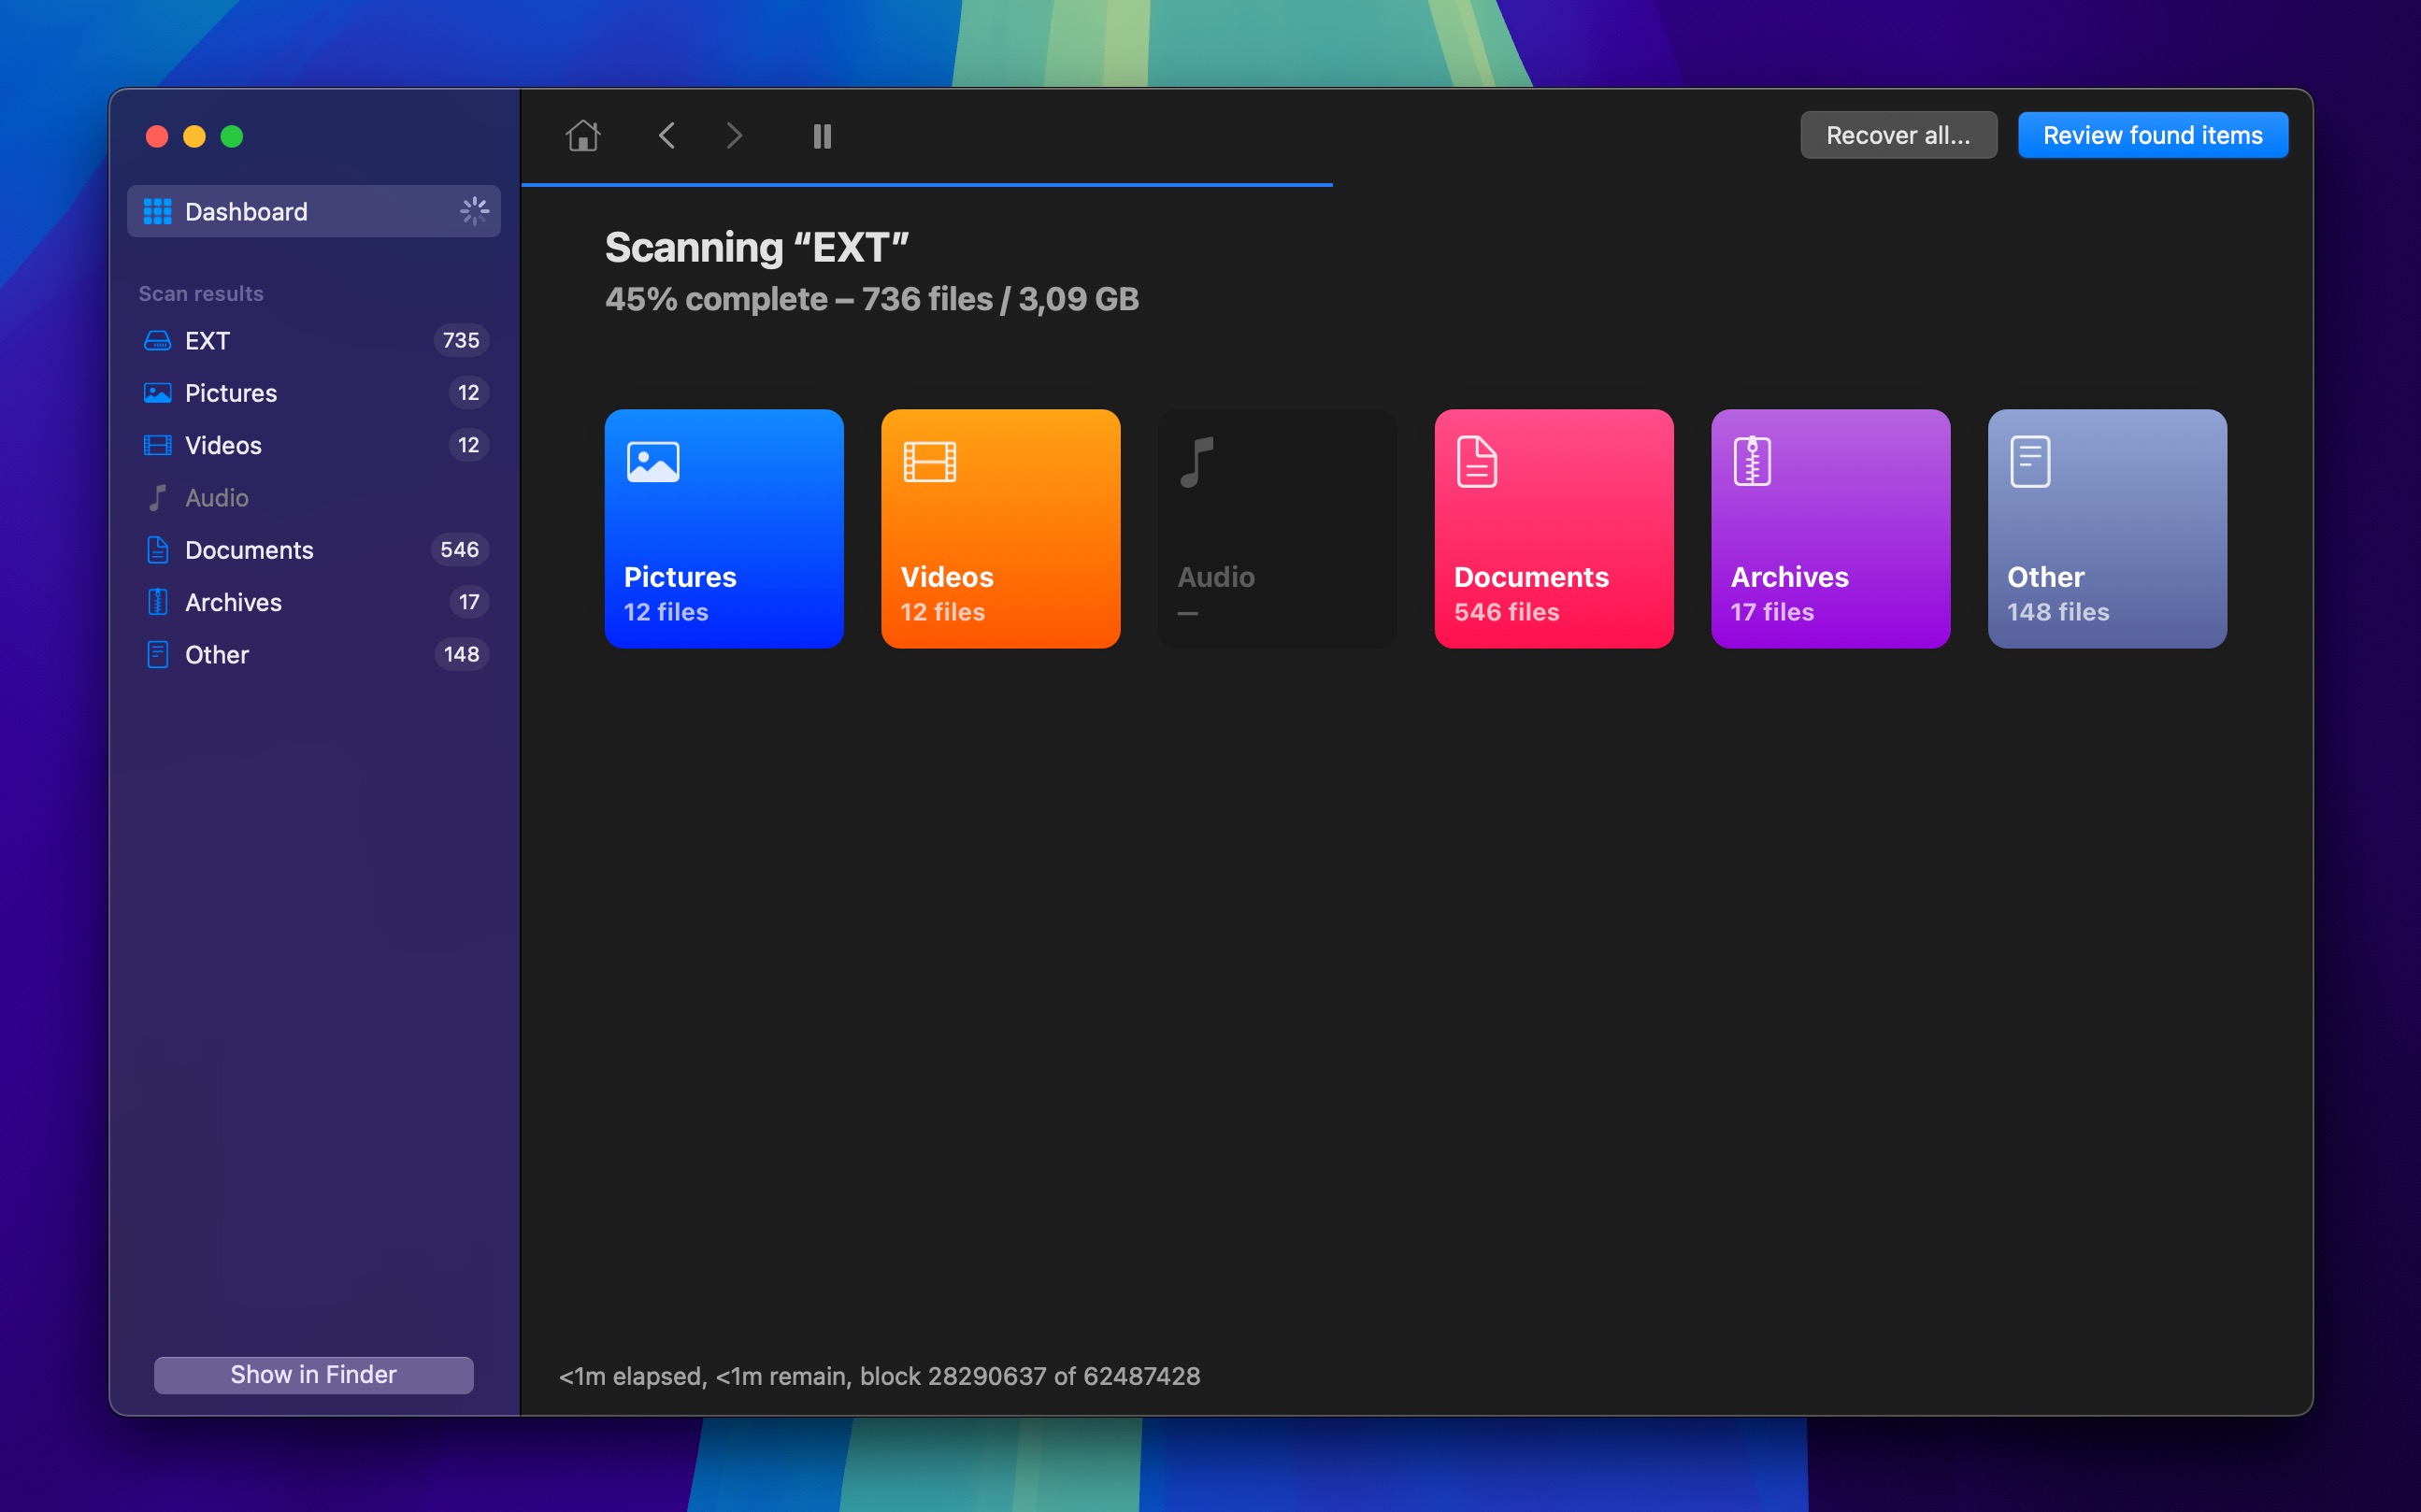
- Connect the formatted external hard drive to your Mac and launch Disk Drill. Select the drive from the list of available storage devices and click Search for lost data to begin scanning.
- The scanning process duration depends on a bunch of factors, including the size of your drive (larger drives take longer), the drive’s physical condition (drives with bad sectors scan more slowly), and the connection type (USB 3.0 or Thunderbolt is faster than USB 2.0).
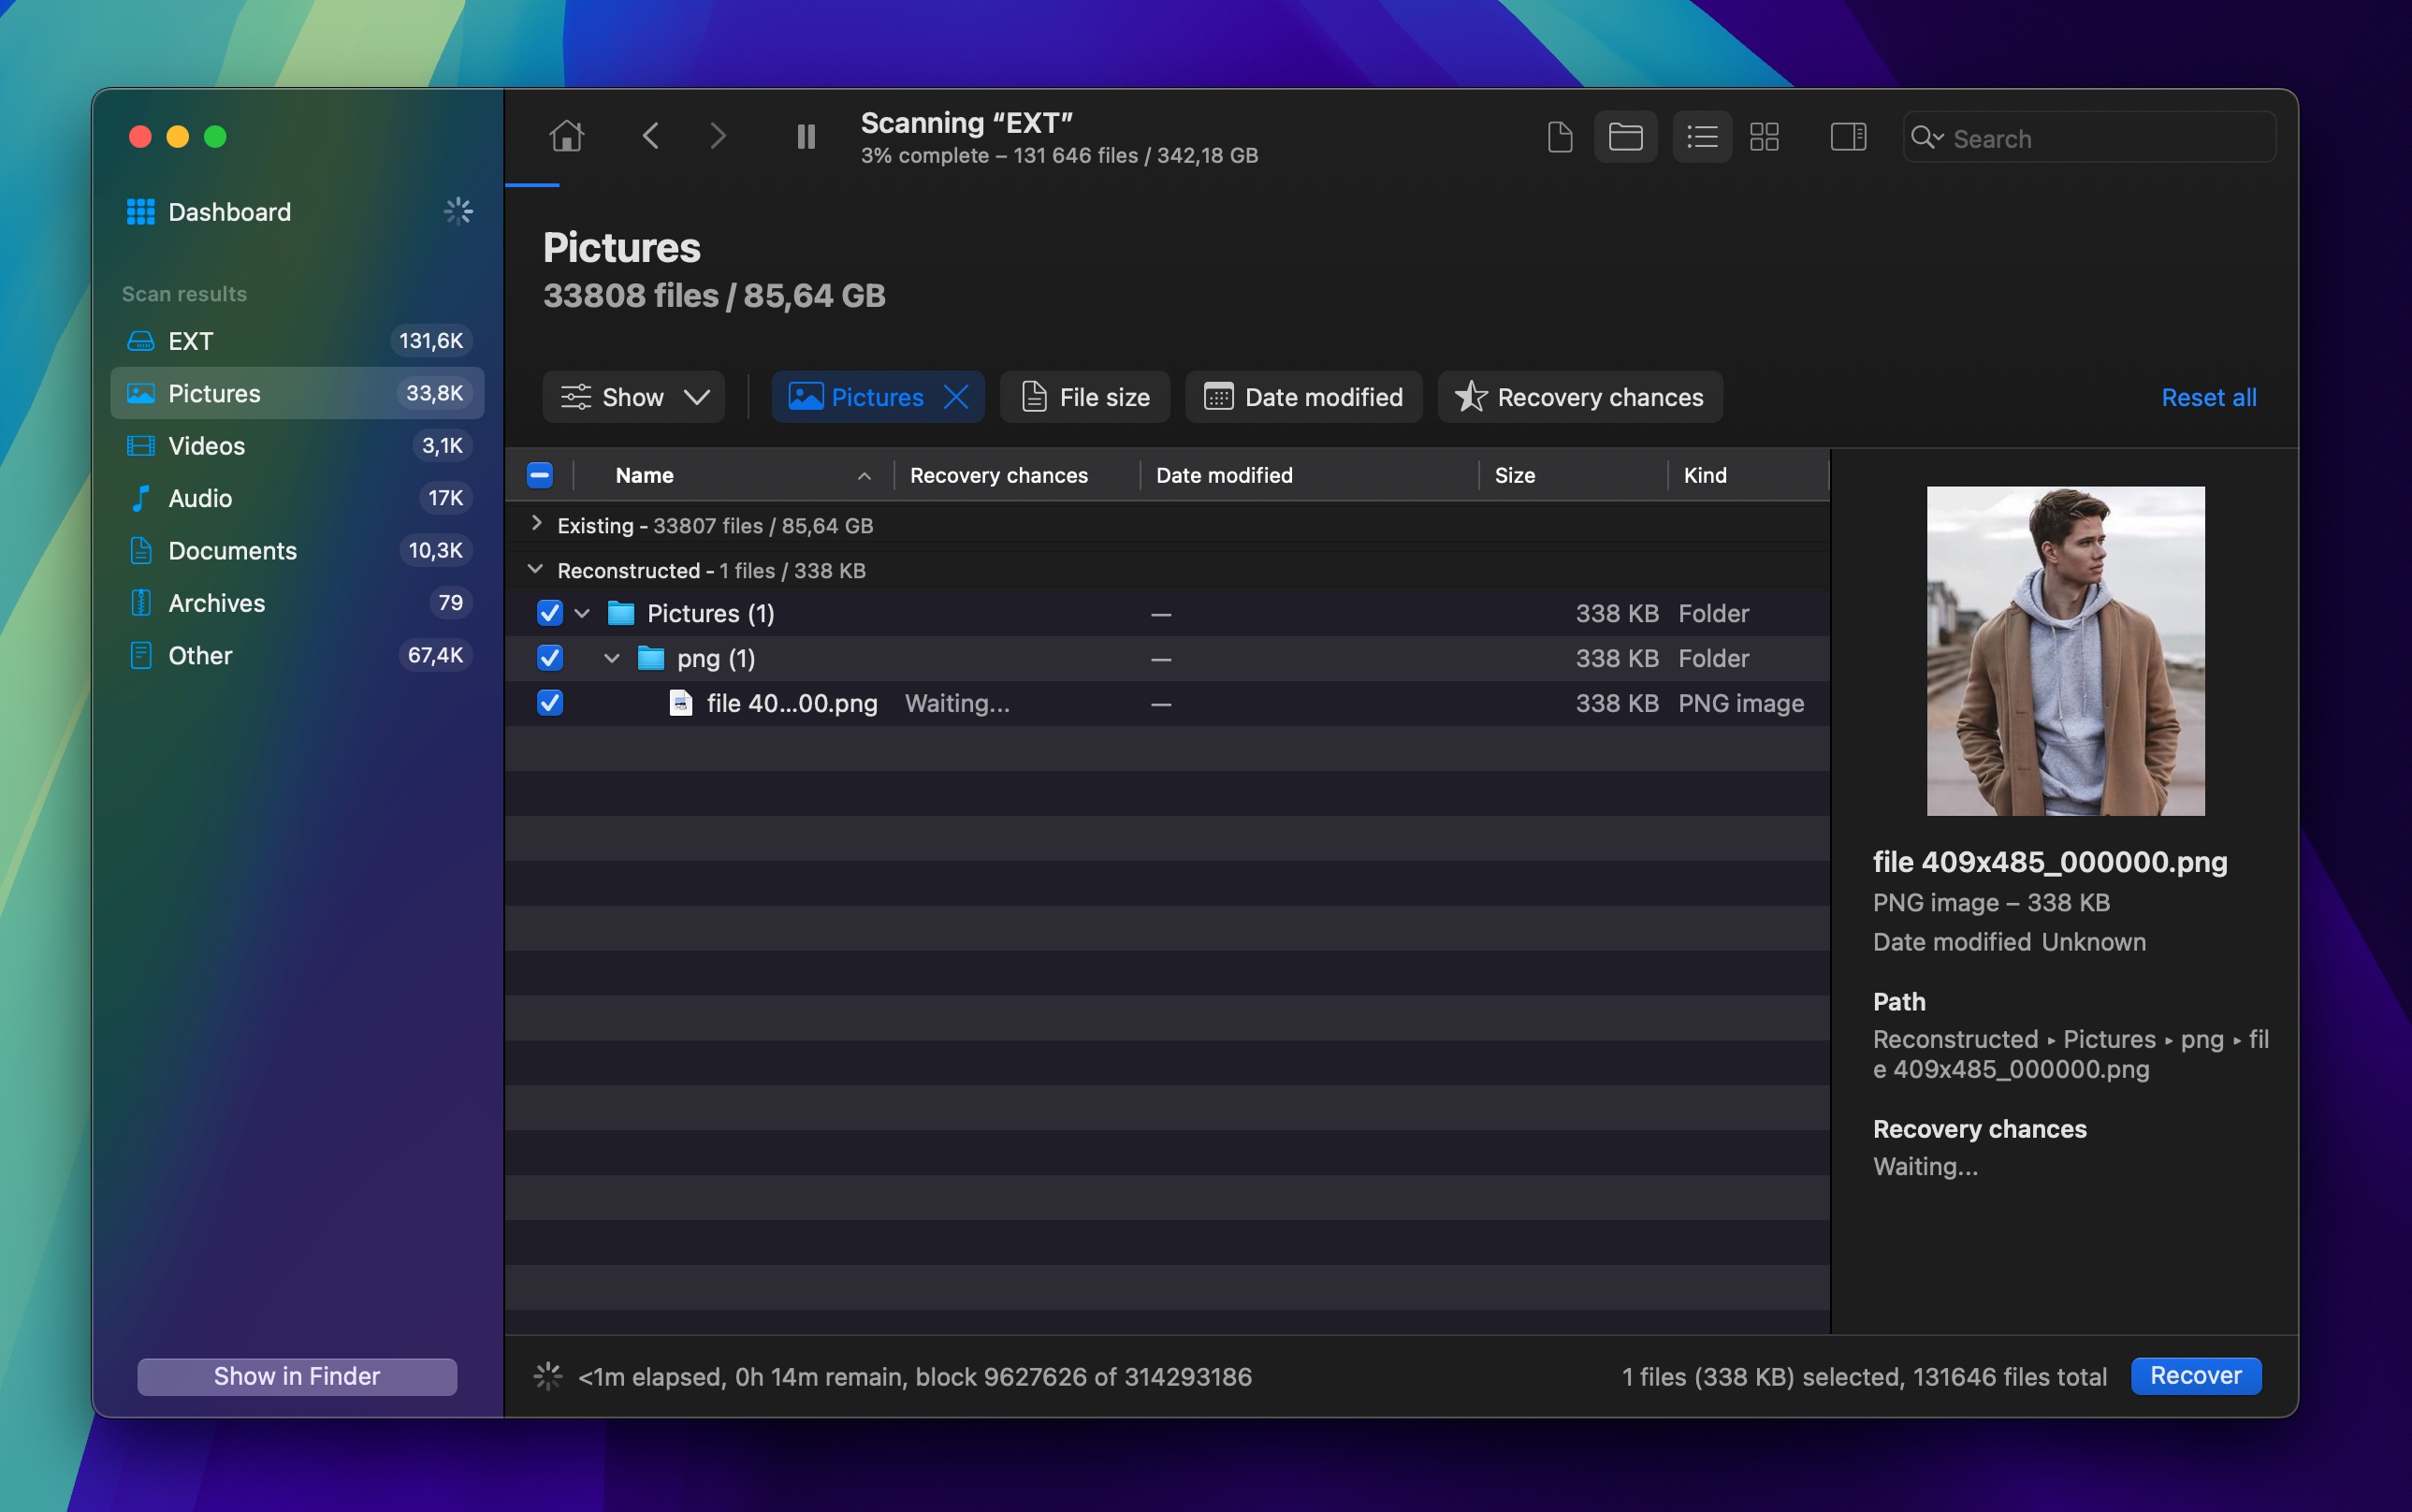
- Once scanning is complete, you can browse through the recoverable files. Disk Drill’s preview feature allows you to see the contents of many file types before recovery. You can also activate all kinds of filters to reduce the number of displayed files so that only the most relevant ones are visible.
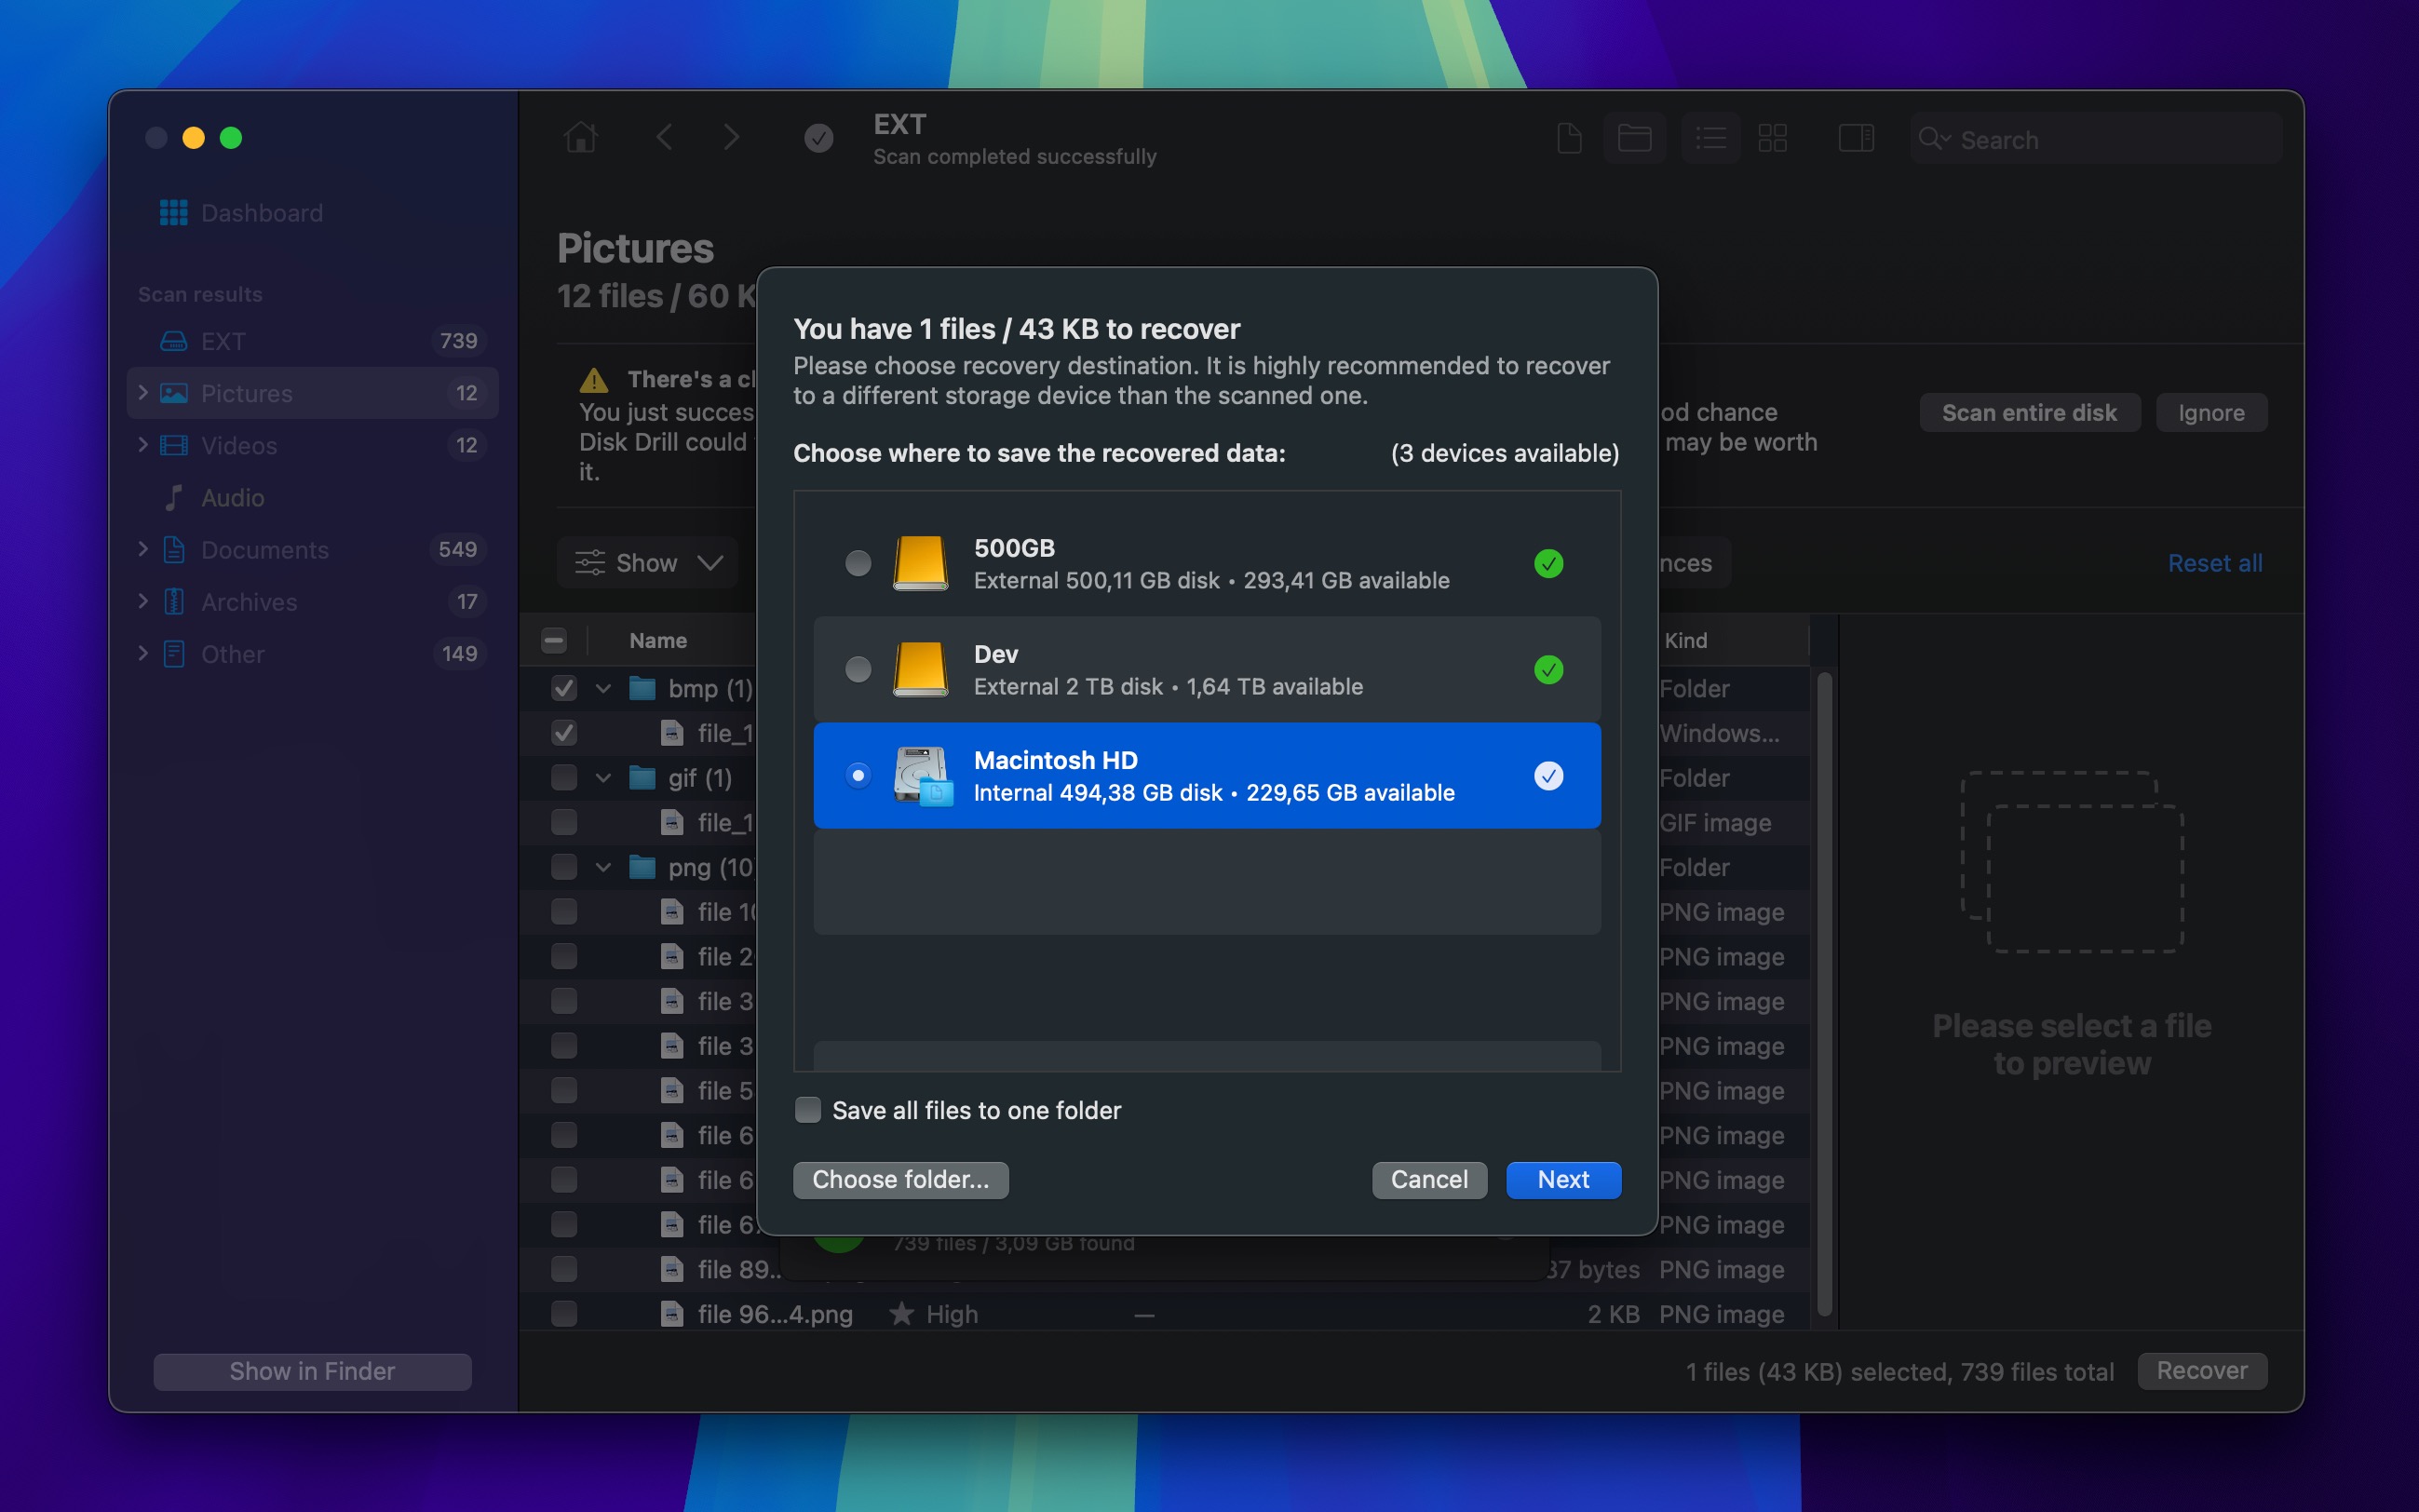
- Finally, select the files you want to recover and click the Recover button. Choose a recovery destination that’s different from the drive you’re recovering from to prevent overwriting potentially recoverable data.
Disk Drill offers a free version that allows you to scan and preview recoverable files, but recovering the data from an external hard drive on a Mac requires upgrading to the Pro version.

When It’s Better to Contact a Recovery Center?

Even with amazing data recovery tools like Disk Drill, there are times when recovering data from an external hard drive on a Mac becomes impossible without professional intervention, such as:
- 🔨 Physical damage: If your external hard drive has suffered physical harm (exposure to water, fire, or significant impact), specialized equipment and expertise are required to safely recover data, especially if the drive isn’t recognized by macOS anymore.
- 💵 Extremely valuable data: When the lost data is of paramount importance (maybe business data is involved), entrusting the recovery process to professionals minimizes the risk of permanent loss.
- 😭 Unsuccessful attempts: After several unsuccessful attempts, it’s often best to let professionals have a go at it instead of continuing to bang your head against the problem and potentially make it worse.
In situations like the ones outlined above, reaching out to a reputable data recovery service is a smart move. For instance, CleverFiles offers a Data Recovery Center equipped to handle complex data loss situations, and it provides a no-obligation quote, so there’s no reason to worry about spending a lot of money without getting any data in return.
Quick Summary
Even if you’ve never done it before, there’s no reason to feel intimidated by external hard drive formatting on Mac. You just need to remember the following key information:
- Match the file system to your workflow: Use APFS for Mac-only use with modern features, ExFAT for cross-platform flexibility, or FAT32 when maximum device compatibility matters more than file size limits.
- Consider partition schemes: GUID Partition Map works best for modern systems, while MBR might be necessary for compatibility with older devices or specific use cases.
- Check the drive’s health: Before you format an external hard drive, it’s a good idea to check its health using a S.M.A.R.T. monitor tool so that you know if it’s still in good shape to be used for many more months or even years.
- Back up before formatting: Always create a safe copy of important data before reformatting. While recovery of formatted data is often possible, the results are never guaranteed, so it’s better to be safe than sorry.
- Perform a secure format before selling: If you’re formatting an external hard drive on Mac to sell it, then a regular format won’t do as your data could be recovered. A secure format is what you need.
Knowing how to properly format an external hard drive on a Mac is a valuable skill for any macOS user. By carefully selecting the best format for your external hard drive, backing up your important data beforehand, and understanding the steps involved, you can prepare your external hard drive for whatever purpose you need.
FAQ
To properly format an SSD for Mac, follow these steps:
- Connect your SSD to your Mac.
- Open Disk Utility from Applications > Utilities.
- Select the SSD in the sidebar (the top-level device, not just a volume).
- Click the Erase button in the toolbar.
- Name your drive and select APFS (recommended for SSDs on macOS High Sierra or later). For Scheme, choose GUID Partition Map.
- Click Erase to begin formatting.
To securely wipe a Mac hard drive before selling:
- Back up any important data you want to keep.
- Connect the drive, open Disk Utility (Applications > Utilities), and select it from the sidebar.
- Click Erase, then choose a file system like APFS or Mac OS Extended (Journaled).
- Before proceeding, click Security Options and select a multi-pass overwrite.
- Hit Erase to start. Wait for the process to finish (might take some time).
To format an external hard drive for Mac Time Machine:
- Connect your external drive to your Mac.
- Open Disk Utility and select the drive in the sidebar.
- Click Erase and choose APFS as the file system for macOS Big Sur and later and Mac OS Extended (Journaled) for older macOS versions.
- Use the GUID Partition Map scheme for compatibility with modern Macs.
- Click Erase. Once formatted, go to System Settings > Time Machine and select the drive as your backup disk.
If the drive will only be used with Mac computers, APFS is the optimal choice for SSDs and newer Macs (running High Sierra or later), while Mac OS Extended (HFS+) works well for traditional hard drives or older Macs. If you need to use the drive with other operating systems like Windows or Linux, exFAT is the recommended format.
Yes, they can be. Any external hard drive or storage device can be formatted to work with your Mac.
- Plug the storage device into your Mac.
- Launch Disk Utility.
- Select the hard drive from within Disk Utility.
- Select the data format that you would like to format it to.
- Click on erase.
The brand of the external hard drive won’t have an effect on how it’s formatted. It can be formatted just as you would any other hard drive.
- Plug the storage device into your Mac.
- Launch Disk Utility.
- Select the hard drive from within Disk Utility.
- Select the data format that you would like to format it to.
- Click on erase.