A corrupted hard drive on a Mac can suddenly turn a normal day into a crisis. As one Reddit user described their experience:
“My external hard drive suddenly disconnected and won’t reconnect. It doesn’t show up in Disk Utility, though it appears in system reports. There’s about 8 years of irreplaceable photos stored there – my only backup after my phone was stolen. This is a truly devastating situation.”
If you’re facing a similar problem with a corrupt Mac hard drive, then you need to address it as soon as possible otherwise important data may become permanently lost. This guide will help you understand what’s happening and explain both how to fix a corrupted hard drive on Mac and recover missing data from it.
What Are the Symptoms of a Corrupt Mac Hard Drive?
A corrupted Mac hard drive can start showing a variety of more or less obvious symptoms, with some associated only with internal drives and some only with external drives.
Note: For situations where your Mac won’t boot at all, you might need advanced techniques to recover data from a dead MacBook.
| Symptom | Explanation | Recommended solutions |
| You can’t access or transfer files from the corrupted drive | The operating system can’t properly locate or read certain file segments on the corrupted drive. | |
| Applications unexpectedly quit | The file system can’t read or write data properly, causing apps to freeze or crash without warning. | |
| Frequent system freezing, slow boot times, or frequent restarts | The Mac struggles to load system files or apps from a damaged disk, leading to freezes or the spinning wheel. | |
| Mac refuses to start | The corruption has spread to essential system files, preventing a normal boot. | |
| Disk name is grayed out in Disk Utility | The drive is recognized by macOS but is unmountable or inaccessible due to file system corruption. | |
| Finder or Desktop not showing external drives | Sometimes external disks are hidden by Finder settings, or the drive is unmountable if badly corrupted. | |
| Repeated “Disk Not Ejected Properly” errors | The drive may disconnect randomly due to power issues, cable faults, or disk corruption causing sudden ejections. | |
| Strange noises or excessive vibrations from a mechanical HDD | Clicking, grinding, or buzzing from a traditional spinning hard drive can indicate physical damage or failing internal components (less applicable to SSDs). |
|
| S.M.A.R.T. errors or warnings | The drive’s built-in diagnostics are reporting bad sectors, reallocated blocks, or other hardware-level problems. |
5 Important Steps Before Fixing a Corrupted Mac Hard Drive
Whether you repair the corrupted hard drive or retrieve your information first matters. I always recommend that your first priority should be to recover data from a corrupted external or internal hard disk on a Mac before attempting repairs of your Mac corrupted hard drive because the remaining lifespan of the drive is unpredictable.
Step 1: Recover Data from a Corrupted Mac Hard Drive
As explained above, your first step should be to recover damaged hard drive Mac data. To do that, you need data recovery software capable of two things:
- 🗃️ Scanning the drive’s file system: The data recovery software must be able to examine the existing directory structure to locate files that are still referenced in the file system but may not be accessible through normal means.
- 📄 Looking for individual files based on their signatures: When a file system is severely corrupted, the directory information may be completely destroyed. In these cases, the software must bypass the file system entirely and scan the raw data blocks, looking for recognizable file headers and patterns that indicate the beginning and end of files.
My favorite data recovery software for recovering data from corrupted internal and external hard drives on Mac is Disk Drill. With it, you can scan all commonly used Mac, Windows, and even Linux file systems and recover hundreds of file types based on their unique signatures.
Disk Drill also stands out with its excellent usability and features that make the recovery of a corrupted Mac hard drive easier. For example, the software automatically continues scanning if your drive experiences connection problems or intermittent disconnections (a common issue when dealing with severe corruption), and it can also show the recovery chances of each found file and even preview many multimedia file types so that you can visually confirm their recoverability.
Here’s how to use Disk Drill to recover data from a corrupted external hard disk on Mac (the process is the same for internal drives):
- Download and install the free version of Disk Drill on a healthy drive.
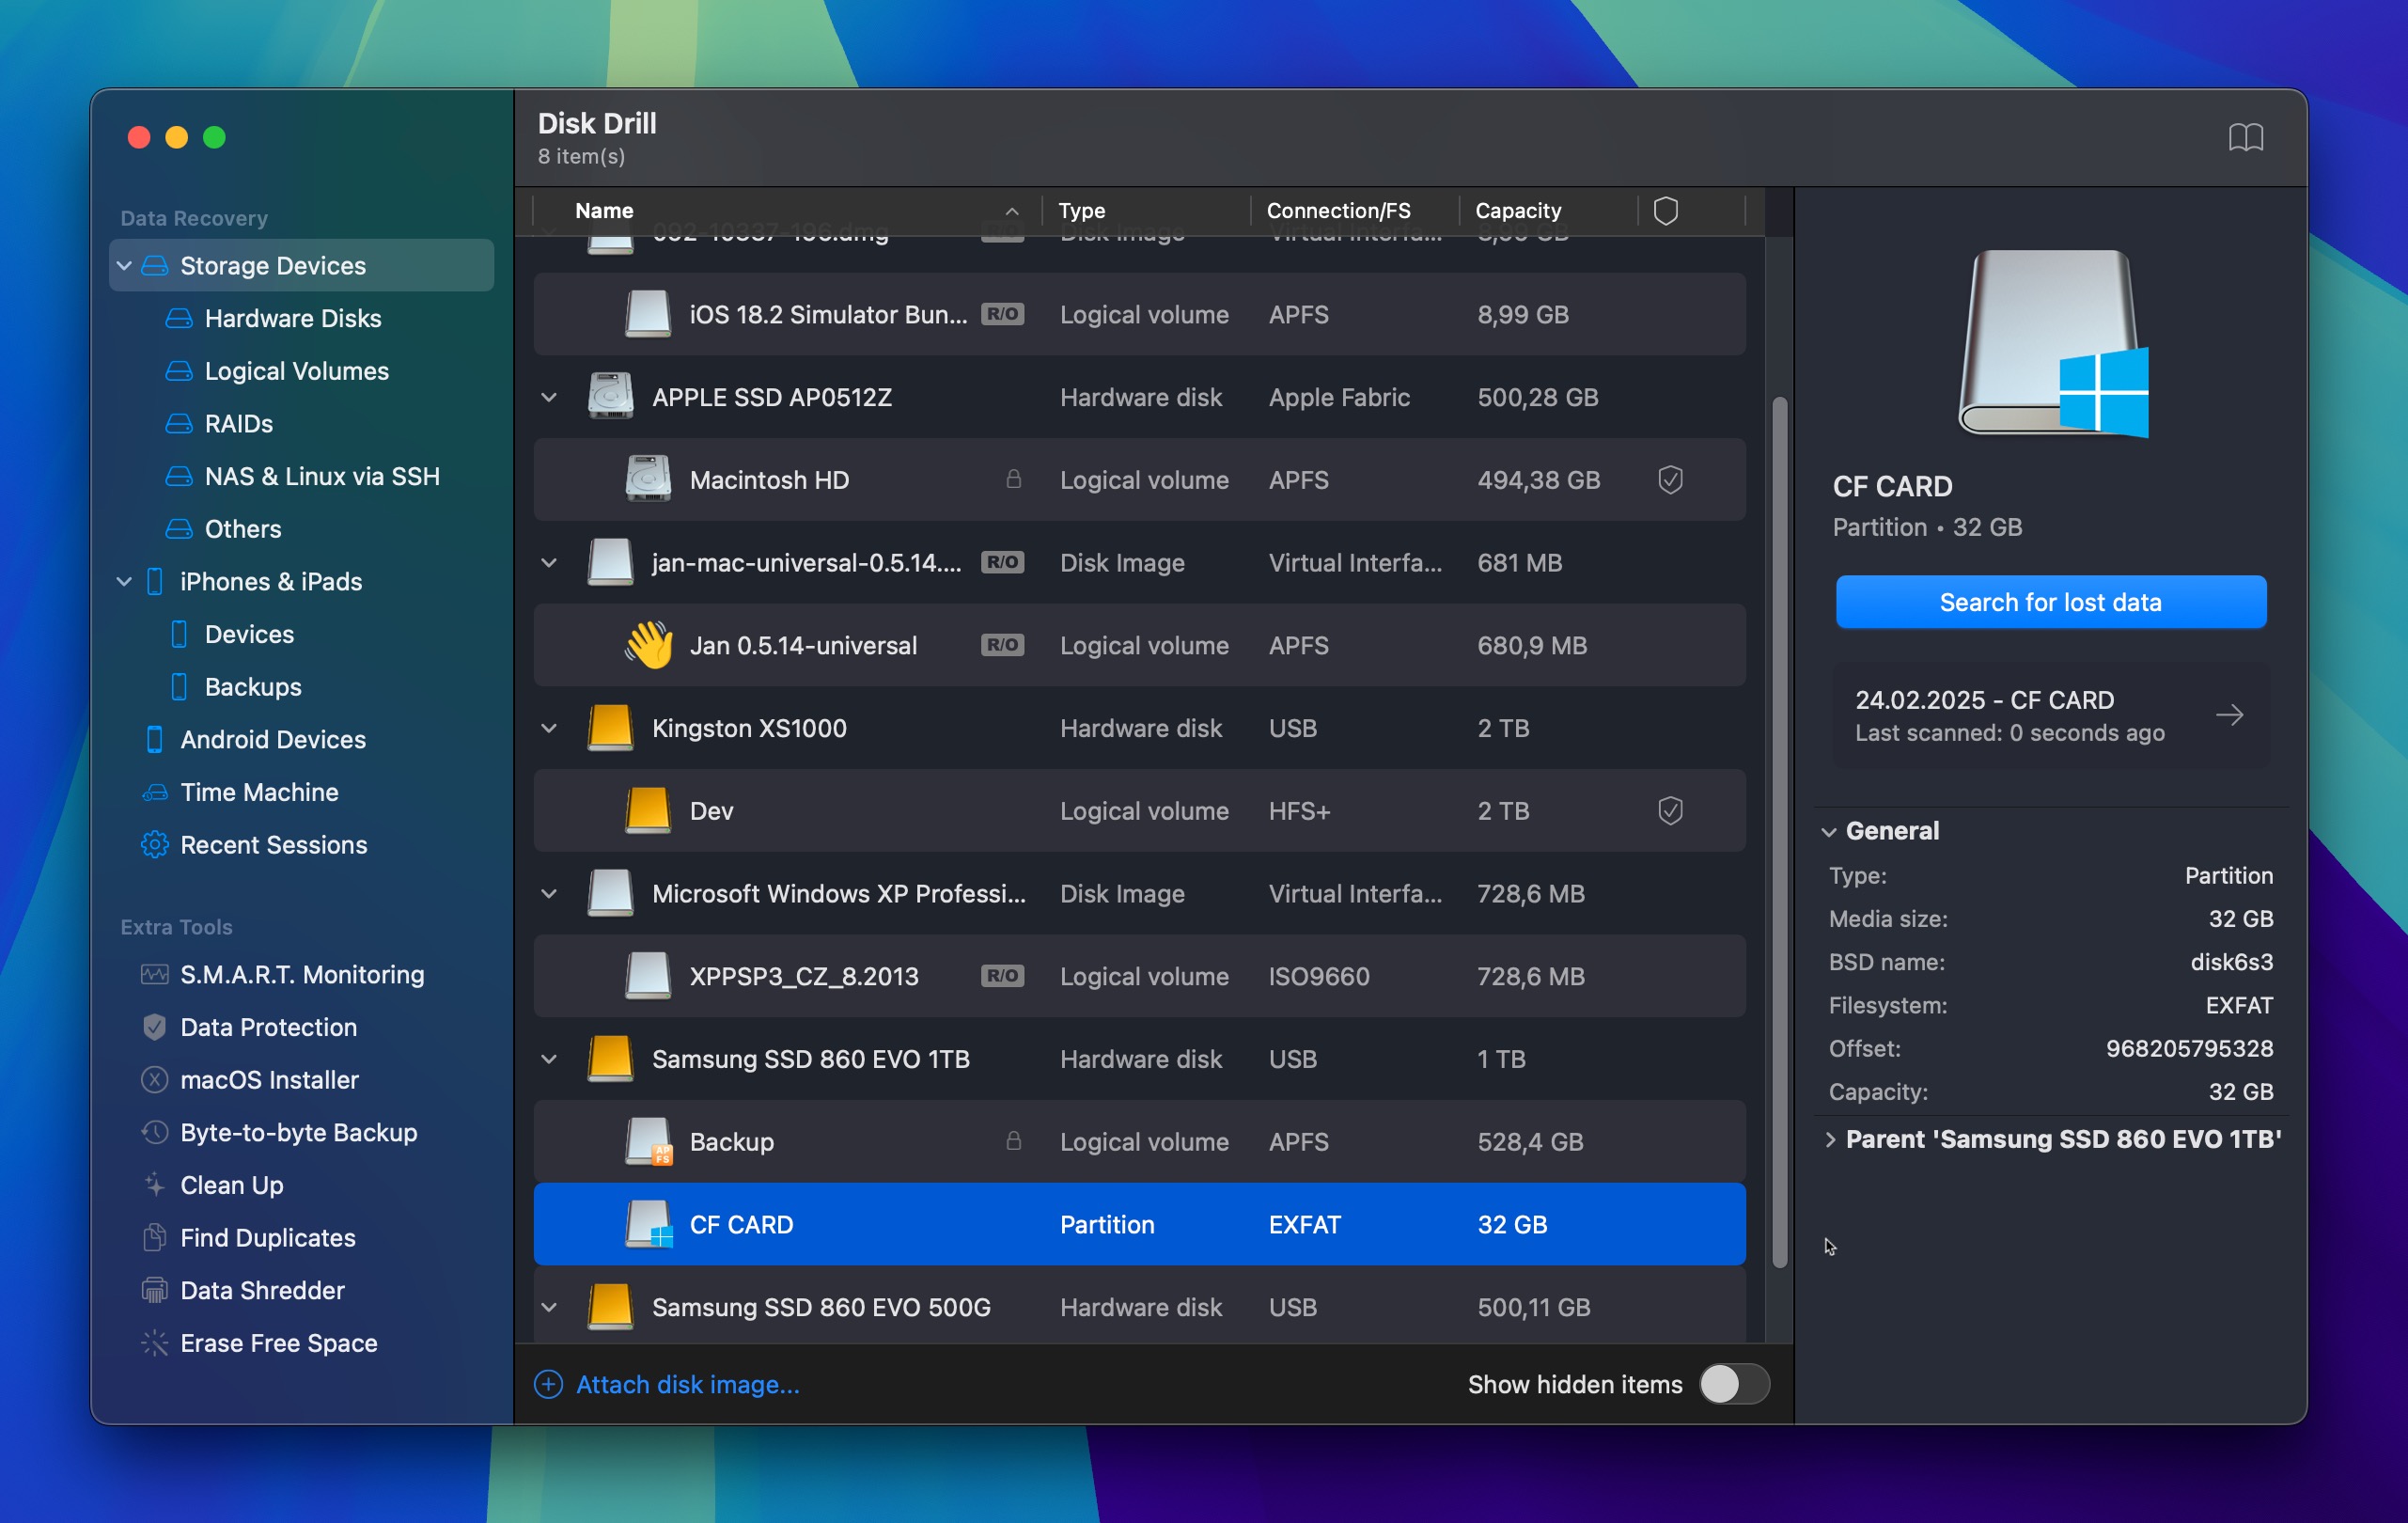
- Launch the software, select the corrupted drive, and click Search for lost data.
- Wait for scanning to finish. The process can take minutes to hours, depending on drive size and speed.
- Go through found files and select everything you want to recover. You can preview files in Disk Drill, sort them by recovery chances, apply various filters, and more to quickly find what you’re looking for.
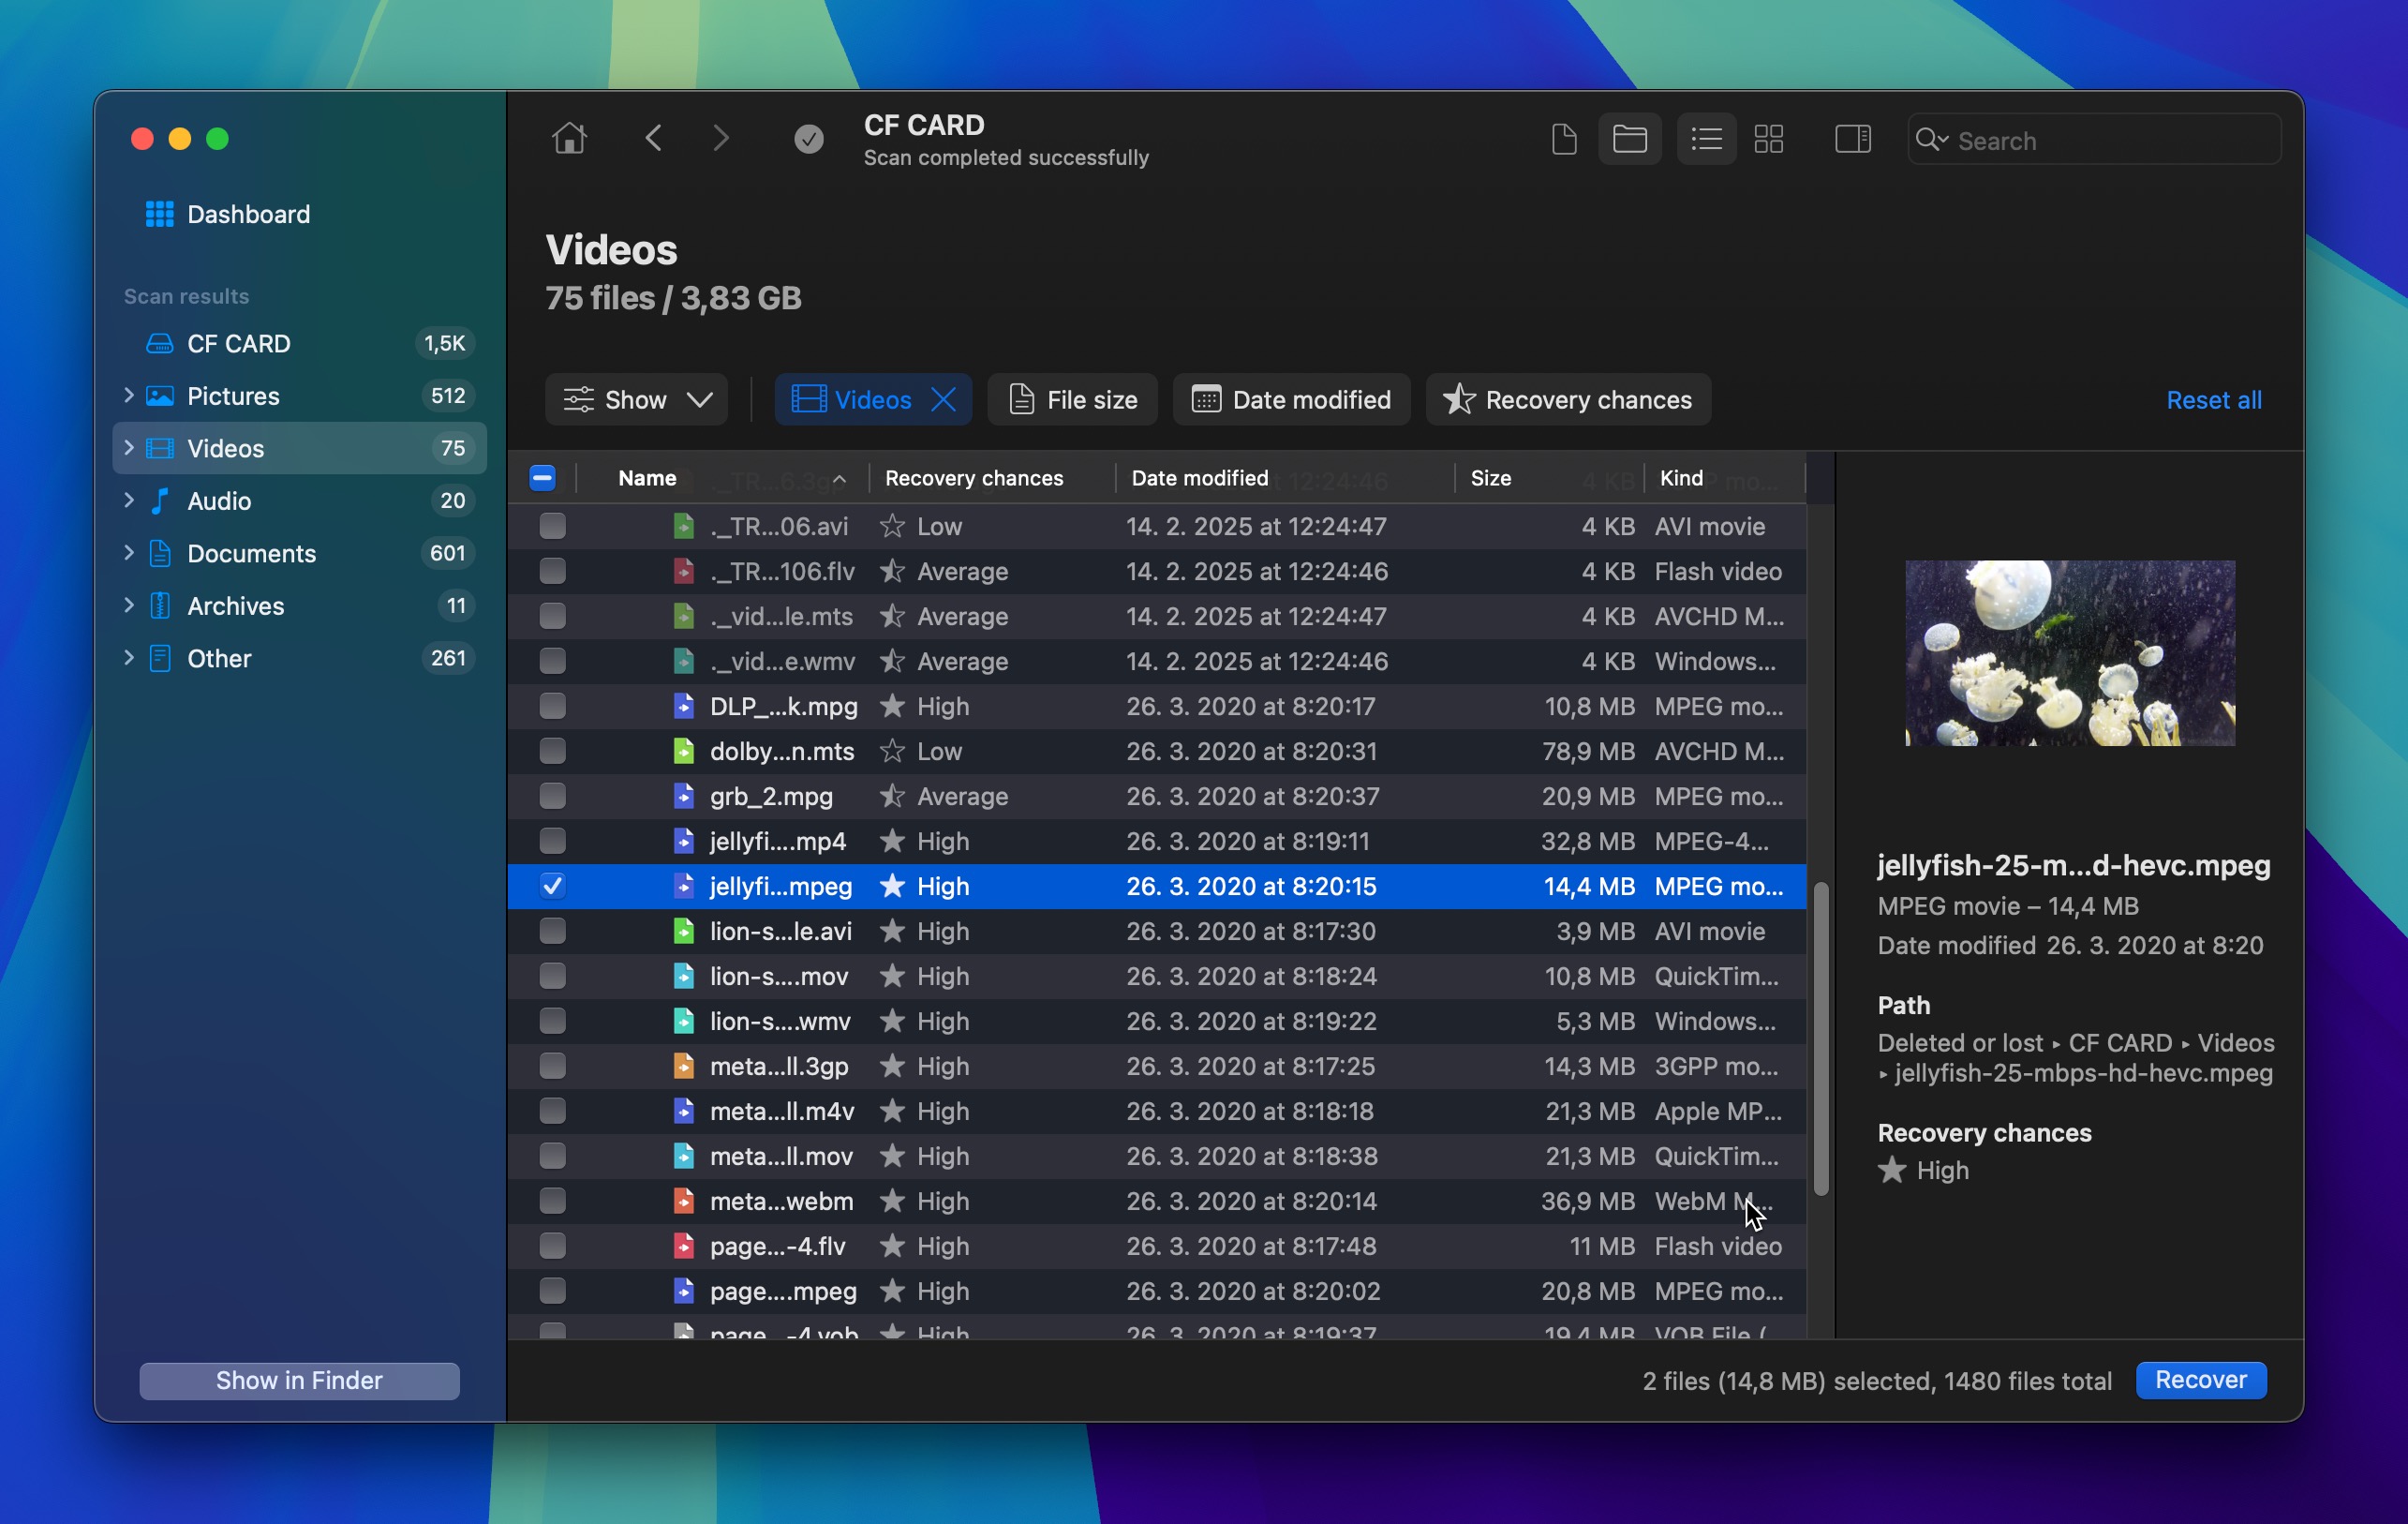
- With your files selected, click the Recover button and point Disk Drill to a healthy storage device.
Step 2: Try Connecting the Drive to Another Computer
Sometimes what appears to be a corrupted external hard drive Mac issue might actually be a problem with your Mac itself, so it’s worth verifying whether the drive works properly on other systems.
In fact, there are many users who have reported success with this method. “I have an external hard drive that wasn’t showing up on my Windows laptop, but when I tried it on a Mac, it worked perfectly,” said one Reddit user. Similarly, HP support forums document cases where drives boot in one laptop but not another.
Here’s how to test your external drive on another computer:
- Safely eject the drive from your Mac (if it’s recognized).
- Unplug the drive from your Mac.
- Connect it to another computer — either another Mac or even a Windows PC (you might need to use software like APFS for Windows if the drive is using a file system that’s not natively supported by Windows).
- Check if the drive is accessible and the files can be read.

If the drive works correctly on another computer, the issue likely lies with your Mac, such as a faulty port, insufficient power delivery, or some other hardware-related problem.
Step 3: Connect the Drive Directly (Instead of Using a USB Hub)
If you’re using a USB hub, that’s another potential source of failure. You may be dealing with a faulty USB hub, while the drive itself is fine, and so is your Mac. Simply unplug the drive from the USB hub you’re using, and try connecting it to a USB port on your Mac directly.
If that doesn’t work, try switching to a different USB port. If one of those two fixes work, you’re likely dealing with a damaged USB hub or USB port on your Mac. Try replacing your USB hub with a different one and see if that fixes the issue.
Step 4: Check Your Finder Settings
There’s a setting in Finder which can make external drives invisible. You may have this setting enabled without realizing it, which could lead you to believe that your drive is corrupted. To check if that’s the issue, try these steps:
- Launch Finder.
- Go to Finder -> Preferences.
- From the list of checkboxes under “Show these items on the desktop:”, make sure External disks is checked.

- Close Finder and reopen it.
- Check to see if your disk shows up now.
If that fixes your issue, it means the drive was not damaged in the first place.
Step 5: Reboot in Safe Mode
Safe Mode can allow you to boot your computer with minimal extra software and utilities, and is a great way to troubleshoot various issues. It can also help you access a corrupted Mac hard drive in some cases. Simply do the following:
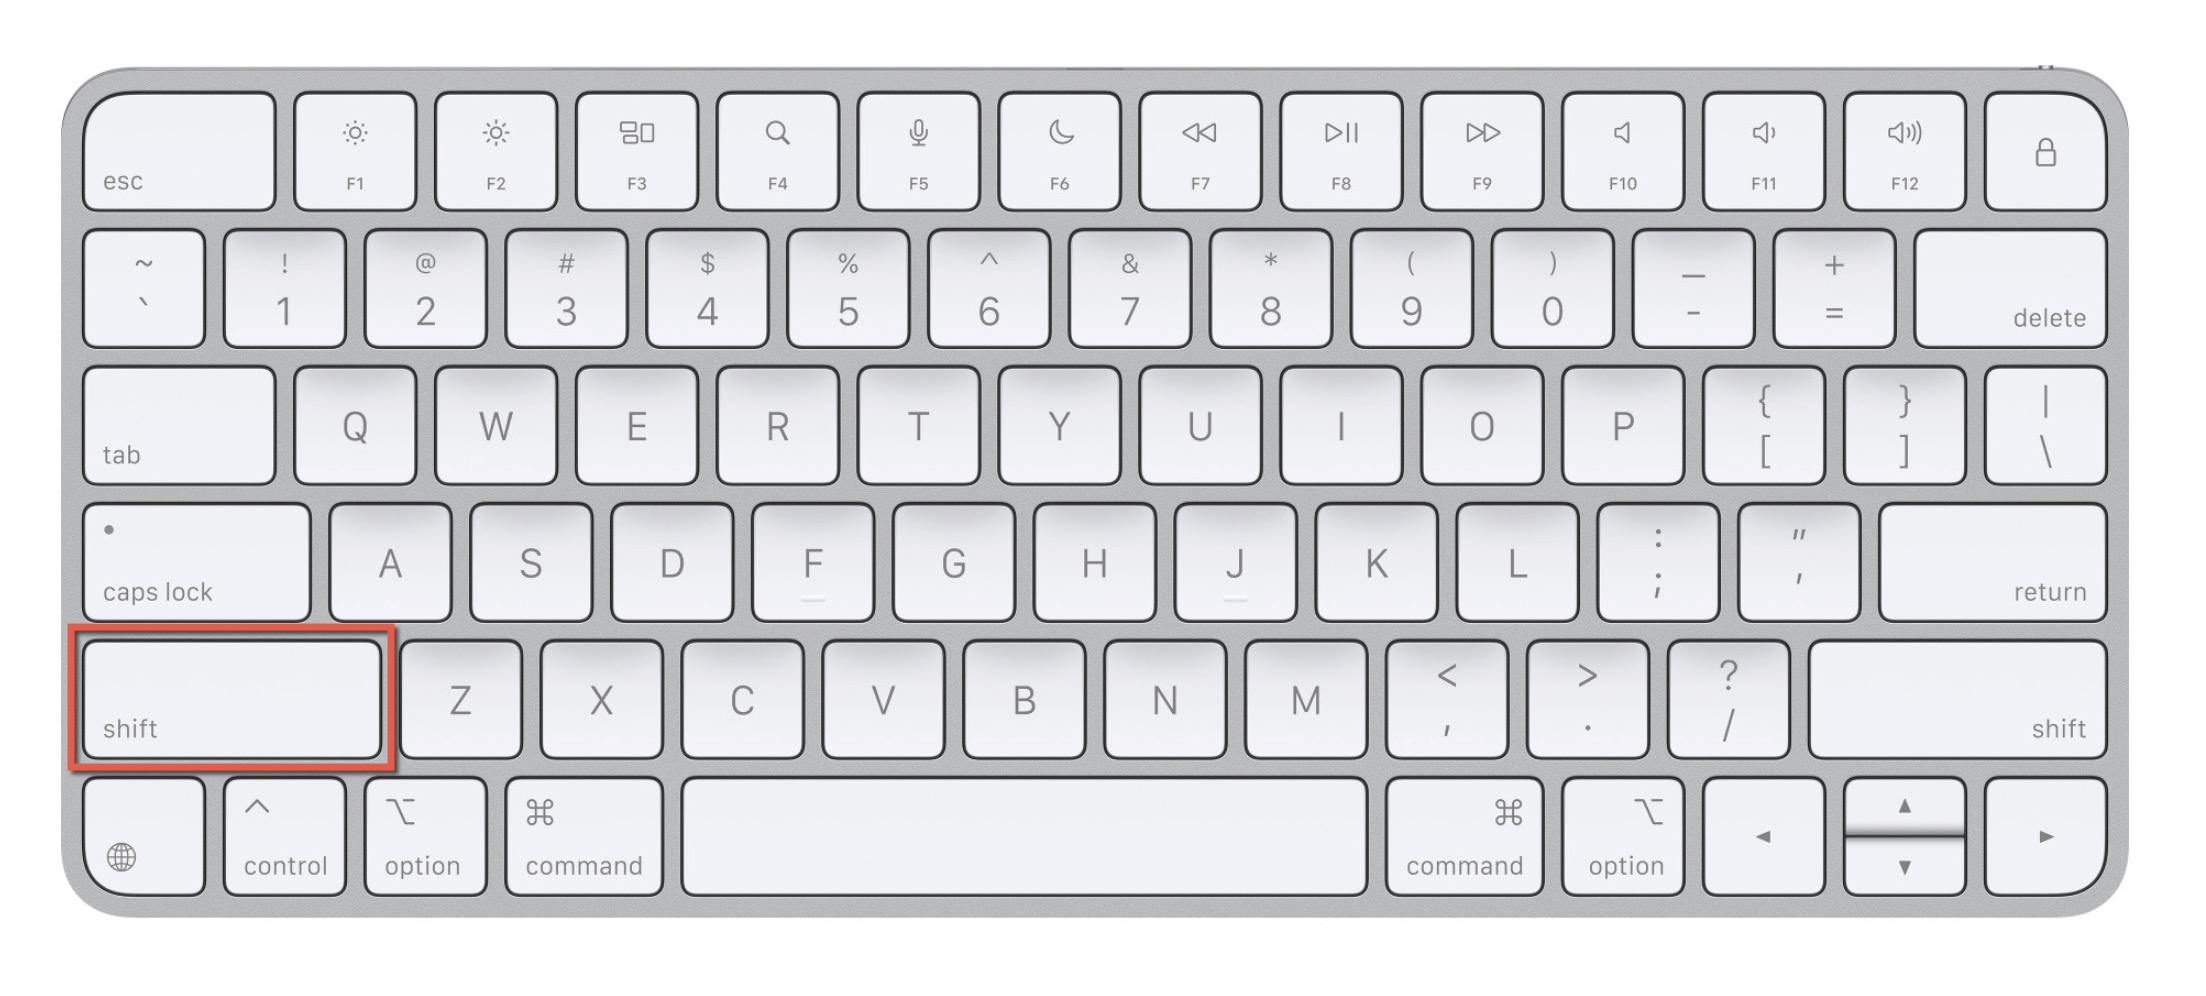
If you have an Intel chip:
- Turn off your Mac.
- Wait for 10 seconds.
- Turn on the Mac and keep the Shift key pressed through the boot-up sequence.
If you have an Apple chip:
- Turn off your Mac.
- Wait for 10 seconds.
- Turn on the Mac and keep the power button pressed.
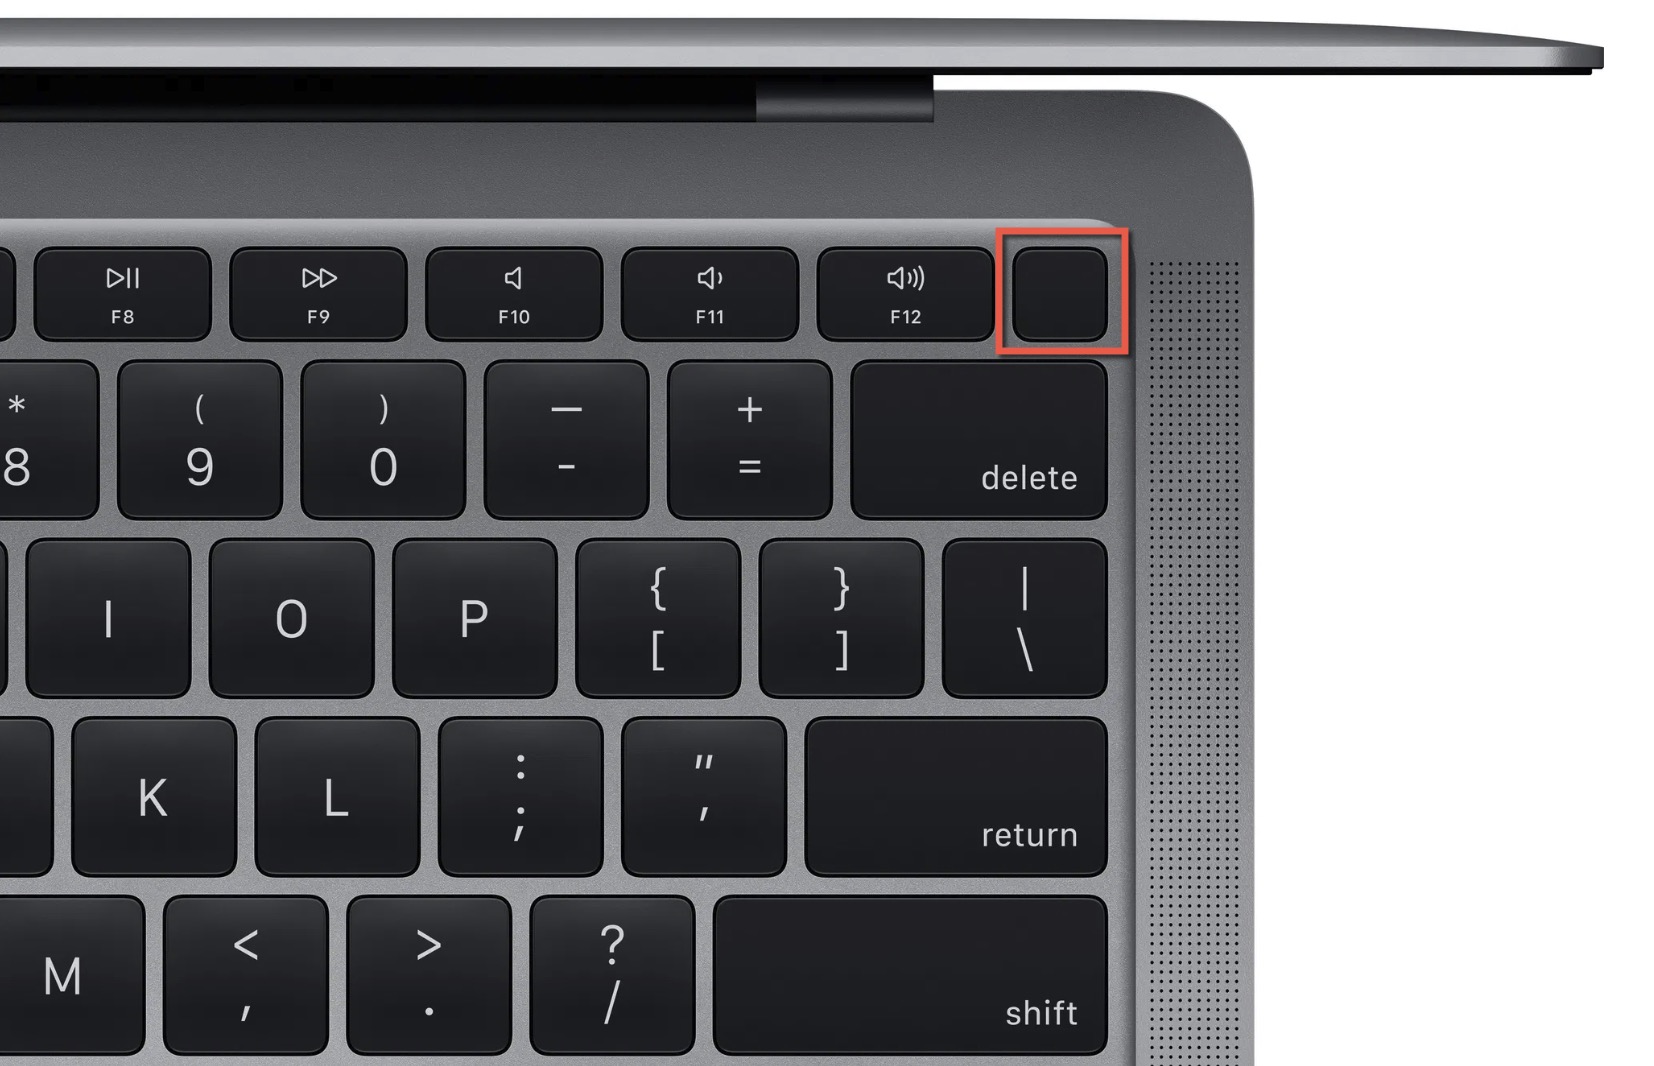
- Choose the right startup disk.
Hold down Shift, and click on Continue in safe mode.
How to Fix a Corrupted Hard Drive on a Mac
Once you’ve safely recovered your important data, you can attempt to repair the corrupted hard drive on a Mac by going through the fixes explained in this section, starting from the first one.
Solution 1: Repair the Corrupted Hard Drive Using Disk Utility
Disk Utility is macOS’s disk management application that allows you to repair, format, erase, and manage storage devices connected to your Mac.
When a hard drive becomes corrupted, the problem often lies in the file system’s metadata rather than with the physical drive itself. Disk Utility’s repair feature can sometimes (don’t set your expectations too high—you still have more fixes to try if this one doesn’t work) fix hard drive corruption by repairing the logical file system damage.
The easiest approach for most users is through Disk Utility’s graphical interface:
- Open Disk Utility from Applications > Utilities folder (or use Spotlight to search for it).
- In the sidebar, select your corrupted drive or volume.
- Click the First Aid button in the toolbar.
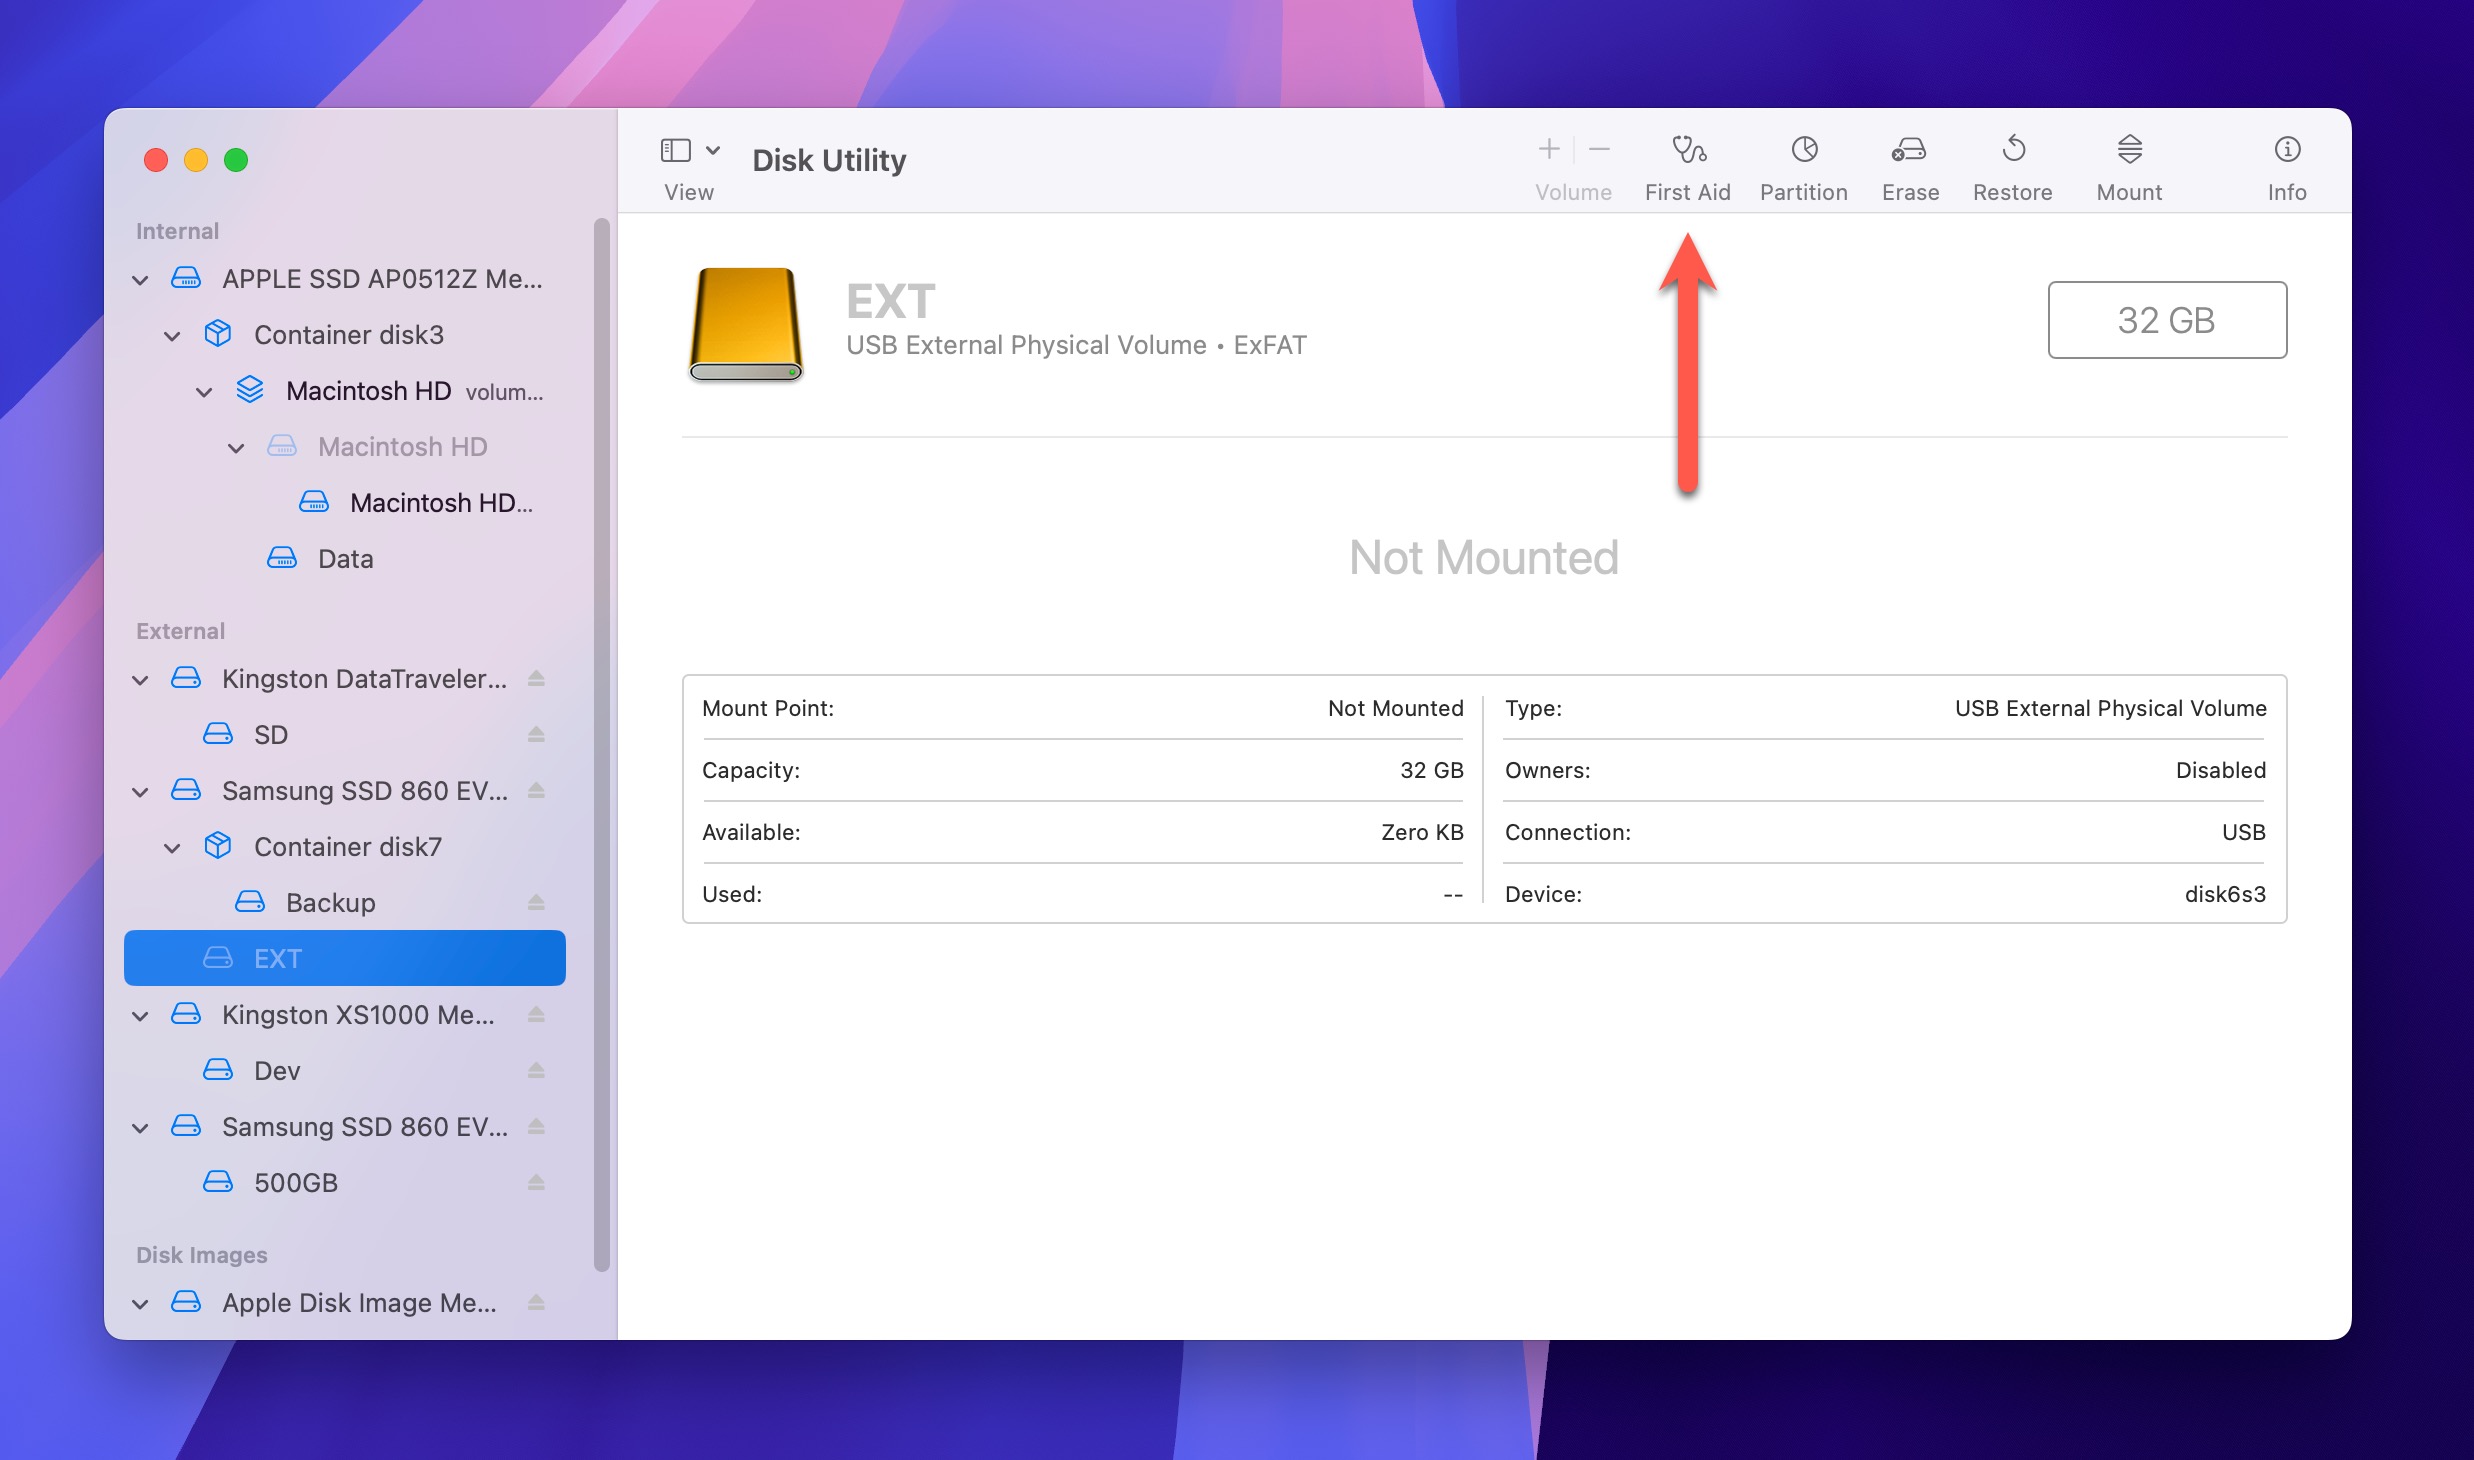
- Click Run to begin scanning and repairing the drive.
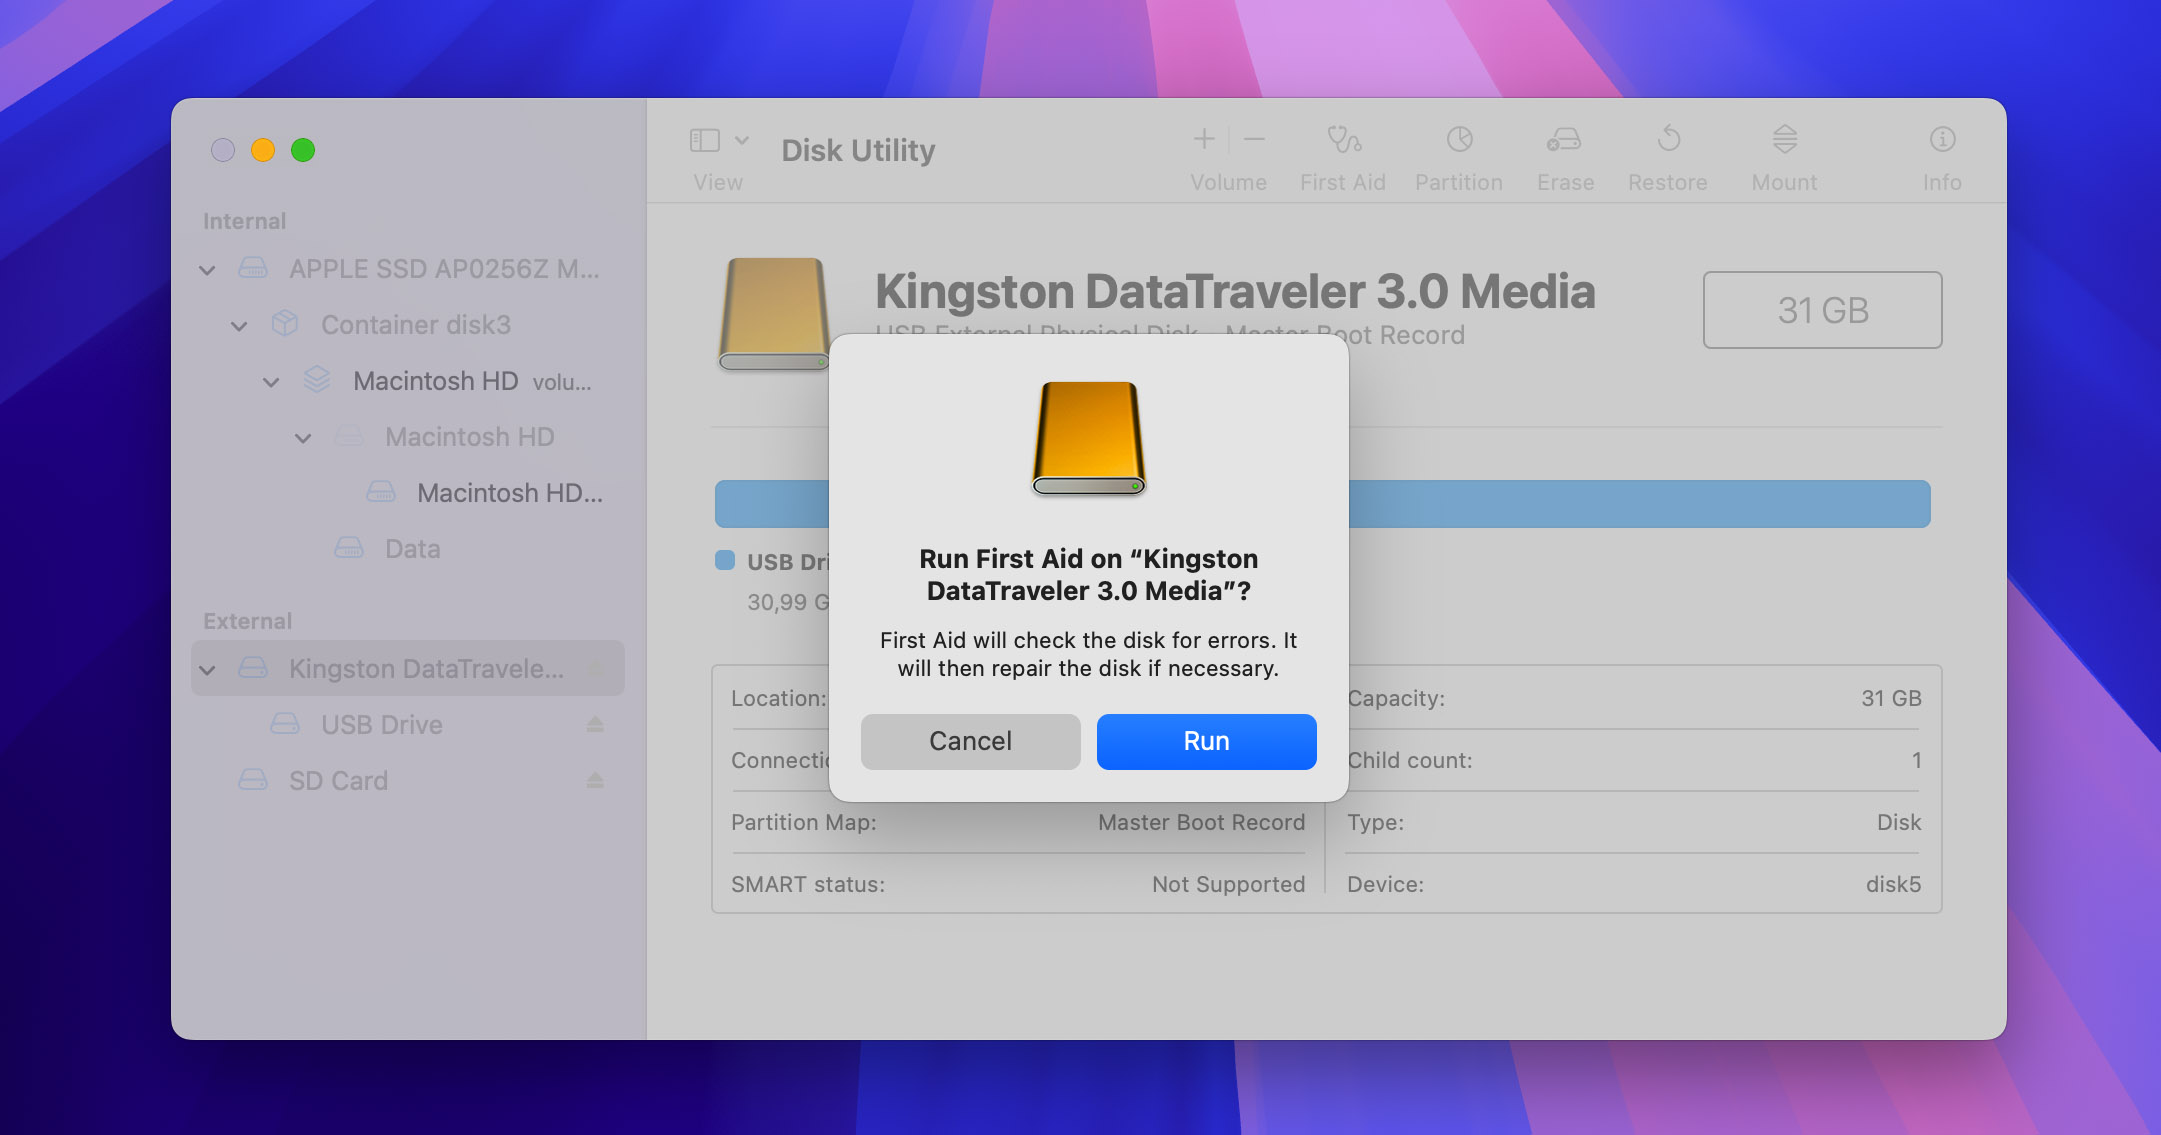
- Follow any on-screen instructions and wait for the process to complete.
For more advanced users or situations where the graphical interface isn’t accessible:
- Open Terminal from Applications > Utilities.
- Type the command: diskutil repairVolume /Volumes/DriveName (replace “DriveName” with your drive’s name).
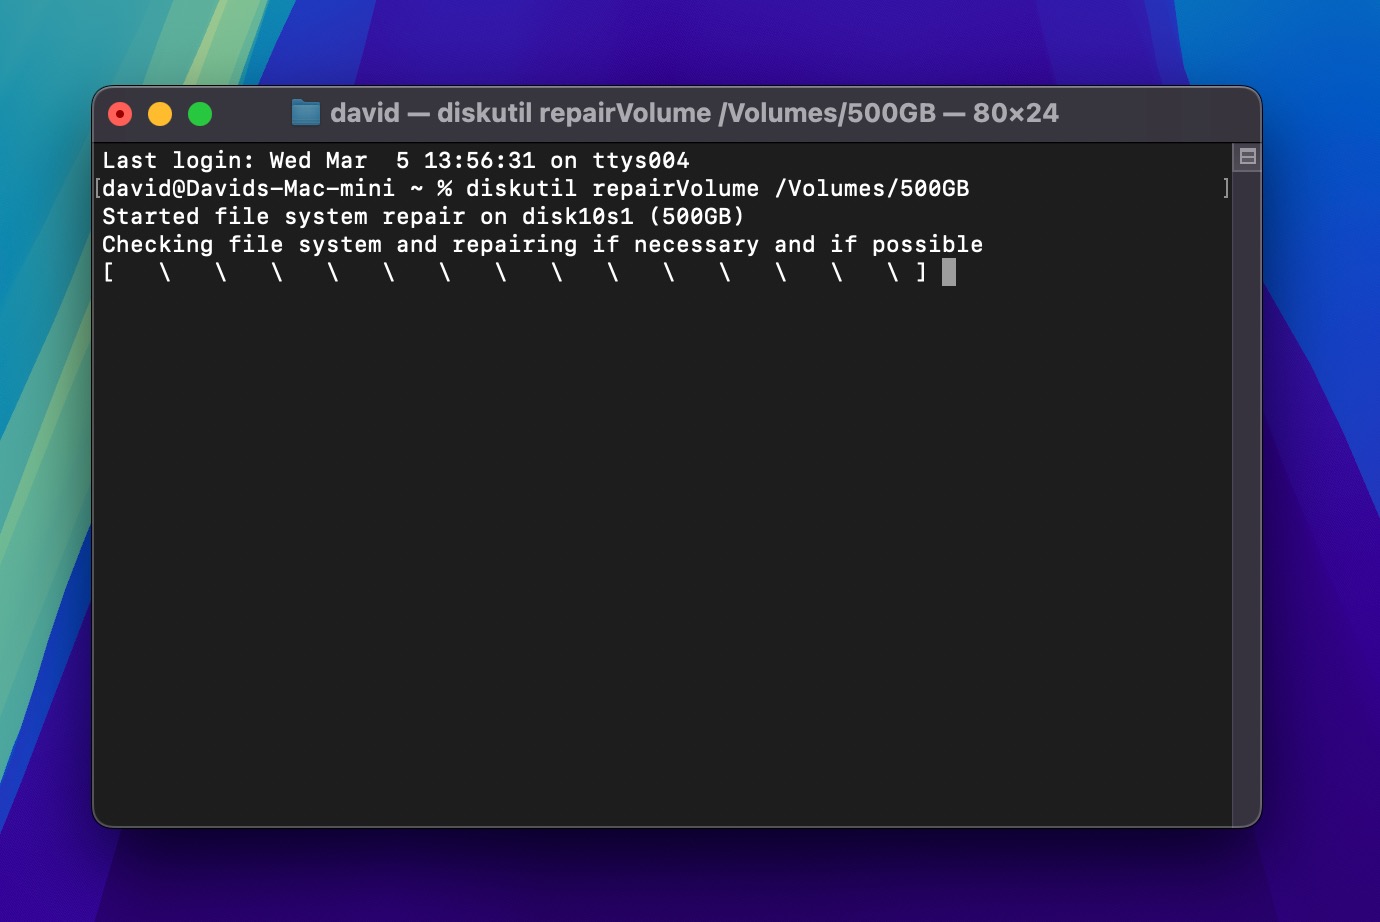
- Press Enter and wait for the repair process to complete.
- The terminal will display results indicating success or failure.
Solution 2: Initiate the FSCK Command
When an external drive is corrupted on Mac, you can also use the File System Consistency Check (FSCK) command to identify and repair issues.
For Intel Macs without T2 Security Chip:
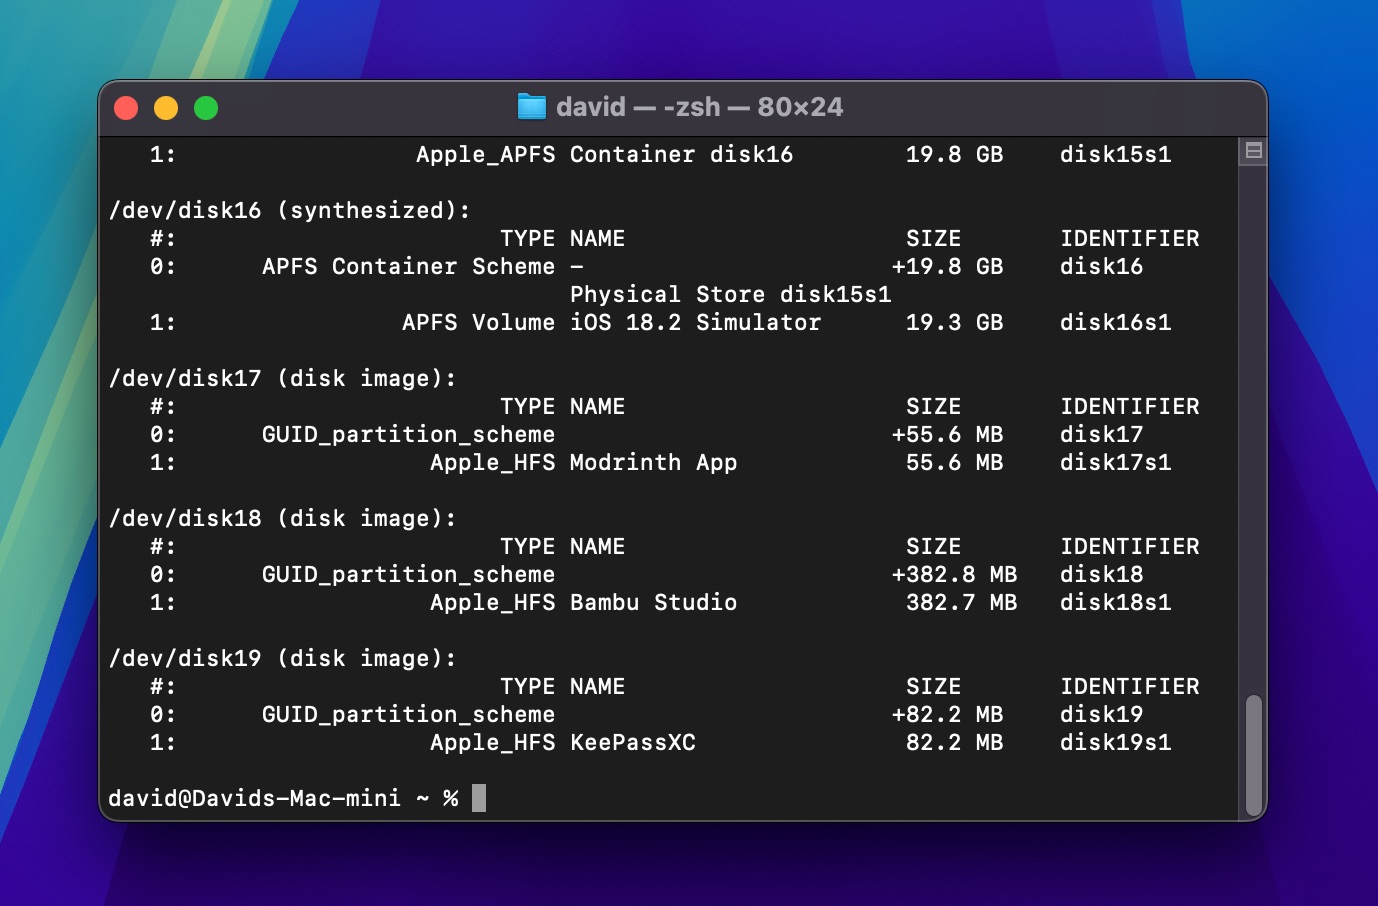
- Open Terminal and type this command to identify your drives: diskutil list
- Press Enter. The command will display all volumes and their identifiers.
- Restart your Mac and hold Command + S during startup to enter single-user mode.
- At the command prompt, type one of these commands based on your file system type (don’t forget to replace “disk0s2” with the correct identifier for your partition from the previous diskutil list command):
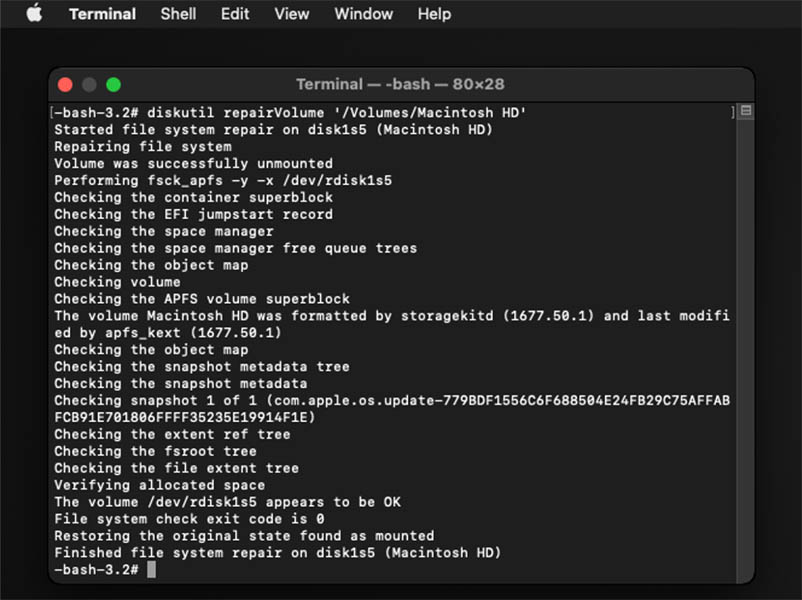
- For HFS+ drives: /sbin/fsck_hfs -fy /dev/disk0s2
- For APFS drives: /sbin/fsck_apfs -fy /dev/disk0s2
- Press Enter. Terminal will scan for errors and repair any issues it finds.
- Run the command a second time to verify repairs. When you see “The volume appears to be OK,” type reboot to restart your Mac.
For T2 Security Chip Macs and Apple Silicon Macs:
- For Intel Macs with T2 chip: Restart and hold Command + R during startup. For Apple Silicon Macs: Shut down, then press and hold the power button until you see “Loading startup options.”
- Select Options and click Continue. Enter administrator credentials if prompted.
- When in Recovery Mode, select Utilities from the menu bar, then open Terminal.
- Run diskutil commands to check and repair your drive (replace disk0s2 with your drive identifier): diskutil repairVolume /dev/disk0s2
- Wait for the repair process to finish.
Solution 3: Recover the Hard Drive from a Time Machine Backup
If your Mac fails to boot beacuse a portion of your hard drive has become corrupted, then often the fastest way to fix it is to reinstall macOS and then restore your data from your Time Machine backup (if you have one, of course).
- First, you’ll need to reinstall macOS to create a fresh system installation that can properly boot. On the latest models, you can do so from macOS Recovery. For more information, you can follow Apple’s official instructions.
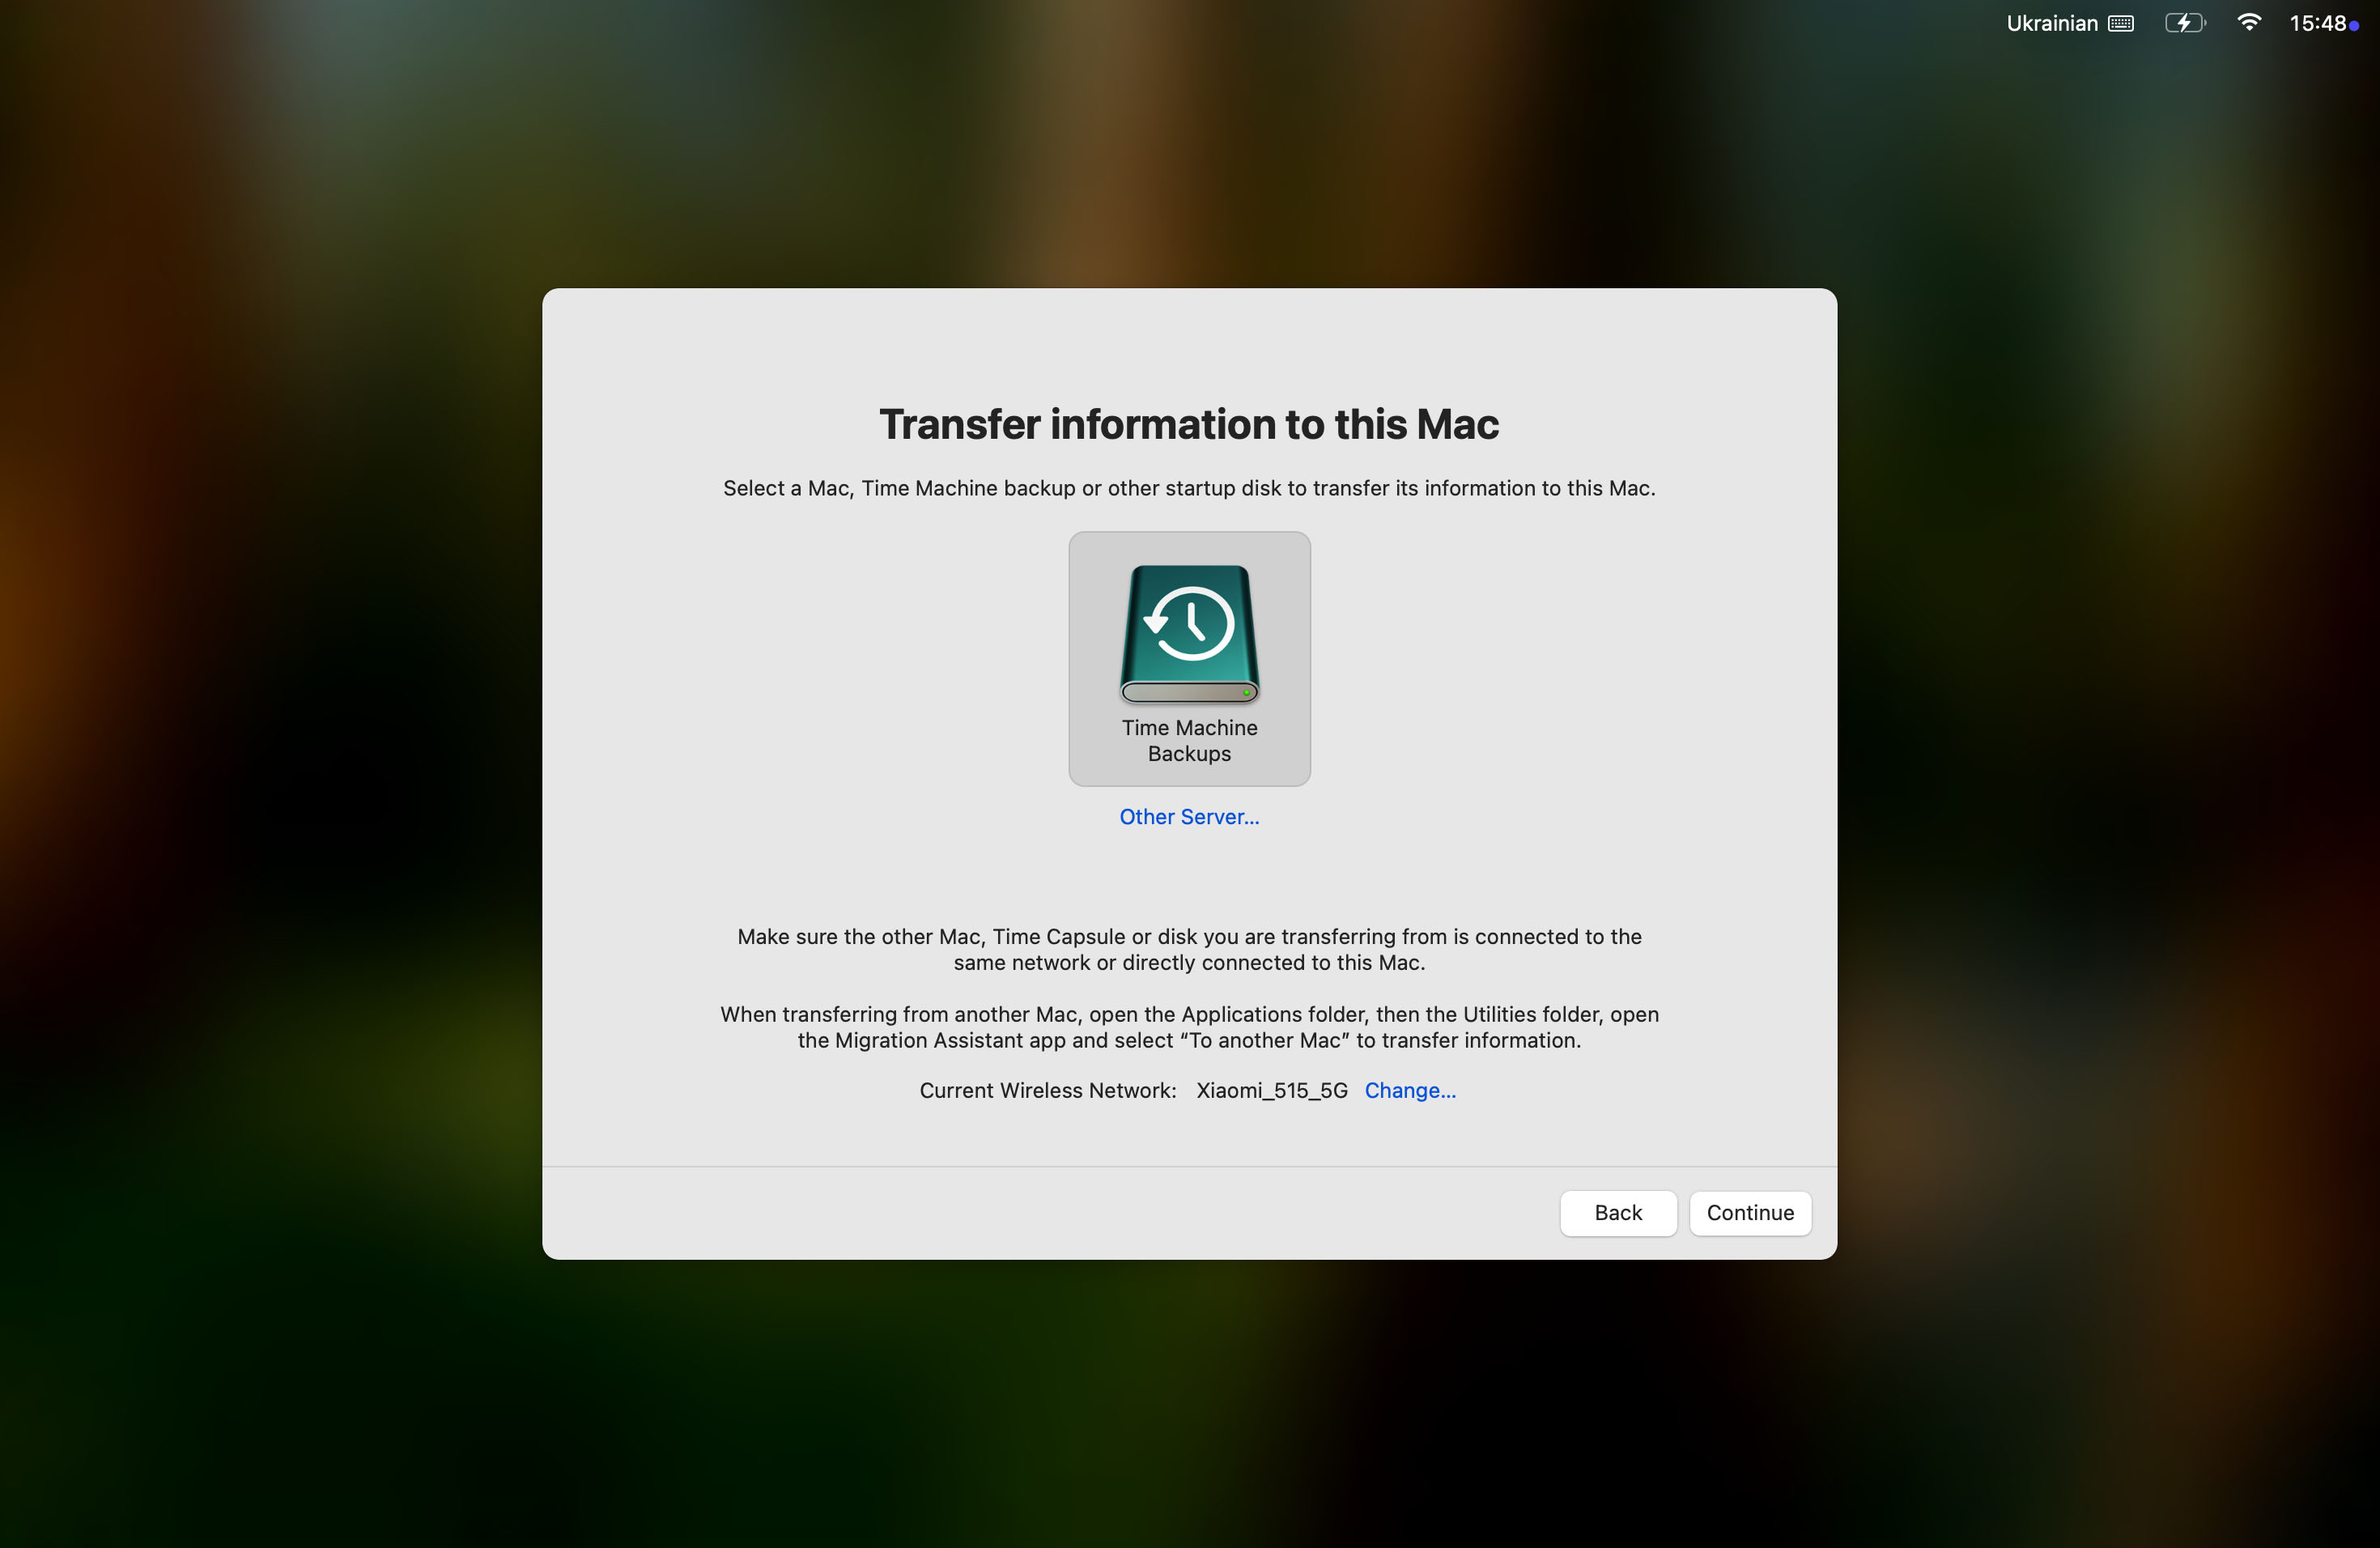
- After reinstalling macOS, you’ll be presented with the option to restore from a Time Machine backup during the setup process, so connect your Time Machine backup disk.
- When prompted on how you want to transfer your information, choose the option to transfer from a Mac, Time Machine backup, or startup disk, then click Continue.
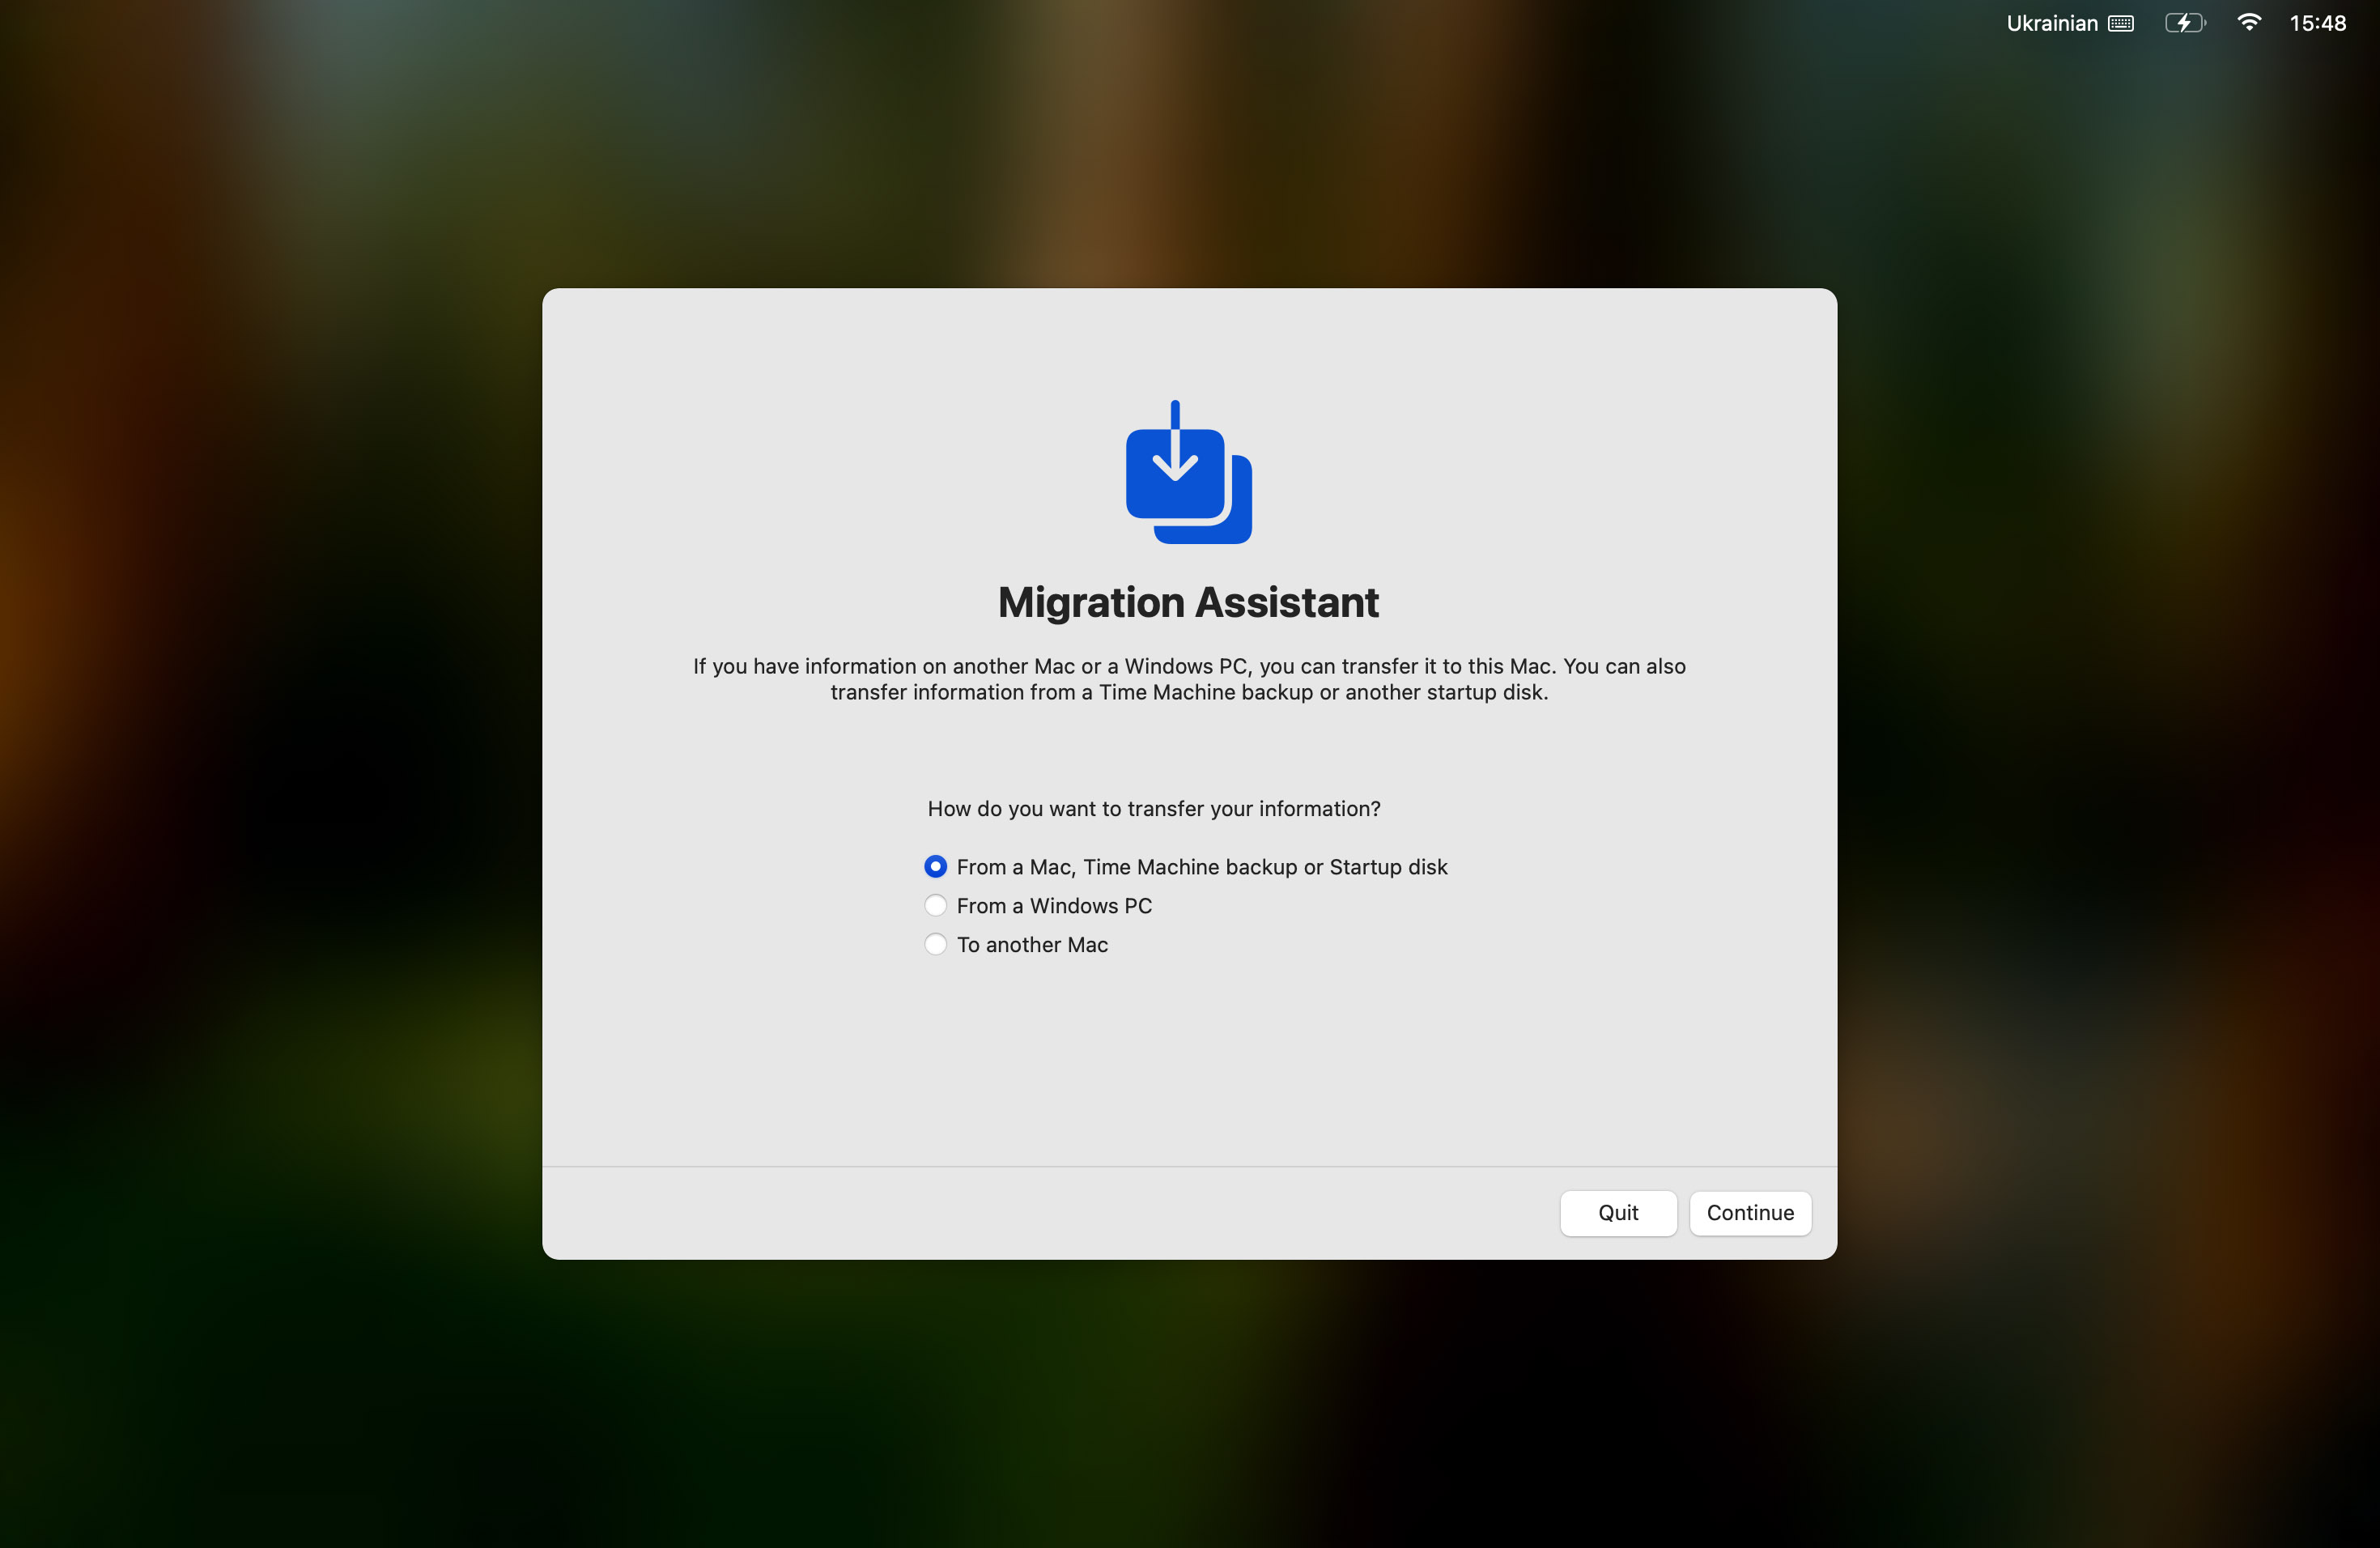
- Follow the on-screen instructions to complete the data recovery process.
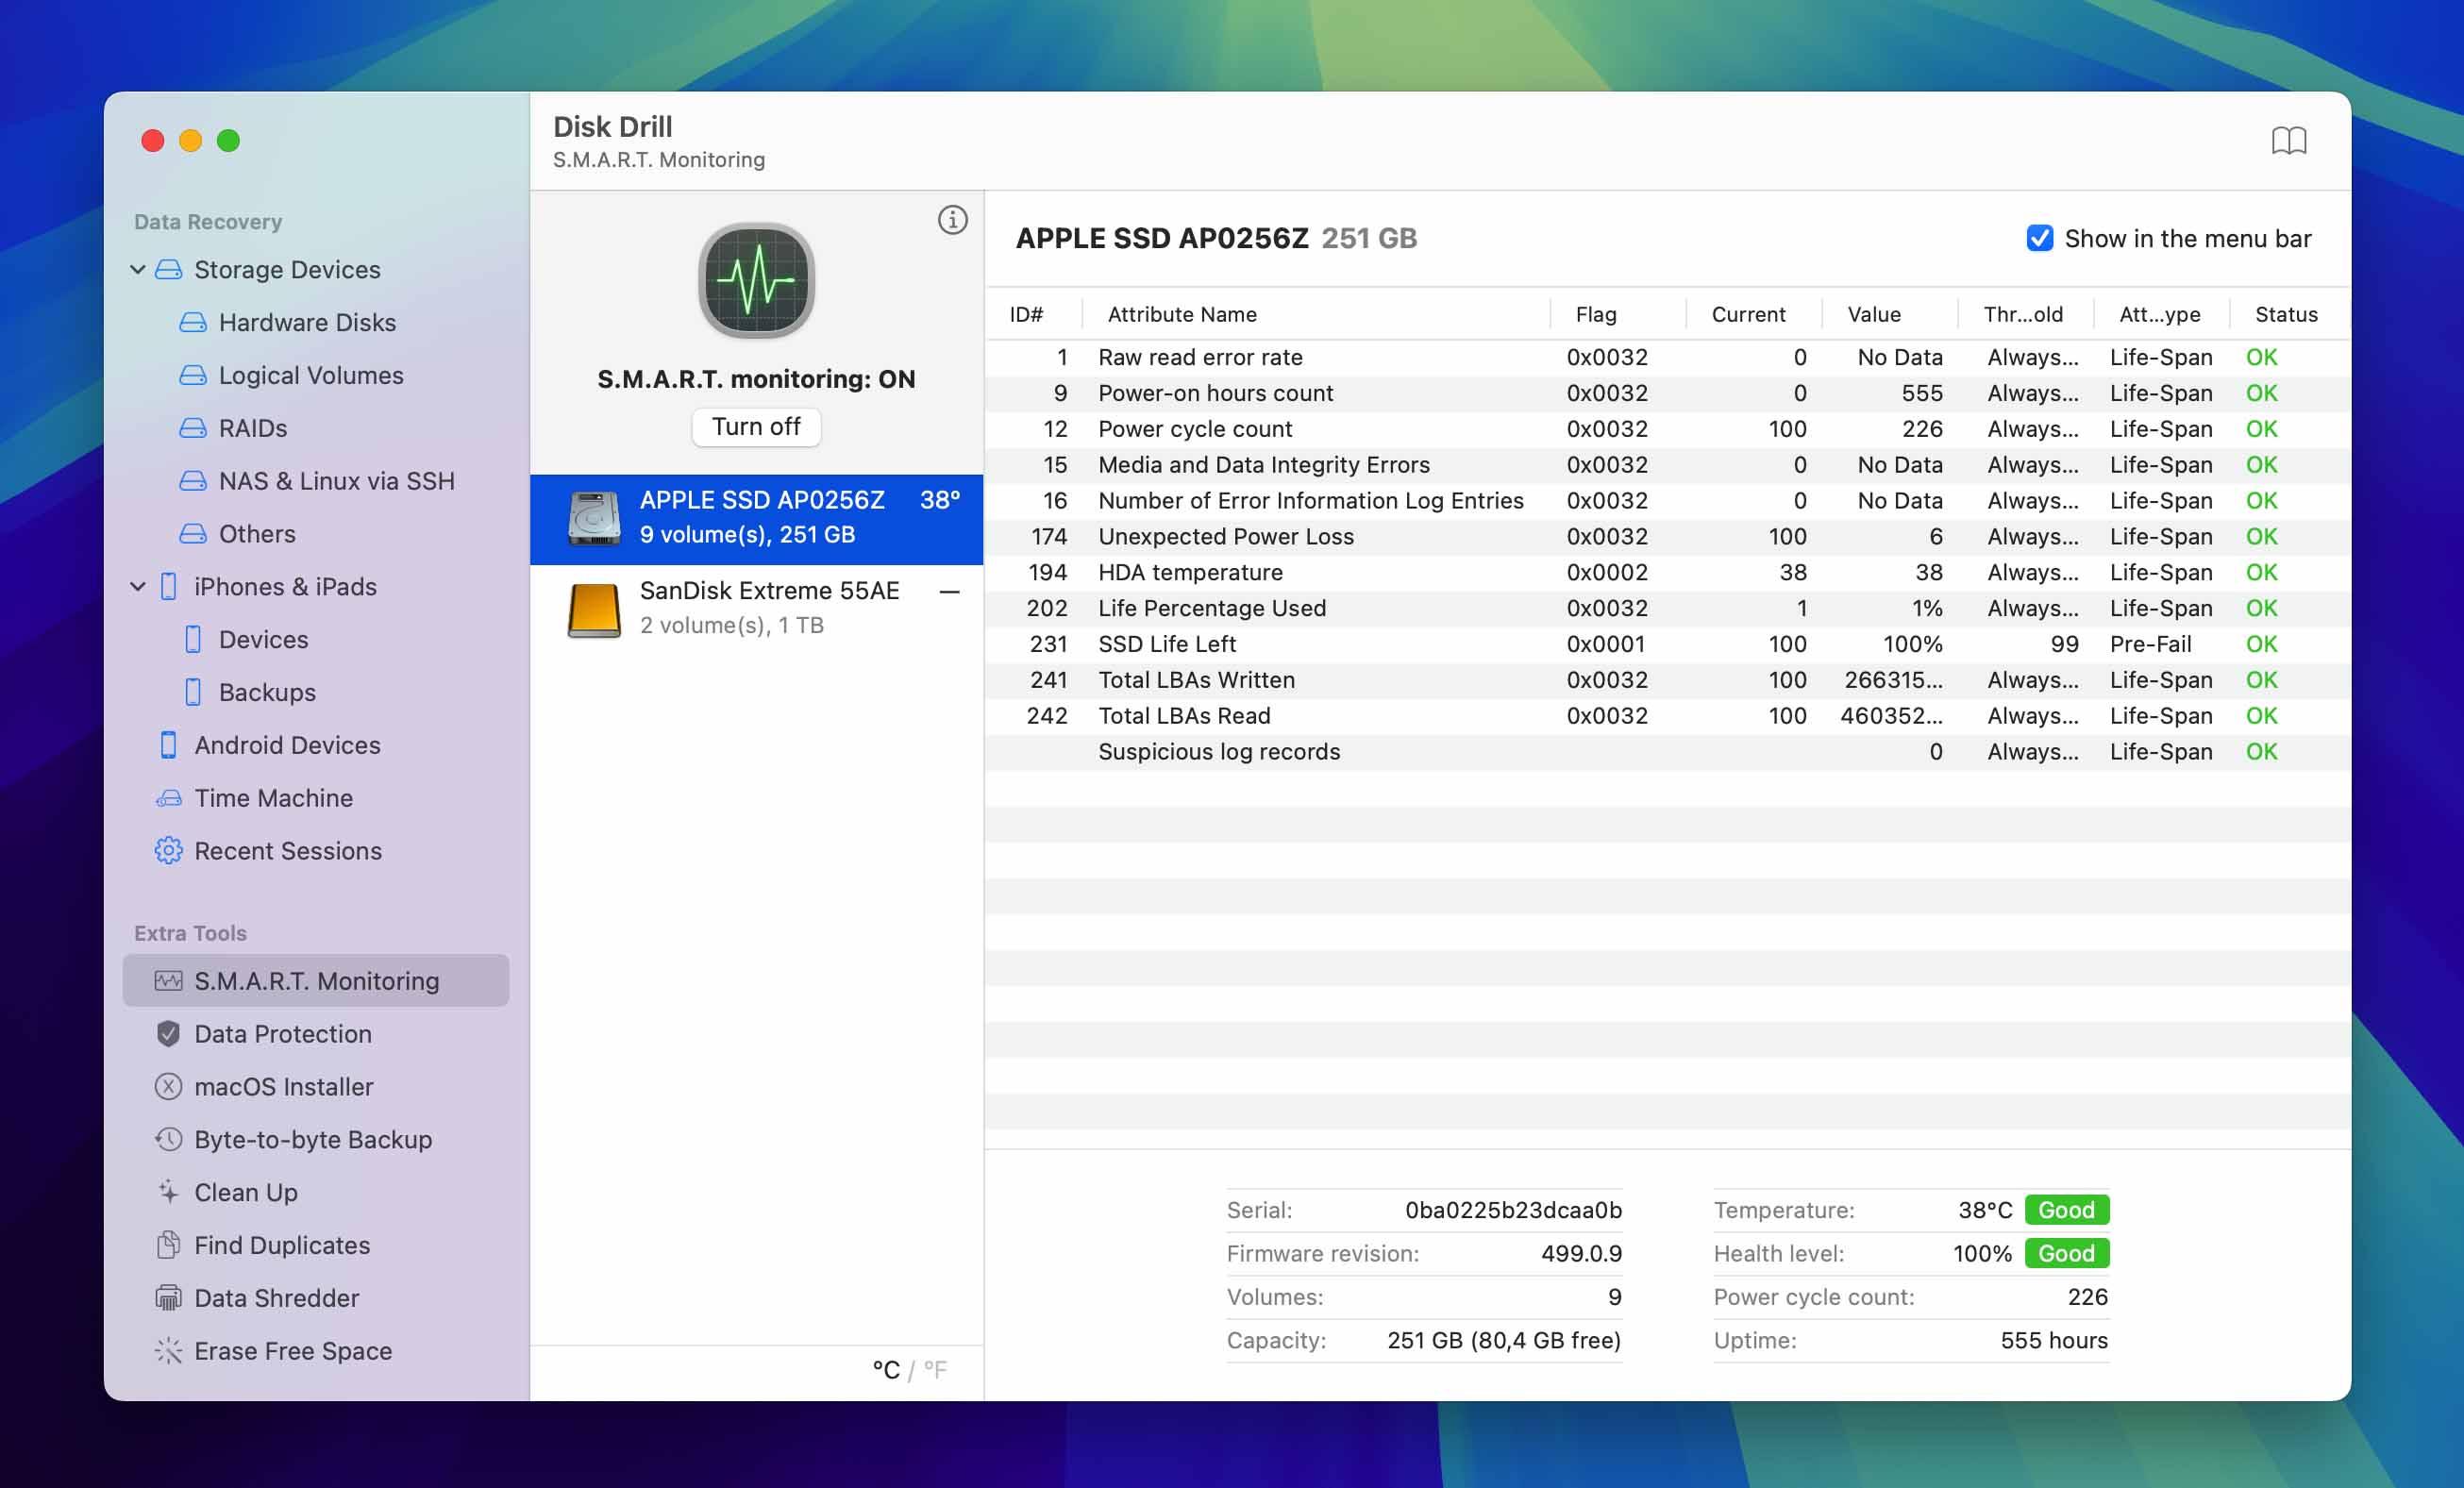
Once your files have been restored, run S.M.A.R.T. diagnostics on your system drive using a tool such as Disk Drill or a similar application to determine if the hard drive is still healthy or if the corruption was an isolated incident. If the drive isn’t healthy, the issues might recur, so you better replace the drive as soon as possible (or get a new Mac if the current one’s storage isn’t replaceable).
Solution 4: Hire a Hard Drive Recovery Service for Mac
If you’ve tried all the previously described solutions but have yet to fix your corrupted Mac hard drive, then it might be time to consider professional help, especially if one or more of the following factors plays a role:
- The corruption is more severe than simple file system errors, such as clear signs of physical harm (e.g., unusual clicking sounds or overheating).
- The data stored on your drive is extremely valuable. For example, it’s never worth the risk to attempt DIY recovery on company-owned Macs that storage important business data. In such cases, the company’s IT department or a hired recovery service should take care of it.
- You’re not confident in your skills and even our step-by-step instructions are making you anxious.
In cases like this, it’s worth contacting a reputable data recovery service with a good track record. One such service is Cleverfiles Data Recovery Center, which specializes in recovering data from various types of storage media. Here’s how the process typically looks like:
- You send your drive (or your entire Mac) to the data recovery service. Most reputable services offer a free initial assessment of your drive to determine the extent of the damage and provide a recovery estimate.
- If you approve the quote, they’ll proceed with the recovery work in a specialized clean-room environment using advanced tools that aren’t available to consumers.
- The technicians will extract your data and verify that it’s intact and accessible. You’ll receive your recovered data on a new storage device.
The cost will depend on several factors: the severity of the corruption, whether physical recovery is needed, the drive capacity, and the urgency of the recovery. Prices can range from a few hundred to several thousand dollars, which is significantly higher than DIY data recovery software like Disk Drill. However, for irreplaceable data or when all other recovery methods have failed, professional services often represent the last and best chance for successful recovery.
How to Prevent Hard Drive Corruption on macOS?
A corrupted Mac hard drive is often a consequence of not paying attention to or missing subtle warning signs, such as sluggish performance, frequent freezes, or unexpected error messages.
Fortunately, you don’t have to rely on these and other elusive signs alone. One of the most reliable ways to stay ahead of potential issues is S.M.A.R.T. (Self-Monitoring, Analysis, and Reporting Technology) monitoring, a feature built into modern drives that tracks critical health metrics like temperature, read/write errors, and bad sectors.
Using a tool like Disk Drill’s S.M.A.R.T. monitoring feature, for instance, you can enjoy real-time status updates accessible via your menu bar to reliably spot degradation before it escalates. For a detailed guide on setting this up, refer to CleverFiles’ tutorial on S.M.A.R.T. monitoring.
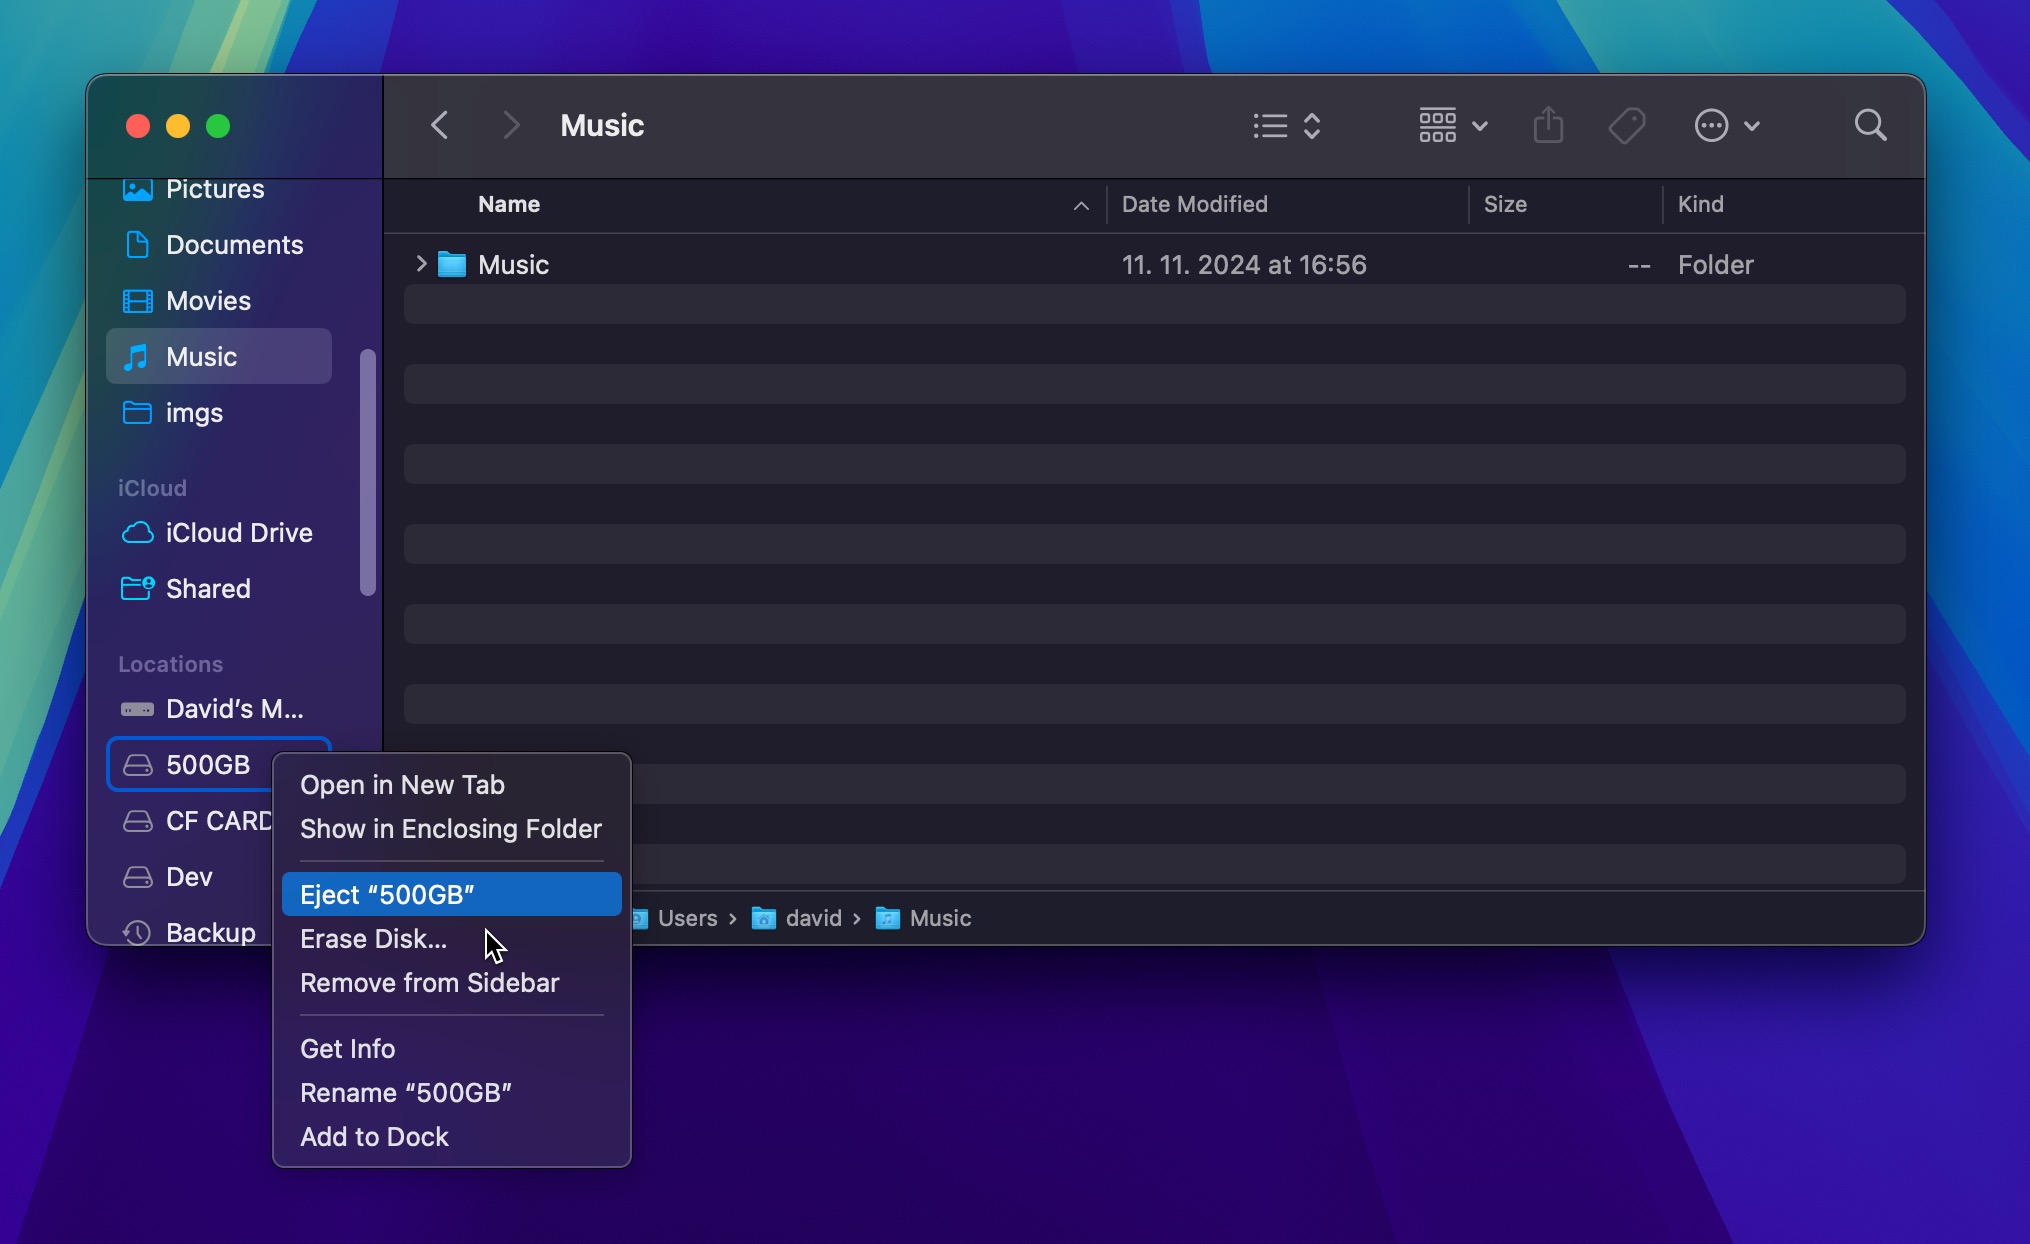
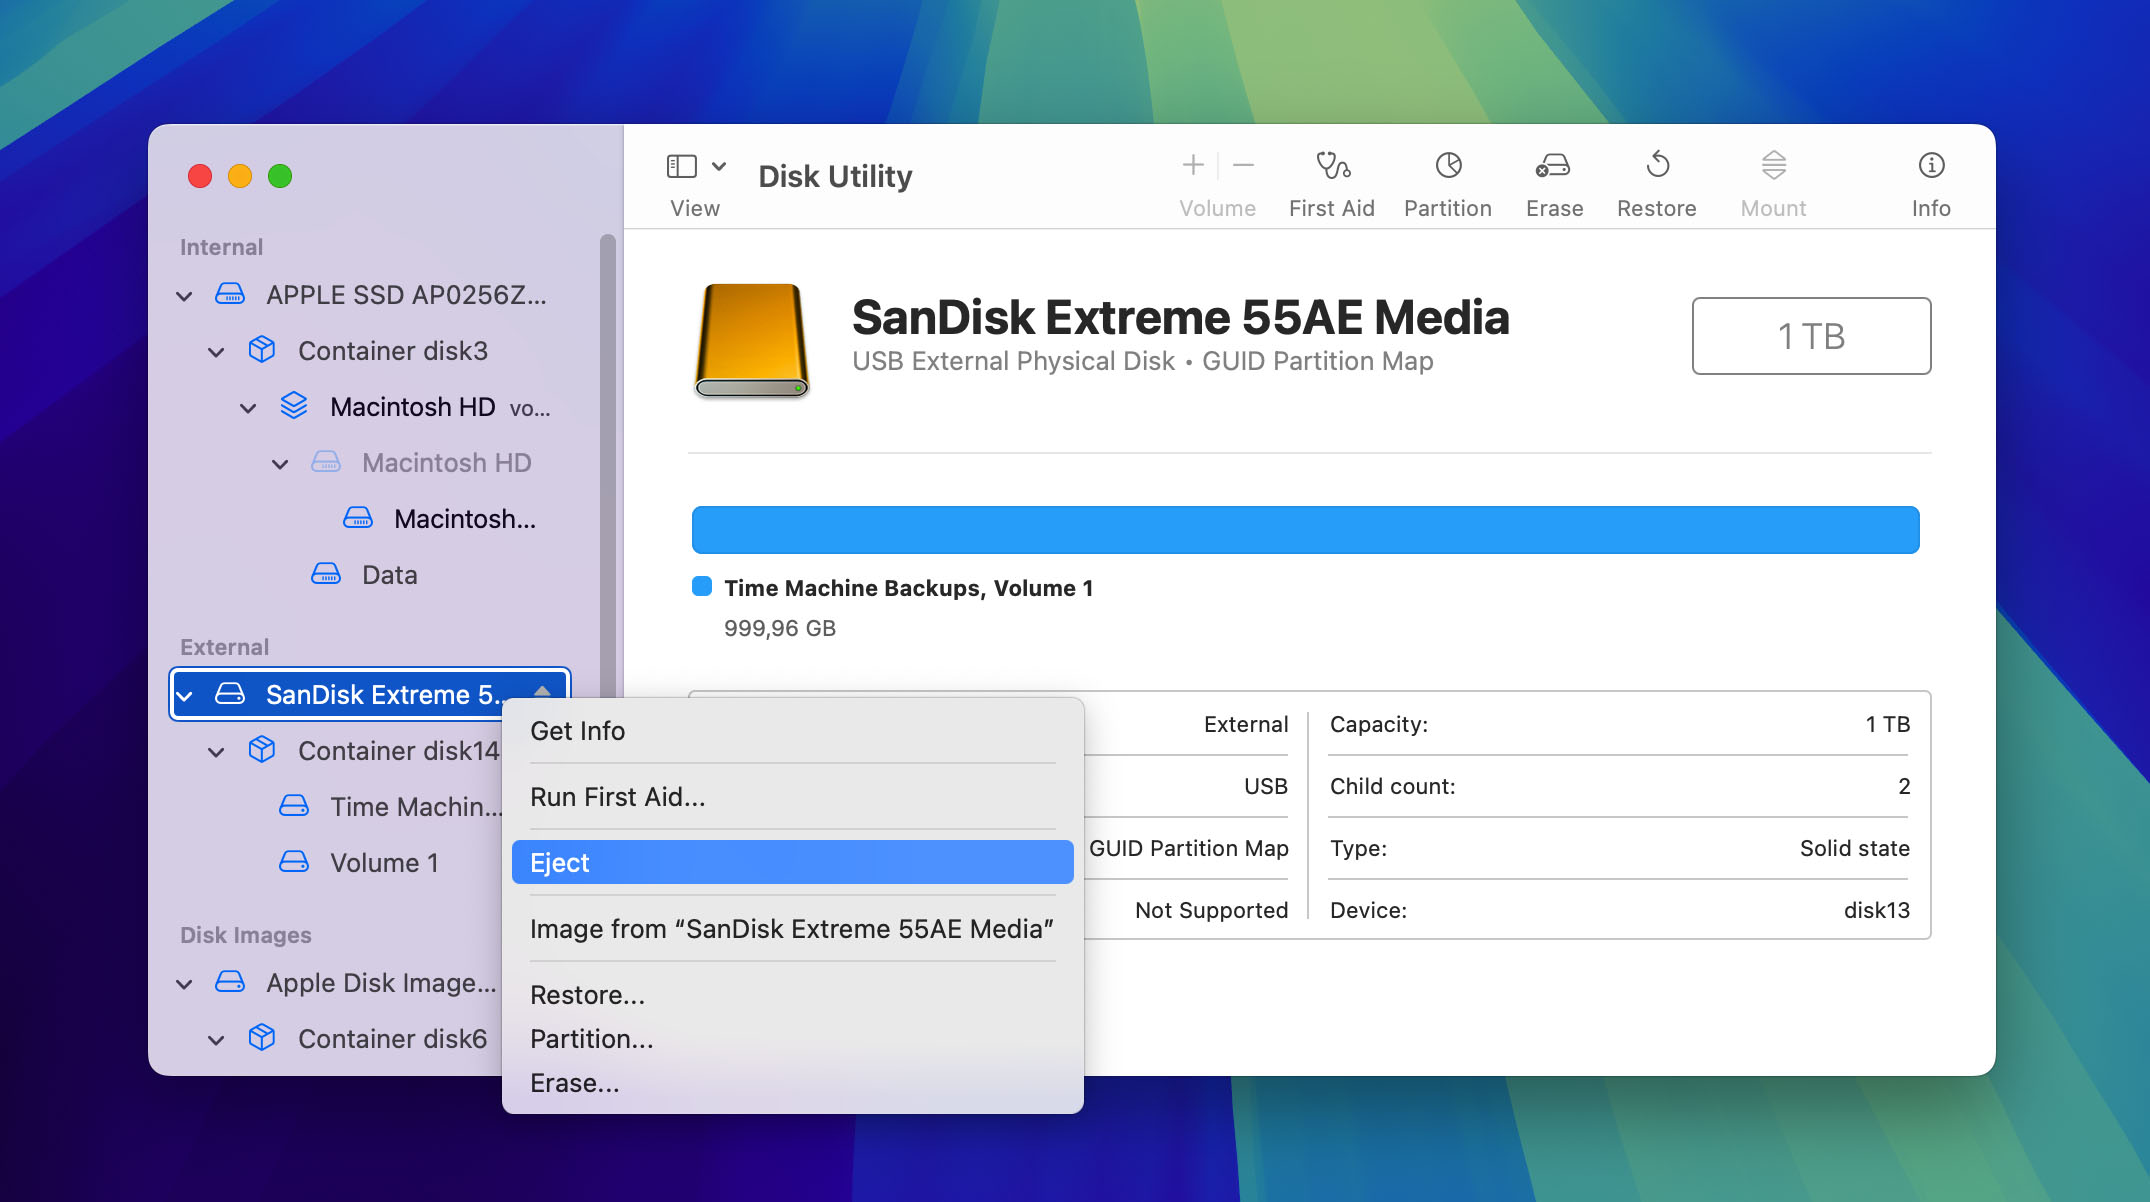
Properly disconnecting external drives is also essential for keeping hard drive corruption at bay. Yanking out a USB drive without safely ejecting it can corrupt files or damage the drive’s file system. That’s why you should eject drives through Finder by right-clicking the drive icon and selecting Eject or dragging it to the Trash (which turns into an eject symbol). If a drive becomes unresponsive, macOS offers Terminal commands like diskutil eject /dev/diskX to force ejection. Apple’s step-by-step guide for troubleshooting stubborn drives provides additional solutions for these tricky scenarios.
Similarly, it’s important to always shut down your Mac properly by clicking the Apple icon in the Menu bar and choosing the Shut Down option. A sudden power loss during a write operation can leave files partially written or corrupt filesystem indexes.
When storing drives long-term, environmental factors matter just as much as daily usage habits. Exposure to humidity, extreme temperatures, or dust can shorten a drive’s lifespan. Manufacturers like Western Digital recommend storing drives in anti-static bags, keeping them upright to avoid physical stress, and placing them in cool, dry environments away from direct sunlight.
Even if you fully commit to diligently practicing these corruption prevention strategies, you should always back up your hard drive to least one additional location. To be extra safe, you can follow the 3-2-1 backup rule: keep three copies of your data (original + two backups), use two different storage types (e.g., an external SSD and a cloud service like iCloud or Backblaze), and store one backup offsite.
In Conclusion: Fixing a Corrupted Hard Drive on a Mac
Dealing with a corrupted hard drive on a Mac requires a systematic approach to maximize your chances of successful recovery and repair. The most effective strategy follows this sequence:
- First, recover your data before attempting repairs as they might worsen the corruption.
- Then, do basic troubleshooting, such as checking the connection and Finder settings.
- If basic troubleshooting doesn’t solve the problem, use Disk Utility’s First Aid and FSCK commands to attempt non-destructive repairs.
- If repairs fail, restore your system from Time Machine or other backups (if you have any).
- For physical damage or as the last resort, consult with data recovery specialists.
A corrupted hard drive on a Mac won’t fix itself—but with the right approach, you can often recover your valuable data and get your Mac running smoothly again.
FAQ
To fix a mac corrupted startup disk, you need to boot into Recovery Mode (Command+R during startup or power button on Apple Silicon Macs). From there, run First Aid in Disk Utility on your startup disk. If that fails, try using Terminal commands like fsck. For serious corruption, you may need to reinstall macOS and then recover your data from Time Machine backup.
Yes, you can fix a corrupted Mac SSD using the same methods as HDDs, but with some important differences. SSDs don’t make unusual noises when failing and often fail suddenly rather than gradually. Also, newer MacBooks come with SSDs that are soldered on to the motherboard, so they can’t be removed and connected to a different computer.
You can attempt to fix a corrupted hard drive on a Mac using First Aid in Disk Utility or the FSCK command in Terminal. However, you should first connect the drive to another computer to rule out if it’s a connection issue. If the drive can’t be repaired, then you can use data recovery software like Disk Drill to recover important files from it, which allows you to format without any data loss.
Most Mac corruption issues occur because of unexpected power failures, physical damage, RAM problems, and hardware failure.
Malware can also create corruption problems on a Mac hard drive.
These factors can adversely impact any external drives you have connected to the Mac, which means each one may need to be searched, scanned, and repaired before full functionality gets restored.
If your hard drive won’t boot, it depends on whether it’s your system disk or an external one. For a system disk, try using a tool like Disk Drill in Recovery Mode to salvage what you can. For an external boot drive, you can attempt to repair logical damage using TestDisk, and you should also check the cables or ports for connection issues, which often lead to the same symptoms as corruption.
Follow these steps to fix a corrupted hard drive on Mac:
- Check for physical damage and connection issues.
- Recover data from a corrupted Mac hard drive using Disk Drill.
- Run First Aid to fix errors on the drive.
- If it doesn’t solve the issue, format the drive.
If your Mac’s hard drive is corrupted, you might notice:
- Apps crashing
- Files not opening
- Random freezes
- Odd clicking noises
- Boot issues
To confirm your suspicion, you can run a S.M.A.R.T. diagnostics tool like the one that’s included for free in Disk Drill.