Building a music collection can take years of careful curation, but it can be lost in seconds due to accidental deletion, device issues, or storage failures. Fortunately, you’re on the right track to recover deleted audio files from your computer, iPhone, Android device, or Mac because this article covers in detail the best recovery methods currently available.
Can You Recover Lost Audio Files?
Yes, it’s often possible to recover lost music files, but your chances depend heavily on the device you’re using and how the files were lost.
All iPhones and Macs, most Android smartphones and tablets, and many Windows PCs encrypt all files stored on the internal storage device. When encrypted files become lost, recovery is possible only from existing backups or the Trash/Recycle Bin.
That said, data recovery software tools depend on how quickly you act since deleted files remain recoverable only until their storage space is overwritten by new data. So, don’t hesitate and use the table of solutions below to jump to the most relevant section of the article:
| Device | Common reasons for data loss | Solutions |
| 📱Android smartphone |
|
|
| 🍏 iPhone |
|
|
| 🖥️ Windows PC or Mac |
|
How to Recover Deleted Audio File from Android
The recovery of deleted audio files on Android is complicated by the fact that there are so many different flavors of the operating system and so many devices that use them. Still, there are several universal methods that you can always try.
Method 1: Check Recently Deleted Folder
Most modern Android devices keep deleted files in a temporary storage area, often called Recently Deleted or Trash or Bin, for 30 days before permanent deletion to provide a safety net for accidental deletions. The exact recovery steps will depend on which file management app you’re using, but they should be similar to the following instructions for Files by Google.
To recover music files from the Trash folder using the Files by Google app:
- Open the Files app on your Android device.
- Tap the hamburger menu and select Trash.
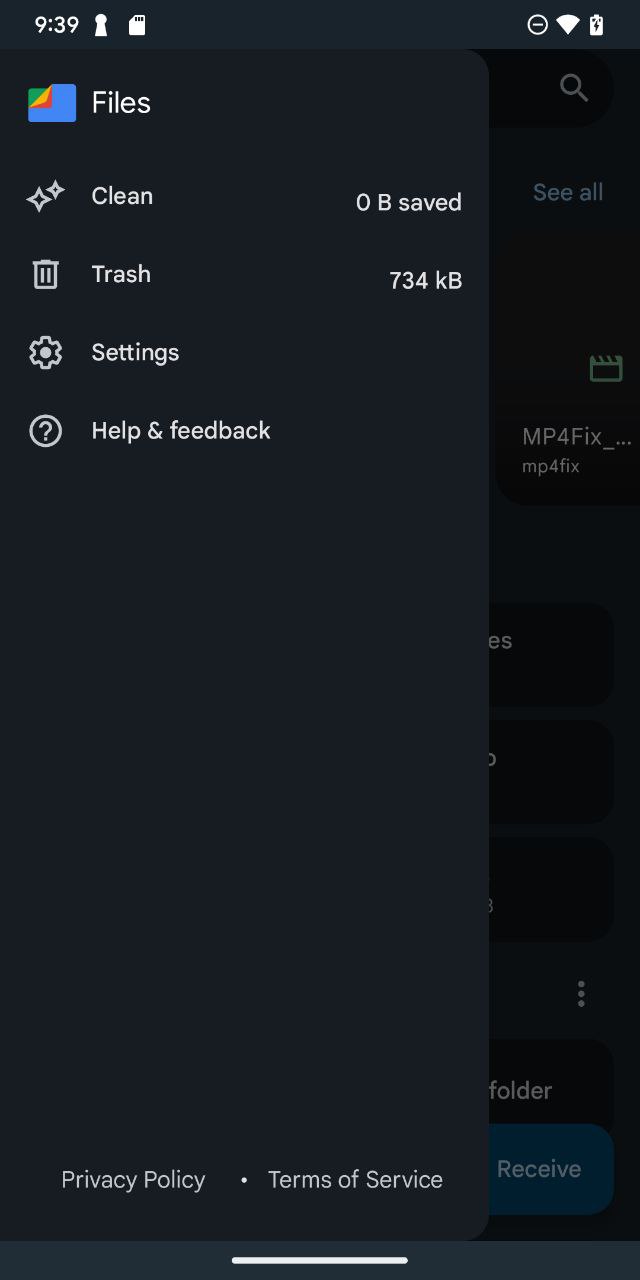
- Find the files that you want to move out of the Trash folder.
- Select your music files and tap Restore.
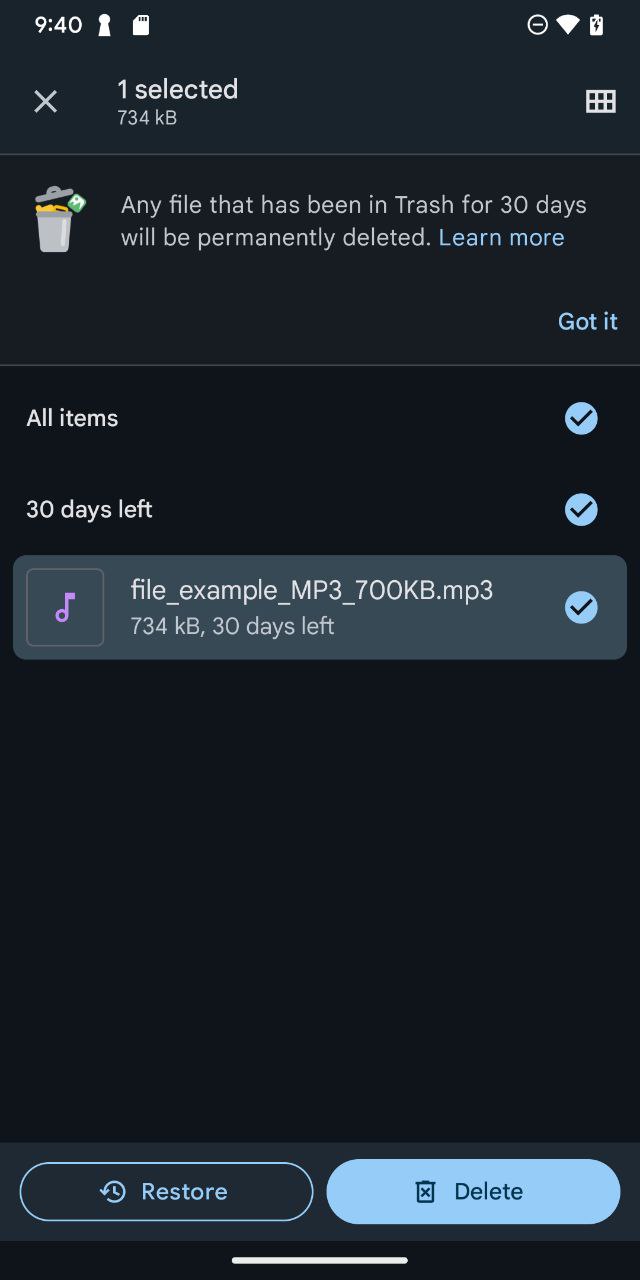
- Confirm your decision to restore the deleted music files.
Method 2: Restore Audio Files from the Cloud
Cloud storage and streaming services have become an integral part of how we manage our music collections. Music loss from cloud services typically happens in several ways. Sometimes, local downloads get deleted while the songs remain in your cloud library. In other cases, synchronization issues between your device and cloud service can cause files to vanish. You might also lose access to music when switching devices or when your subscription status changes.
For example, if you’ve previously downloaded music videos from YouTube for offline viewing, then you can re-download them by following these steps:
- Open the YouTube app and go to the Library tab.

- Look for the Downloads section and locate the missing music you want to download.
- Tap the three dots menu (⋮) next to the video and select the Download option.
- Choose your preferred quality.
- Wait for the download to complete.
/Android/data/com.google.android.youtube/files/Offline/(system generated folder)/streams on your microSD card or your device’s internal storage.Method 3: Use Data Recovery Tools
Data recovery from an Android device’s internal storage is usually impossible due to encryption and the way Android manages storage in general.
The only two exceptions are older devices, which are often unencrypted, and music stored on non-encrypted microSD cards. In such cases, you can use Android data recovery software, but it’s best to keep your expectations modest since Android internal storage and microSD cards are often small, so your lost music can become overwritten by new data relatively quickly.
To increase your chance of success when using Android data recovery software, you should:
- Stop using the device or SD card immediately after noticing the data loss.
- Remove the microSD card if that’s where your music was stored.
- Don’t save any new files to the storage device.
- Use data recovery software as soon as possible.
How to Recover Deleted Music Files From Computer
Windows provides built-in features like the Recycle Bin and File History that can help you recover recently deleted music files, and for more difficult data loss scenarios, you can turn to specialized data recovery software.
Method 1: Check the Recycle Bin
When you delete a music file on Windows, it usually goes to the Recycle Bin first (even large high-quality audio files like lossless FLAC recordings should end up in the Recycle Bin).
The Recycle Bin acts as a safety net against accidental deletions and keeps your files recoverable until you either empty the Bin or the files exceed the storage limit set in the Recycle Bin properties.
To recover deleted music files from the Recycle Bin:
- Open the Recycle Bin.
- The easiest way to do this is to double-click on its icon on the Desktop.
- If you don’t see the Recycle Bin on your desktop, click the Start button and then select Settings. Go to Personalization > Themes > Desktop icon settings. Select the Recycle Bin checkbox and click Apply.
- Locate and then select the music files you need to restore.
- Right-click or double-click on the selection and choose Restore.
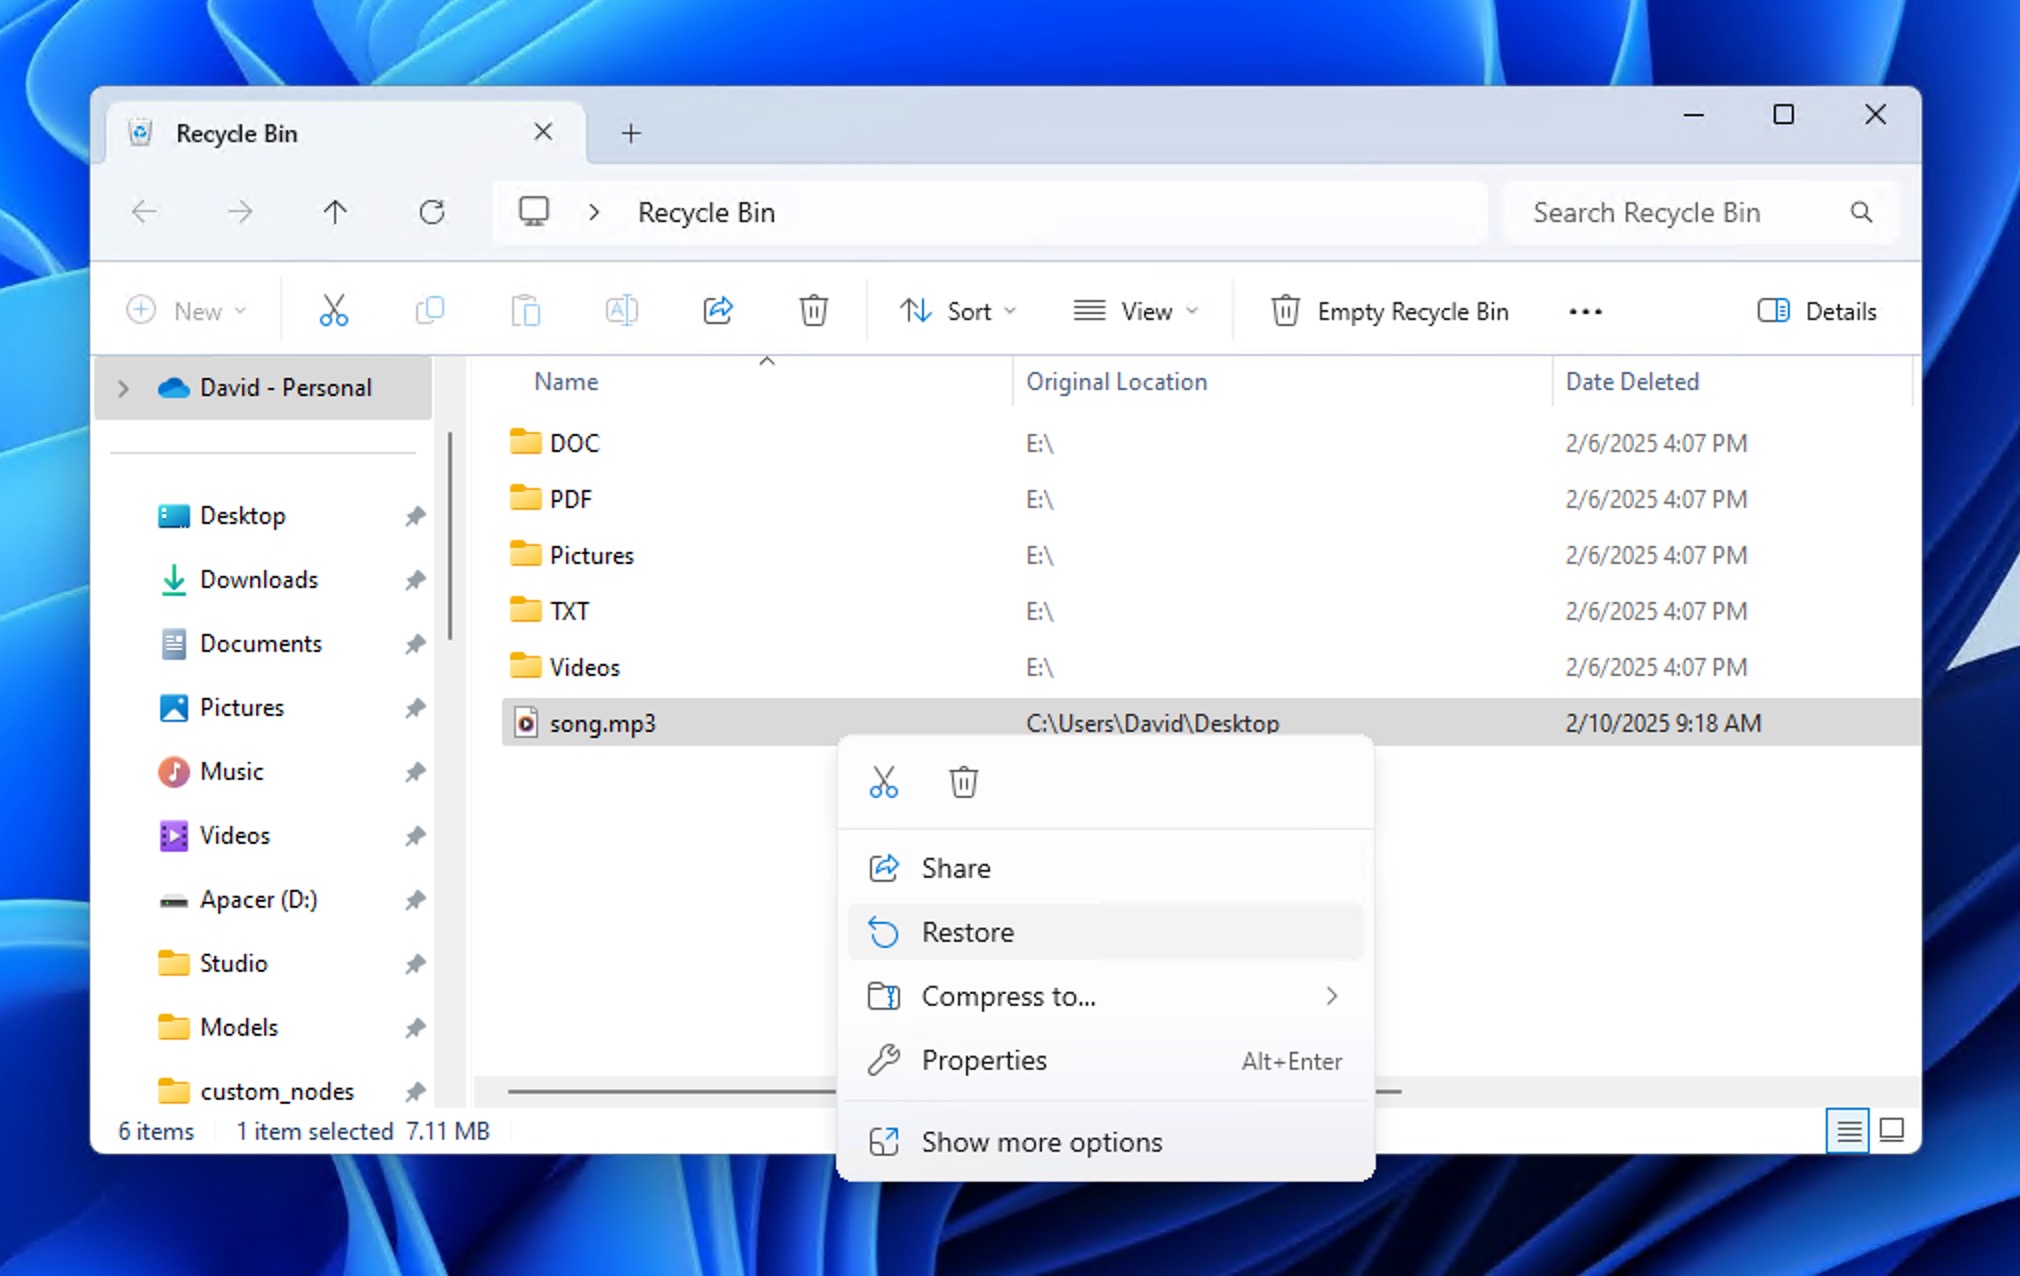
- The Recycle Bin instantly restores the deleted files to their original locations.
- You can see the original location by viewing the Recycle Bin in Details view.
Method 2: Use Audio Recovery Software
When music files don’t end up in the Recycle Bin (whether due to using Shift + Delete or because you’ve emptied the Recycle Bin or exceeded its maximum size), you can use audio recovery software to scan the storage device where they were located to recover them. The same applies to music lost due to formatting or file corruption.
One of the best audio recovery software solutions available to Windows and macOS users is Disk Drill. With it, you can recover all common audio formats including MP3, MIDI, AAC, M4A, FLAC, WAV, WMA, Ogg Vorbis, ALAC, and AIFF from all commonly used storage devices, including hard drives, memory cards, and flash drives.
@Cleverfiles So glad I found Disk Drill. Works amazing. I lost 36 audio file recordings when I mistakenly formatted the my memory card. Sure enough Disk Drill recovered all 36 files in less than an hour. Back to work on my project! I
— Jonathan Nimerfroh (@JDNPHOTOGRAPHY) November 22, 2024
Disk Drill can even play found music files before their actual recovery, making it easy to verify their recoverability.
To recover deleted music files with Disk Drill:
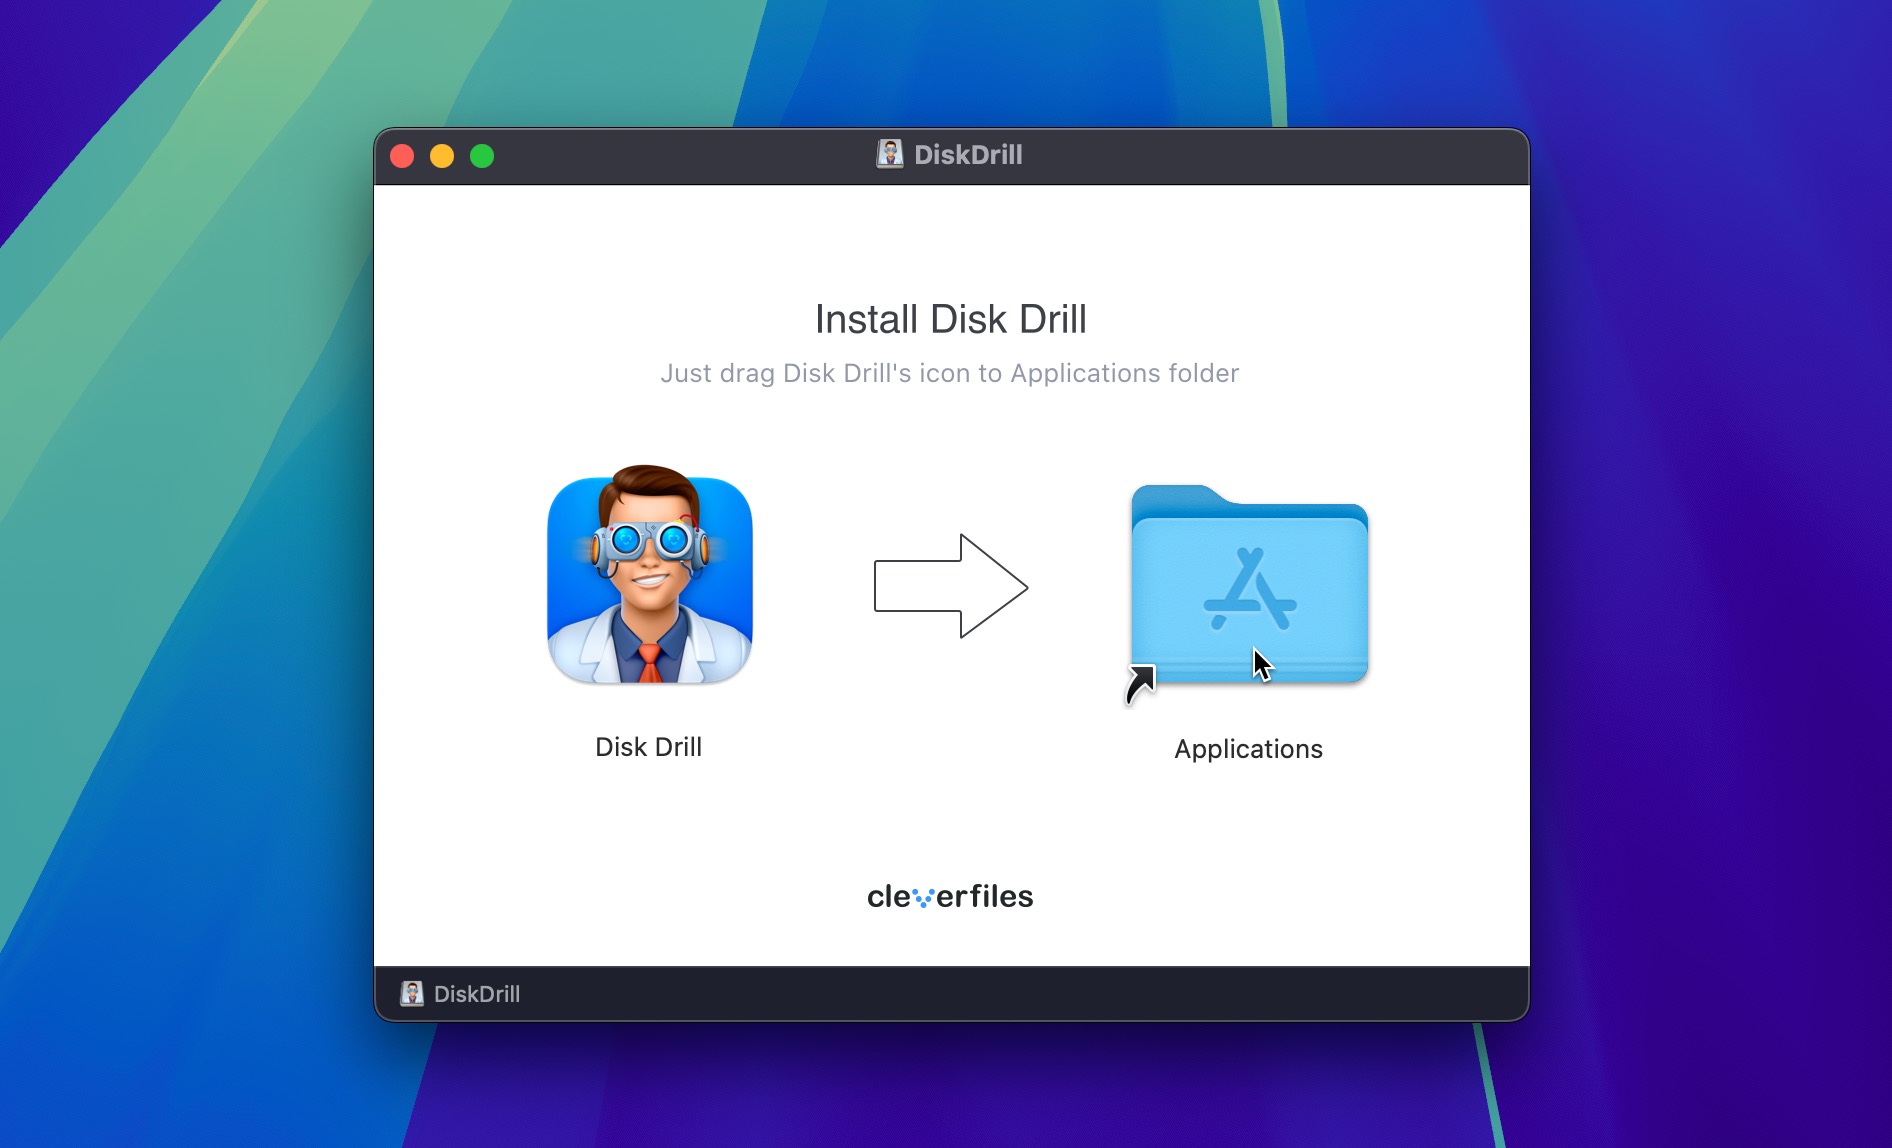
- Get Disk Drill for your operating system. Install and launch the application.

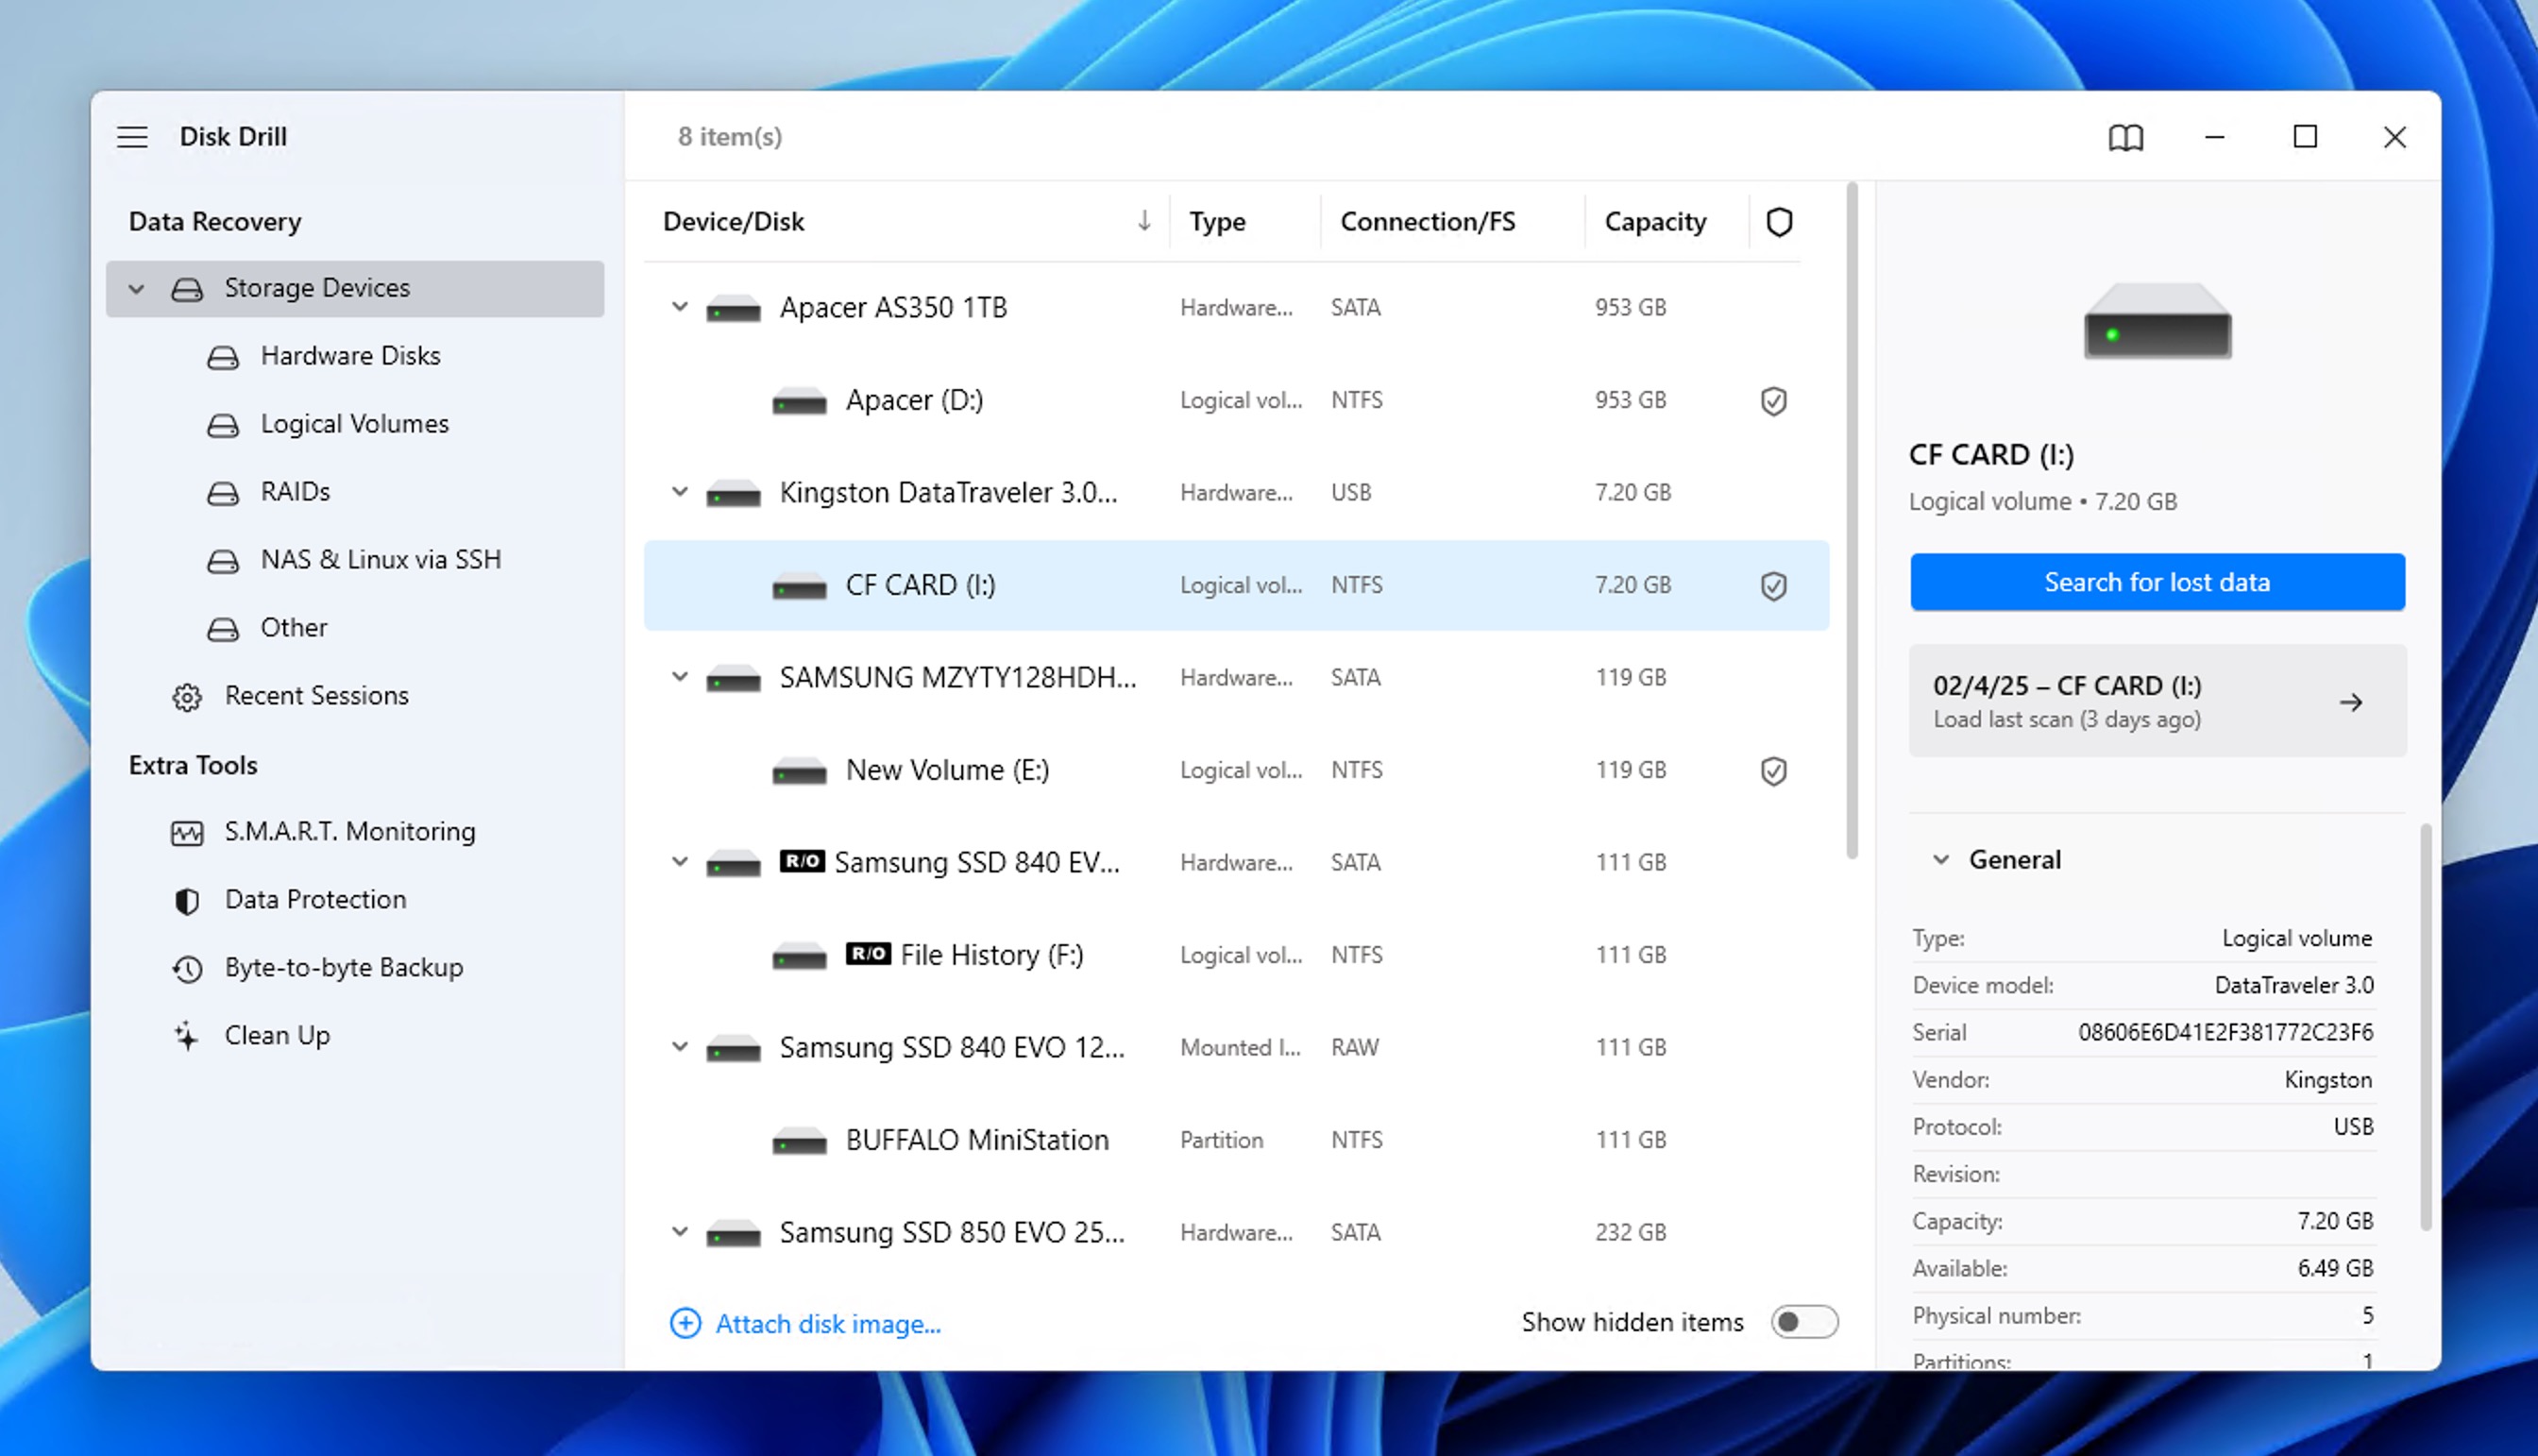
- Select the drive or external storage device from where you want to recover the music file.
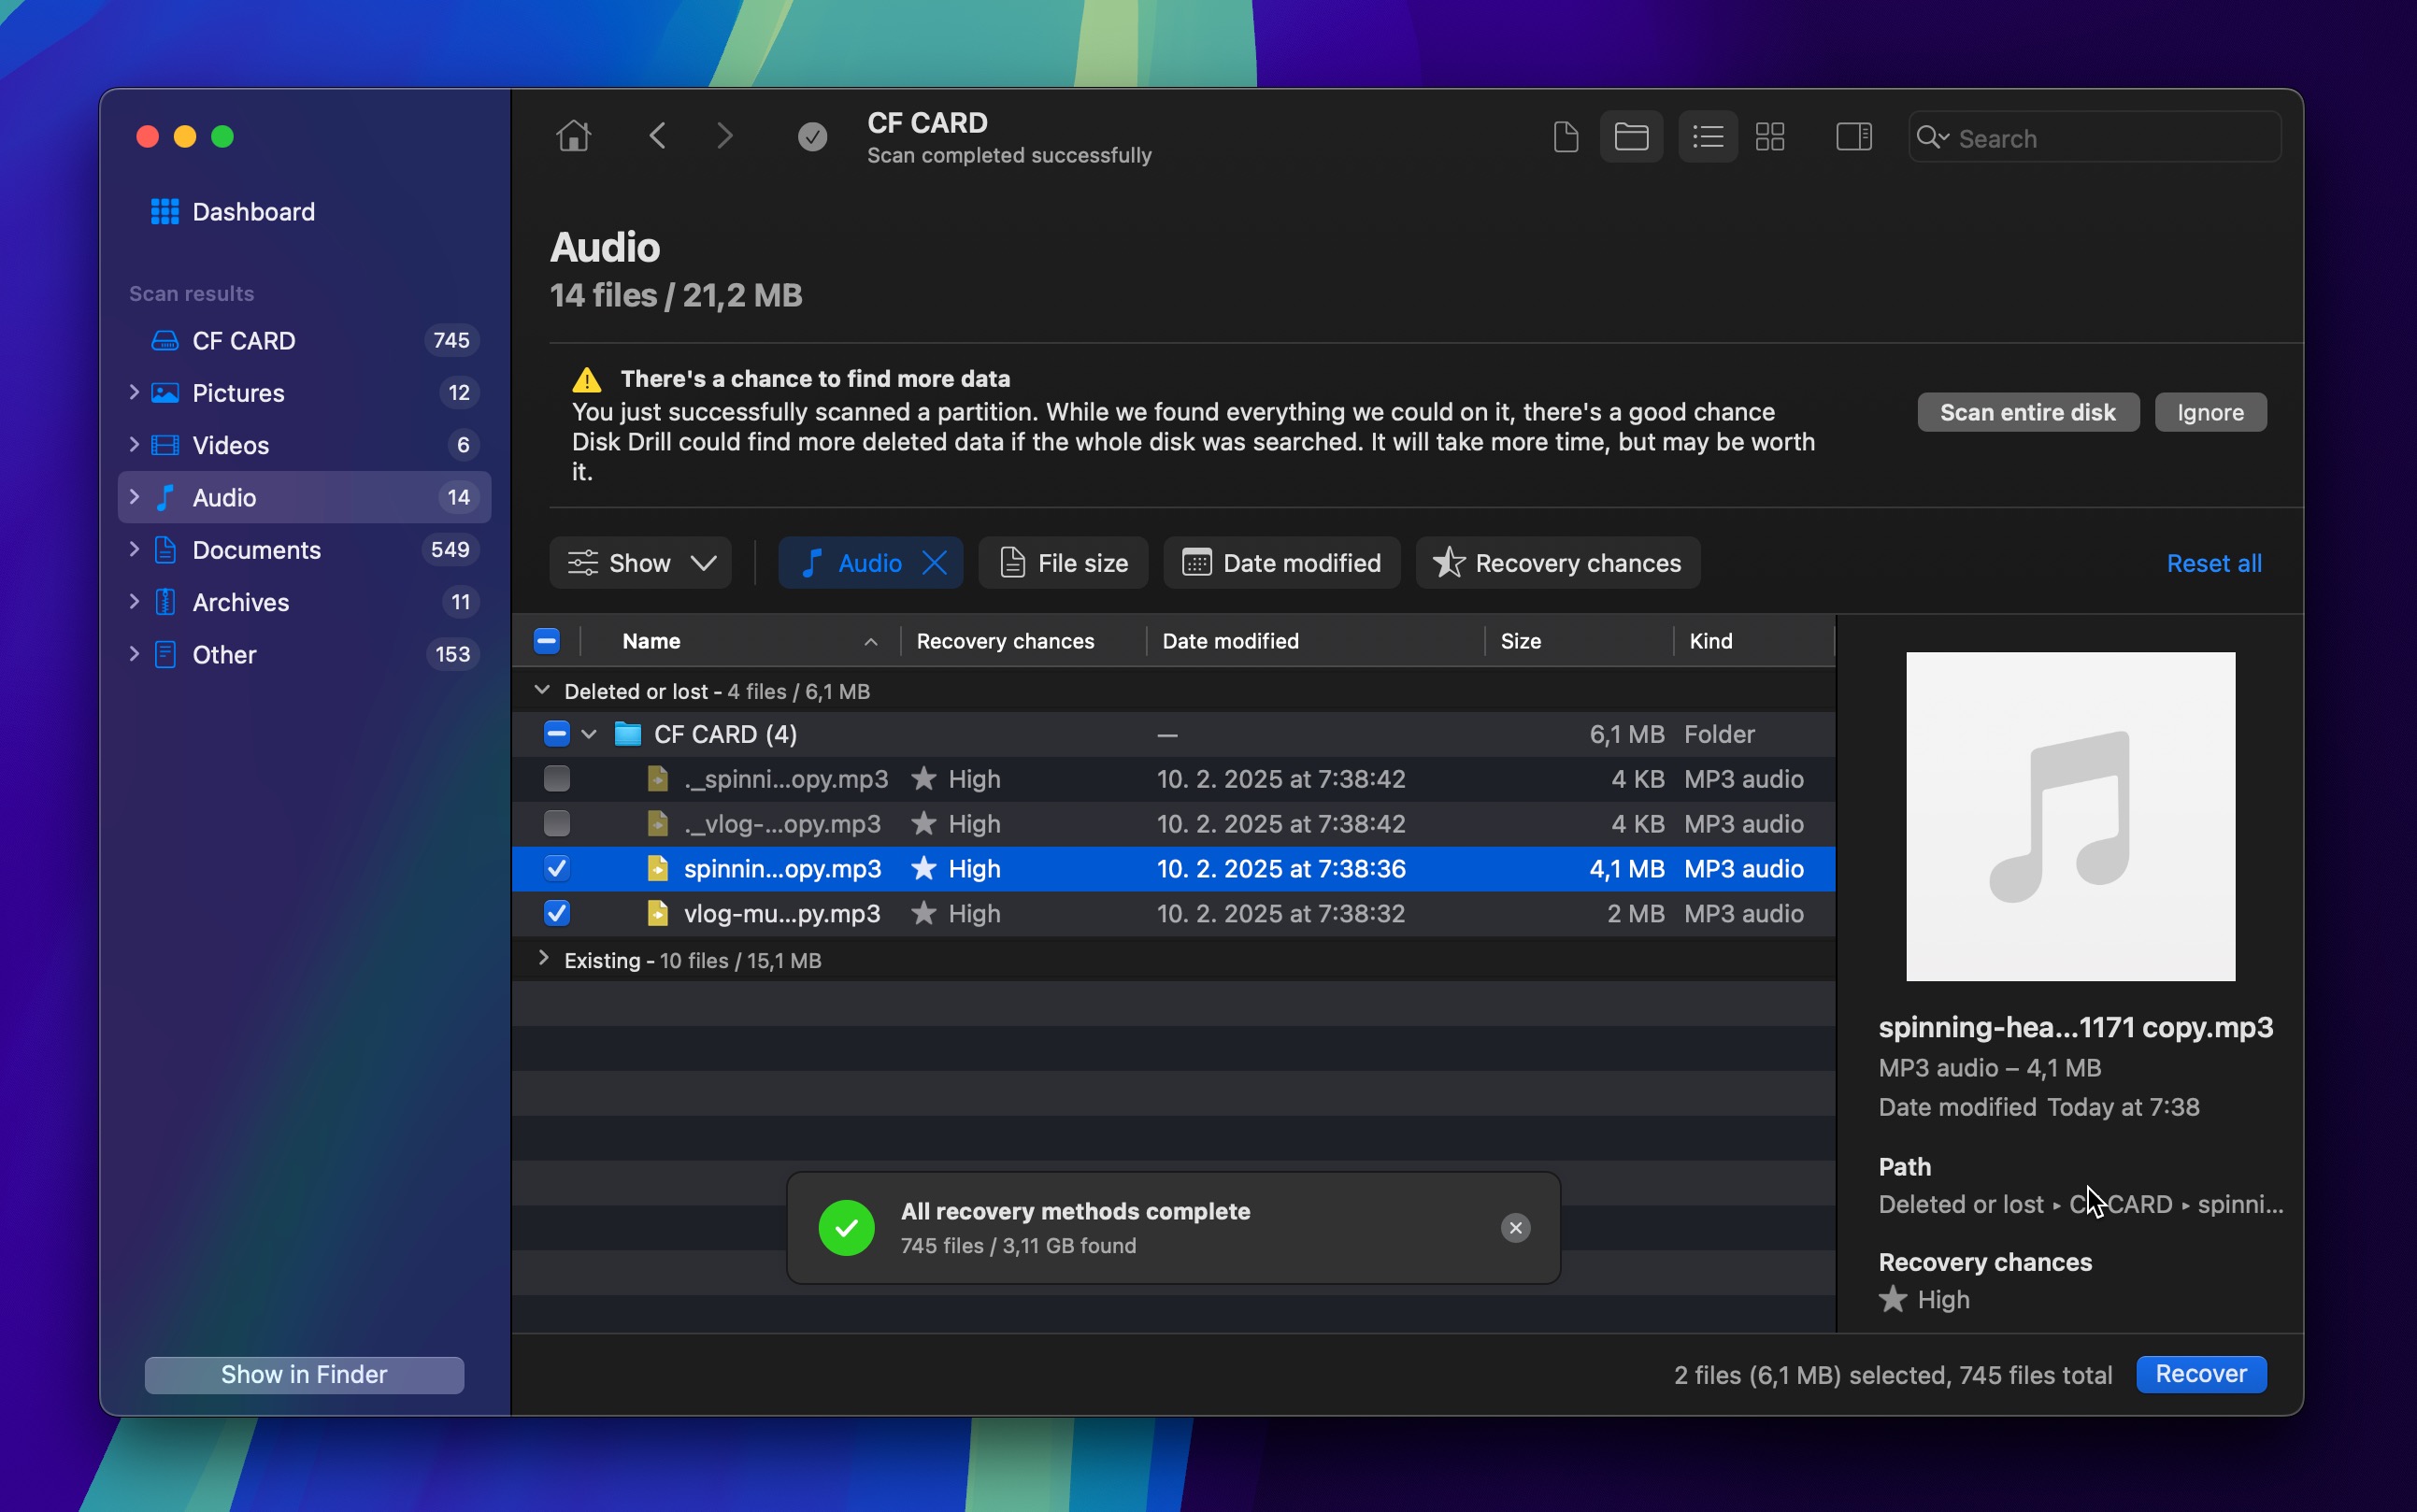
- Click the Search for lost data button and wait as Disk Drill scans your storage device.
- Use the file type filter to show only audio files. Locate your music files and, if you want, preview them to verify their recoverability.
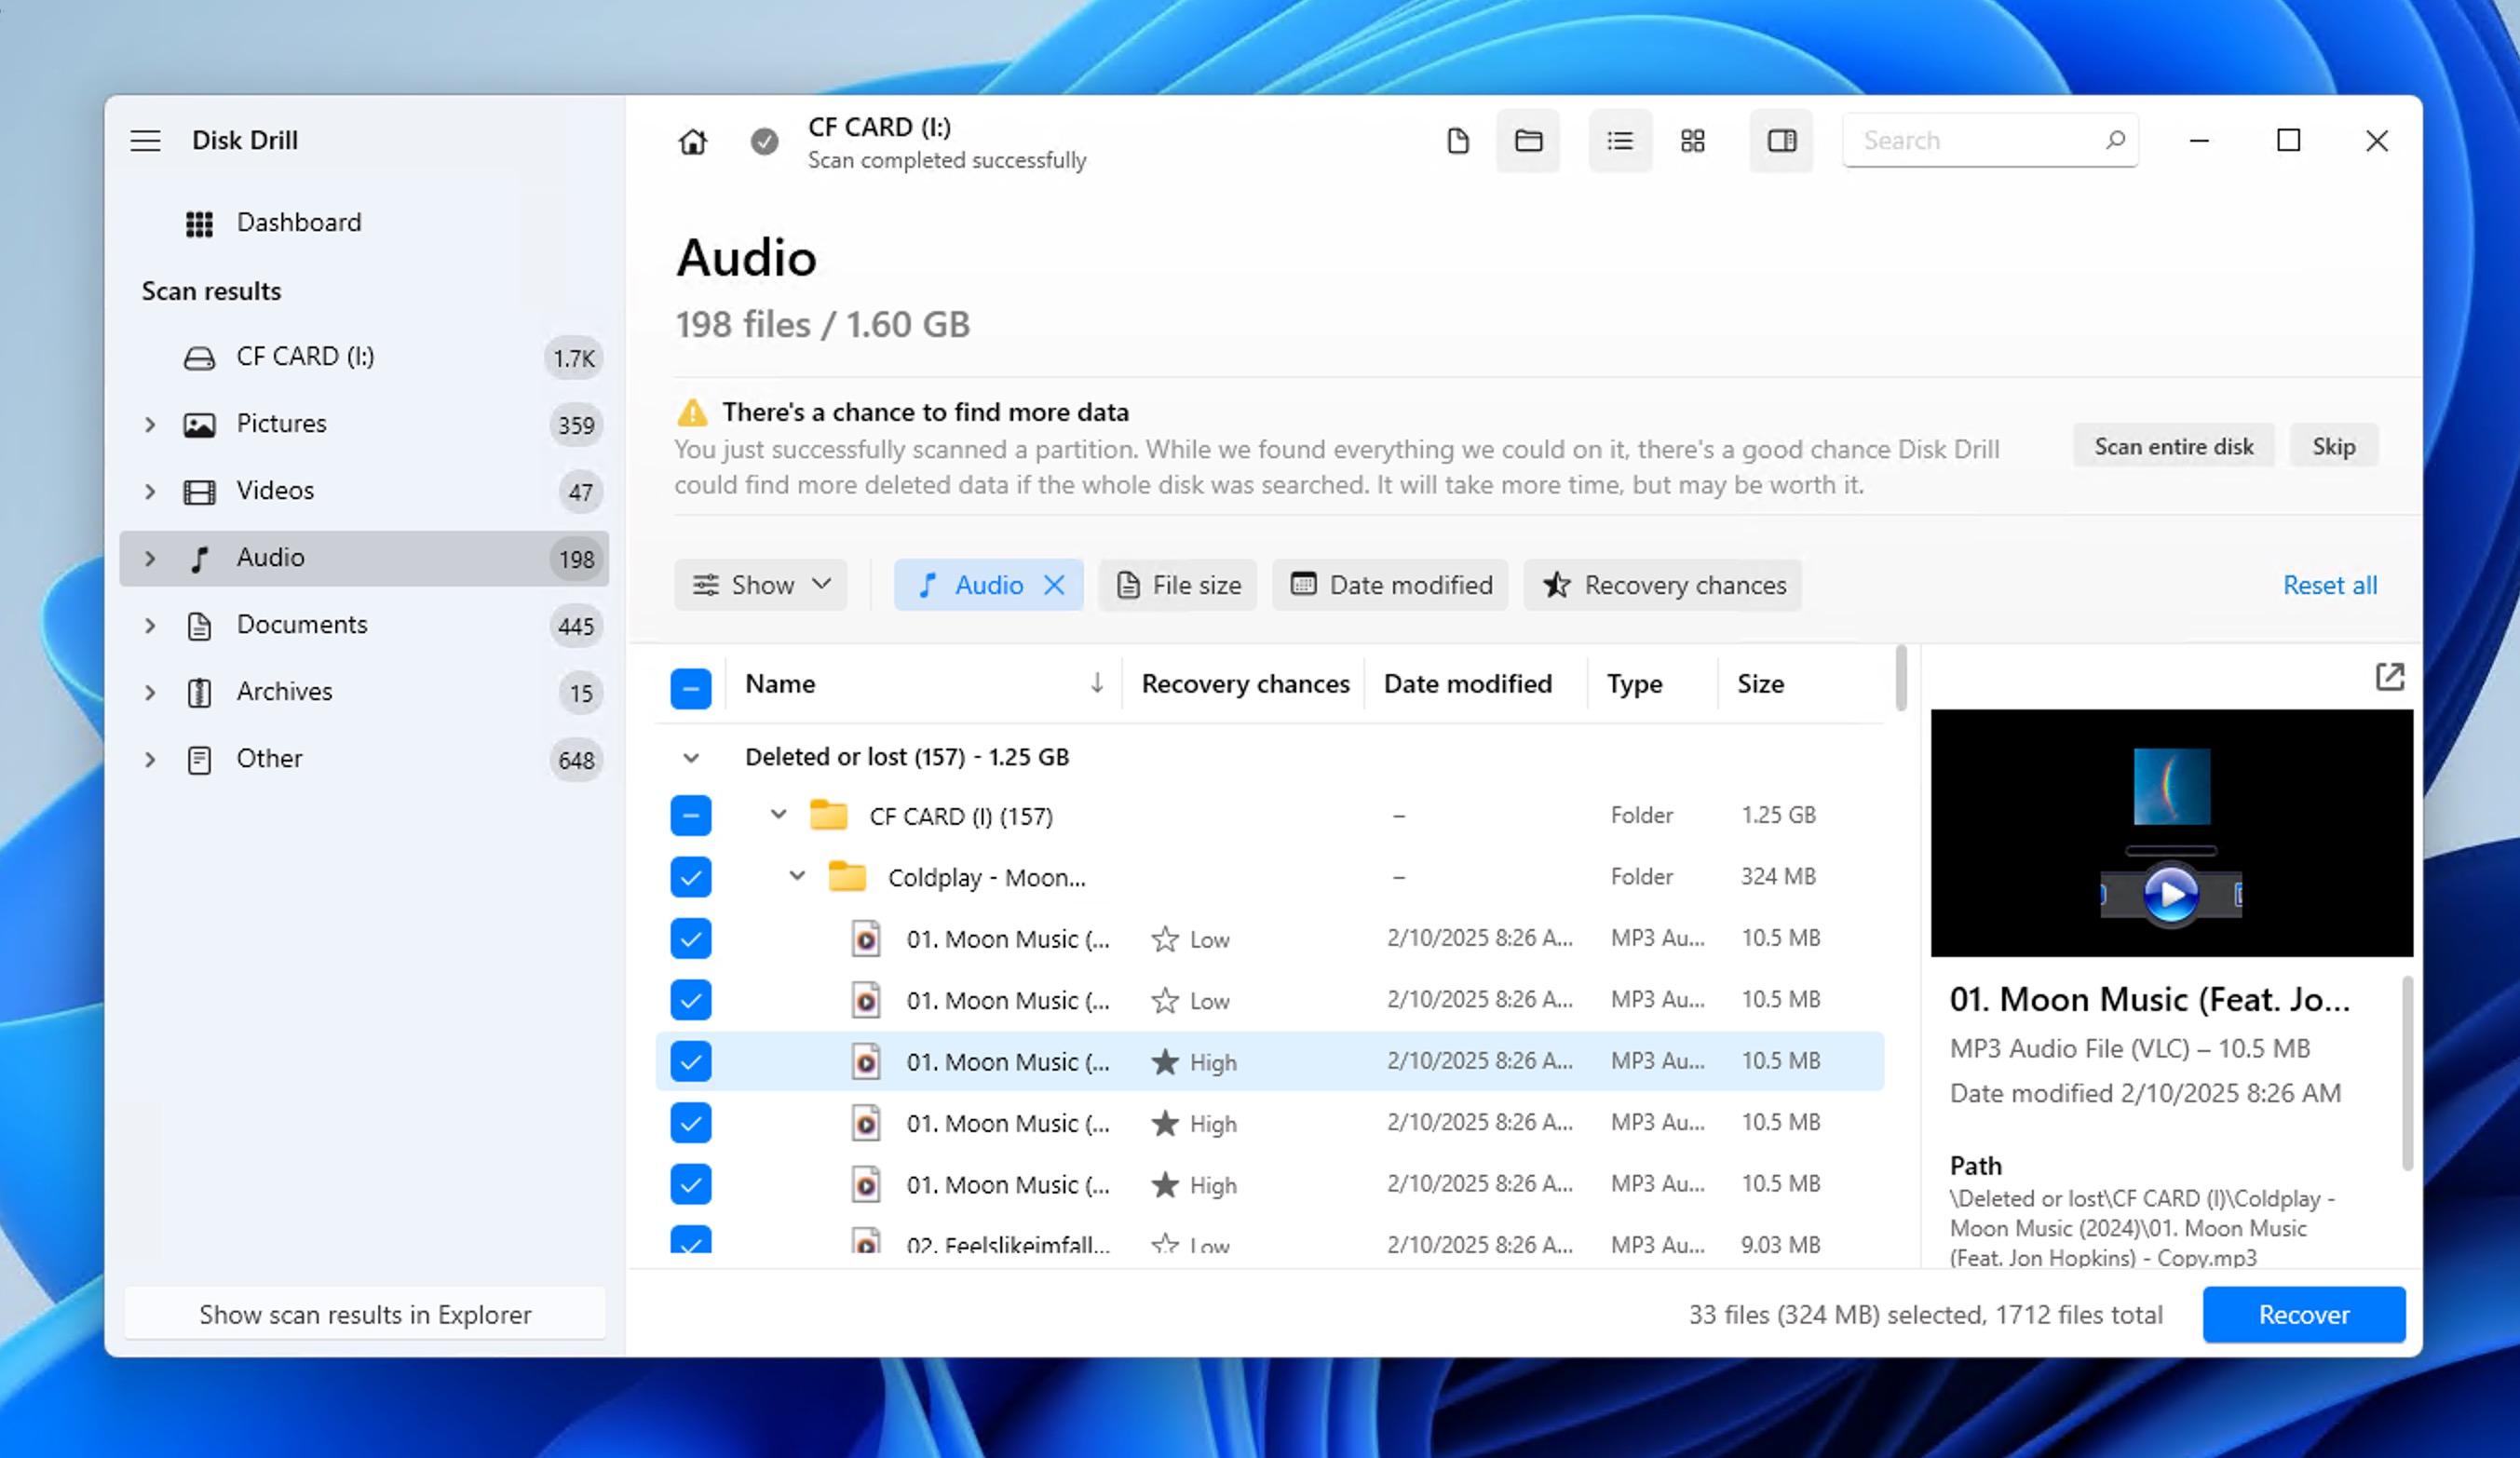
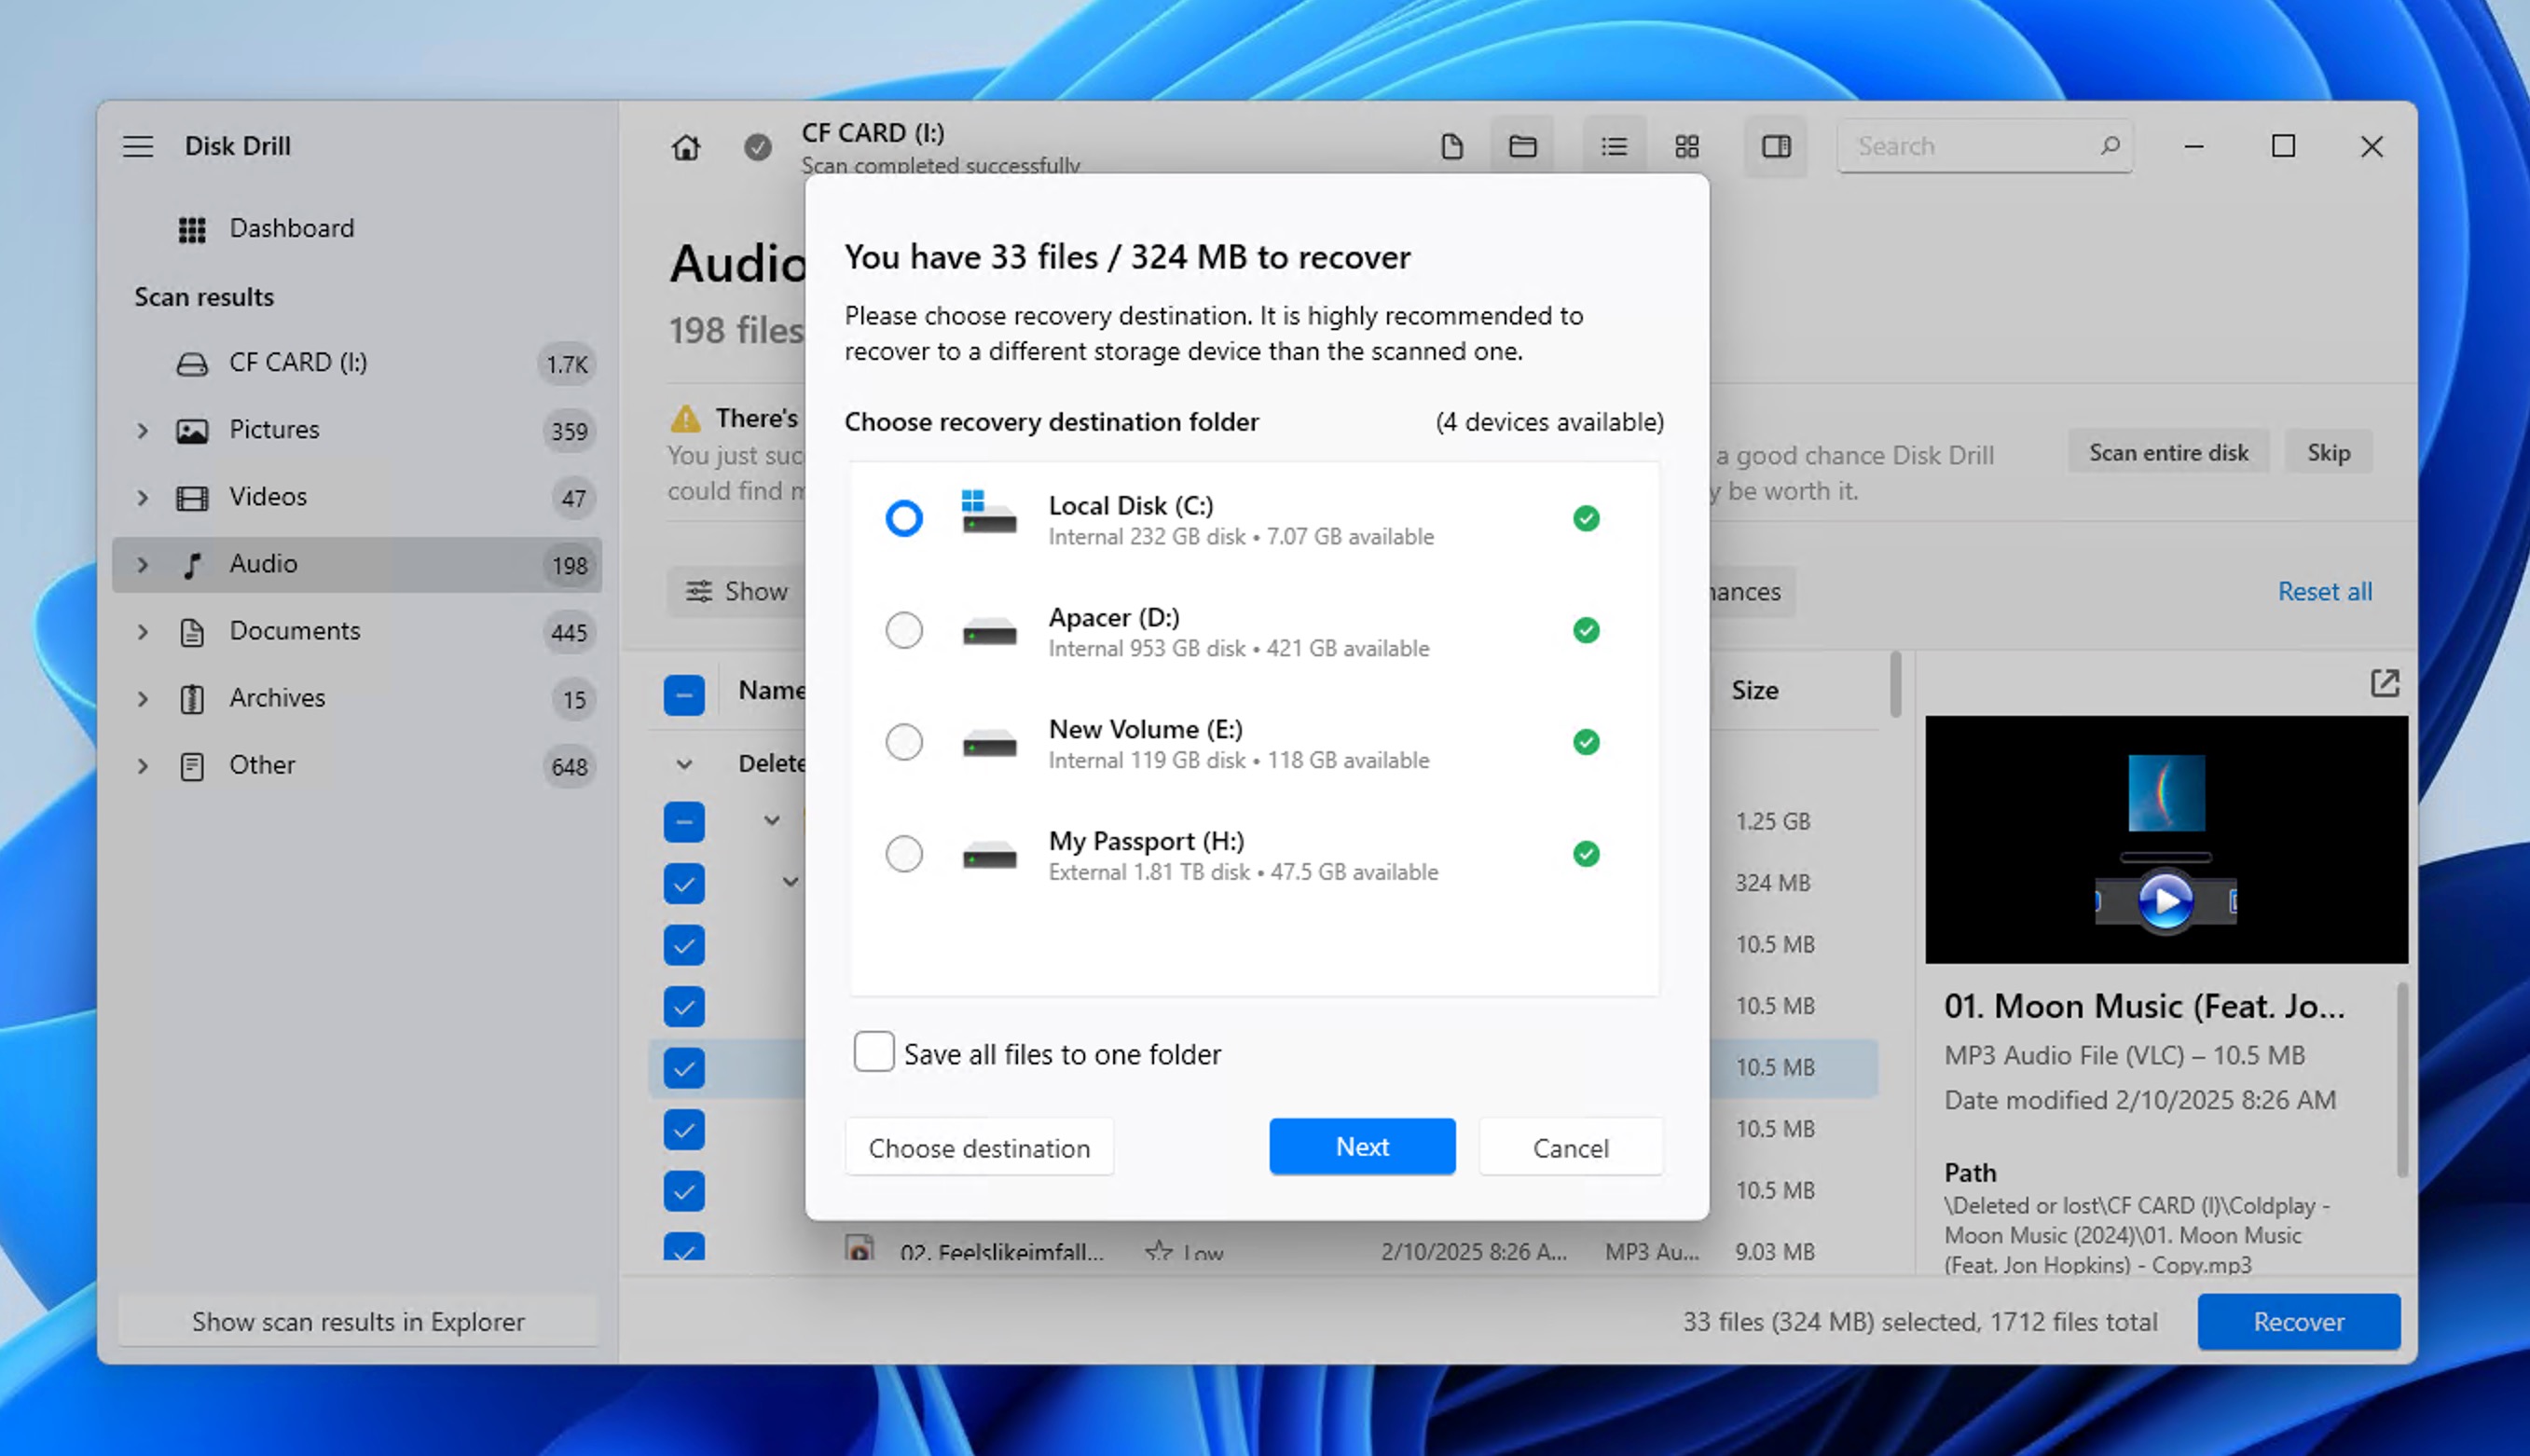
- Select the music files you want to recover and click the Recover button. Choose a recovery destination (different from the source drive) and confirm.
Whenever you use Disk Drill to recover lost music like in the example above, the software automatically employs two powerful recovery methods: file system scanning that can recover audio files even when directory structures are intact but files are deleted, and signature-based recovery that can detect and restore audio files by their unique formats even when the file system is severely damaged or formatted.
Thanks to Disk Drill’s dual recovery approach, it’s just as easy to recover common audio formats (MP3, WAV, FLAC, AIFF) as professional project files from digital audio workstations like FruityLoops, Ableton Live, and Logic Pro. Whether you’re a podcaster who accidentally formatted an SD card from a field recorder, a producer dealing with a corrupted studio drive, a musician who lost tracks from a failing USB drive, or just a regular home listener who has accidentally deleted beloved songs, Disk Drill can help.
Method 3: Recover MP3 Files Using Windows File History
If you keep backups of your files, you can attempt to recover your deleted or lost music files via cloud backups or your external drive. It’s good to create such backups since they can be beneficial in unexpected data-loss situations such as device formatting or storage corruption.
To recover MP3 files using Windows File History:
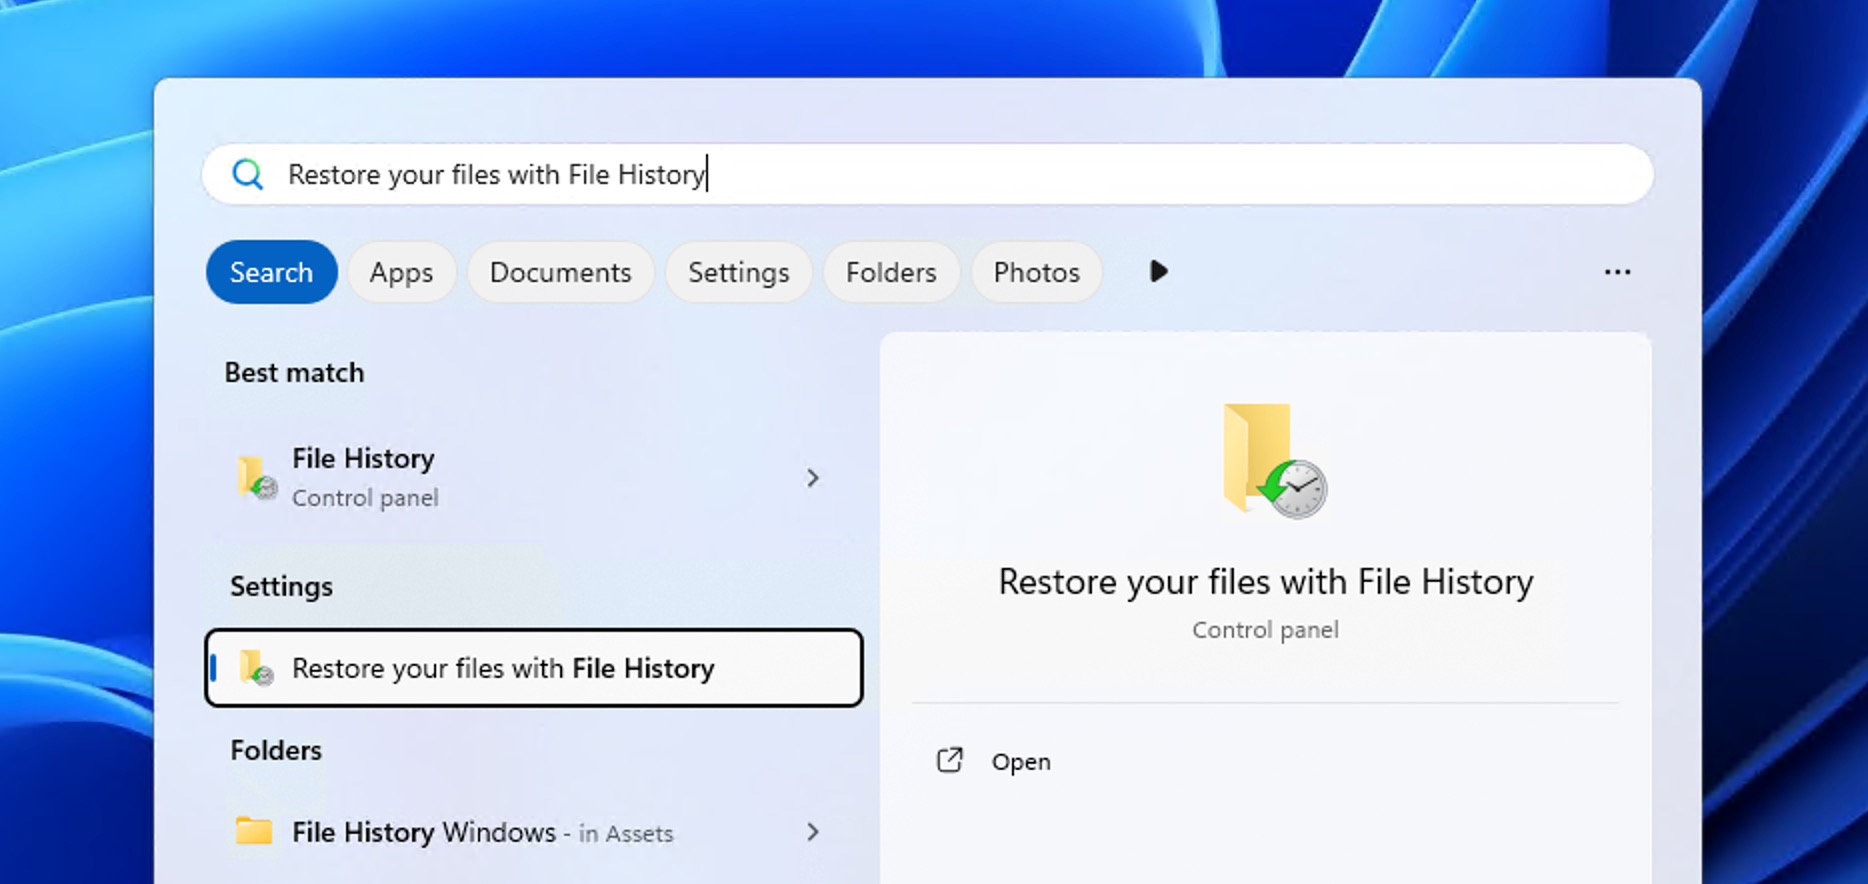
- Open the Start menu and type in Restore your files using File History (or just File History). Select the corresponding search result. This will redirect you to the Control Panel.
- Browse through the available backups or the music folder and locate the MP3 files you want to recover.
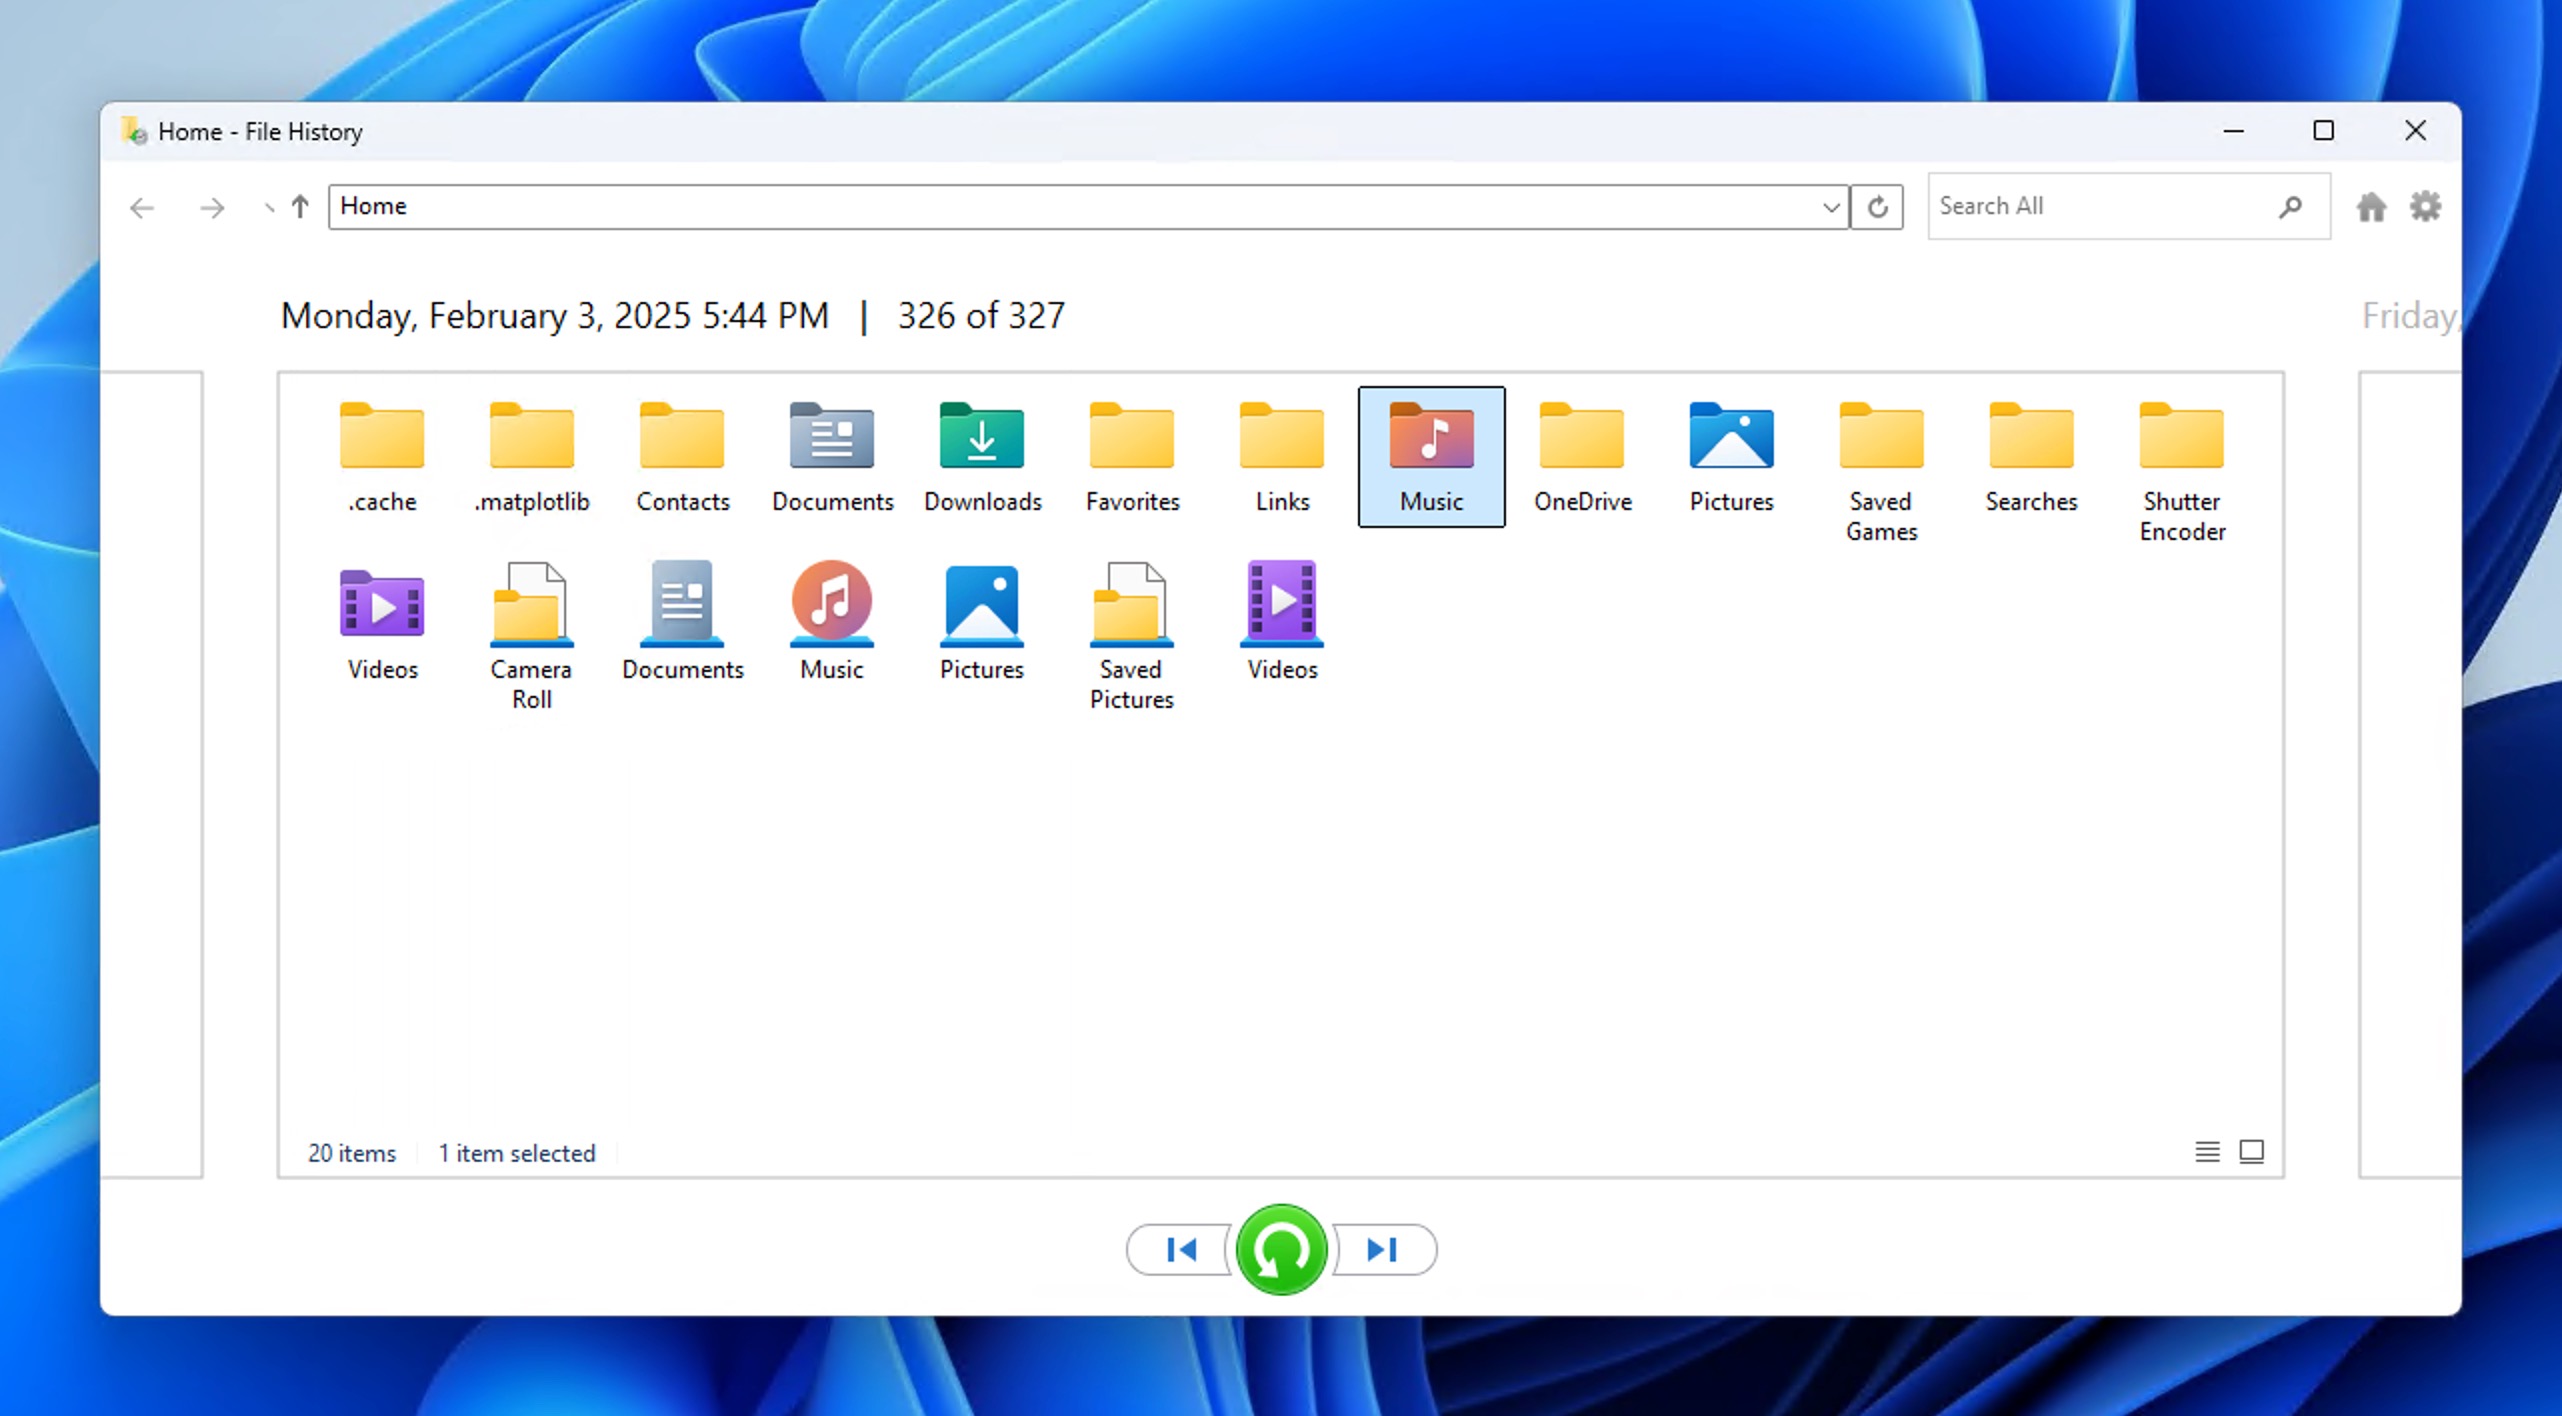
- Once you’ve found the desired files, click on the green Recover button. Your file will then be restored to its original location.
How to Recover Lost Music Files on Mac
Apple’s approach to file management on macOS is quite different from Windows, but the music file recovery methods available to Mac owners are very similar.
Method 1: Check Trash
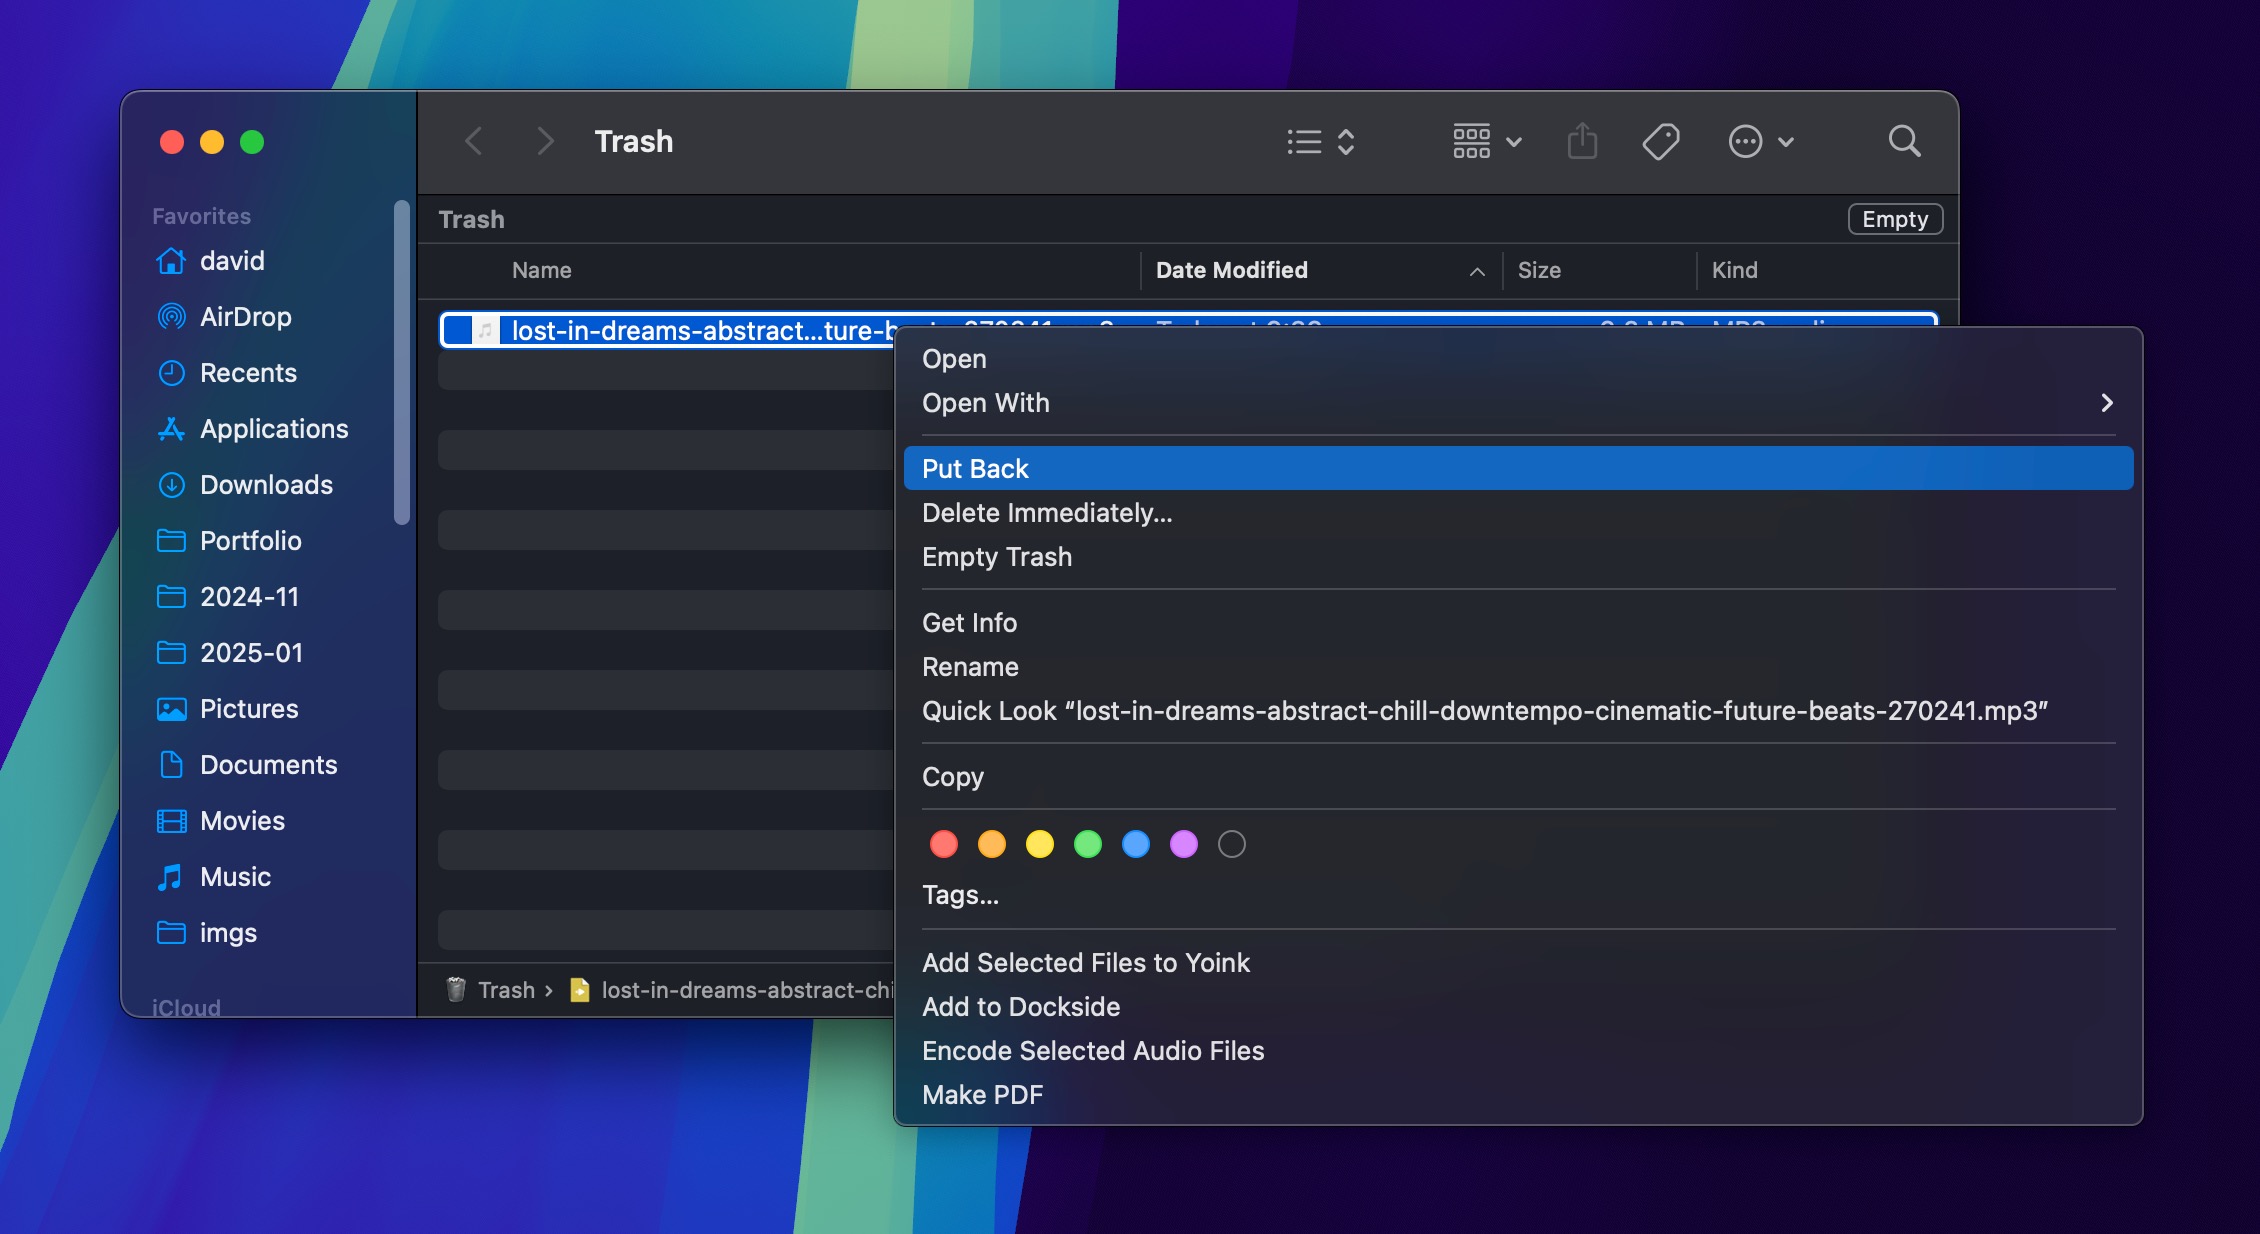
The macOS operating system also has its own temporary storage area for files that have been deleted by the user but are not yet permanently erased from the file system, the Trash folder.
To restore deleted music files from the Trash:
- Open the Trash by clicking its icon in the Dock.
- To restore deleted music files from the Trash, right-click the file and click on Put Back.
Method 2: Use a Music Recovery Tool
When the Trash doesn’t contain your deleted music files, you can use the same music recovery tool as on Windows: Disk Drill.
The Mac version of Disk Drill supports Apple’s proprietary file systems (APFS and HFS+), as well as Windows and some Linux file systems, so it can deliver results no matter where your music was stored.
To recover permanently deleted music from Mac:
- Download and install Disk Drill for Mac.
- Launch Disk Drill and select the drive with your music.

- Click Search for lost data.
- Use the audio file filter to locate your music.
- Select your music and click Recover.
Disk Drill for Mac can preview an unlimited number of music files before their recovery, allowing you to verify that they can be restored before you purchase a license.
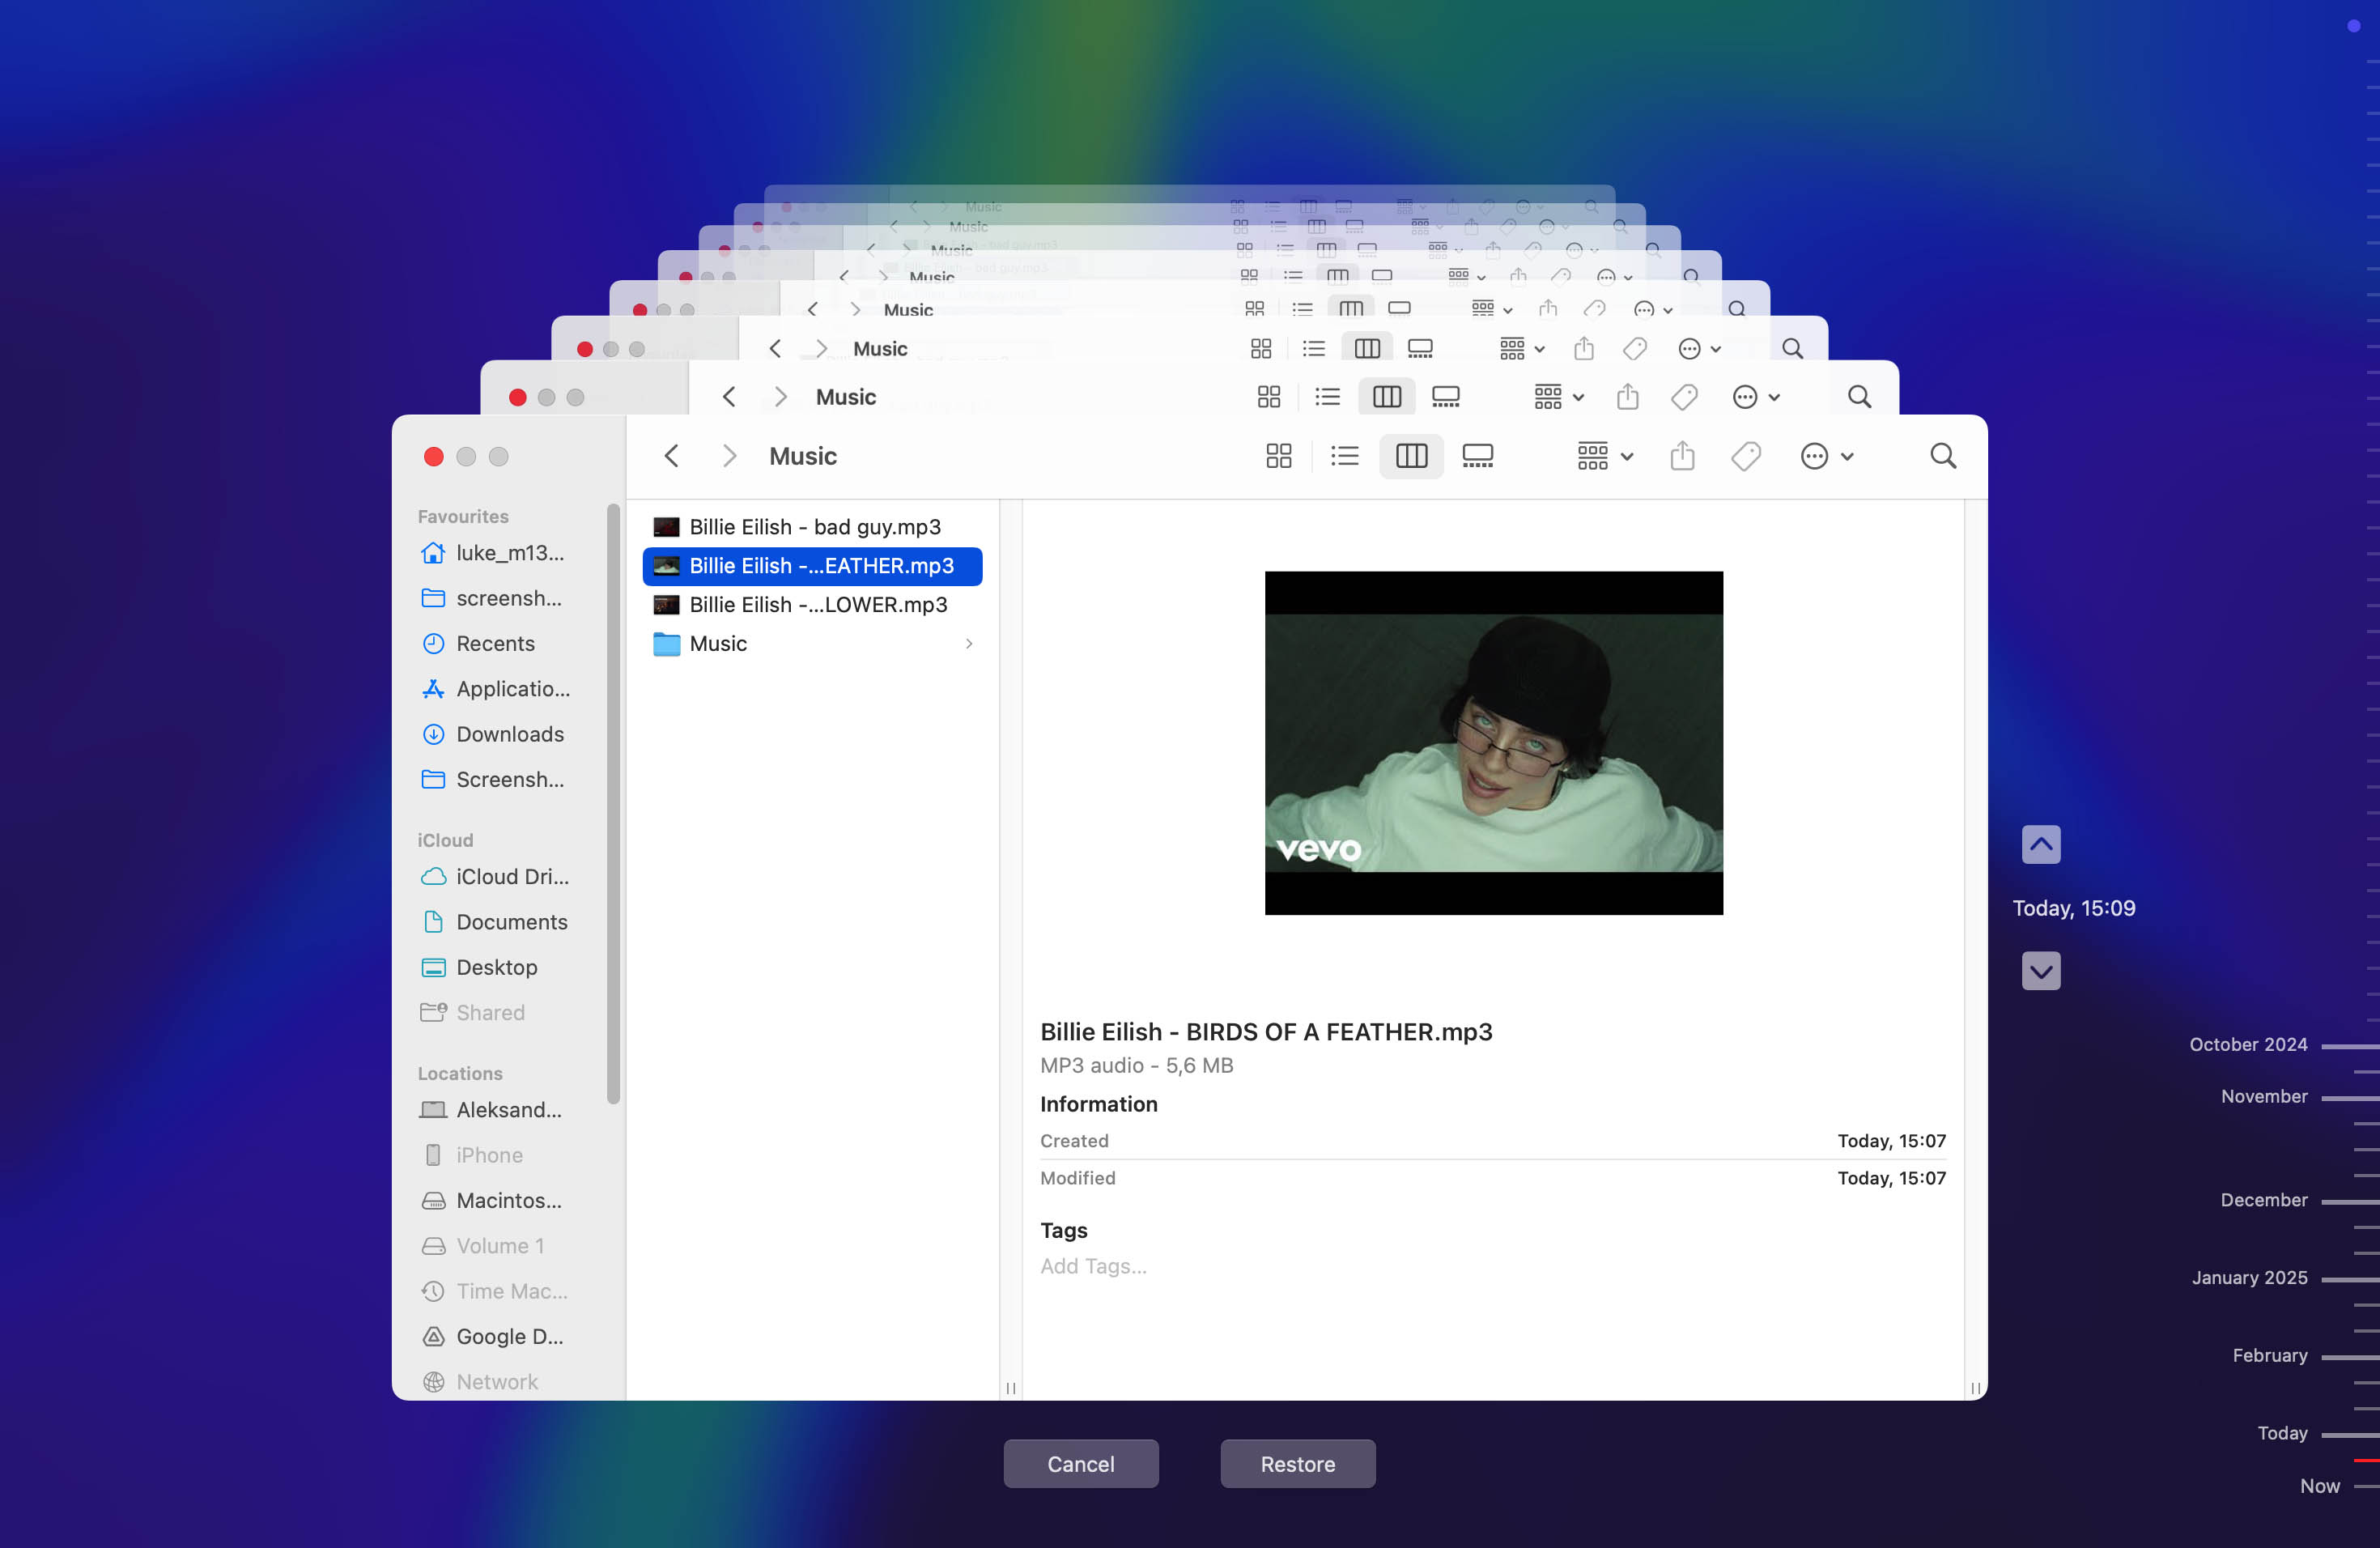
Method 3: Recover MP3 Files Using Mac Time Machine
Deleted or otherwise lost music files that can’t be recovered even with music recovery software like Disk Drill may still be salvaged if you’re using Time Machine to back up your data.
Just note that Time Machine only backs up your internal drive by default, so if your MP3 files were stored on an external drive that wasn’t backed up, you won’t be able to recover them with Time Machine.
To recover MP3 files using Mac Time Machine:
- Open Spotlight (CMD + spacebar) and type in Time Machine.
- Navigate through the folders to locate your MP3 file from the local backups.
- Once you’ve selected the file, click on the Restore option.
How to Recover Audio Files on iPhone
Apple’s “walled garden” approach to iOS means that recovering deleted audio files from an iPhone works quite differently from other devices.
Due to the iPhone’s robust encryption and strict security measures, traditional data recovery methods often won’t work. However, Apple has built several safety nets into iOS that can help you recover lost music, and you might even have some luck with iOS data recovery tools.
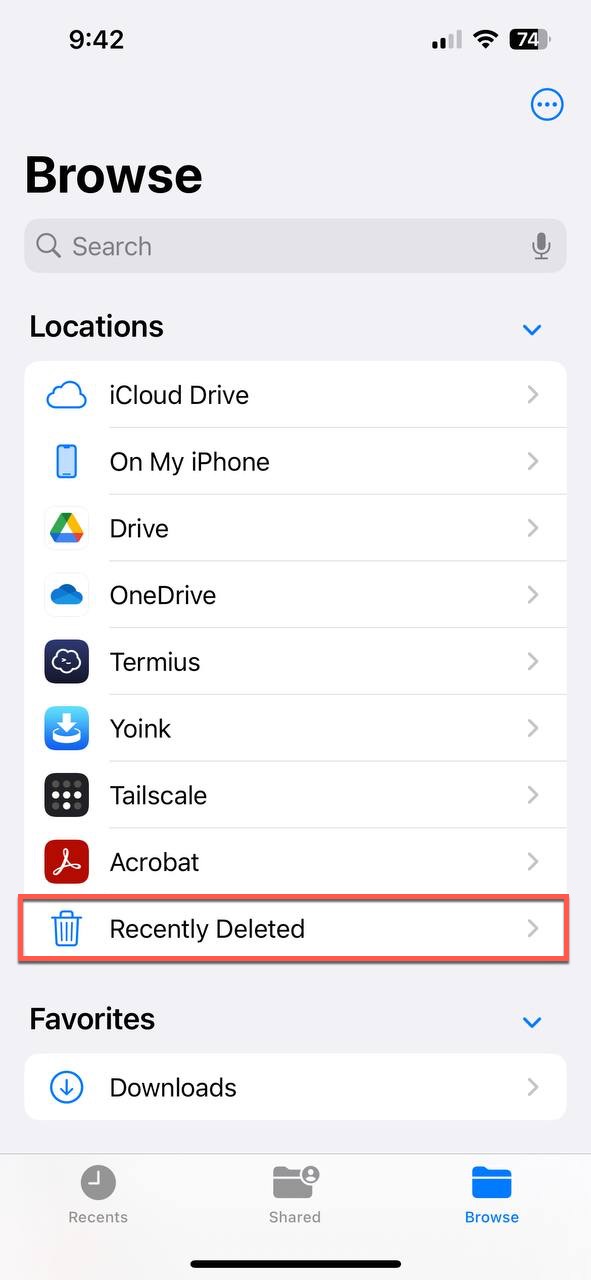
Method 1: Check Files App for Recently Deleted Audio
The Files app in iOS includes a built-in recovery feature that works similarly to the Recycle Bin on Windows or the Trash on Mac. When you delete an audio file stored locally on your iPhone, it is moved to a special Recently Deleted folder where it remains recoverable for up to 30 days.
- Launch the Files app on your iPhone.
- Tap Browse at the bottom of the screen.
- Look for Locations and then Recently Deleted.
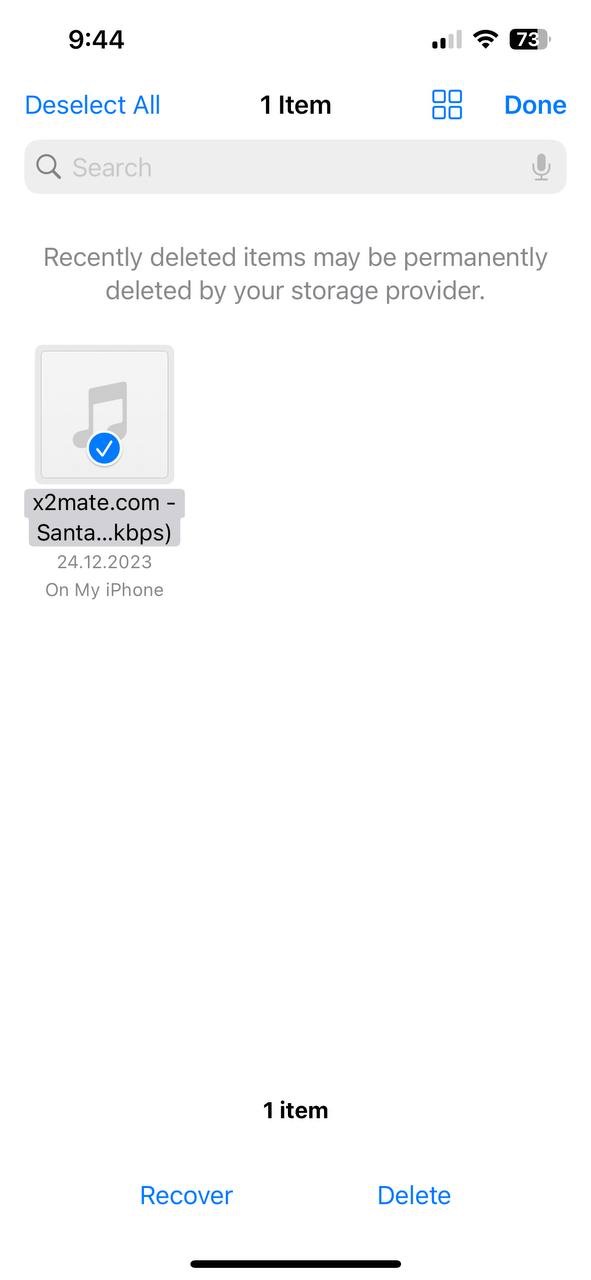
- Tap the three horizontal dots in the top-right corner and then Select the audio files you want to restore.
- Tap Recover after selecting your files.
Method 2: Re-download Music from the iTunes Store
The iTunes Store and Apple Music services maintain a complete record of every song you’ve ever purchased or added to your library through your Apple ID. This means that even if you’ve deleted music files from your device, you can always download them again (provided you have an internet connection).
- Open the iTunes Store app and tap the More button at the bottom of the screen.
- Select the Purchased option and choose Music from the list.
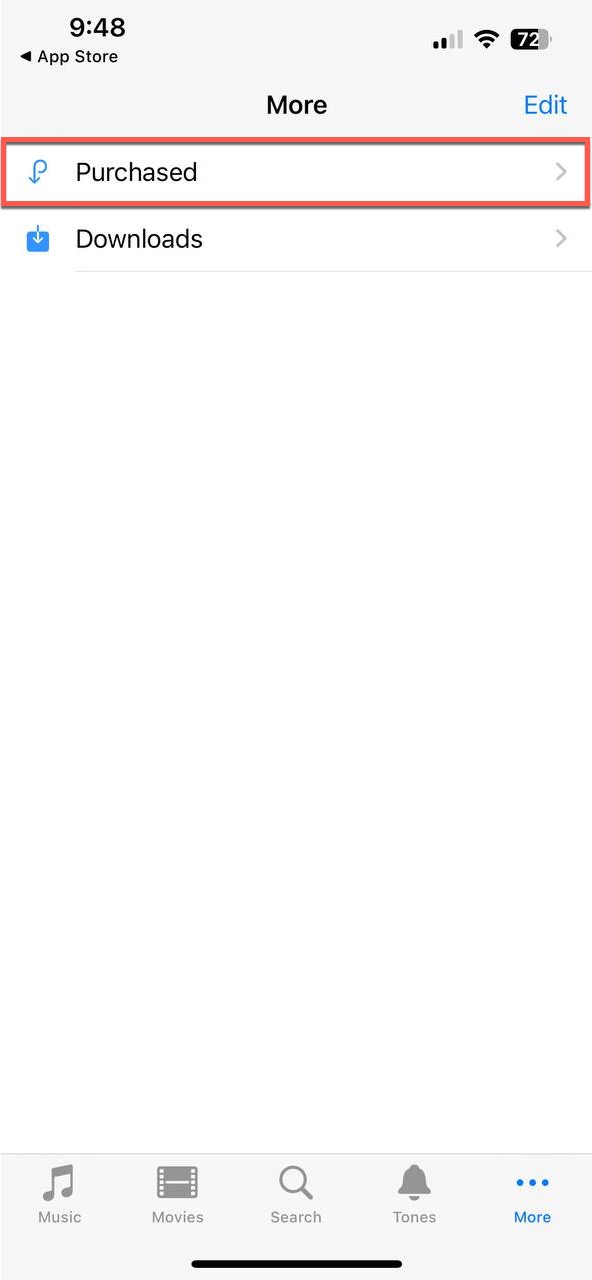
- Tap All Songs to view everything you’ve purchased, or browse by artist or use the search function to quickly locate specific tracks.
- Download individual songs and albums by tapping the cloud icons next to them, or tap Download All at the top of the screen to download all of your purchases at once.
Method 3: Restore Deleted Voice Memos
The Voice Memos app on iOS has its own Recently Deleted folder, separate from the Files app, which helps prevent accidental permanent deletion of important recordings.
- Launch the Voice Memos app.
- Navigate to the Recently Deleted folder.
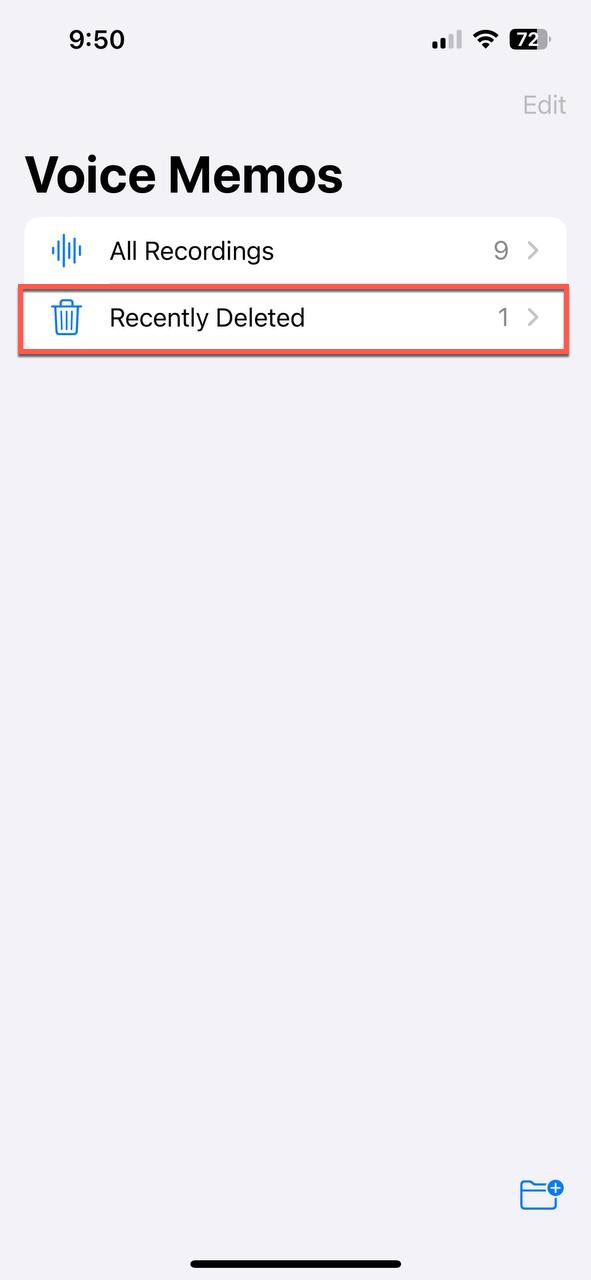
- Tap on the recording you want to recover and select Recover to restore it to your main Voice Memos list. Alternatively, tap Recover All to restore all recordings.
Method 4: Use an iPhone Data Recovery Tool
Due to the iPhone’s encryption and security features, iPhone data recovery tools work by analyzing existing backups rather than scanning the device directly. While this approach may be less effective than methods used for Android, it can deliver excellent results if you have older iTunes or iCloud backups.
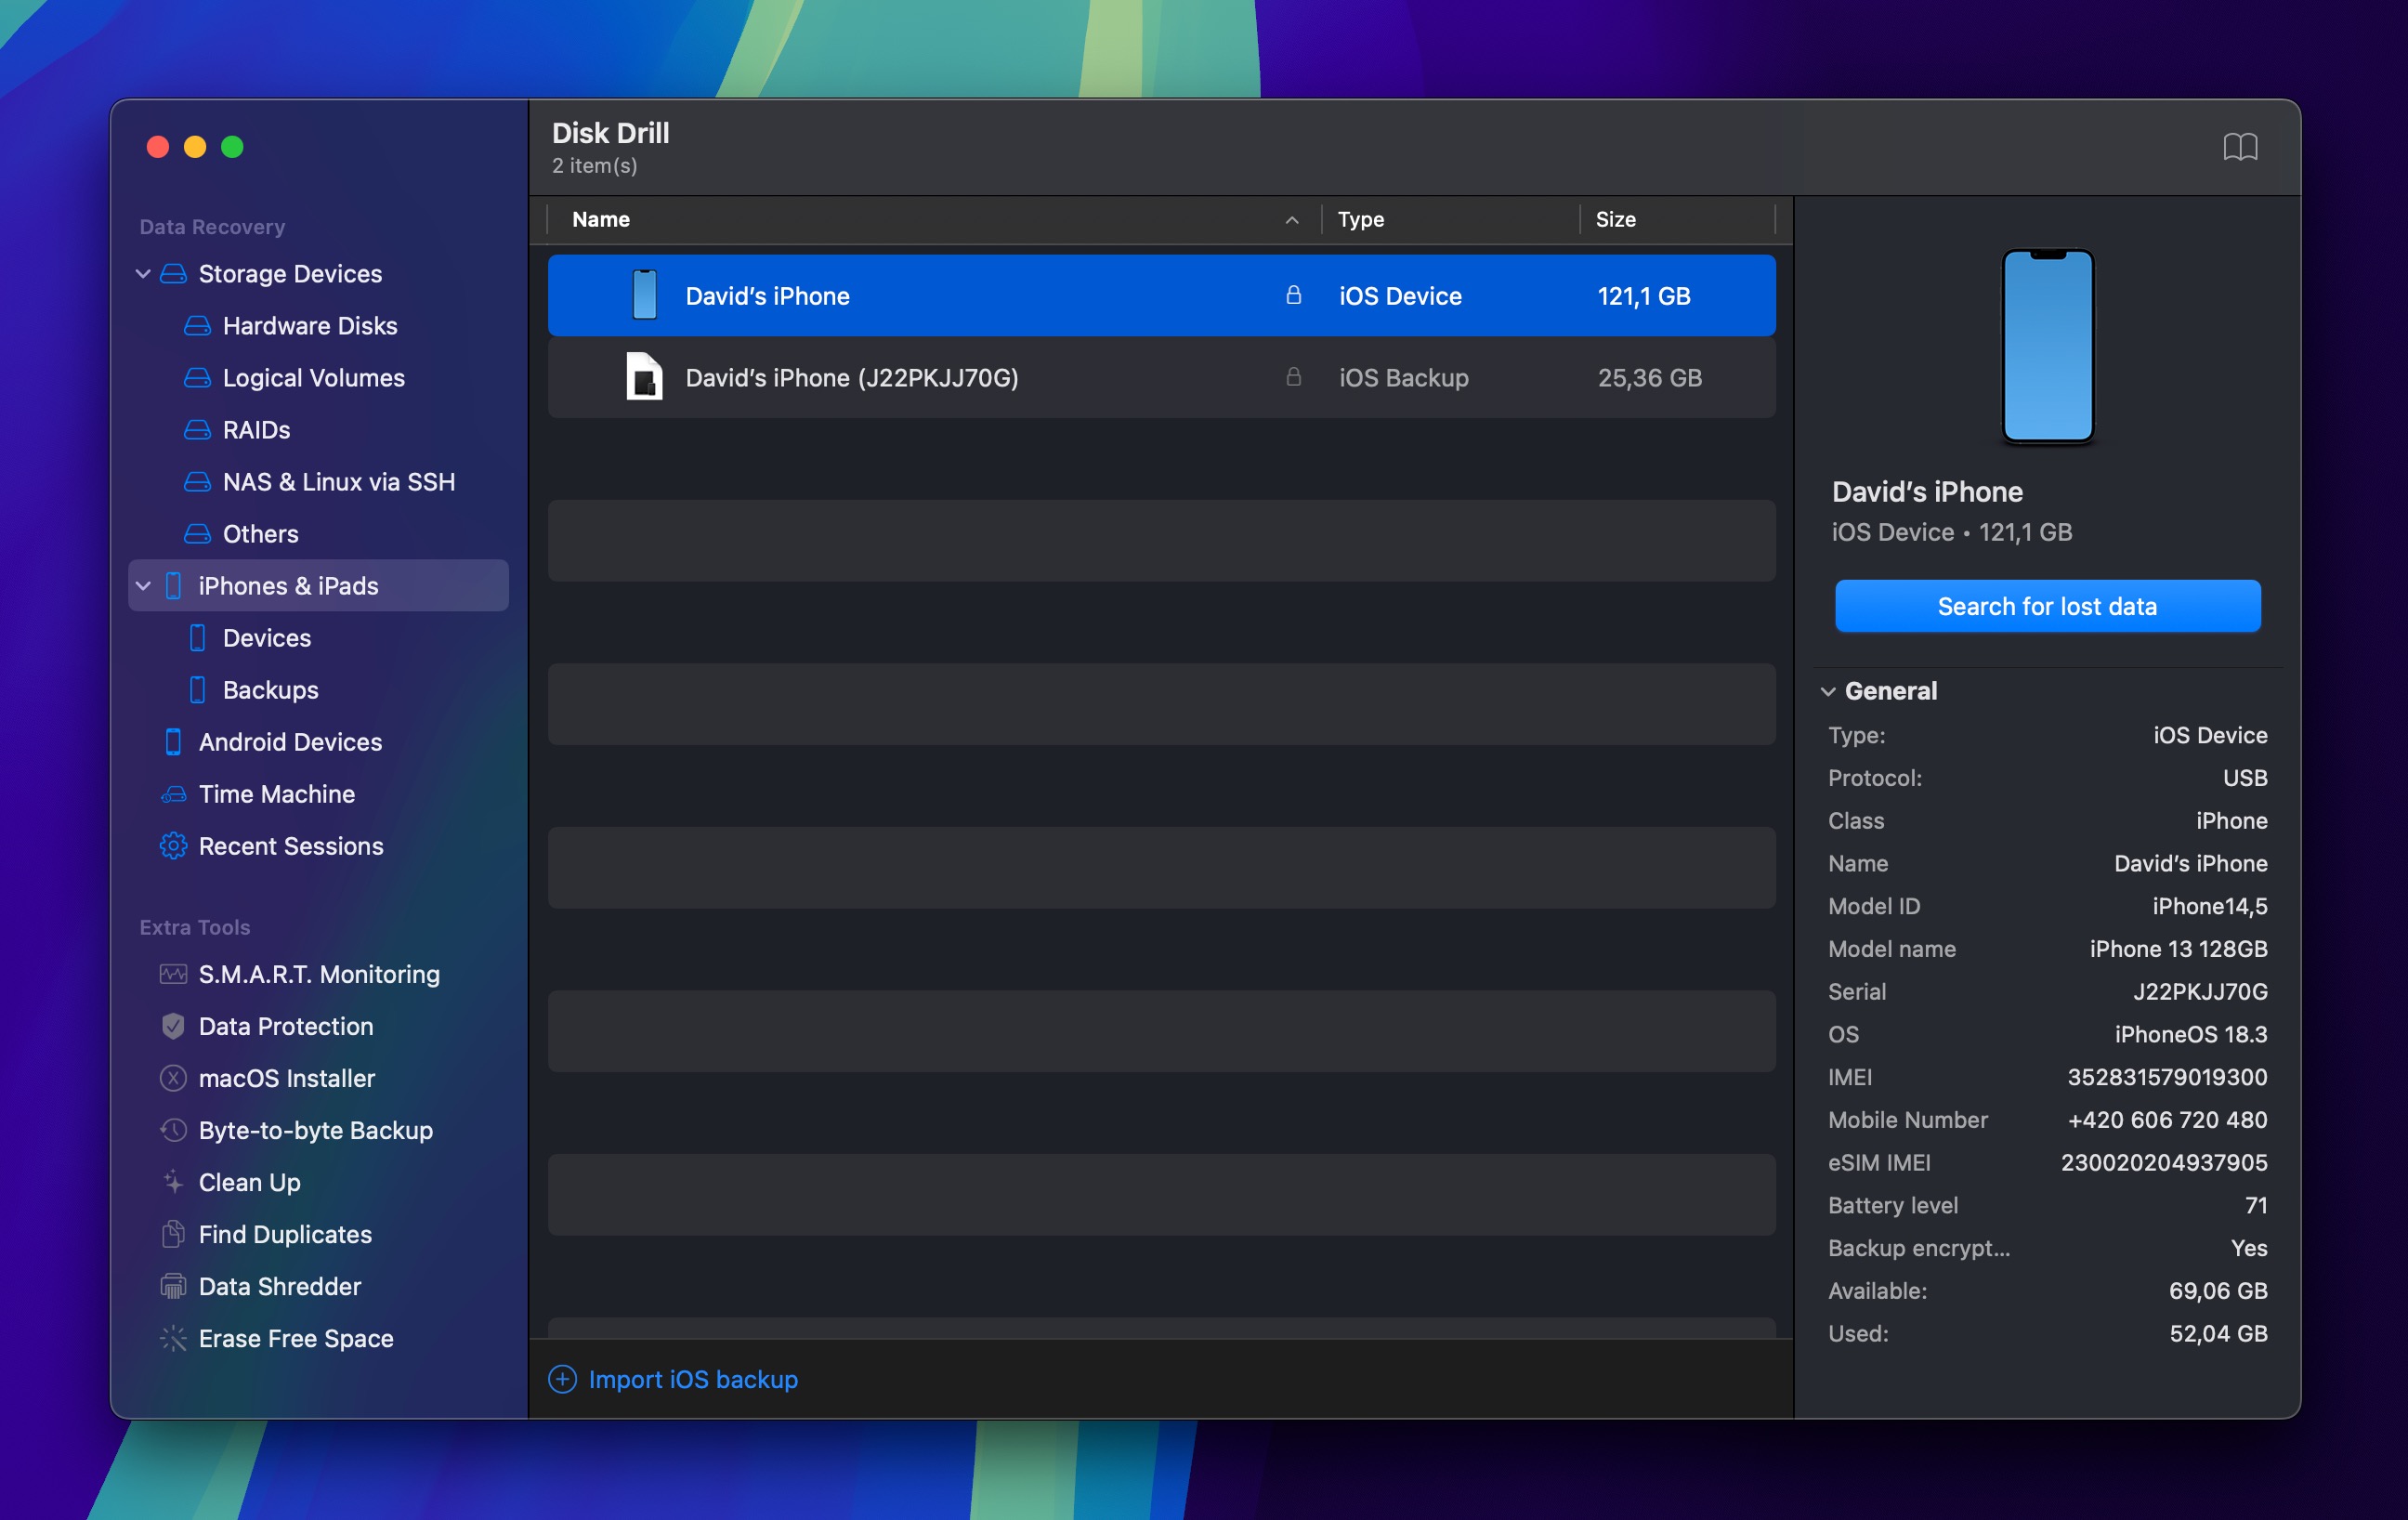
To recover lost music from an iPhone using Disk Drill:
- Download and install Disk Drill for iOS data recovery on your Mac.
- Connect your iPhone to your computer and make sure it is unlocked and trusts the computer.
- Launch Disk Drill and select your iPhone. Choose between scanning the device directly or recovering from backups. For best results, it’s recommended to recover from backups first. Start the scanning process by clicking the Search for lost data button.
- Wait for scanning to finish and then use filters to display only audio files.
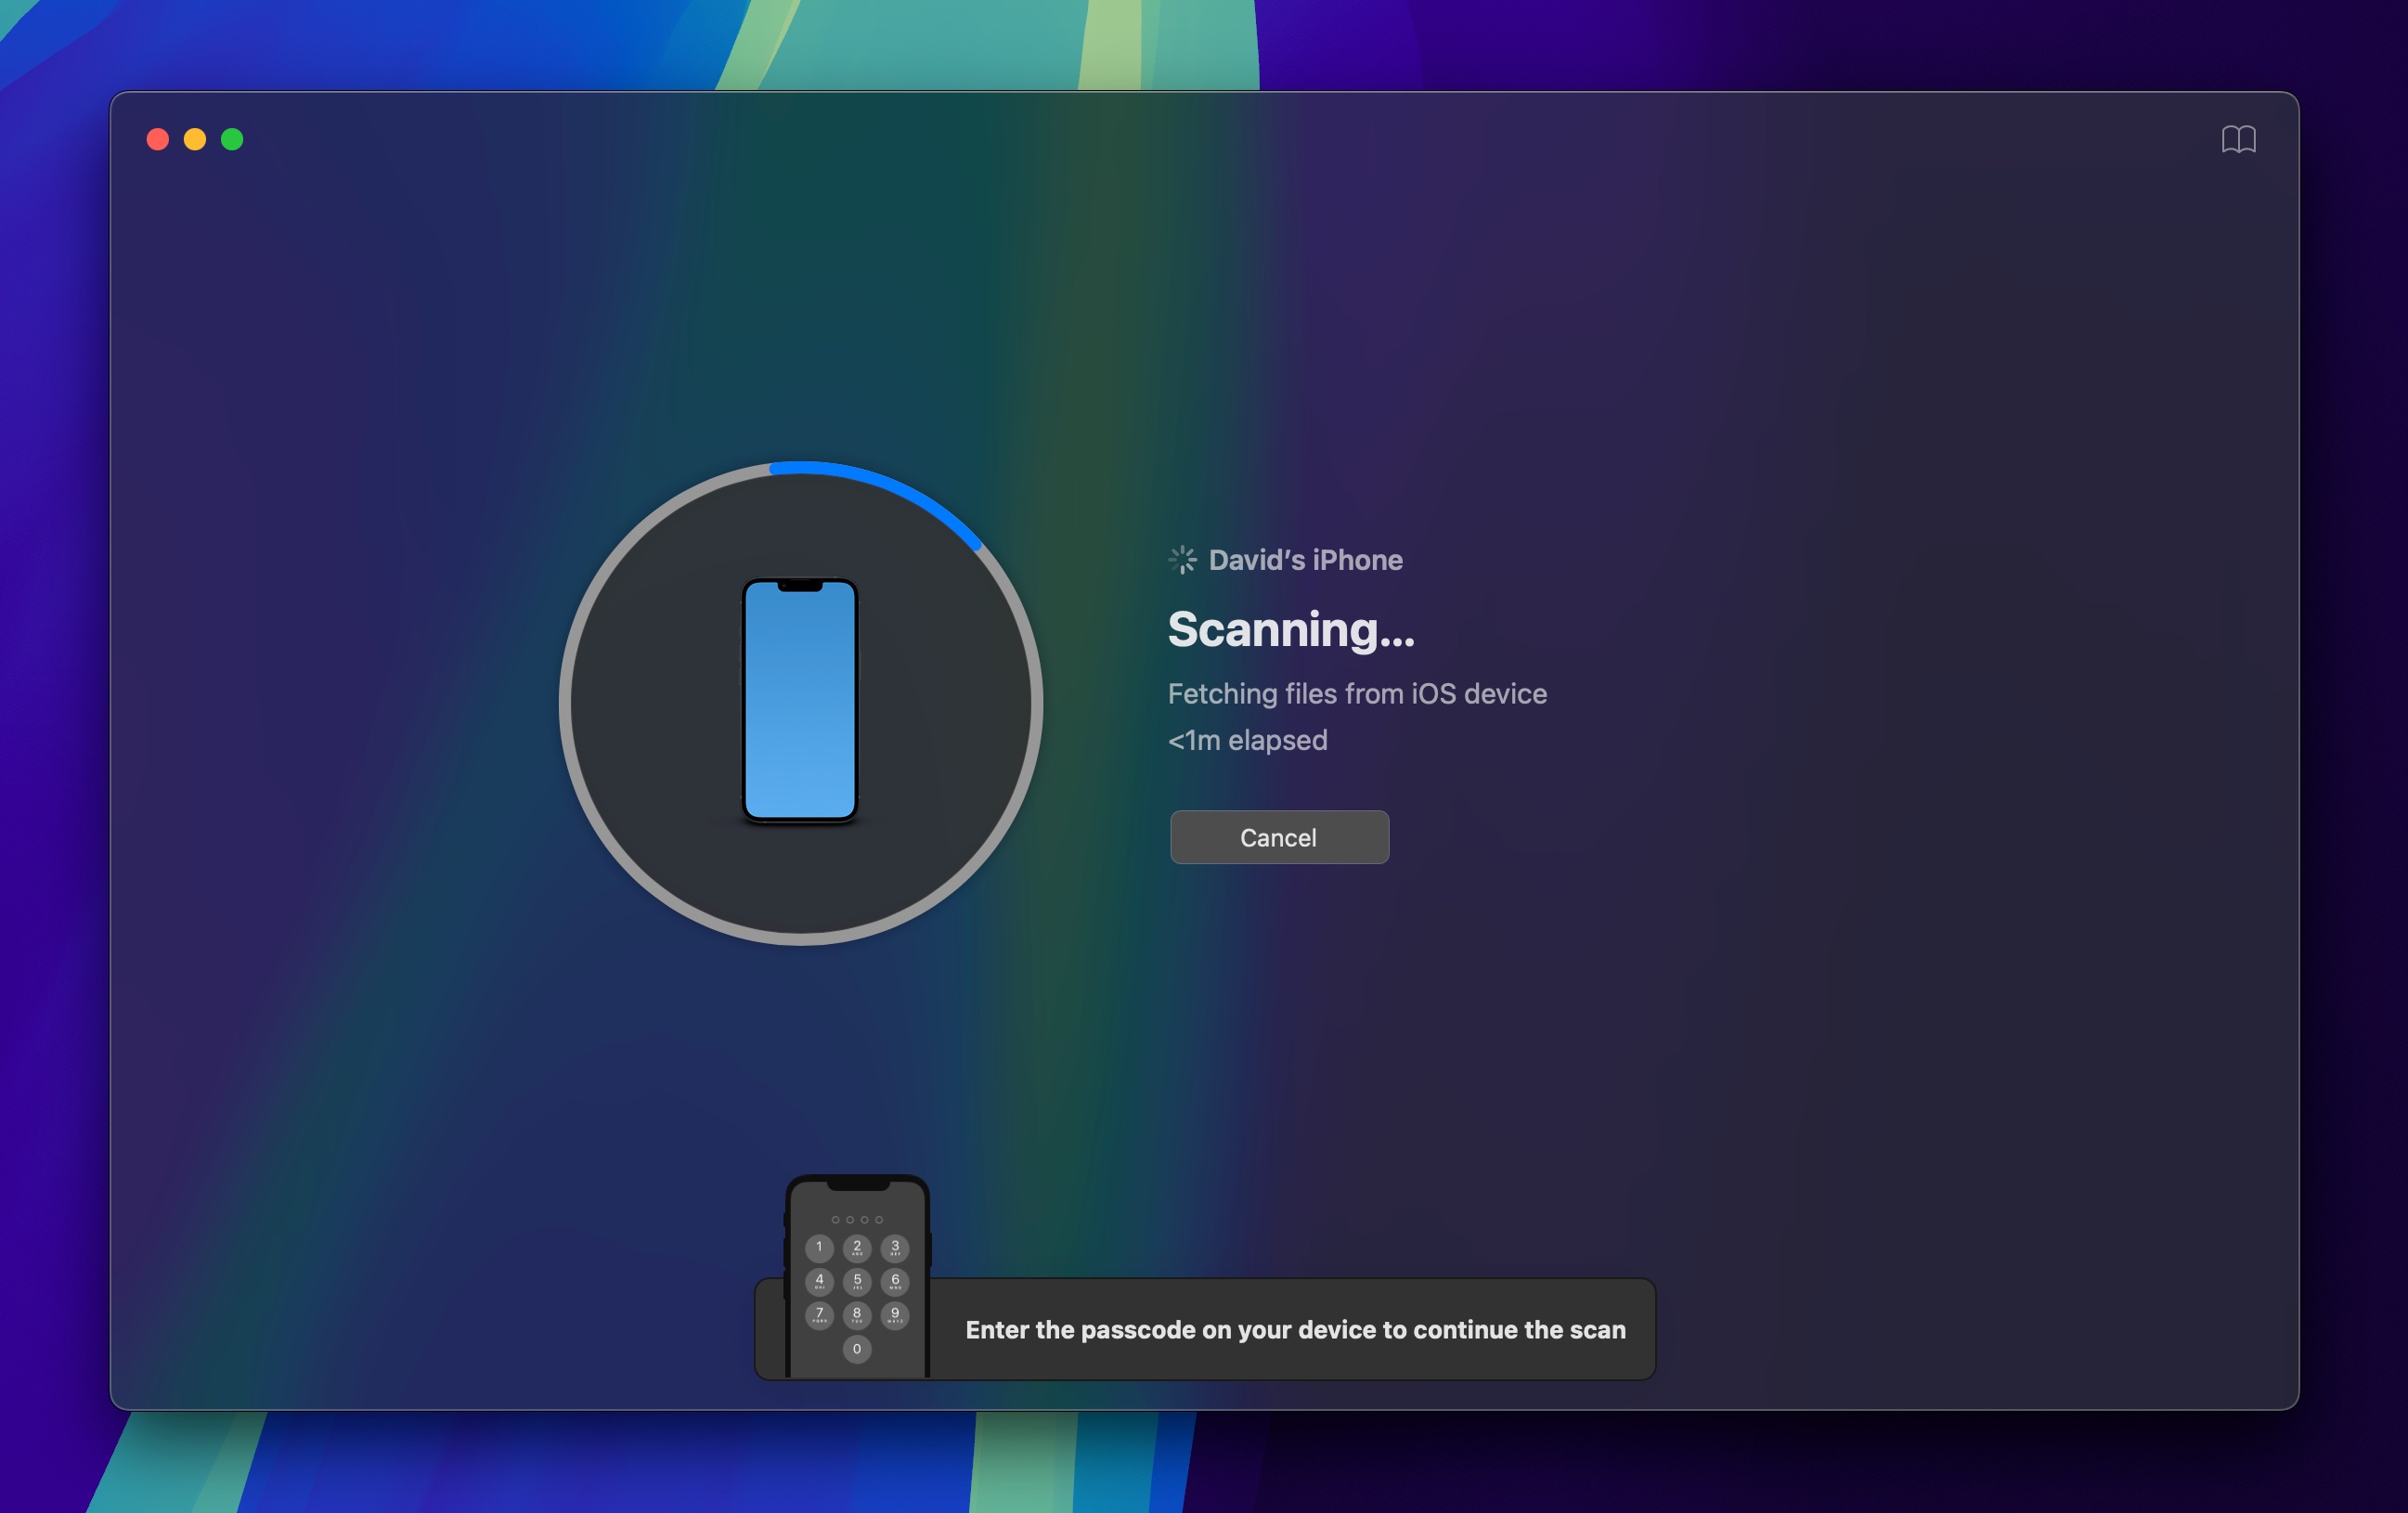
- Select the audio files you want to recover and choose a recovery destination on your computer.
How to Avoid Losing Music Files
With the right preventive measures and backup strategies, you can keep your music safe and accessible across all your devices.
Organize Your Collection

A well-organized music collection is easier to navigate and less susceptible to accidental deletion. Create a clear folder structure that organizes your music by artists and albums, and go the extra mile so that all folders follow the same naming convention.
It’s also a good idea to check if your music files are properly tagged. Tools like One Tagger can automatically add tags, enabling music players to display accurate information about your tracks, including artist, album, and track number.
Never Keep Only One Copy of Important Music
Relying on a single copy of your music collection is risky, as hard drives can fail, phones can be lost or stolen, and accidents occur more often than we’d like to admit.
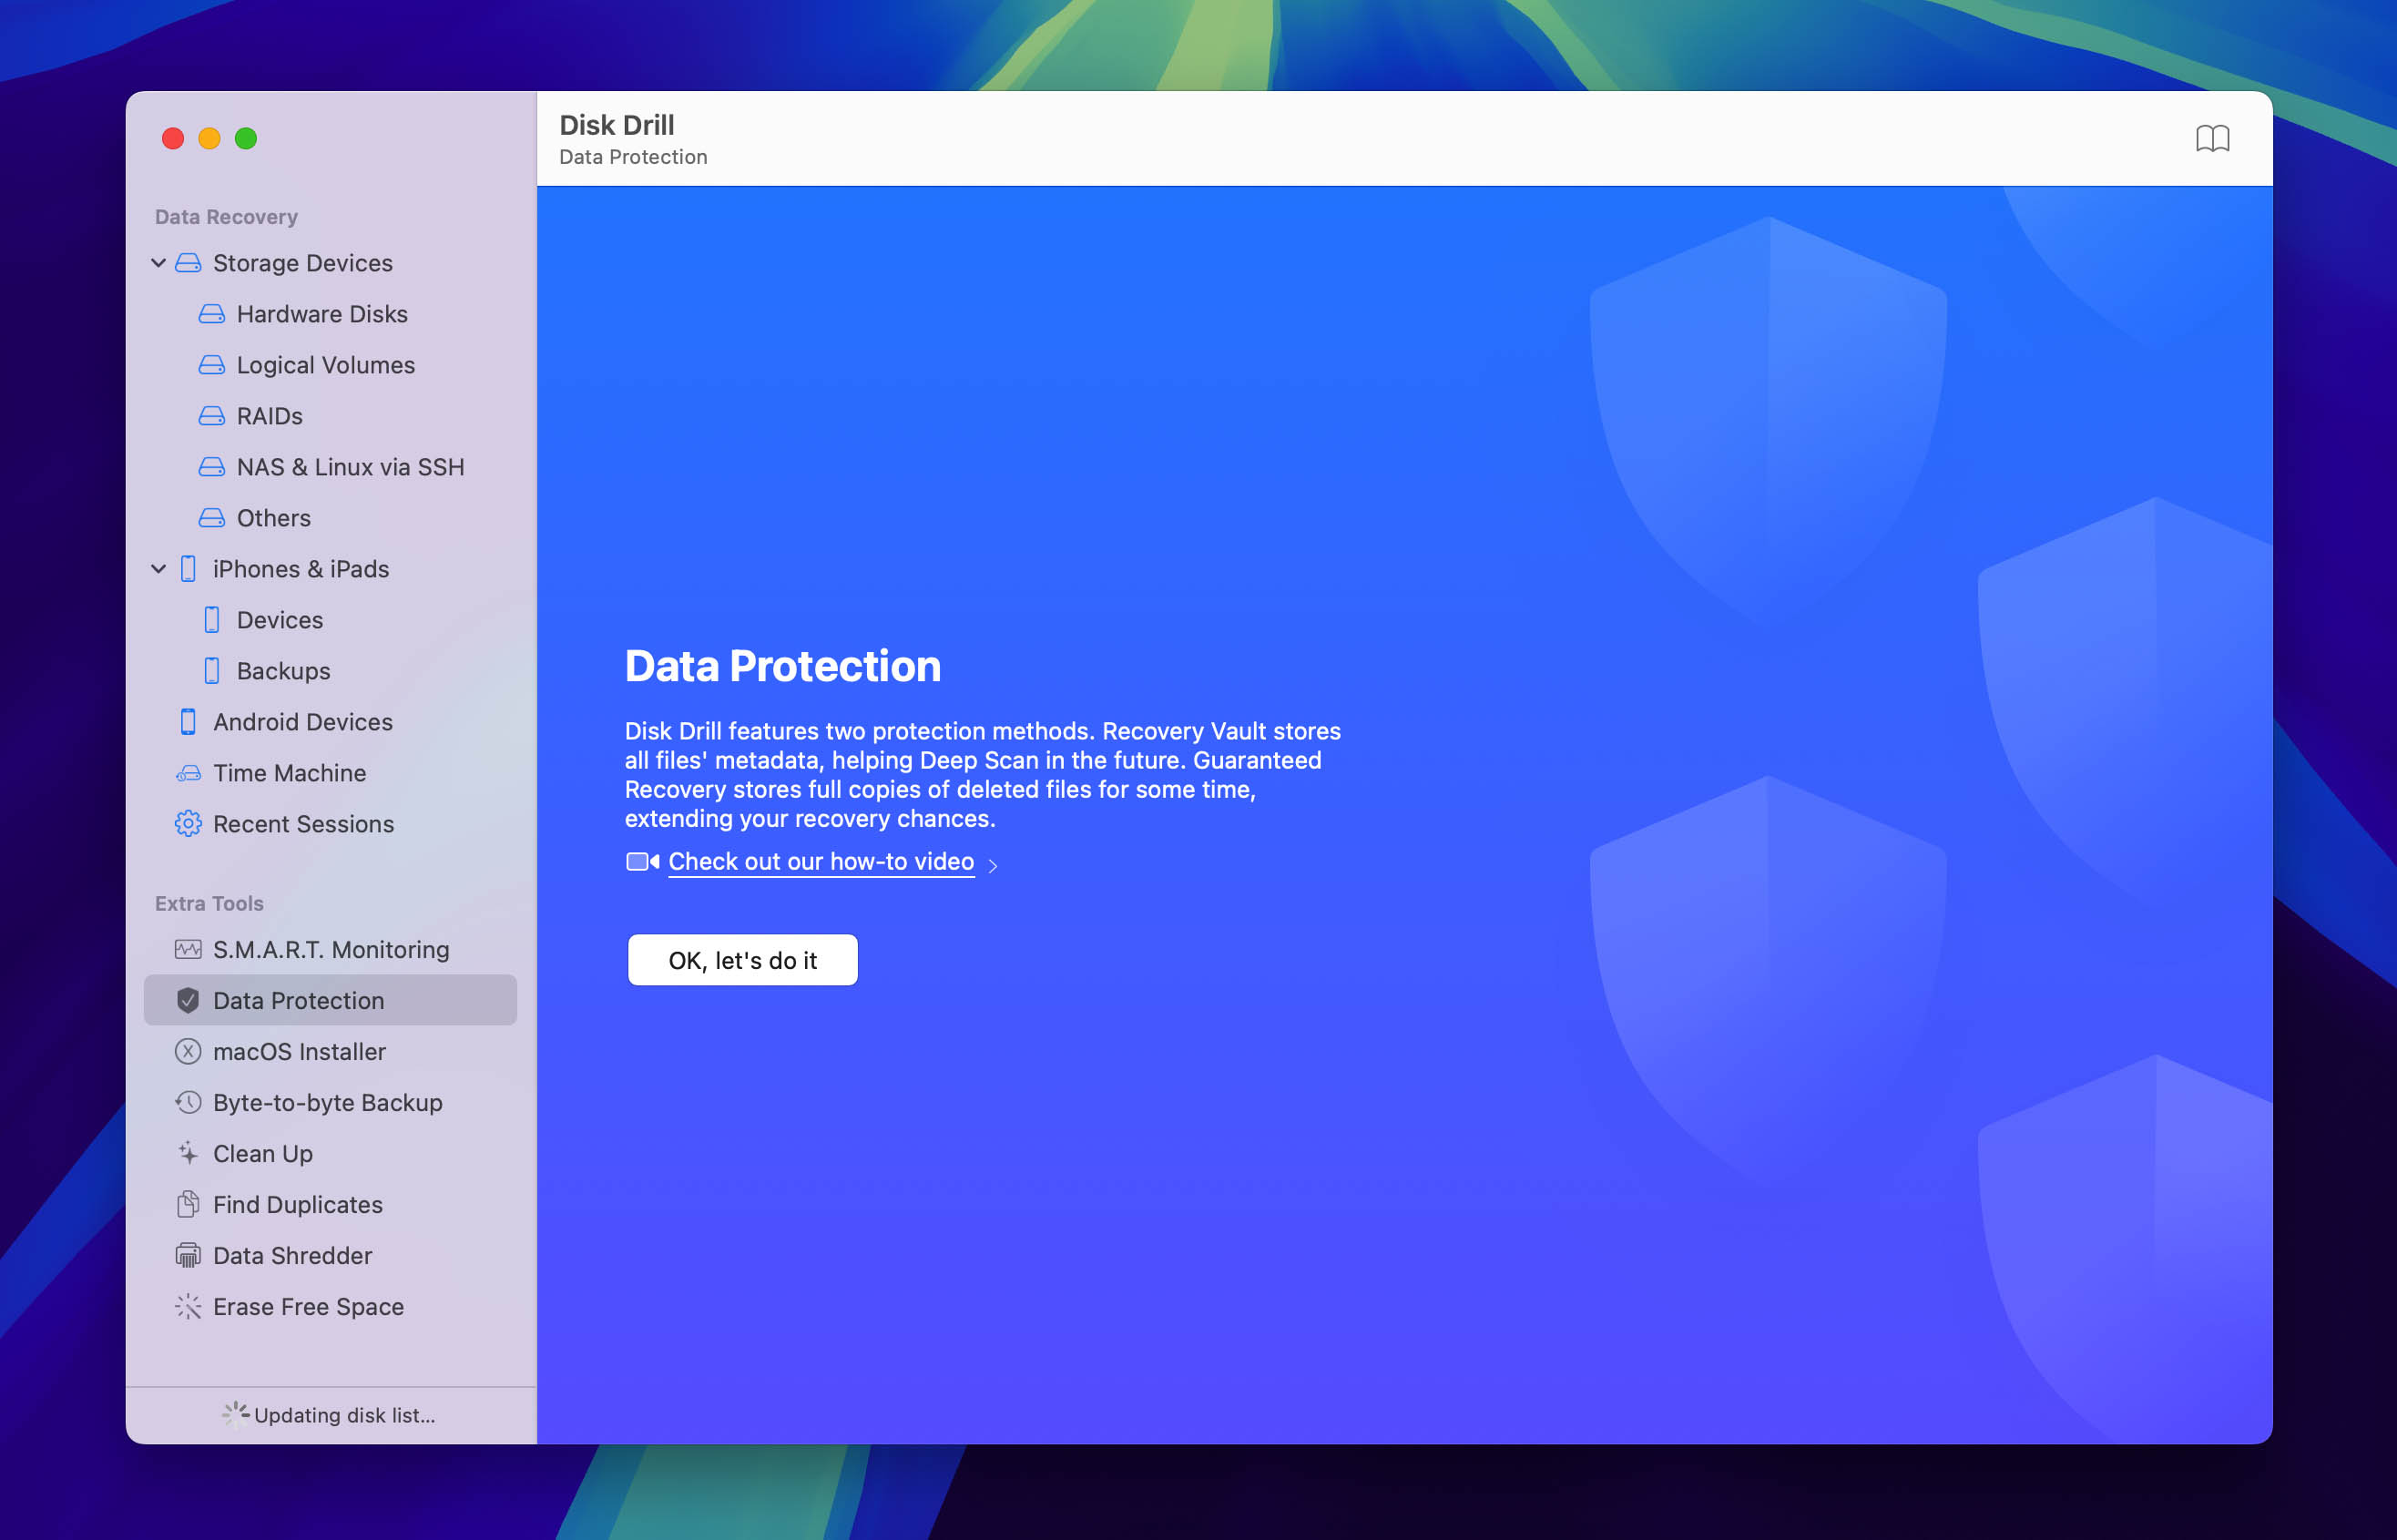
Your best options are cloud backup services like Google Drive, Dropbox, and OneDrive, which store your music on remote servers with professional data loss protection measures. If you prefer to keep your music local, you can use backup features like Disk Drill’s Recovery Vault and Guaranteed Recovery, or simply create manual backups on an external storage device.
Access Your Music Remotely
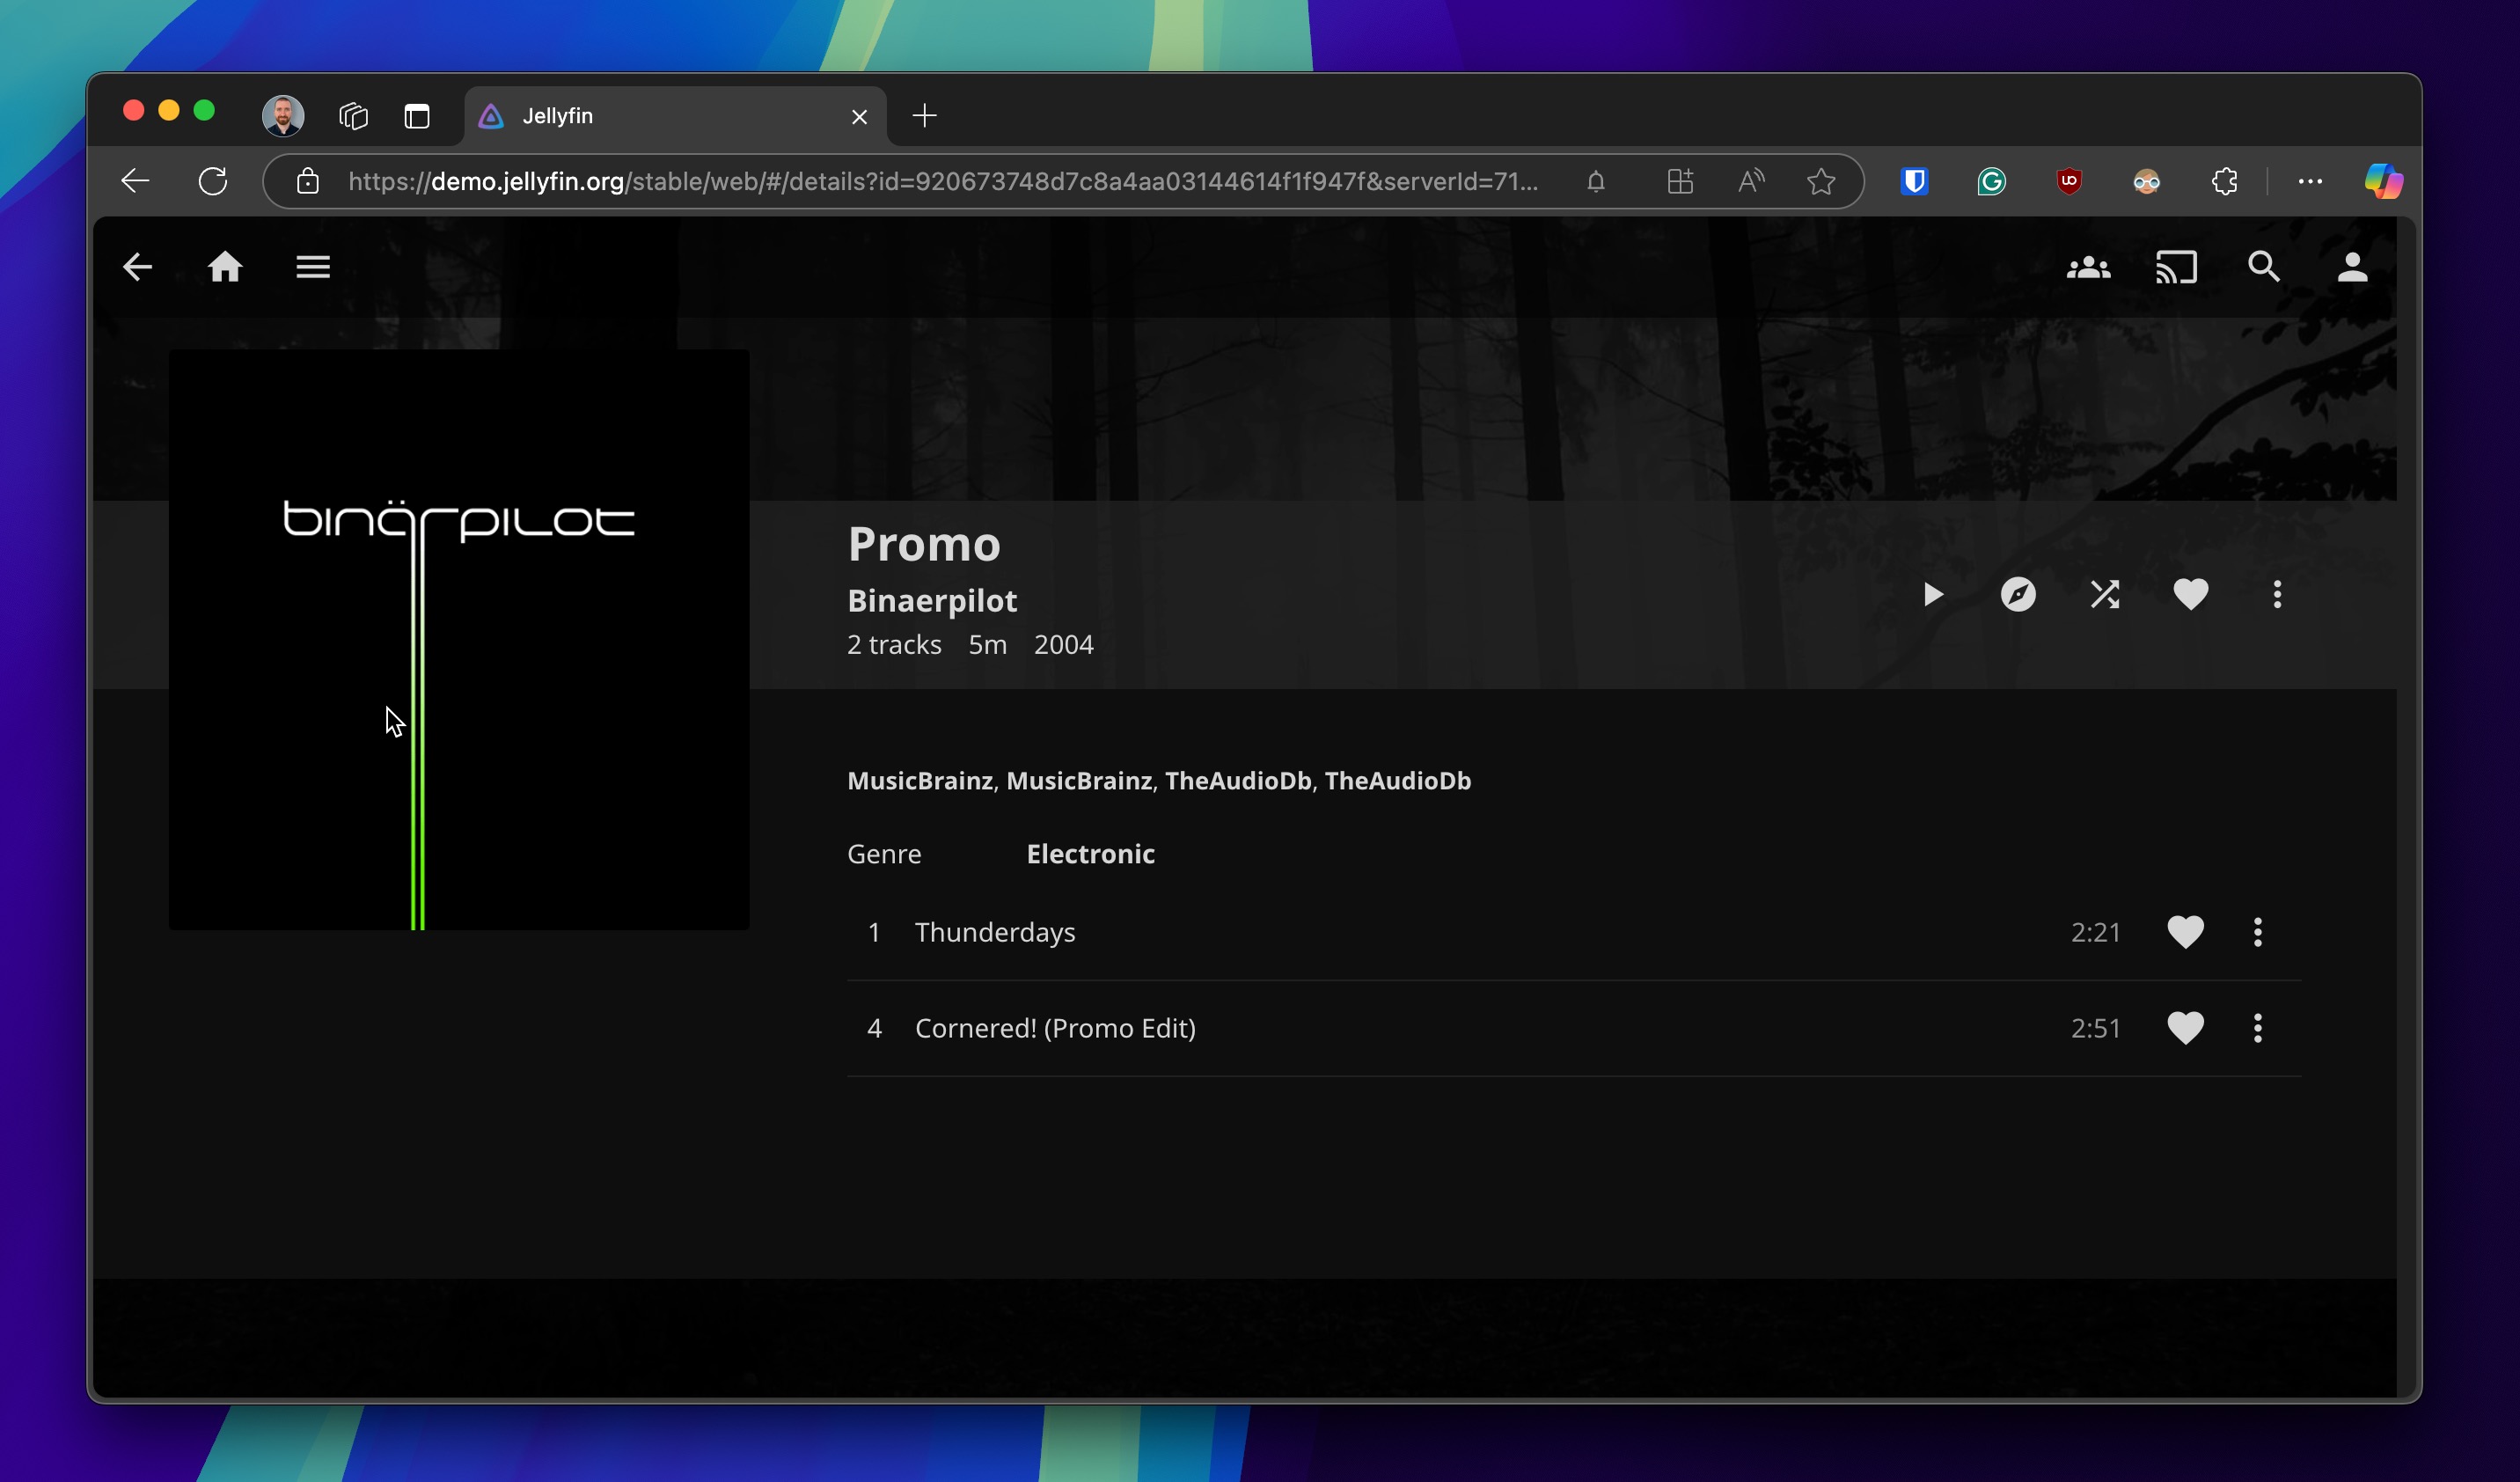
For music enthusiasts who want complete control over their collection while maintaining easy access, setting up a personal music streaming server is an excellent solution. Services like Jellyfin and Navidrome turn your computer into a private streaming service, giving you Netflix-like access to your music collection from any device.
This setup allows your music collection to remain in one central, well-backed-up location while still being accessible from anywhere. It does require some technical know-how, but the convenience and security are well worth the effort.
Conclusion
It always feels horrible to lose your favorite music, regardless of how it happens. Fortunately, not all data loss scenarios are destined to end badly. With the right data recovery tool, the probability that you will see your files again is high.
FAQ
Yes, you can recover music files from a formatted drive by using data recovery software to scan the drive for recoverable data. For best results, stop using the drive immediately after formatting and start the recovery process right away. Learn more about recovering files after formatting.
In terms of both usability and performance, Disk Drill is the best music recovery software for Windows, and you can use it to recover up to 500 MB of audio data for free. As far as completely free music recovery software goes, alternatives like PhotoRec or Recuva are available, but their performance and user experience are generally inferior.
Use Time Machine to restore from a backup, or install data recovery software to scan your Mac for deleted audio files. Recovery chances depend on whether your drive is encrypted and how much time has passed since emptying the Trash.
Connect the damaged drive to your computer and use data recovery software to scan it for lost music files. Do not format or write new data to the drive before attempting recovery. You can also try to repair it using a tool like CHKDSK (Windows) or First Aid (macOS).
Yes, there are several methods to help you recover audio files on Windows and Mac systems. Some of them are:
- Recovery from Recycle Bin or Mac Trash
- Recovery using professional software like Disk Drill
- Recovery from free software like TestDisk
- Recovery from Windows File History or Mac Time Machine
- Recovery from external or cloud backup solutions
You can find your music library on Windows by navigating to File Explorer or following this path:
C:\Users<username>\Music
If you’re a Mac user, you can make your entire music library available on all your devices when you’re signed in with the same Apple ID. Here’s how you can access your library via a PC:
- Go to the Apple Music app on your Mac and choose Music > Preferences.
- Click General, then select the Sync Library option.
- If you don’t see this option, make sure you are signed in with your Apple ID.
- Now, you’ll be able to access your music library easily. Remember to back up your music on both Windows and Mac to protect your files in unforeseen data-loss situations.
If there’s an audio problem with your videos, you can try the following techniques:
- Check if all your audio drivers are up-to-date by going to Settings > Update & Security > Windows Update > Check for updates.
- It’s possible that your audio isn’t playing because you haven’t downloaded the appropriate codec. Make sure that your codec library is updated.
- If these methods don’t work, use an online converter to convert the video file into an MP3 file, which will extract the audio in an uncomplicated manner.