A friend of mine recently asked for help because her family video files got corrupted after being stored on a very old hard drive. Knowing that many other people experience similar problems with video corruption every day, I decided to write this guide. In it, I want to share the 3 best free methods to repair corrupted video files, complete with step-by-step instructions that you can easily follow on your own at home regardless of how tech-savvy you consider yourself to be.
Method 1: Repair Corrupted Videos Using a Free Online Service
The solution I recommended to my friend—the one that allowed her to repair the important family video—was to use an online video repair service.
More specifically, I recommended the Clever Online Video Repair tool, which I’ve begun using only relatively recently but now swear by because it’s the most reliable and straightforward tool of its kind, which makes the fact that it’s also currently completely free even more impressive.
With Clever Online Video Repair, you can fix any video that has become corrupted due to an unexpected interruption of its recording, downloading, or editing (there’s actually a 5 GB file size limit, but I have yet to encounter a broken video file that exceeds it).
Here’s how the straightforward repair process works in practice:
- You open the Clever Online Video Repair tool in your web browser of choice. Since the tool runs on remote servers, you can use it to repair corrupted video files even on mobile devices.
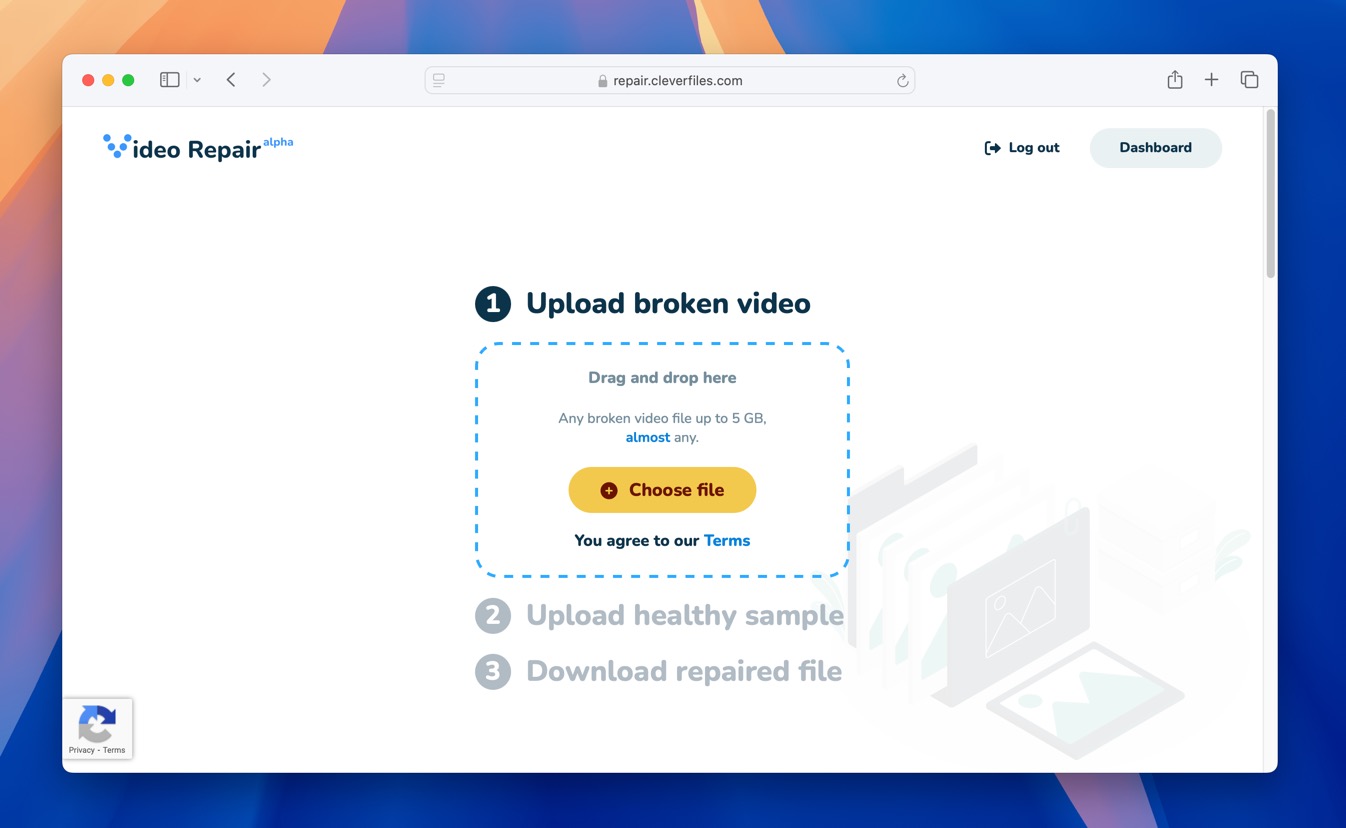
- Either click the Choose file button and select the corrupted video file you want to repair using your operating system’s file picker, or you can simply drag and drop your video onto the designated area.
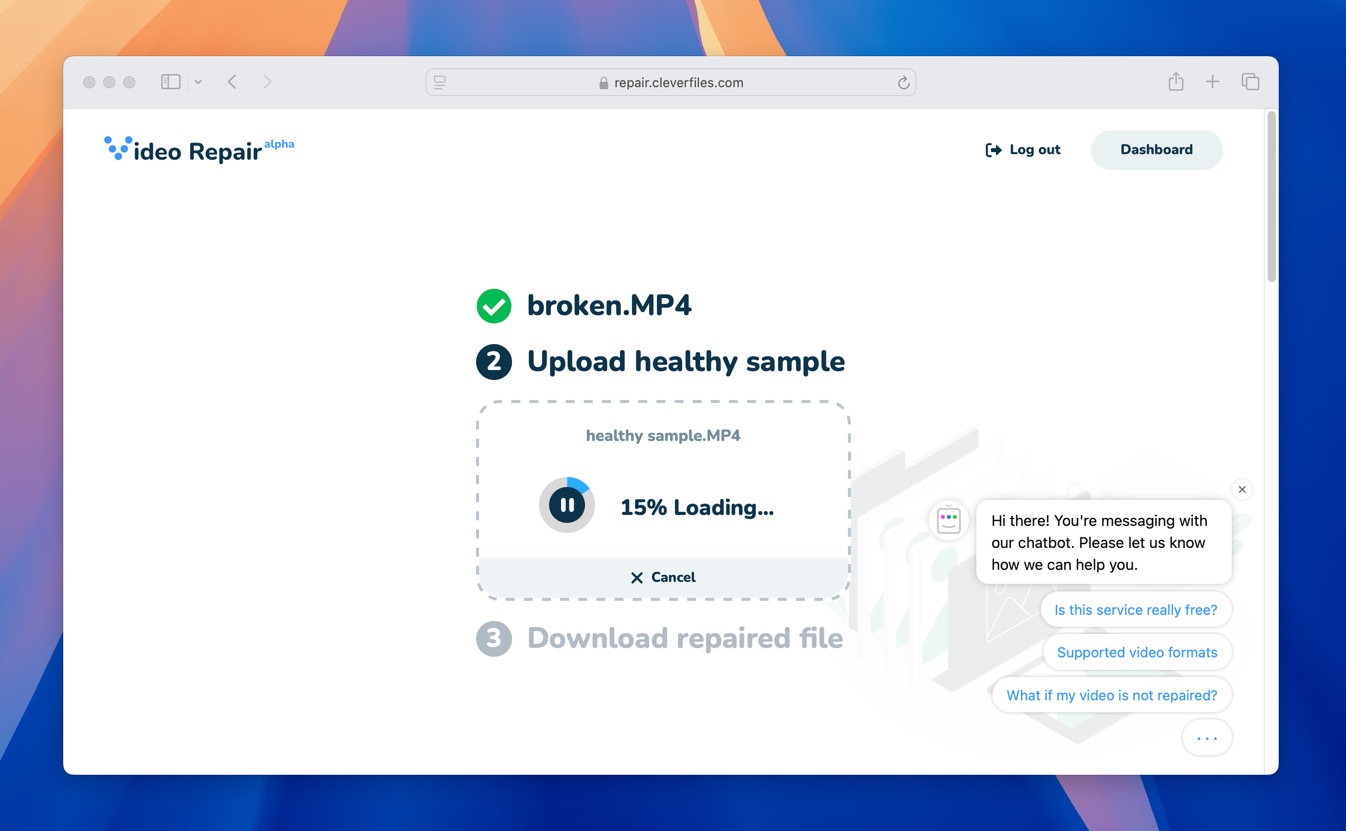
- Once the upload of the broken video finishes, you will be asked to provide information about the camera the video was recorded with (if such information exists or is relevant) and upload a sample of a healthy video recorded using the same camera or created the same way. This healthy video gives the tool a reference point to analyze and repair the corrupted video. Then, you can just sit and wait for the Clever Online Video Repair tool to do its job.
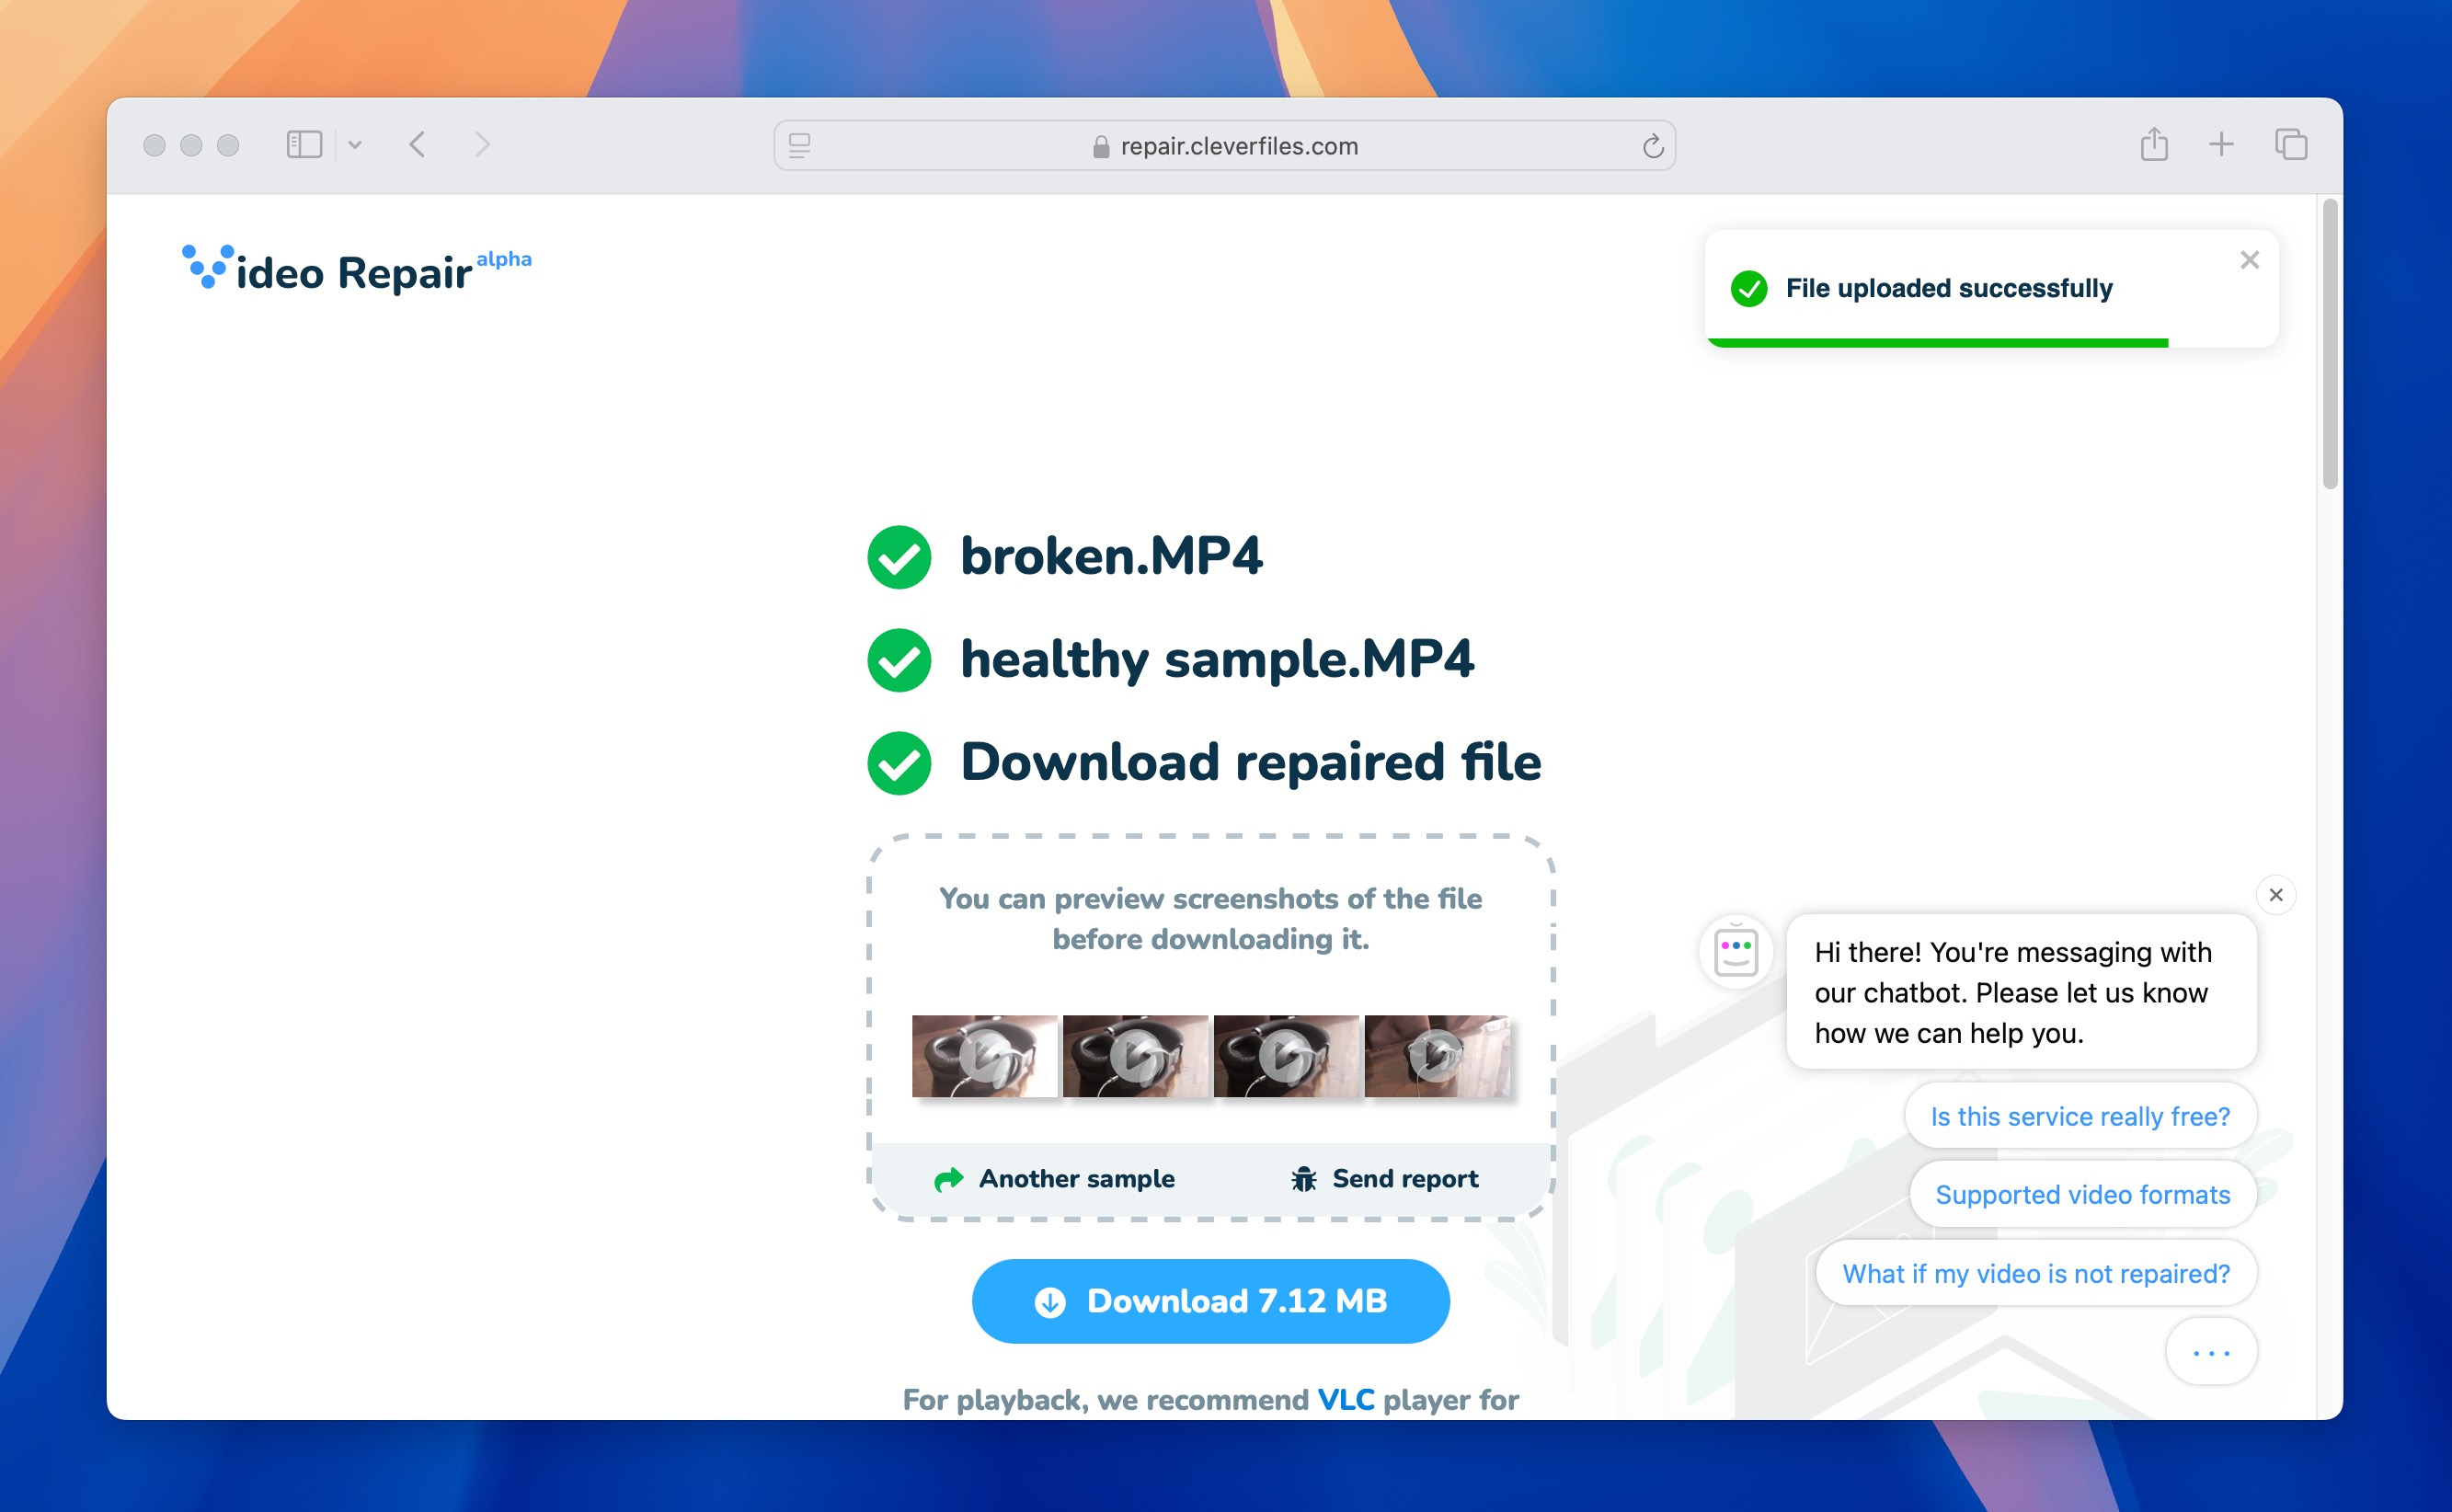
It won’t take a long time before the tool repairs your MP4 file online, allowing you to download a playable version to your device.
Method 2: Fix Corrupted Video Files with the Help of VLC Media Player
VLC Media Player isn’t just great for watching videos; it can also help repair corrupted video files in two different ways.
Method 2A: The File Extension Trick
The first method I want to share with you (recommended, for example, on Ubuntu forums) that lets you take advantage of VLC’s built-in repair capabilities. These capacities have been added to VLC to help it deal with the AVI container format, which stores the data needed for playback in each chunk, allowing AVI files to be played even after significant damage
By renaming your file to .avi, you’re instructing VLC to use these powerful repair tools on your video. With some luck, VLC will manage to repair your video even if the original container format isn’t AVI (it will simply “repackage” your video and turn it into a playable .avi file).
Here’s how it works:
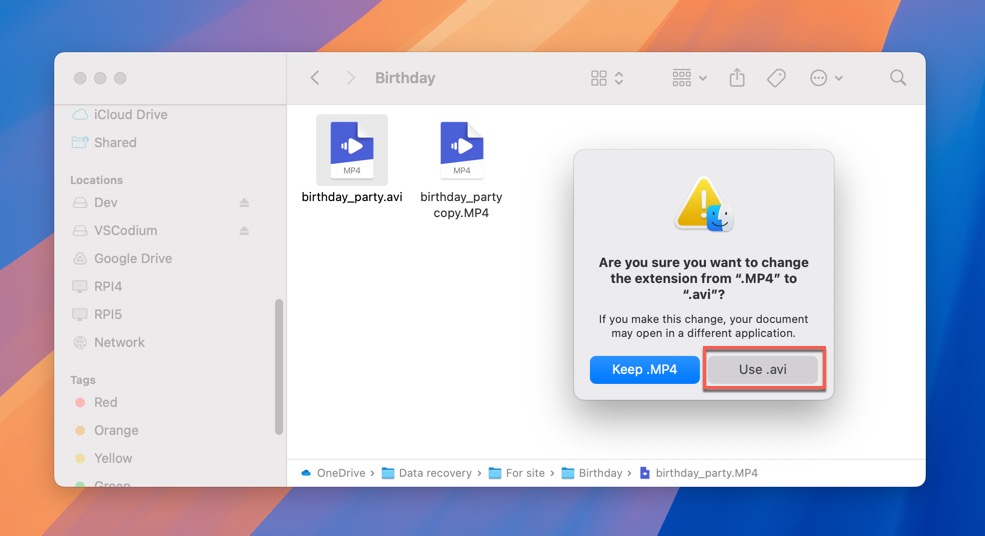
- Start by making a copy of your corrupted video file. We always want to work with a duplicate to avoid any risk of further damaging the original.
- Rename the copy, changing its extension to .AVI. For example, if your file is named “birthday_party.mp4”, rename it to “birthday_party.avi”.
- If you haven’t already, download and install VLC Media Player from videolan.org. It’s free and available for Windows, Mac, and Linux.
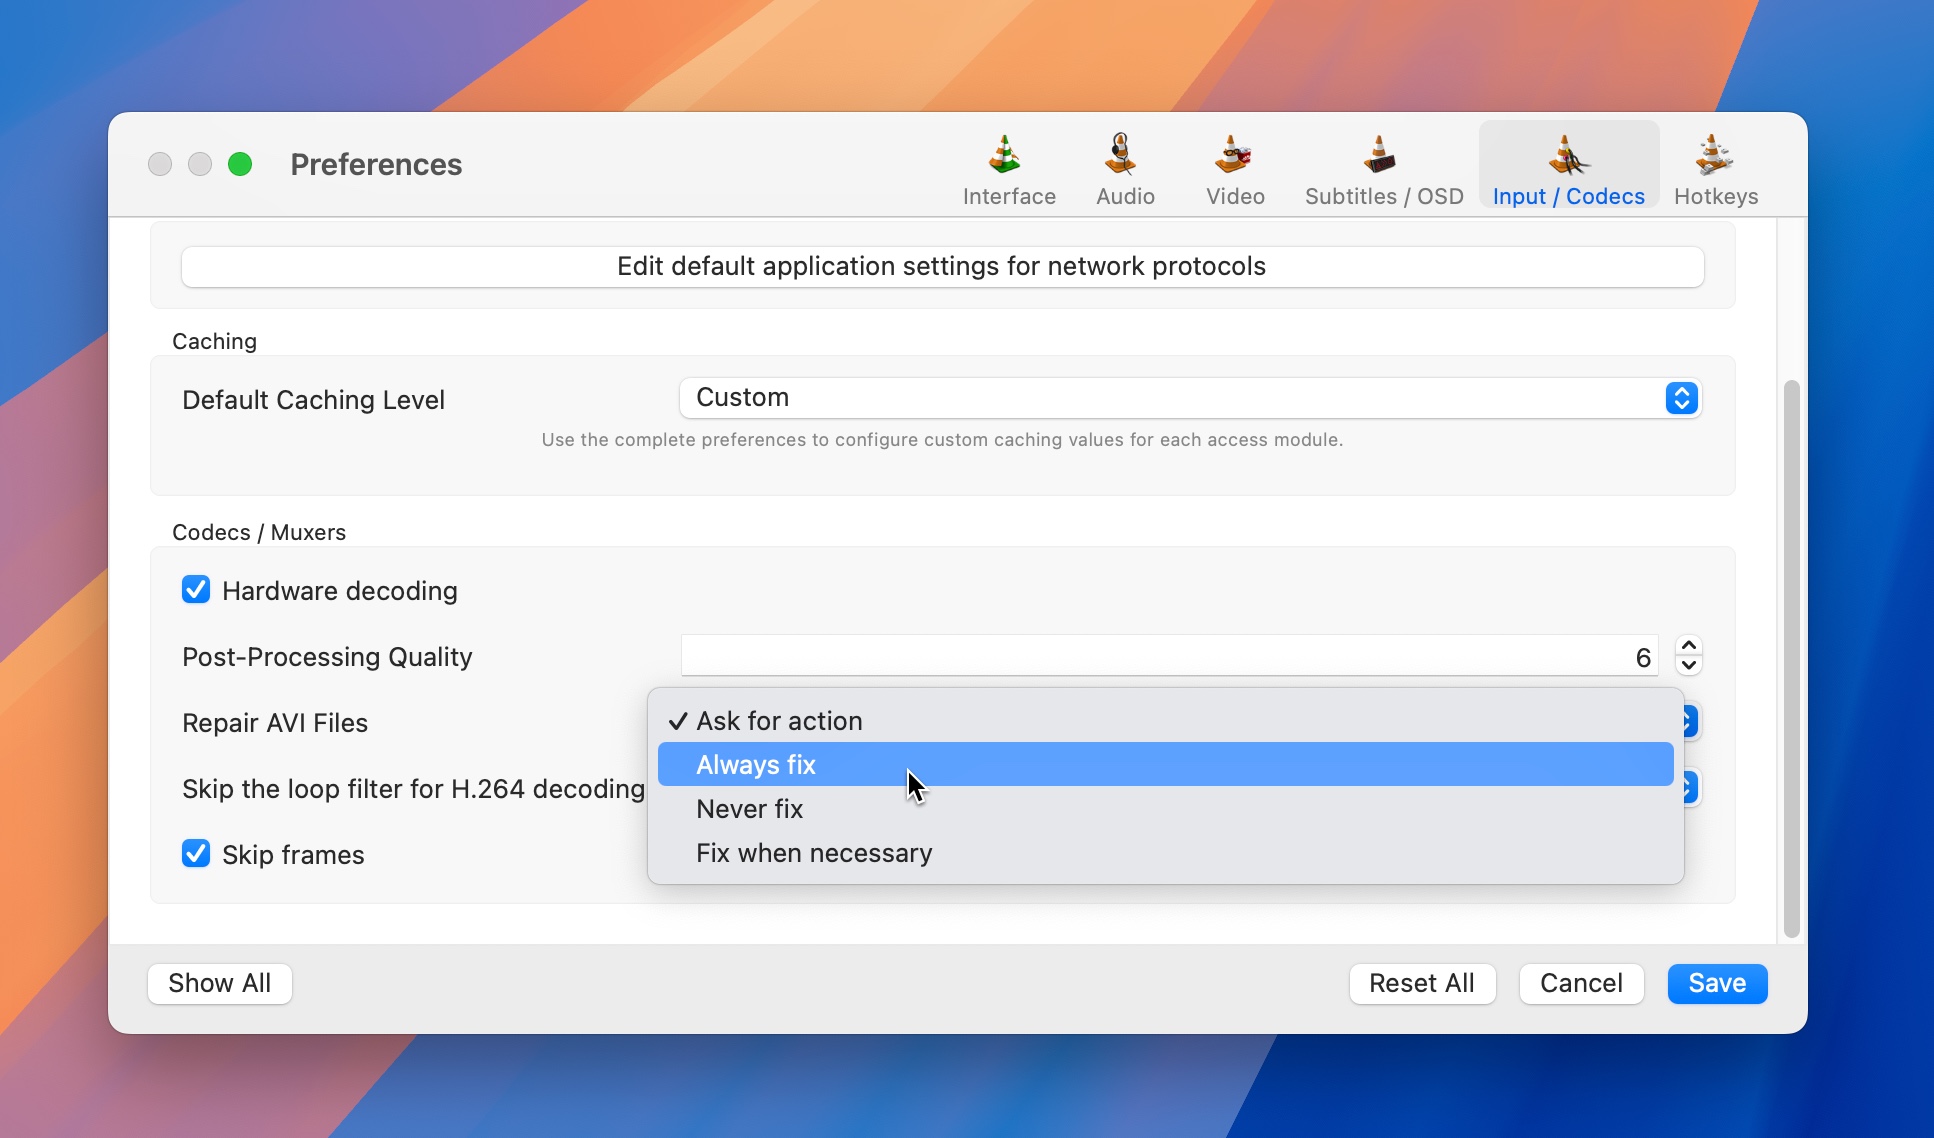
- Open VLC and navigate to Preferences/Settings > Input / Codecs.
- Look for the option labeled Damaged or incomplete AVI file and set it to Always fix.
- Now, try playing your renamed file in VLC.
The beauty of this approach is that it doesn’t actually change your video data. Instead, it focuses on repairing the video container—the structure that holds your video and audio data together. This means there’s no risk of quality loss, unlike with the second VLC method I want to share with you.
Method 2B: Transcode the Video
If the file extension trick doesn’t yield satisfactory results, or if you’ve repaired your video file using a free video repair tool like the Clever Online Video Repair tool but are still experiencing some minor issues, such as audio/video being out of sync or various visual glitches and artifacts, then you can use VLC to transcode your video.
Transcoding essentially rebuilds your video from the ground up by decoding the existing video data and encoding it using the same or a different video codec (the software component that compresses and decompresses video footage). It’s sort of like taking a puzzle apart and putting it back together again—the correct way.
Follow these steps to transcode your video using VLC:
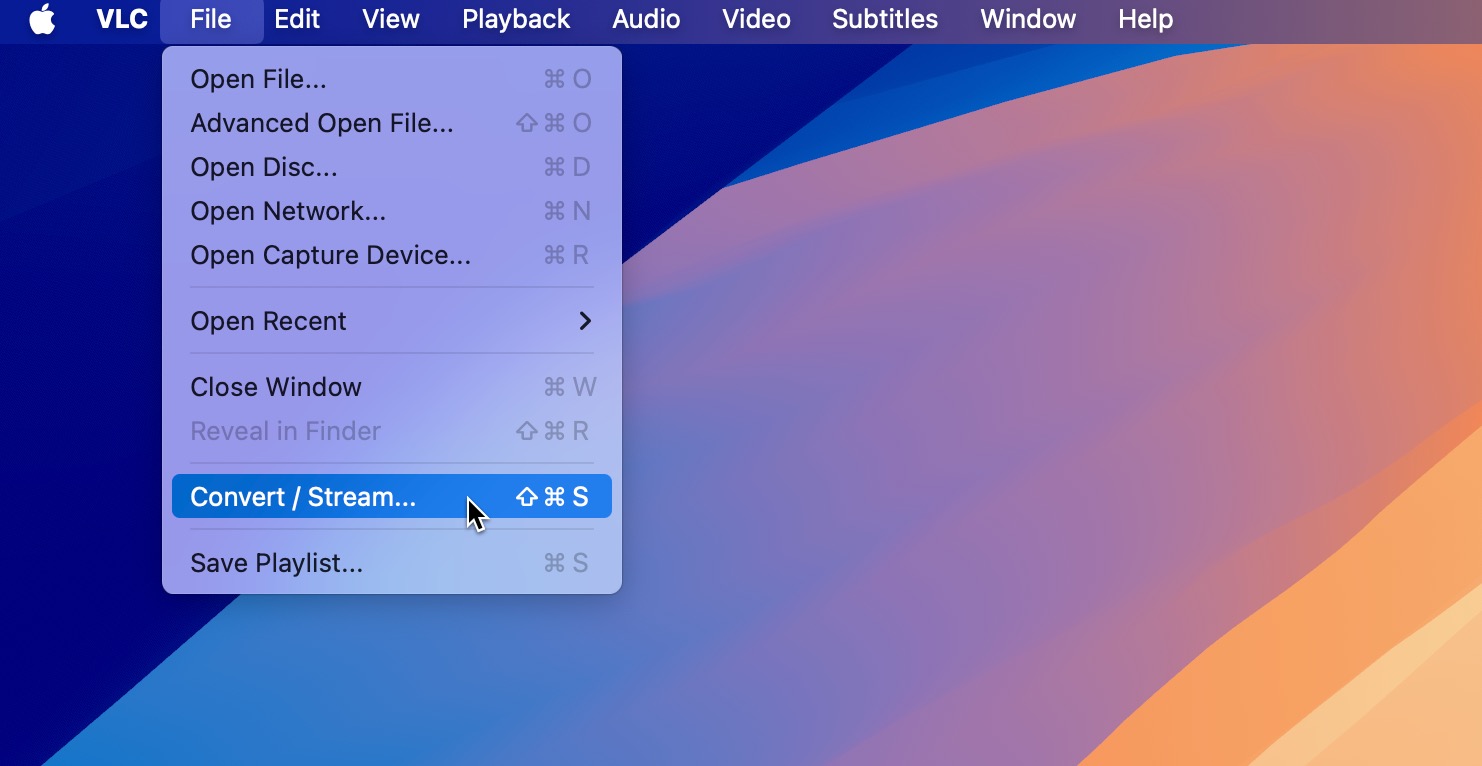
- Open VLC and go to Media > Convert / Save (or File > Convert / Stream on Mac).
- Add the problematic video file you want to convert. On Windows, click Convert / Save at the bottom of the window.
- Select a suitable video conversation profile. The H.264 codec is usually a good bet, but you can also experiment with less common codecs.
- Specify a suitable destination for your new file.
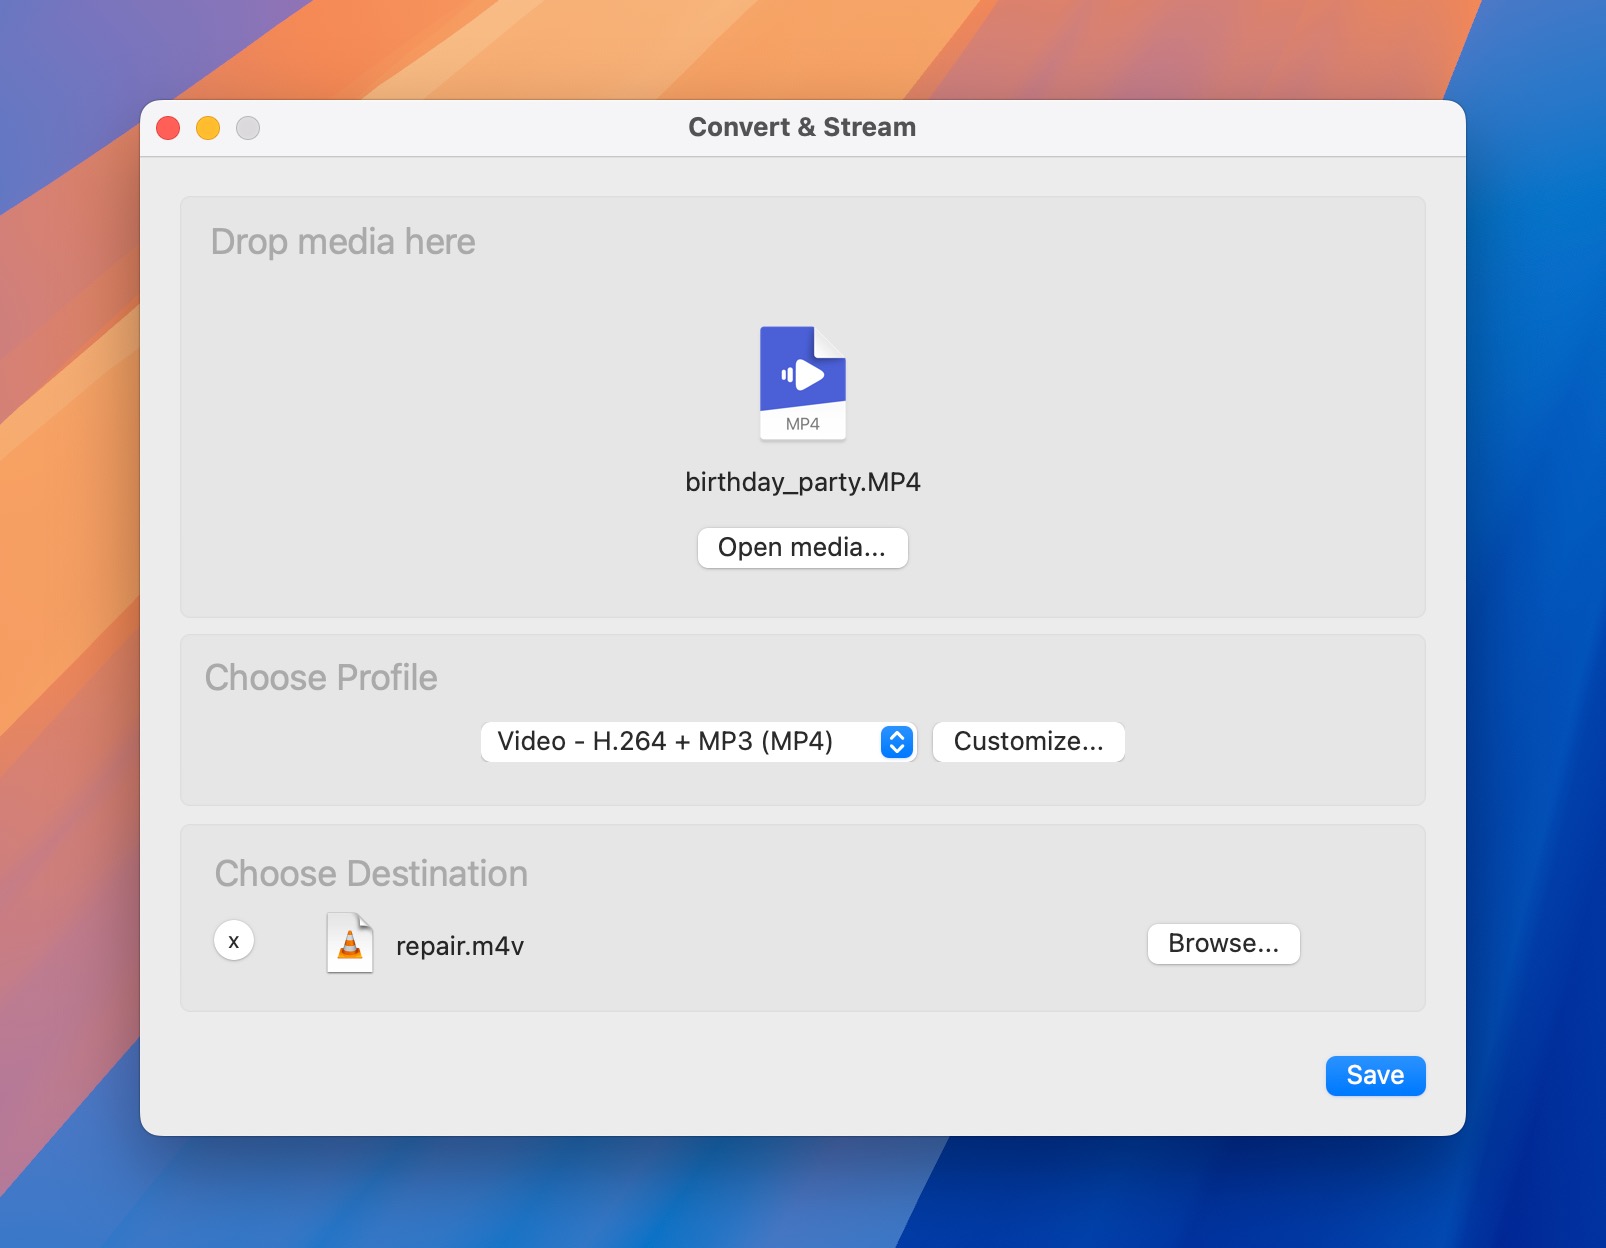
- Click Start on Windows or Save on Mac to begin the transcoding process.
Method 3: Fix Corrupt Video Files with Untrunc Tool
Untrunc is an open-source software tool specifically designed to restore corrupted video files, particularly those in MP4, M4V, MOV, and 3GP formats that were cut off abruptly due to power loss, storage issues, or other interruptions during the recording or saving process.
Just like the Clever Online Video Repair tool, it uses a working video file (ideally from the same device and with the same settings as your corrupted file) as a reference to understand the structure of your video. Then, it applies this knowledge to rebuild your damaged file, potentially restoring your corrupted video to a playable state.
While Untrunc can technically run on Windows, macOS, and Linux, precompiled binaries are currently only provided for Windows users, so I strongly recommend you find yourself a Windows machine otherwise your only option is to compile the software from its source code.
If you do have access to a Windows machine, then you can do the following:
- Download the latest version from the Untrunc GitHub page.
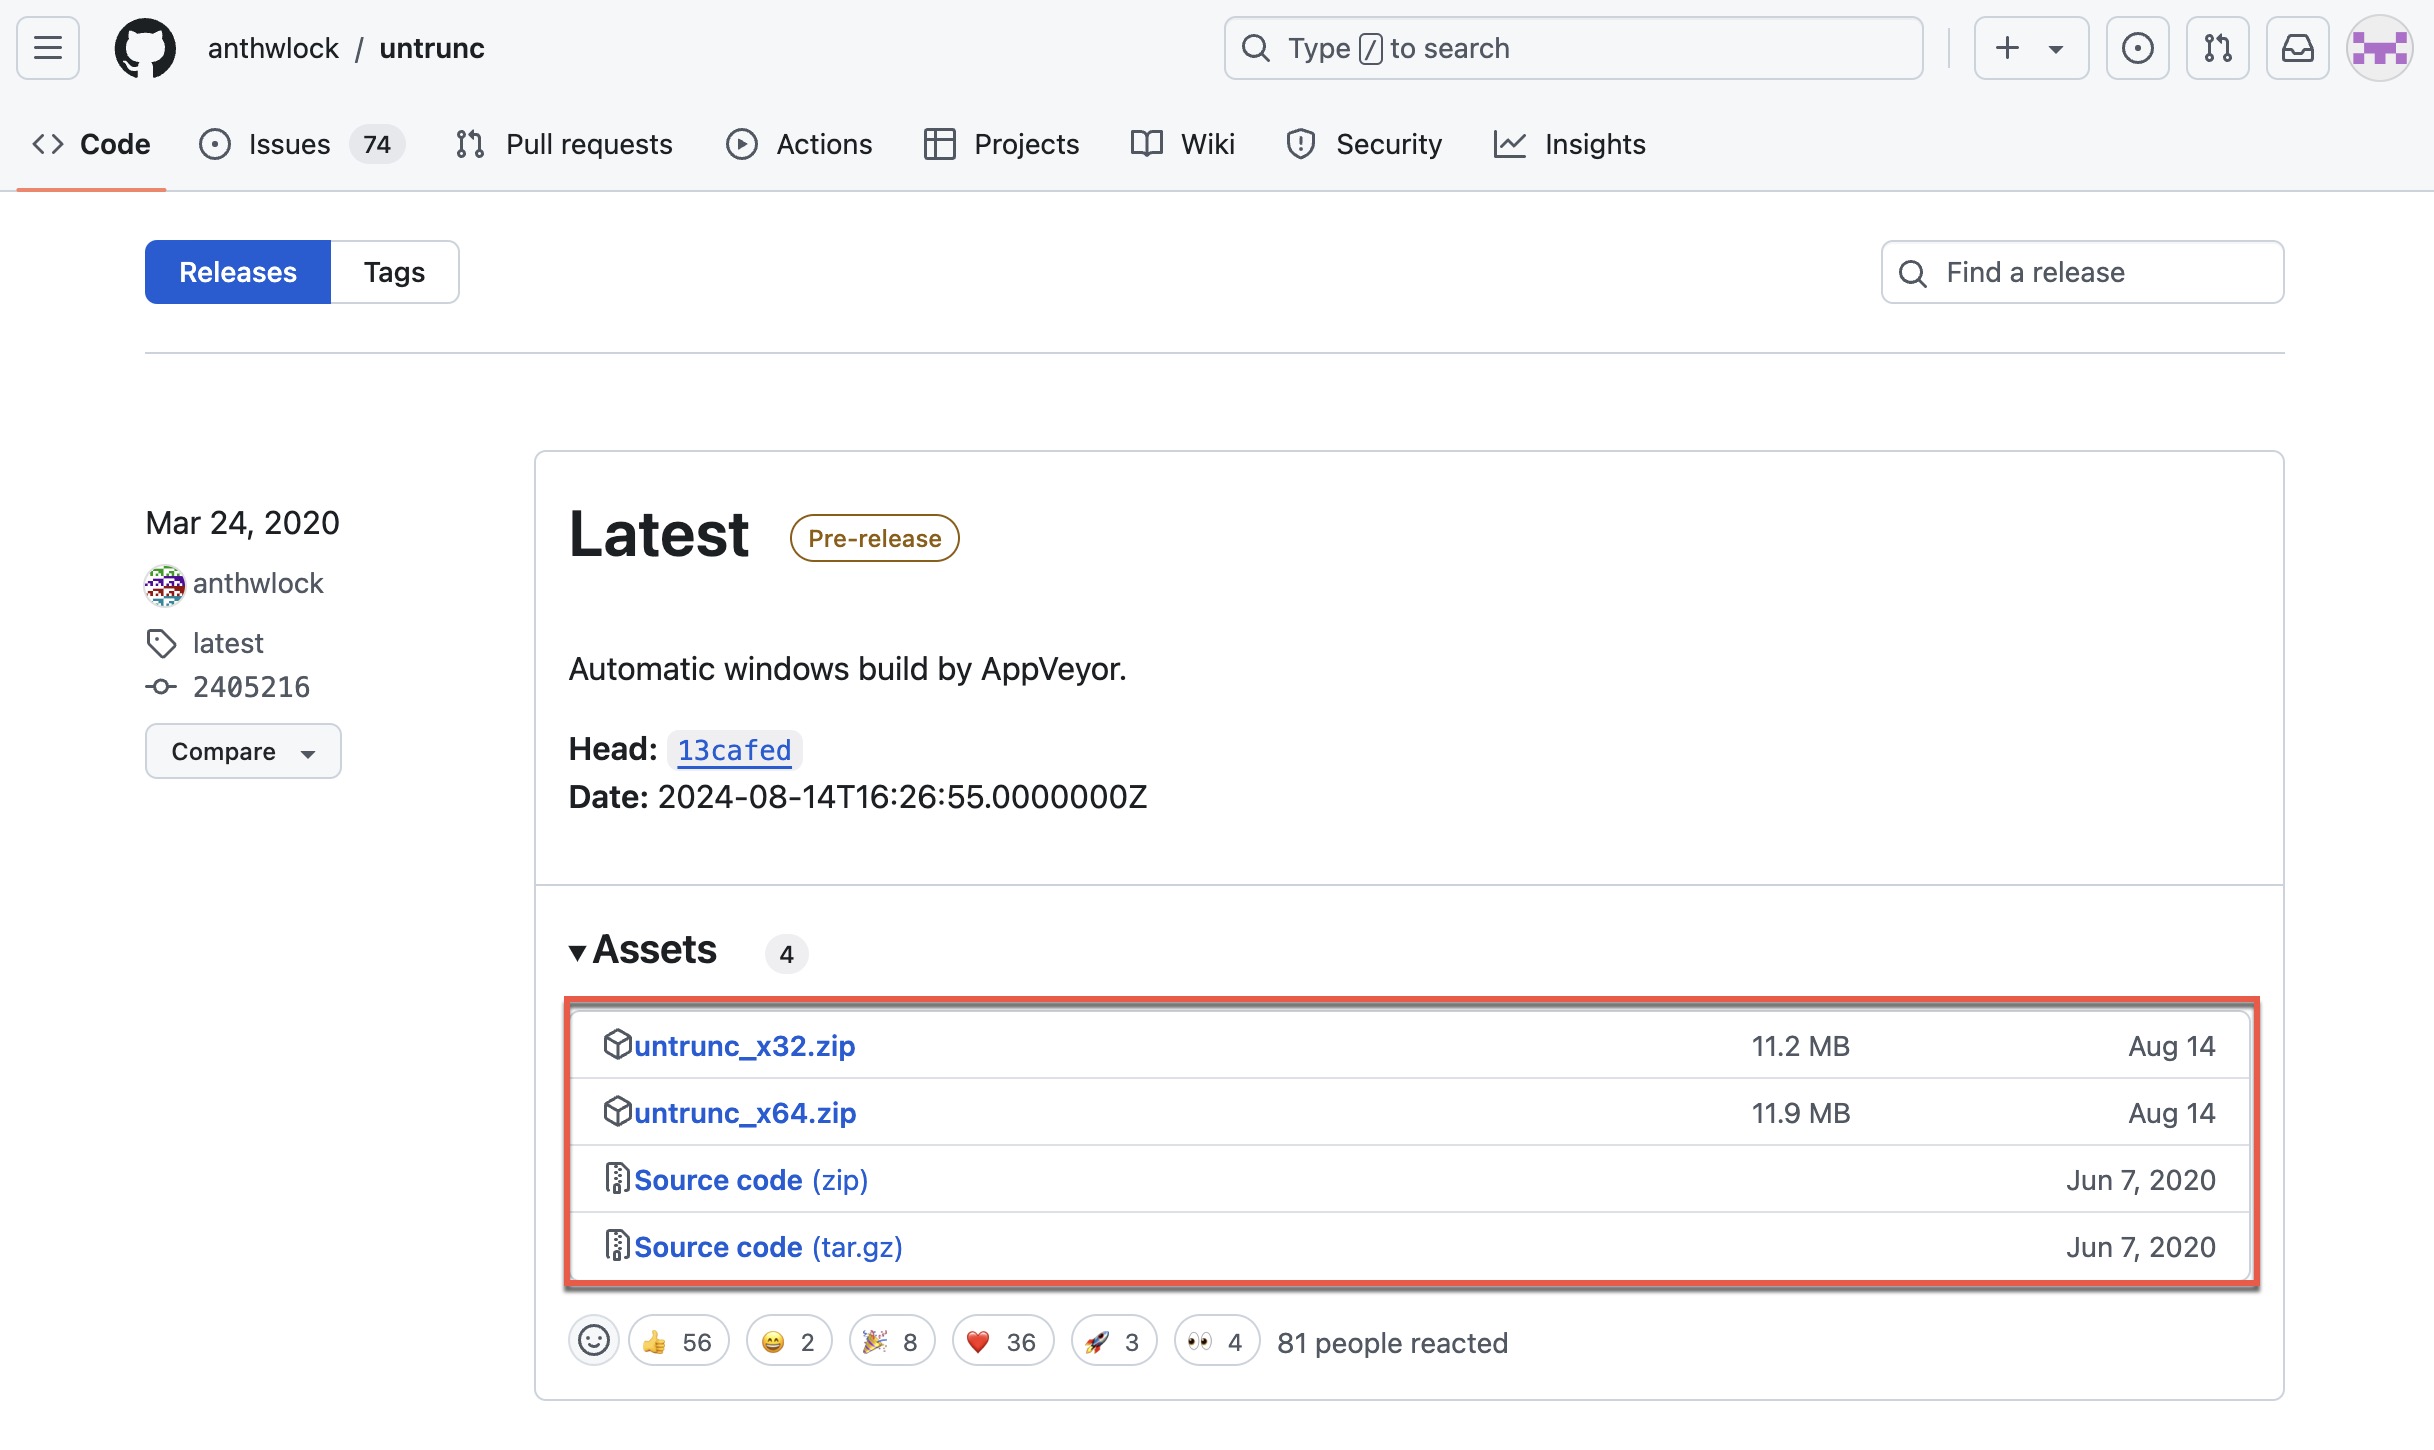
- Unzip the downloaded file to a folder on your computer.
- Open a command prompt (CMD) and navigate to the folder where you unzipped Untrunc.
- Run the following command, replacing the file paths with your actual file locations:
untrunc.exe C:\path\to\working-video.mp4 C:\path\to\corrupted-video.mp4
- Wait for the process to complete.
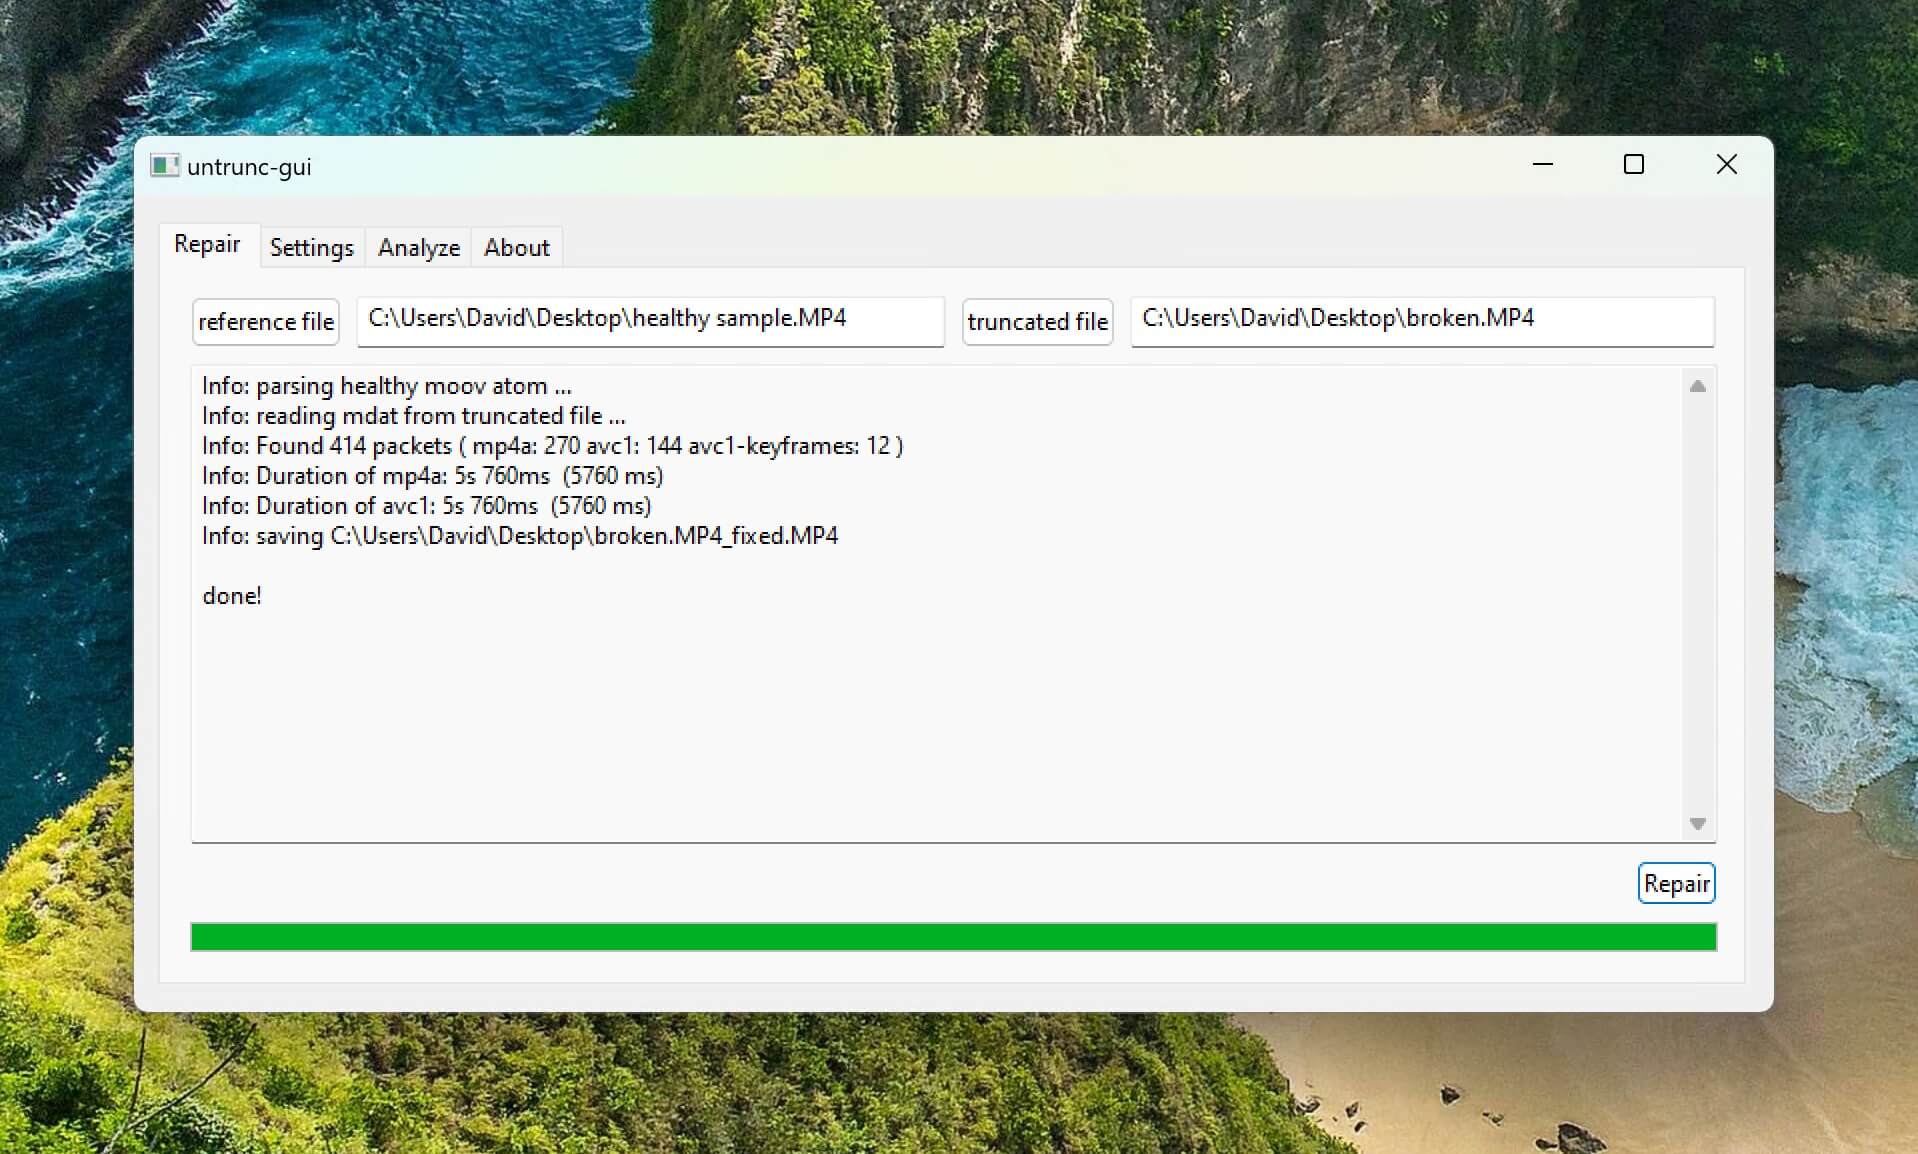
For those less comfortable with command-line interfaces, Untrunc also offers a graphical user interface (GUI). To use this:
- Launch the untrunc-gui application from the unzipped folder.

- Click Select broken file and choose your corrupted video.
- Click Select healthy file and choose a working video file (ideally from the same device).
- Click Execute and wait for the process to complete.
Remember, the success of Untrunc depends on having a suitable working video to use as a reference. If you don’t have any, you won’t be able to achieve the desired results.
Expert Analysis: Your Chances of Video Repair
Some situations are more favorable for video recovery than others. Based on extensive research and consultation with our tech team, I’ve compiled a table outlining different corruption scenarios and their likelihood of successful repair using the methods I’ve recommended:
| Corruption Scenario | Clever Online Video Repair | VLC | Untrunc | Notes |
| Interrupted recording, download, or transfer resulting in a truncated video (end cut off) | High | Low | High | These are often the easiest to recover since the most important information about the video file is intact. |
| Corrupted file header | High | Medium | High | Online and offline tools are capable of rebuilding headers based on a provided sample. |
| Physical damage to storage media | Low | Low | Low | Software can’t fix hardware issues. |
| Codec compatibility issues | Medium | High | Medium | VLC’s re-encoding capabilities shine here. |
| Overwritten file | Low | Low | Low | If the file has been overwritten by a different file, then you should attempt to recover the original using data recovery software. |
| Virus-damaged files | Low to high | Low to high | Low to high | Your recovery chances when dealing with viruses and other malware can vary greatly, but you should always perform antivirus cleanup first. |
FAQ
I’ve analyzed the problems discussed in the Reddit r/VideoEditing and r/techsupport communities, and concluded that the most common reasons for video file corruption are:
- Sudden power loss during recording (e.g., camera battery dying)
- Interrupting the file transfer process (e.g., unplugging the SD card mid-transfer)
- Storage media issues (e.g., faulty SD cards or hard drives)
- Software glitches in the recording device or computer
- Malware infections corrupting files
Interestingly, there are quite a few people who report issues with file corruption after their computer screen “turned blue.” I suspect that all these poor individuals have encountered the dreaded Blue Screen of Death.
I’ve run into this frustrating issue more times than I’d like to admit. It turns out that some camera manufacturers hide video files during recording and make them visible only when recording stops. In situations when something prevents normal recording completion—like a dead battery—the file remains hidden. To recover it, you’ll need to use specialized SD card recovery software first. Then you can attempt to repair it using an online repair tool.
I’ve found that the most reliable free online method is using the Clever Online Video Repair tool. Here’s my step-by-step process to recover corrupted MP4 files or other video formats:
- Go to repair.cleverfiles.com.
- Upload your corrupted video file (up to 5GB).
- Provide a sample video from the same device with similar settings.
- Let the online tool analyze and repair your video.
- Download the repaired file.