While an overwritten file may appear to be permanently lost because it’s not in the Trash, the reality is very different. In this guide, we’ll explain why it’s possible to recover replaced files on Mac and walk you through several proven methods to do so.
Can You Recover Overwritten Files on Mac?
Yes, you can recover overwritten files on Mac, but your success depends on two main factors:
- Physical presence of the overwritten files
- Availability of backups
When you “overwrite” a file, what actually happens is more complex than simply replacing the old data. The operating system typically writes the new version to a different physical location on the drive and updates the file system to point to this new location. This means that in many cases, the original file data may still exist on your drive (even though it’s no longer visible to the operating system) and can be recovered using specialized data recovery software like Disk Drill.
If the original file has been physically overwritten or TRIM (a special SSD feature that effectively permanently erases deleted data) has cleared the data, your recovery options are limited to backups, such as local snapshots, Time Machine backups stored on an external drive, built-in application backups (Word is a good example), or versioning cloud backup services like Dropbox.
| Recovery Method | Best For | Time Window |
| Data Recovery Software ✅ | No backups available | Recent overwrites |
| Local Snapshots | Recent overwriting incidents | Last 24 hours |
| Time Machine | Recovery of overwritten files that are no longer physically present on the drive | Multiple versions |
| Application Backups | Situations involving the overwriting of files created by specific applications | Various |
| Cloud Storage | The recovery of overwritten files that have been synchronized to the cloud | Service dependent |
How to Restore Overwritten Files on Mac
Now that you understand how file overwriting works and what recovery options are available, let’s explore each recovery method in detail.
Method 1: Recover Overwritten Files on a Mac With Time Machine
If you follow best practices you should be performing regular backups of your Mac. Time Machine, the backup and recovery tool that is part of macOS, provides an easy way to protect your data for just this type of occasion. Unless the original file was created after your last backup, you should have a copy of it in Time Machine.
To recover a replaced file using Time Machine:
- Connect the storage media that holds the Time Machine backups to your computer.
- Navigate to the folder that contained the file you want to restore.
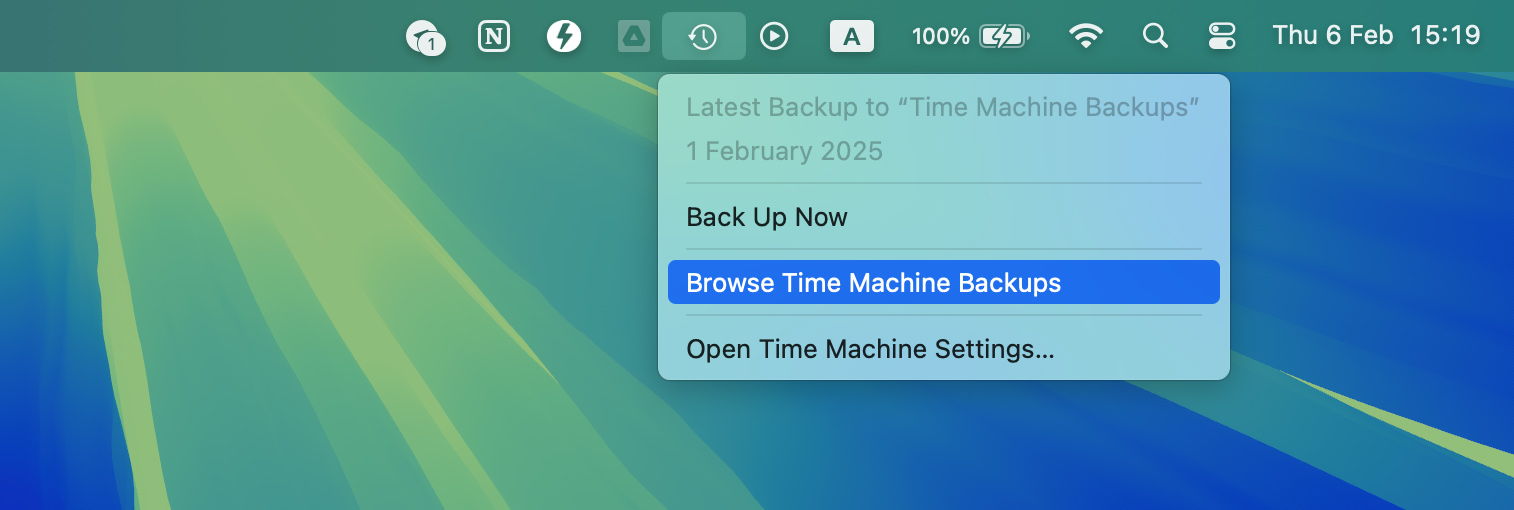
- Click on the Time Machine icon in the Menu bar and select Browse Time Machine Backups.
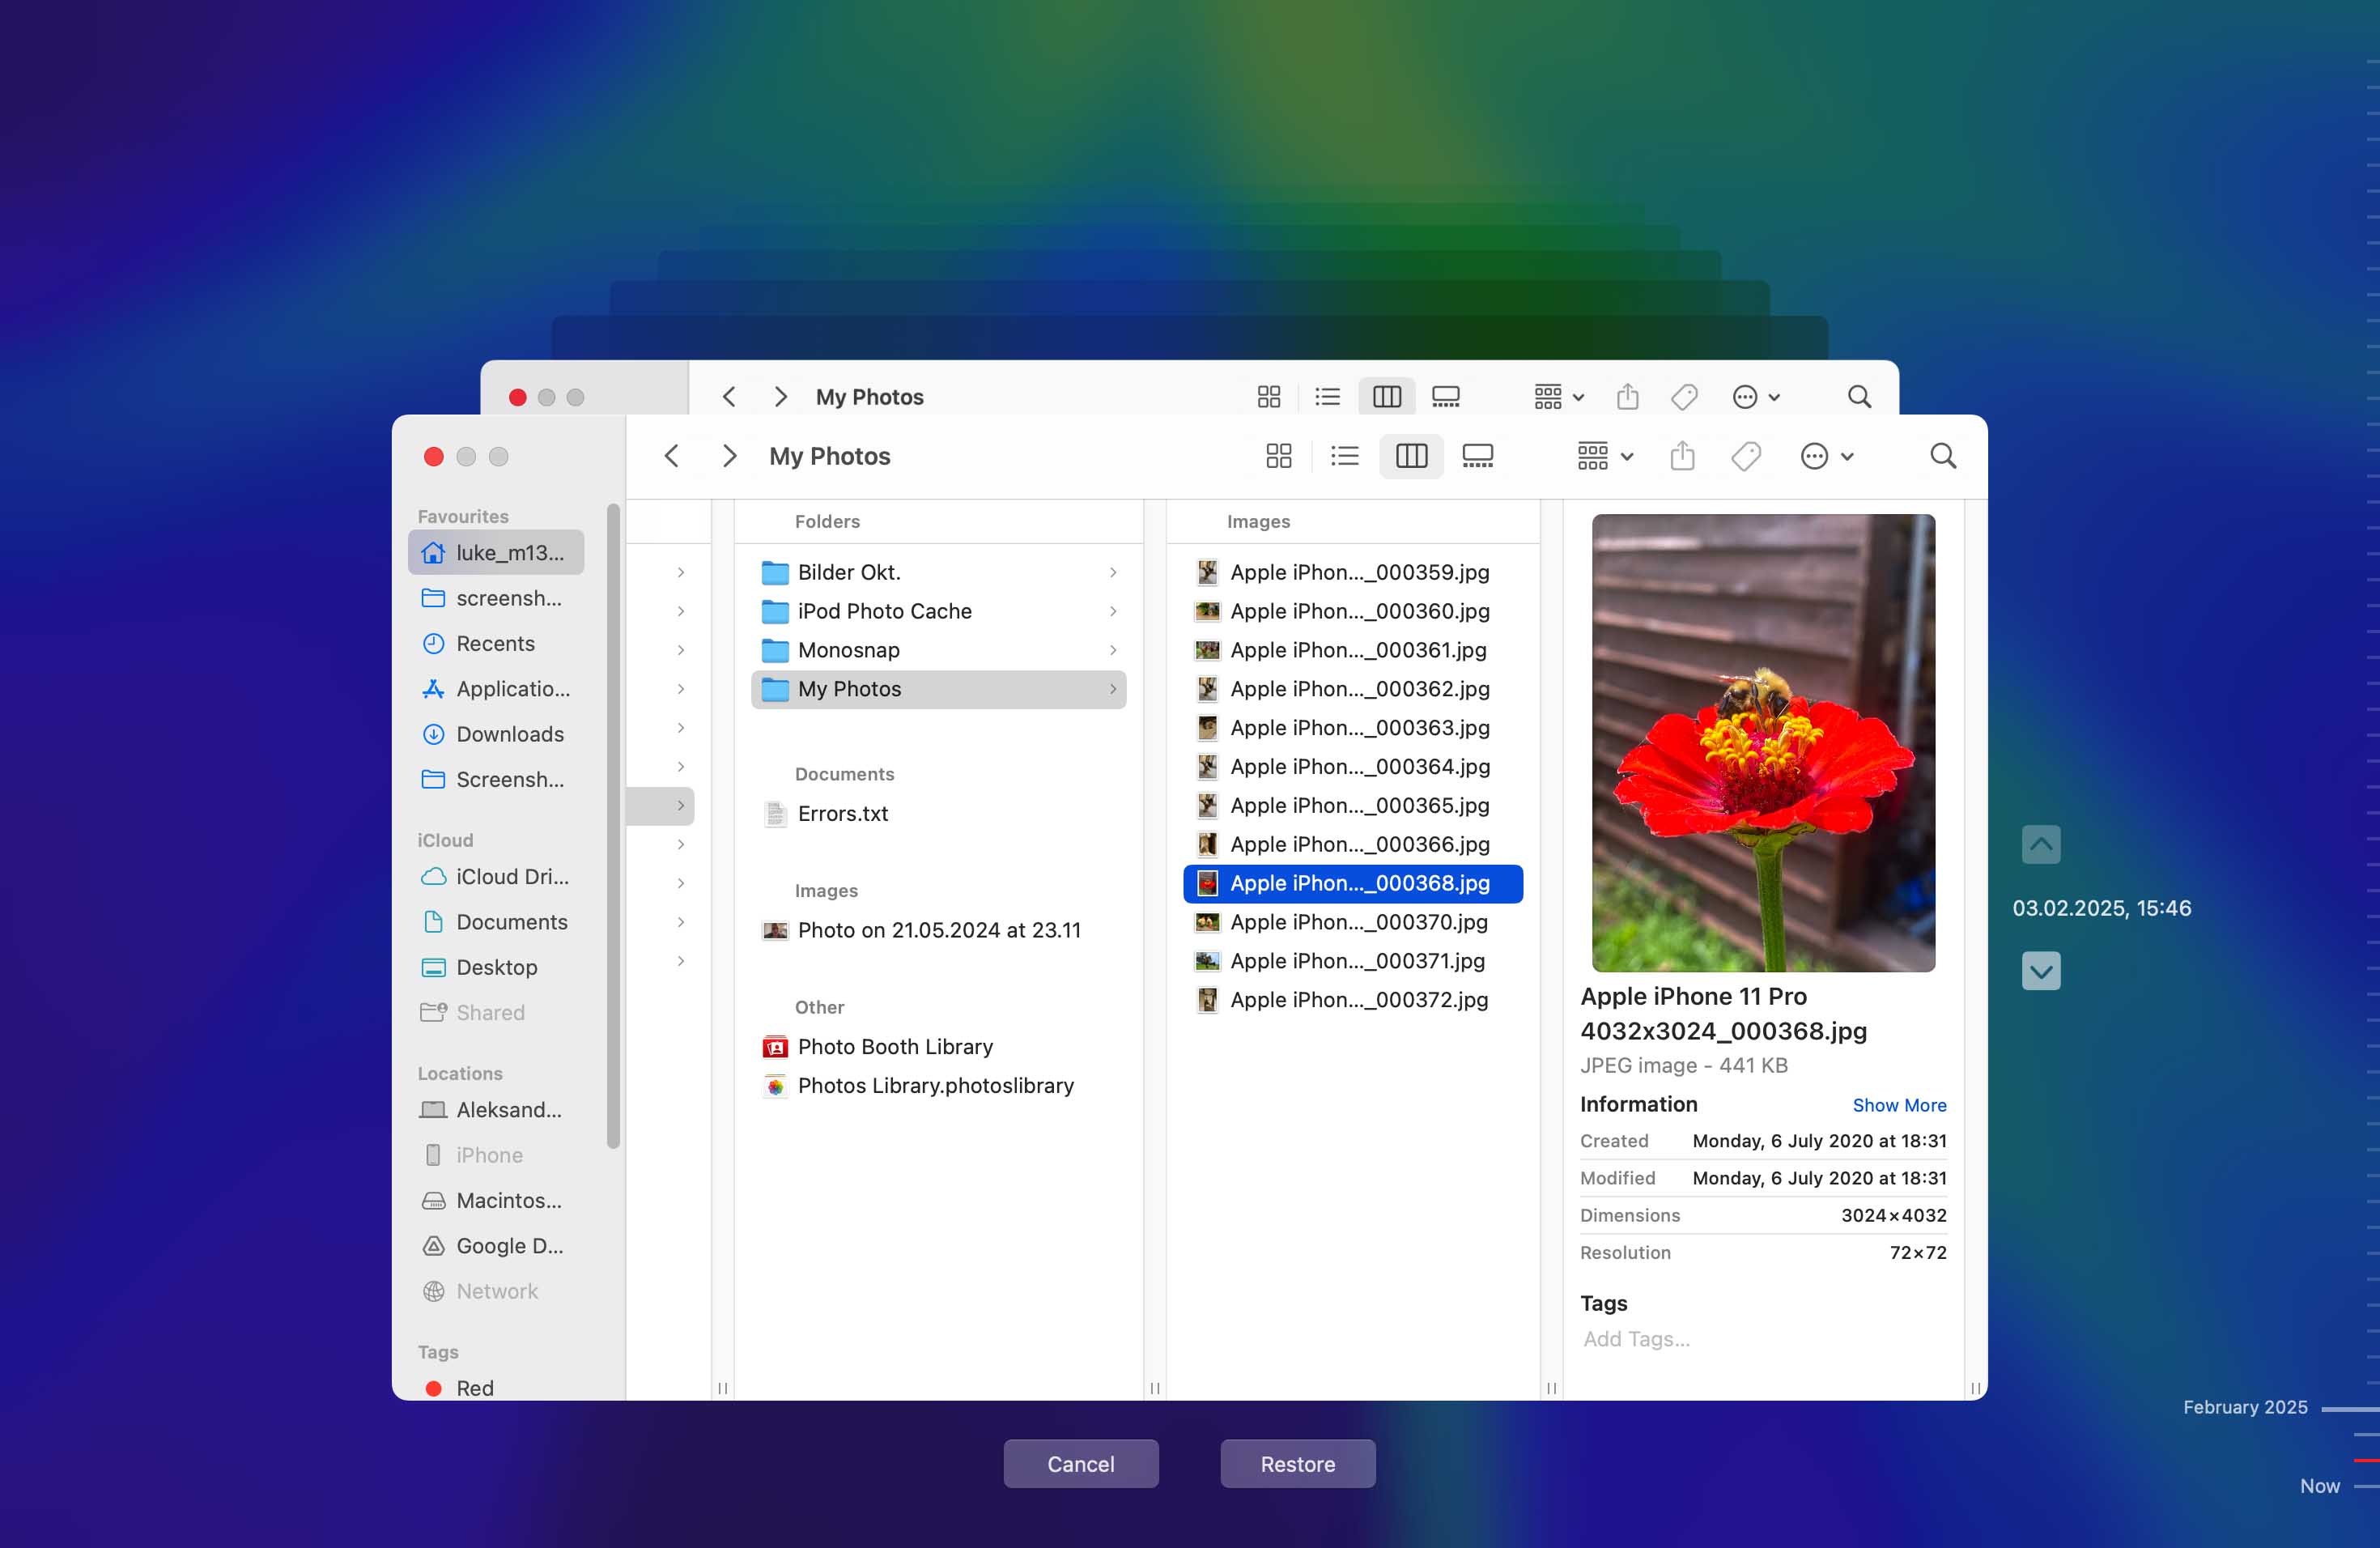
- Locate the items to be restored by using the timeline on the edge of the screen.
- Select an item and press the Space Bar to preview the file.
- Click Restore to recover the selected file.
Method 2: Recover Replaced Files on a Mac Without Time Machine
Disk Drill, saved my bacon not once but twice before.
— Kibs (@CapnKibs) May 3, 2024
Do it soon, and do it quick, higher chance to recover all if not more.https://t.co/1dbW8CKxHc https://t.co/heamihi9YU
To recover accidentally replaced file on Mac:
- Download and install Disk Drill on a storage device different from the one where your overwritten files were located so that you don’t reduce your chances of recovery.
- Connect the storage media if necessary.
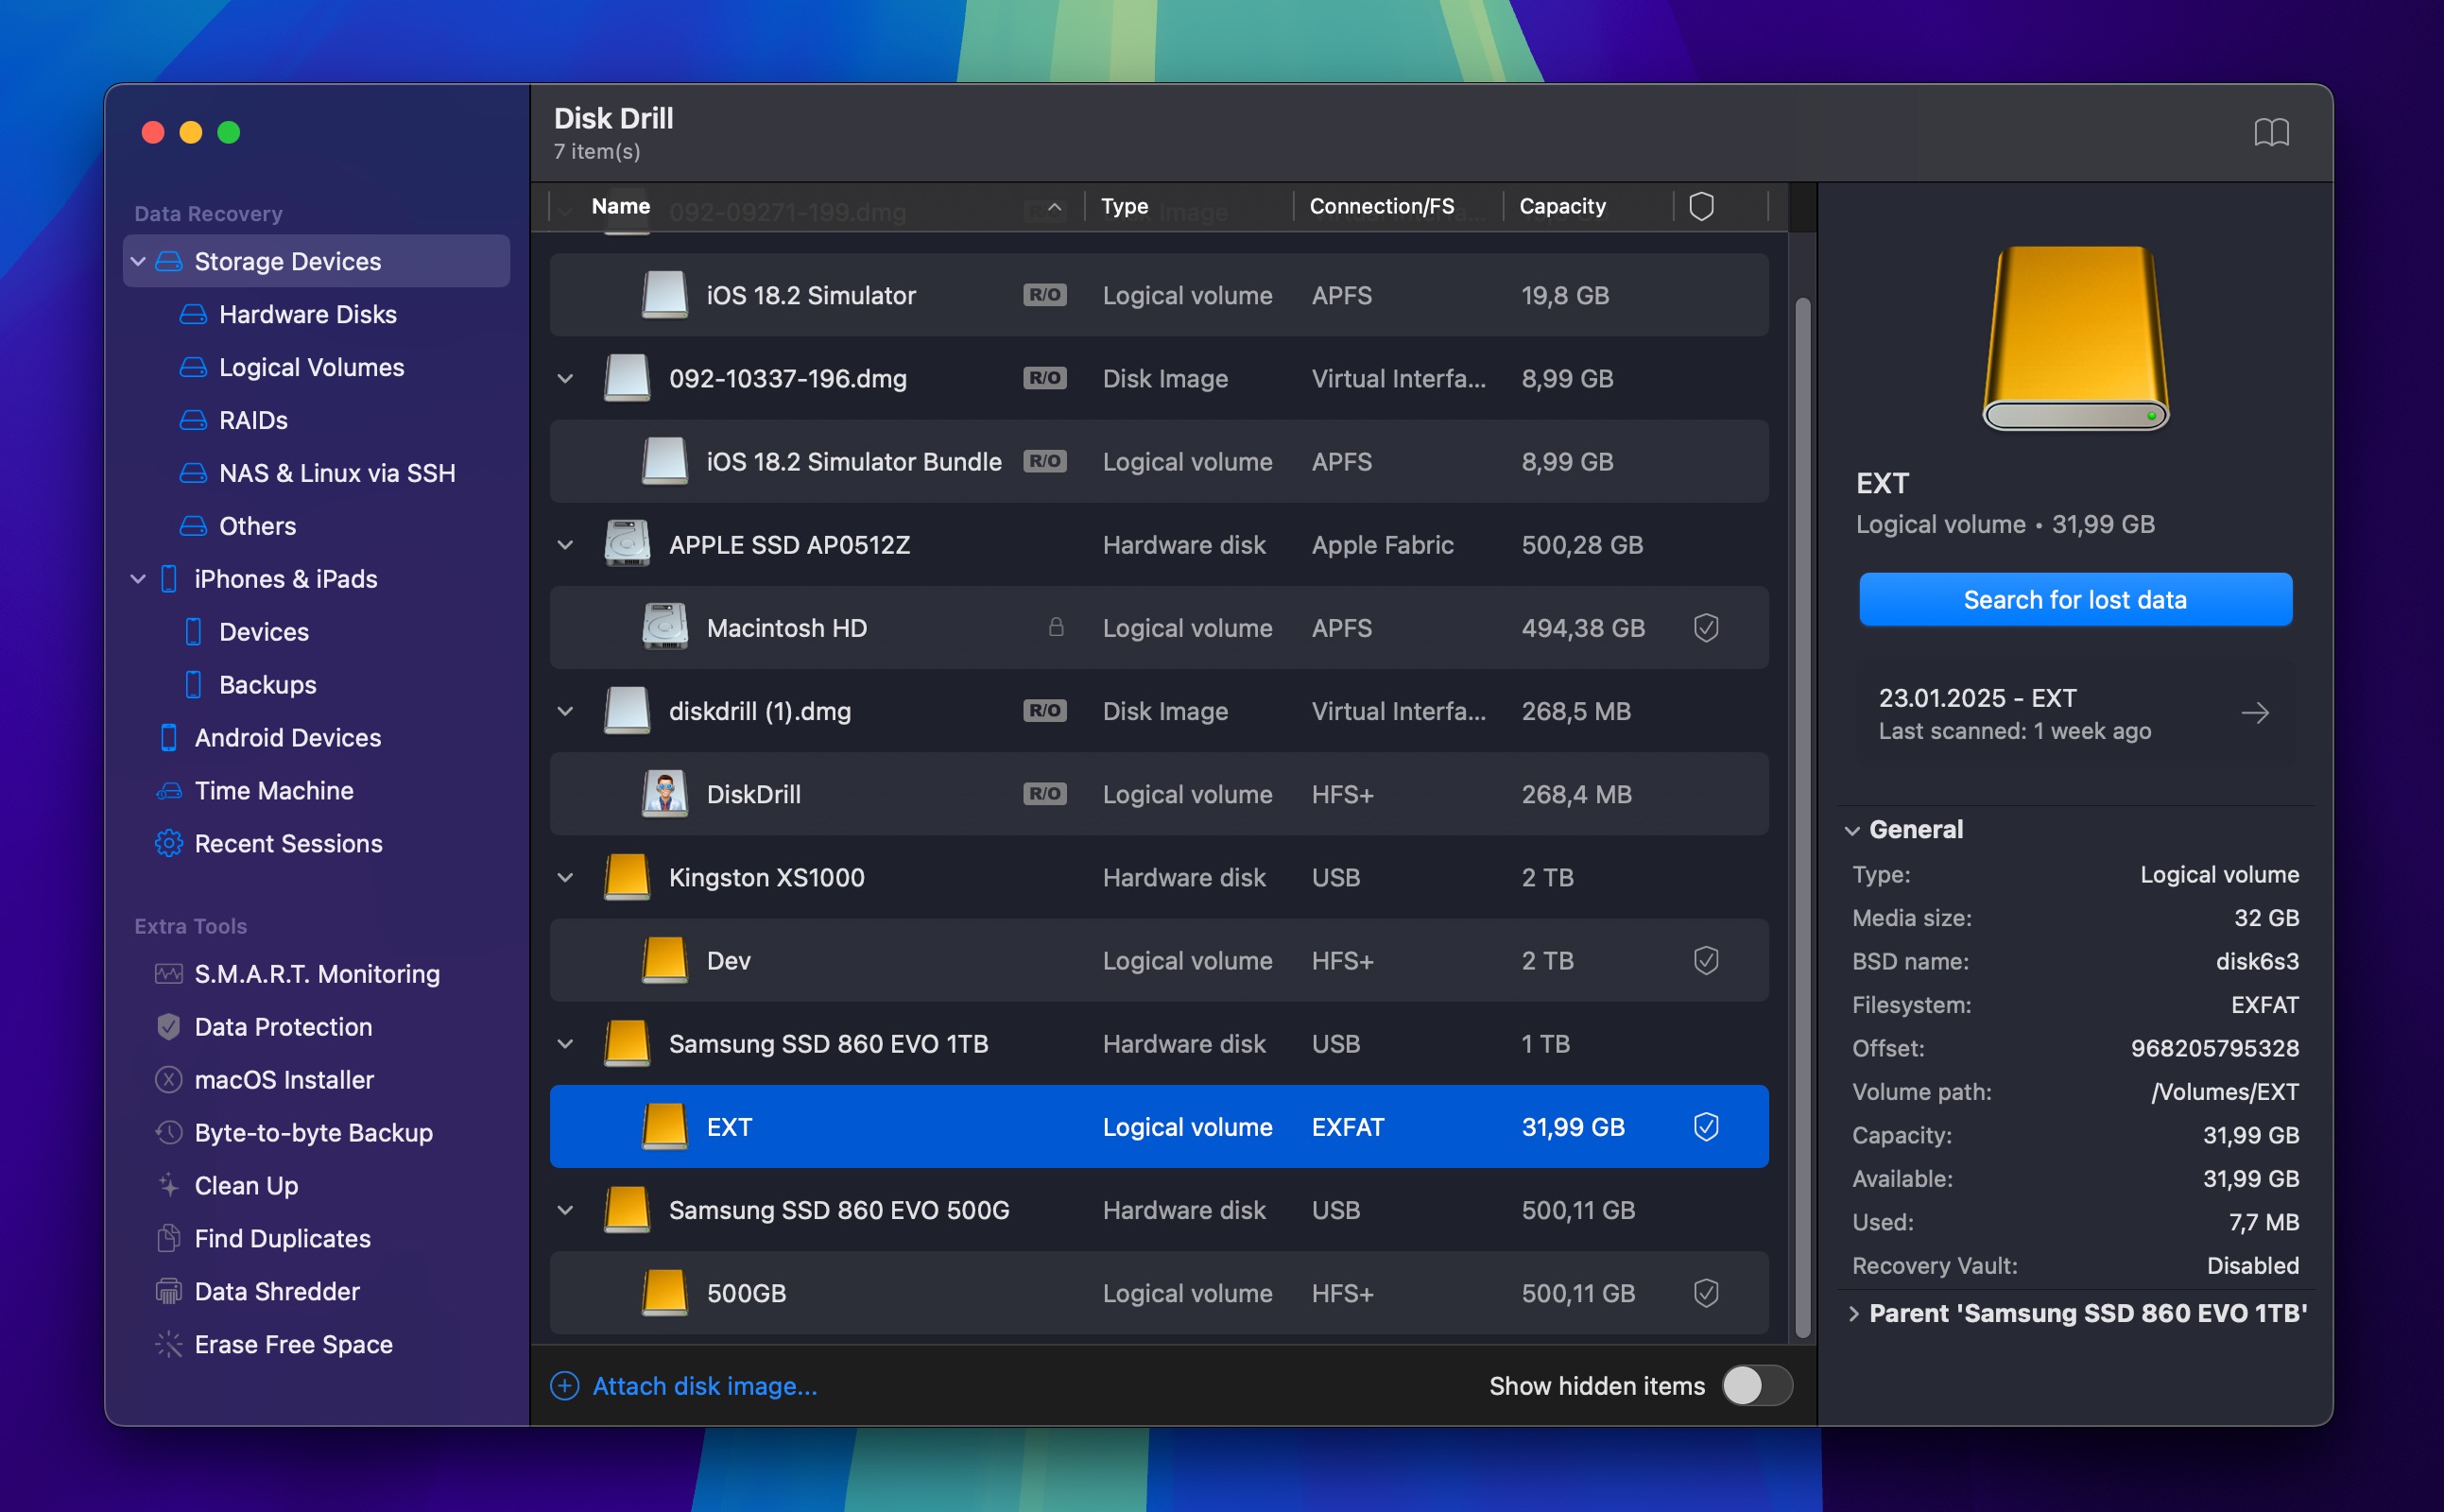
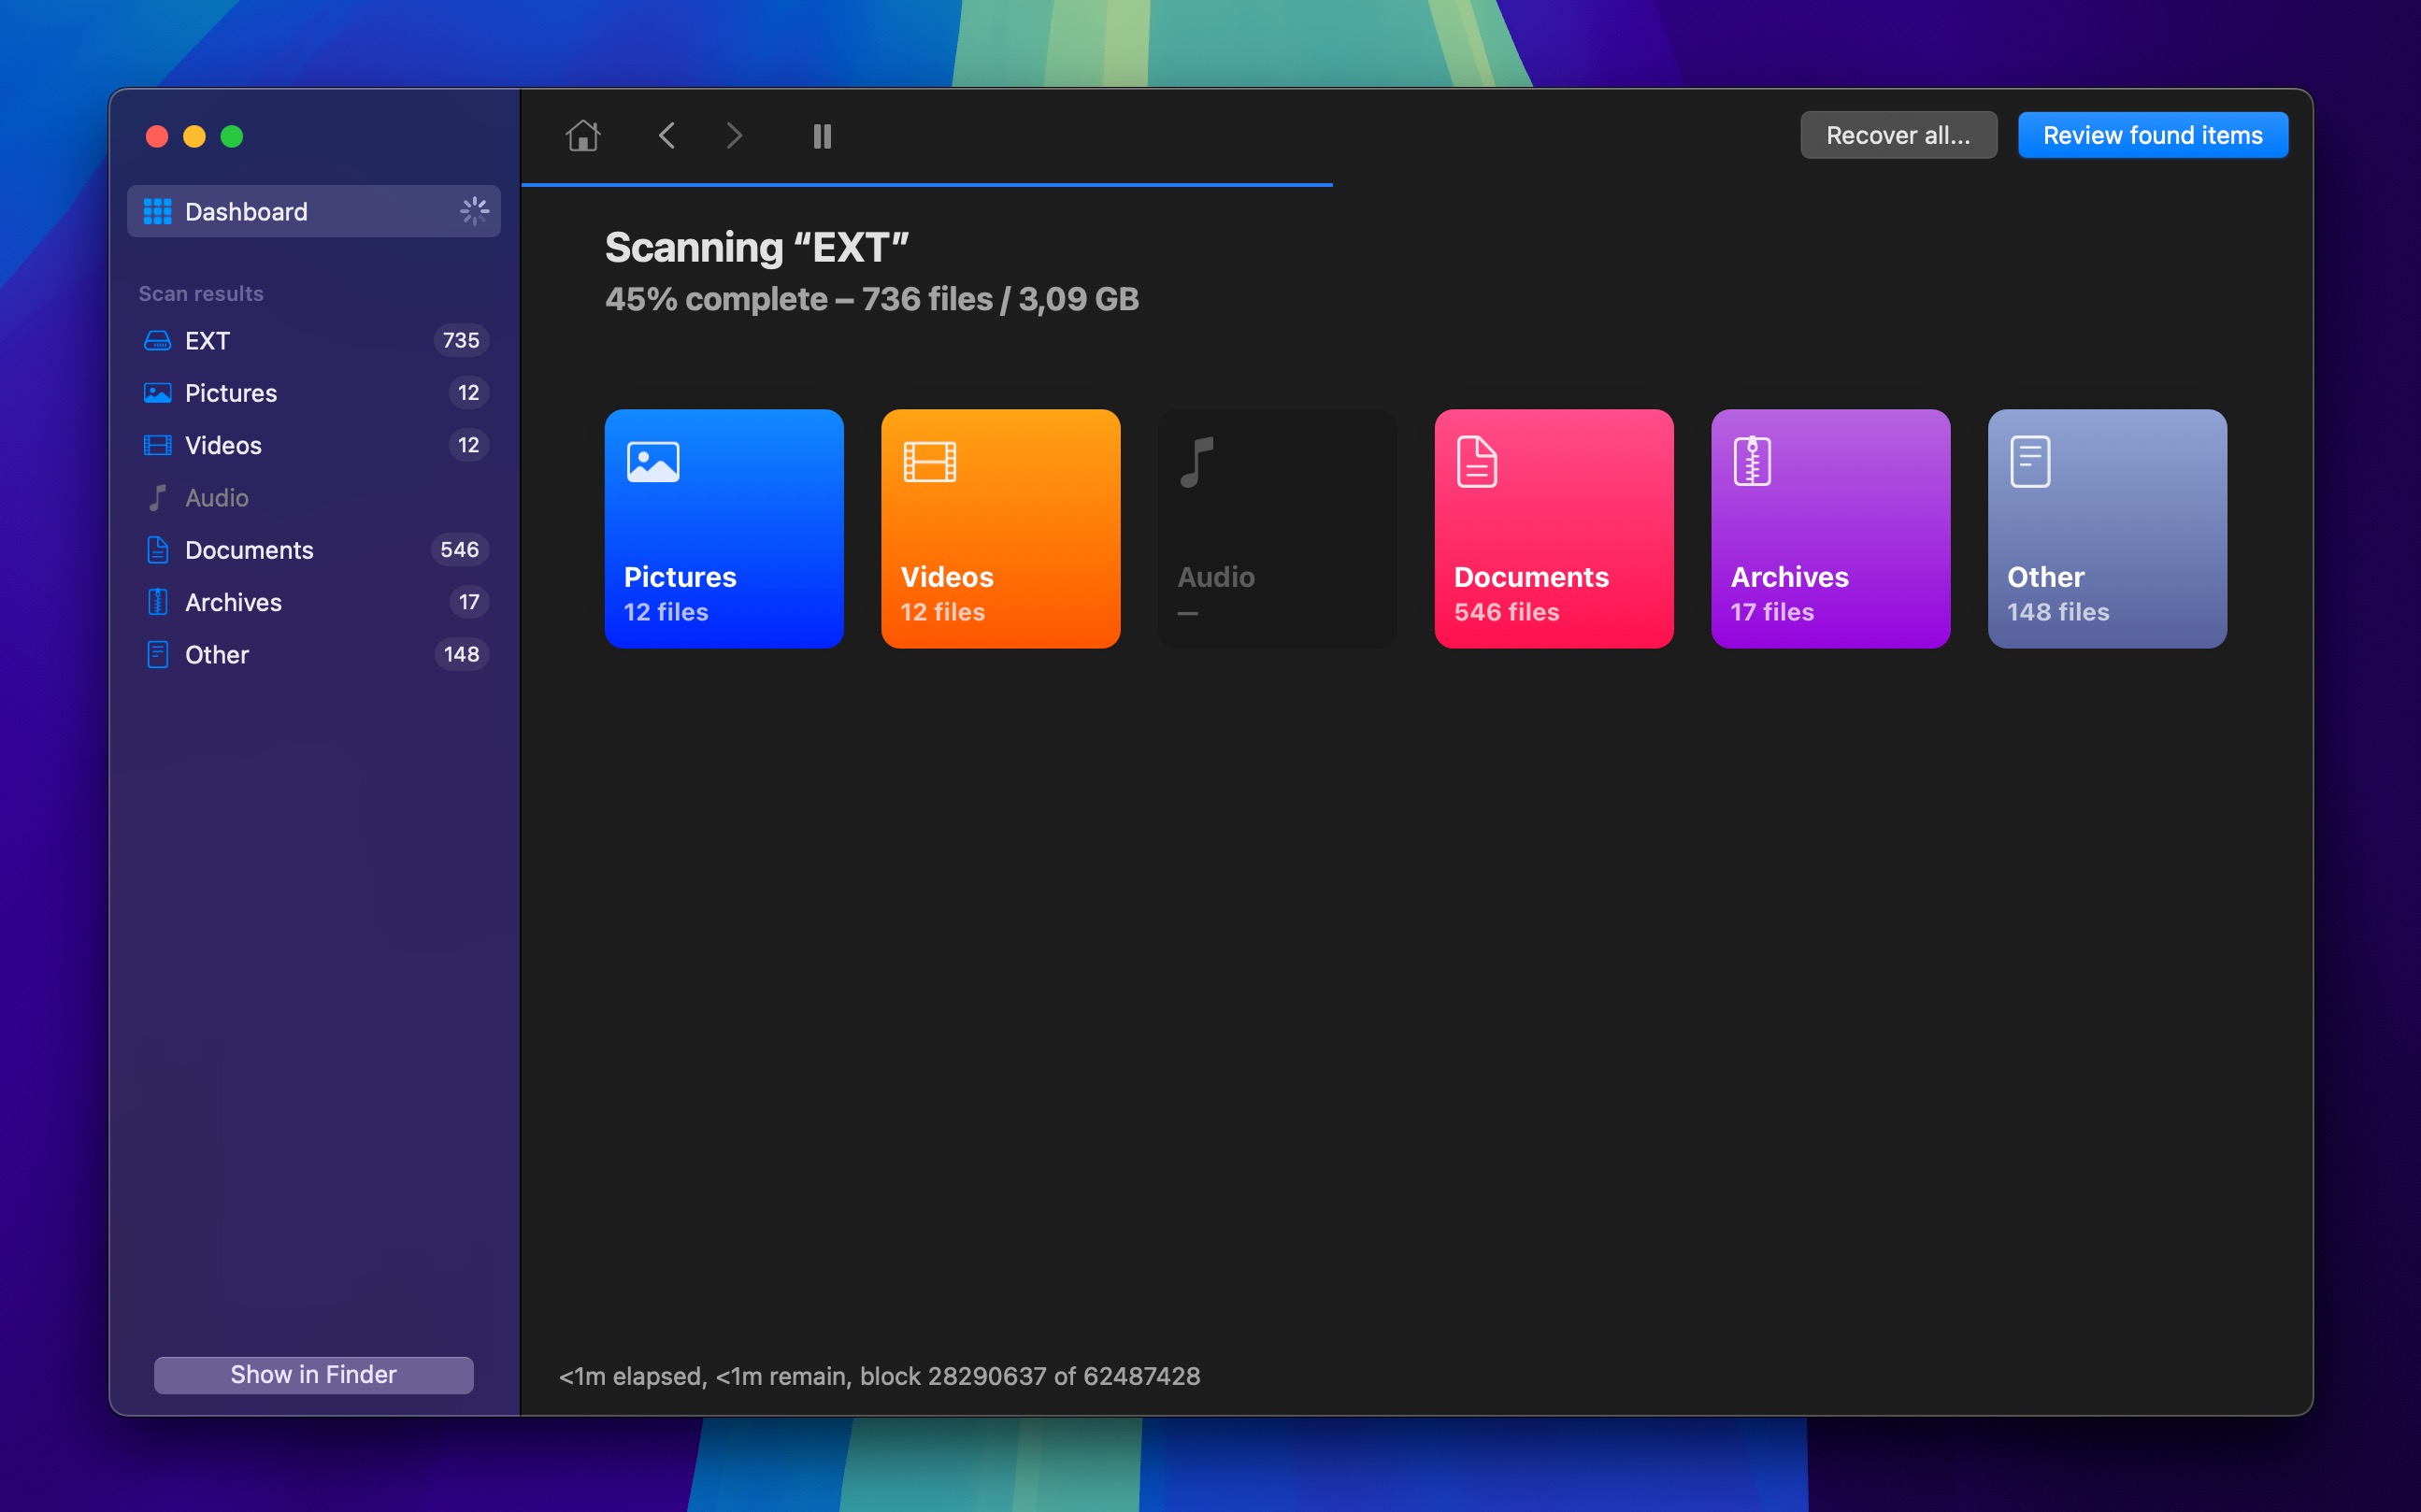
- Launch Disk Drill and select the disk on which your overwritten files were located.
- Click the Search for lost data button to initiate Disk Drill’s scanning algorithms.
- If you don’t want to wait, then you can click the Review found items to instantly display scan results while Disk Drill continues scanning in the background. Otherwise, wait for the scan to finish.
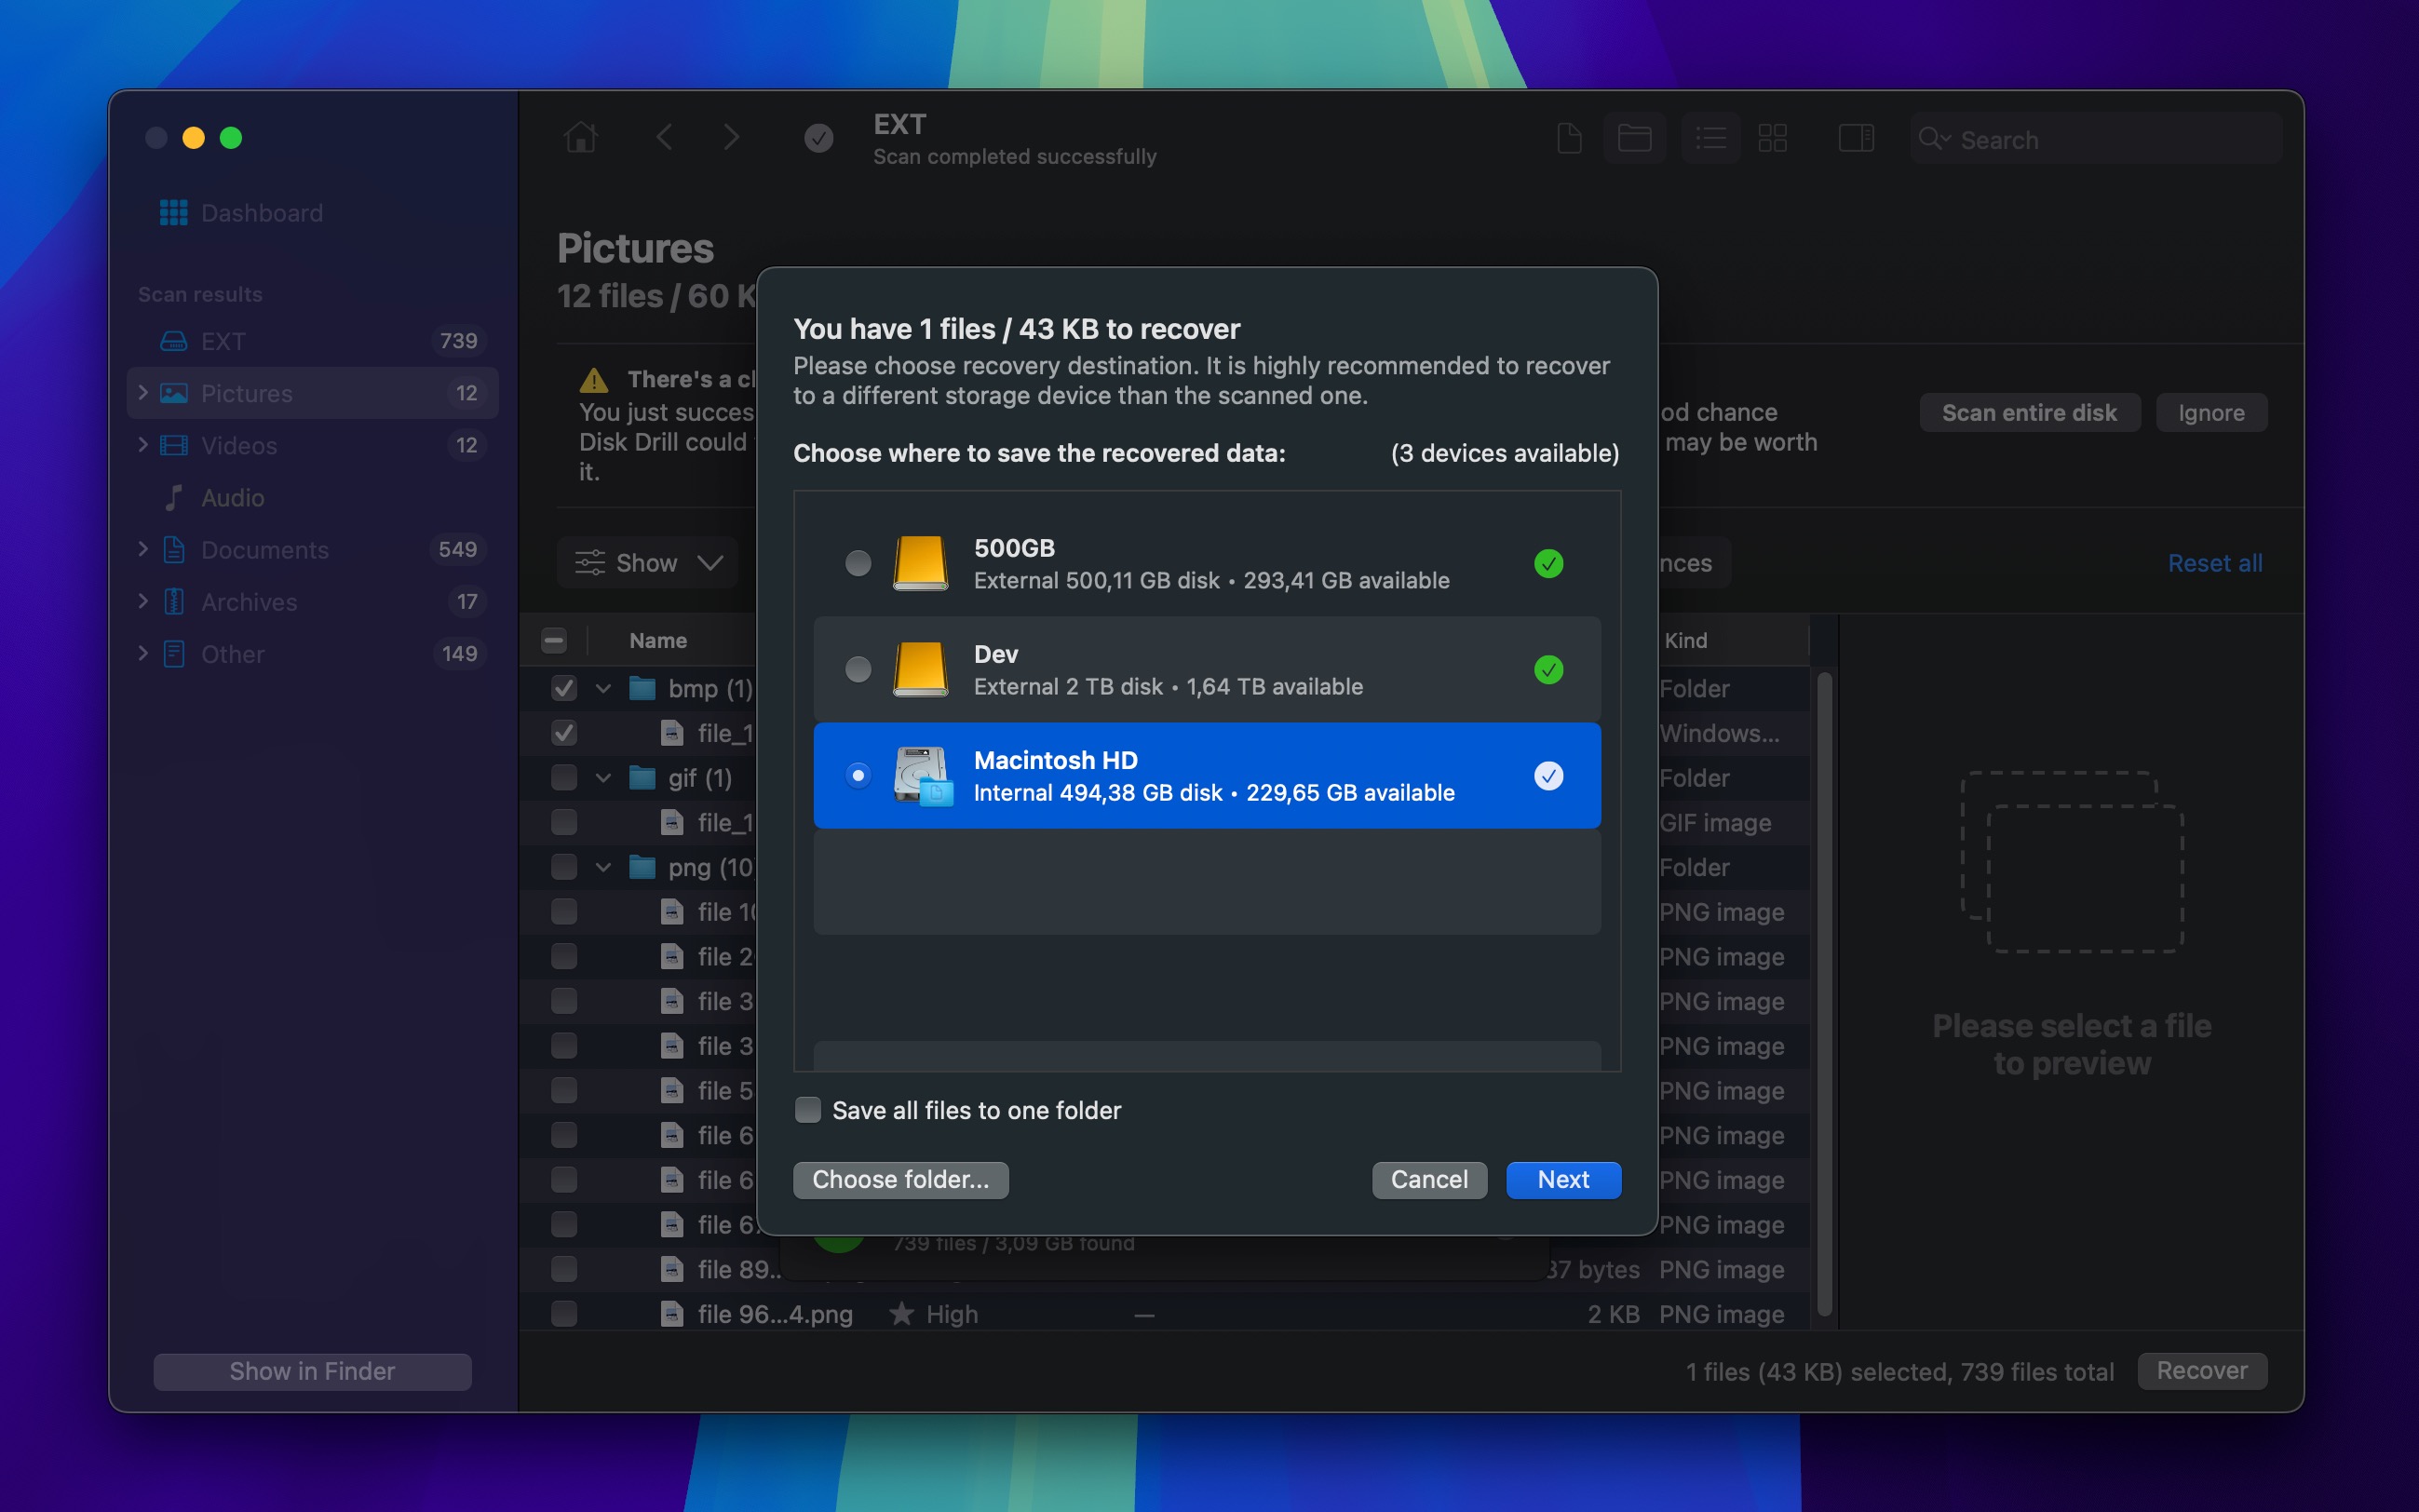
- Select the files you want to recover and click the Recover button.

- Choose a recovery destination on a different drive and click OK.
Method 3: Recover Overwritten Files Using Cloud Backups
Cloud storage services offer another potential way to recover replaced files on Mac, but there’s an important distinction to understand. While iCloud is Apple’s native cloud solution, it doesn’t maintain version history—when you overwrite a file locally, that change is quickly and permanently mirrored in iCloud.
However, some cloud services like Dropbox, Google Drive, and OneDrive maintain separate version histories or snapshots of your files. It’s these preserved earlier versions, not the synchronized copy, that make recovery possible. If you’re using a cloud service that offers version history, here’s how to attempt recovery:
- Connect to the cloud storage service that is storing your backup.
- Use the tool’s search functionality to find the files you want to recover.
- Select the files to be recovered.
- Use the tool’s user interface to perform the recovery.
Method 4: Recover Overwritten files from the Local Snapshots
Even if your Time Machine was disabled or your external backup drive wasn’t connected at the time of overwriting, you might still be able to recover your files thanks to local snapshots, which are hourly backups that Time Machine automatically creates and stores on your Mac’s internal drive so that you can restore previous versions of your files directly from your Mac—no external backup drive required.

The biggest limitation of Local Snapshots is that they’re stored only for up to 24 hours or until your Mac needs the space for other tasks. So, you can use them to recover overwritten files only if the overwriting happened recently. If it did, then you can simply follow the instructions in the Time Machine section since local snapshots can be recovered in the same exact way.
Method 5: Recover Overwritten Files From Within Applications
Most modern productivity applications include built-in version control features that can help you recover overwritten files. Microsoft Office (Word, Excel, PowerPoint), Apple’s iWork suite (Pages, Numbers, Keynote), and many other professional applications automatically save multiple versions of your documents as you work, which might be just what you need after overwriting a file.
Apple’s office applications let you recover past versions of overwritten files from an interface that all those who have at least some experience with Time Machine should find instantly familar:
- Open the File Menu selection in Pages or Numbers.
- Click the Revert To option.
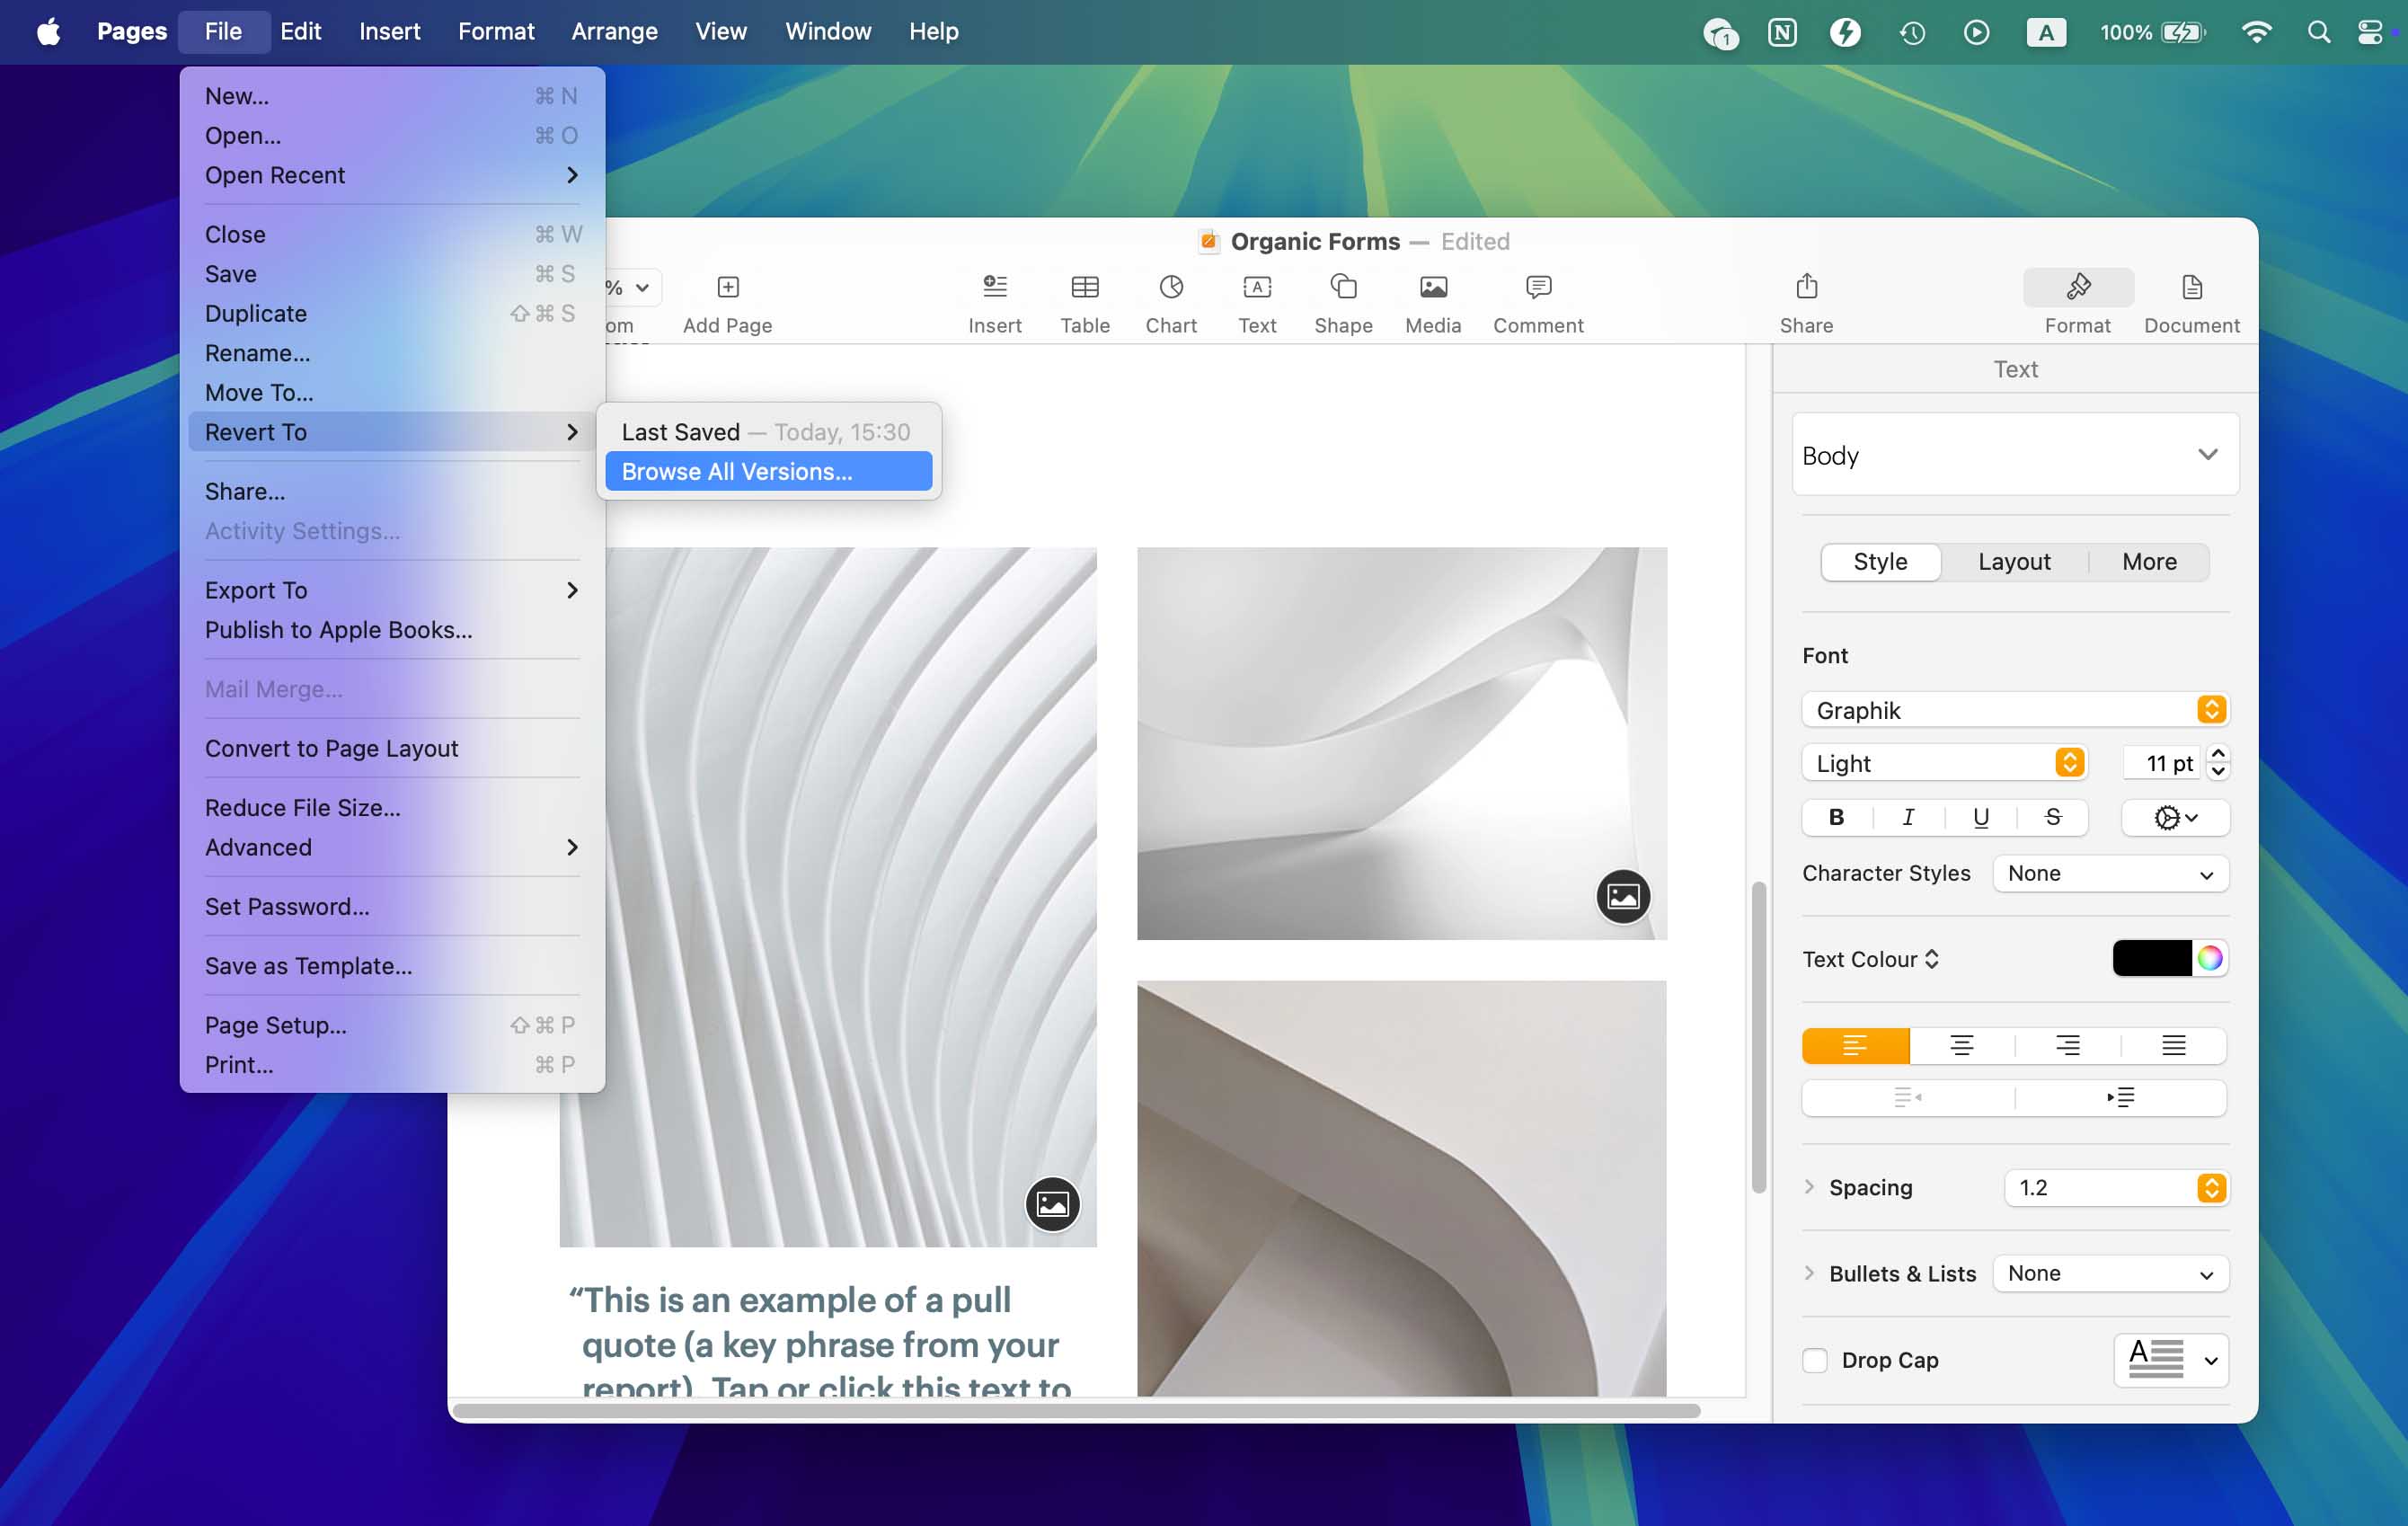
- Browse for the version of a file you want to restore.
- Select the version you want and click the Restore button to perform the recovery.

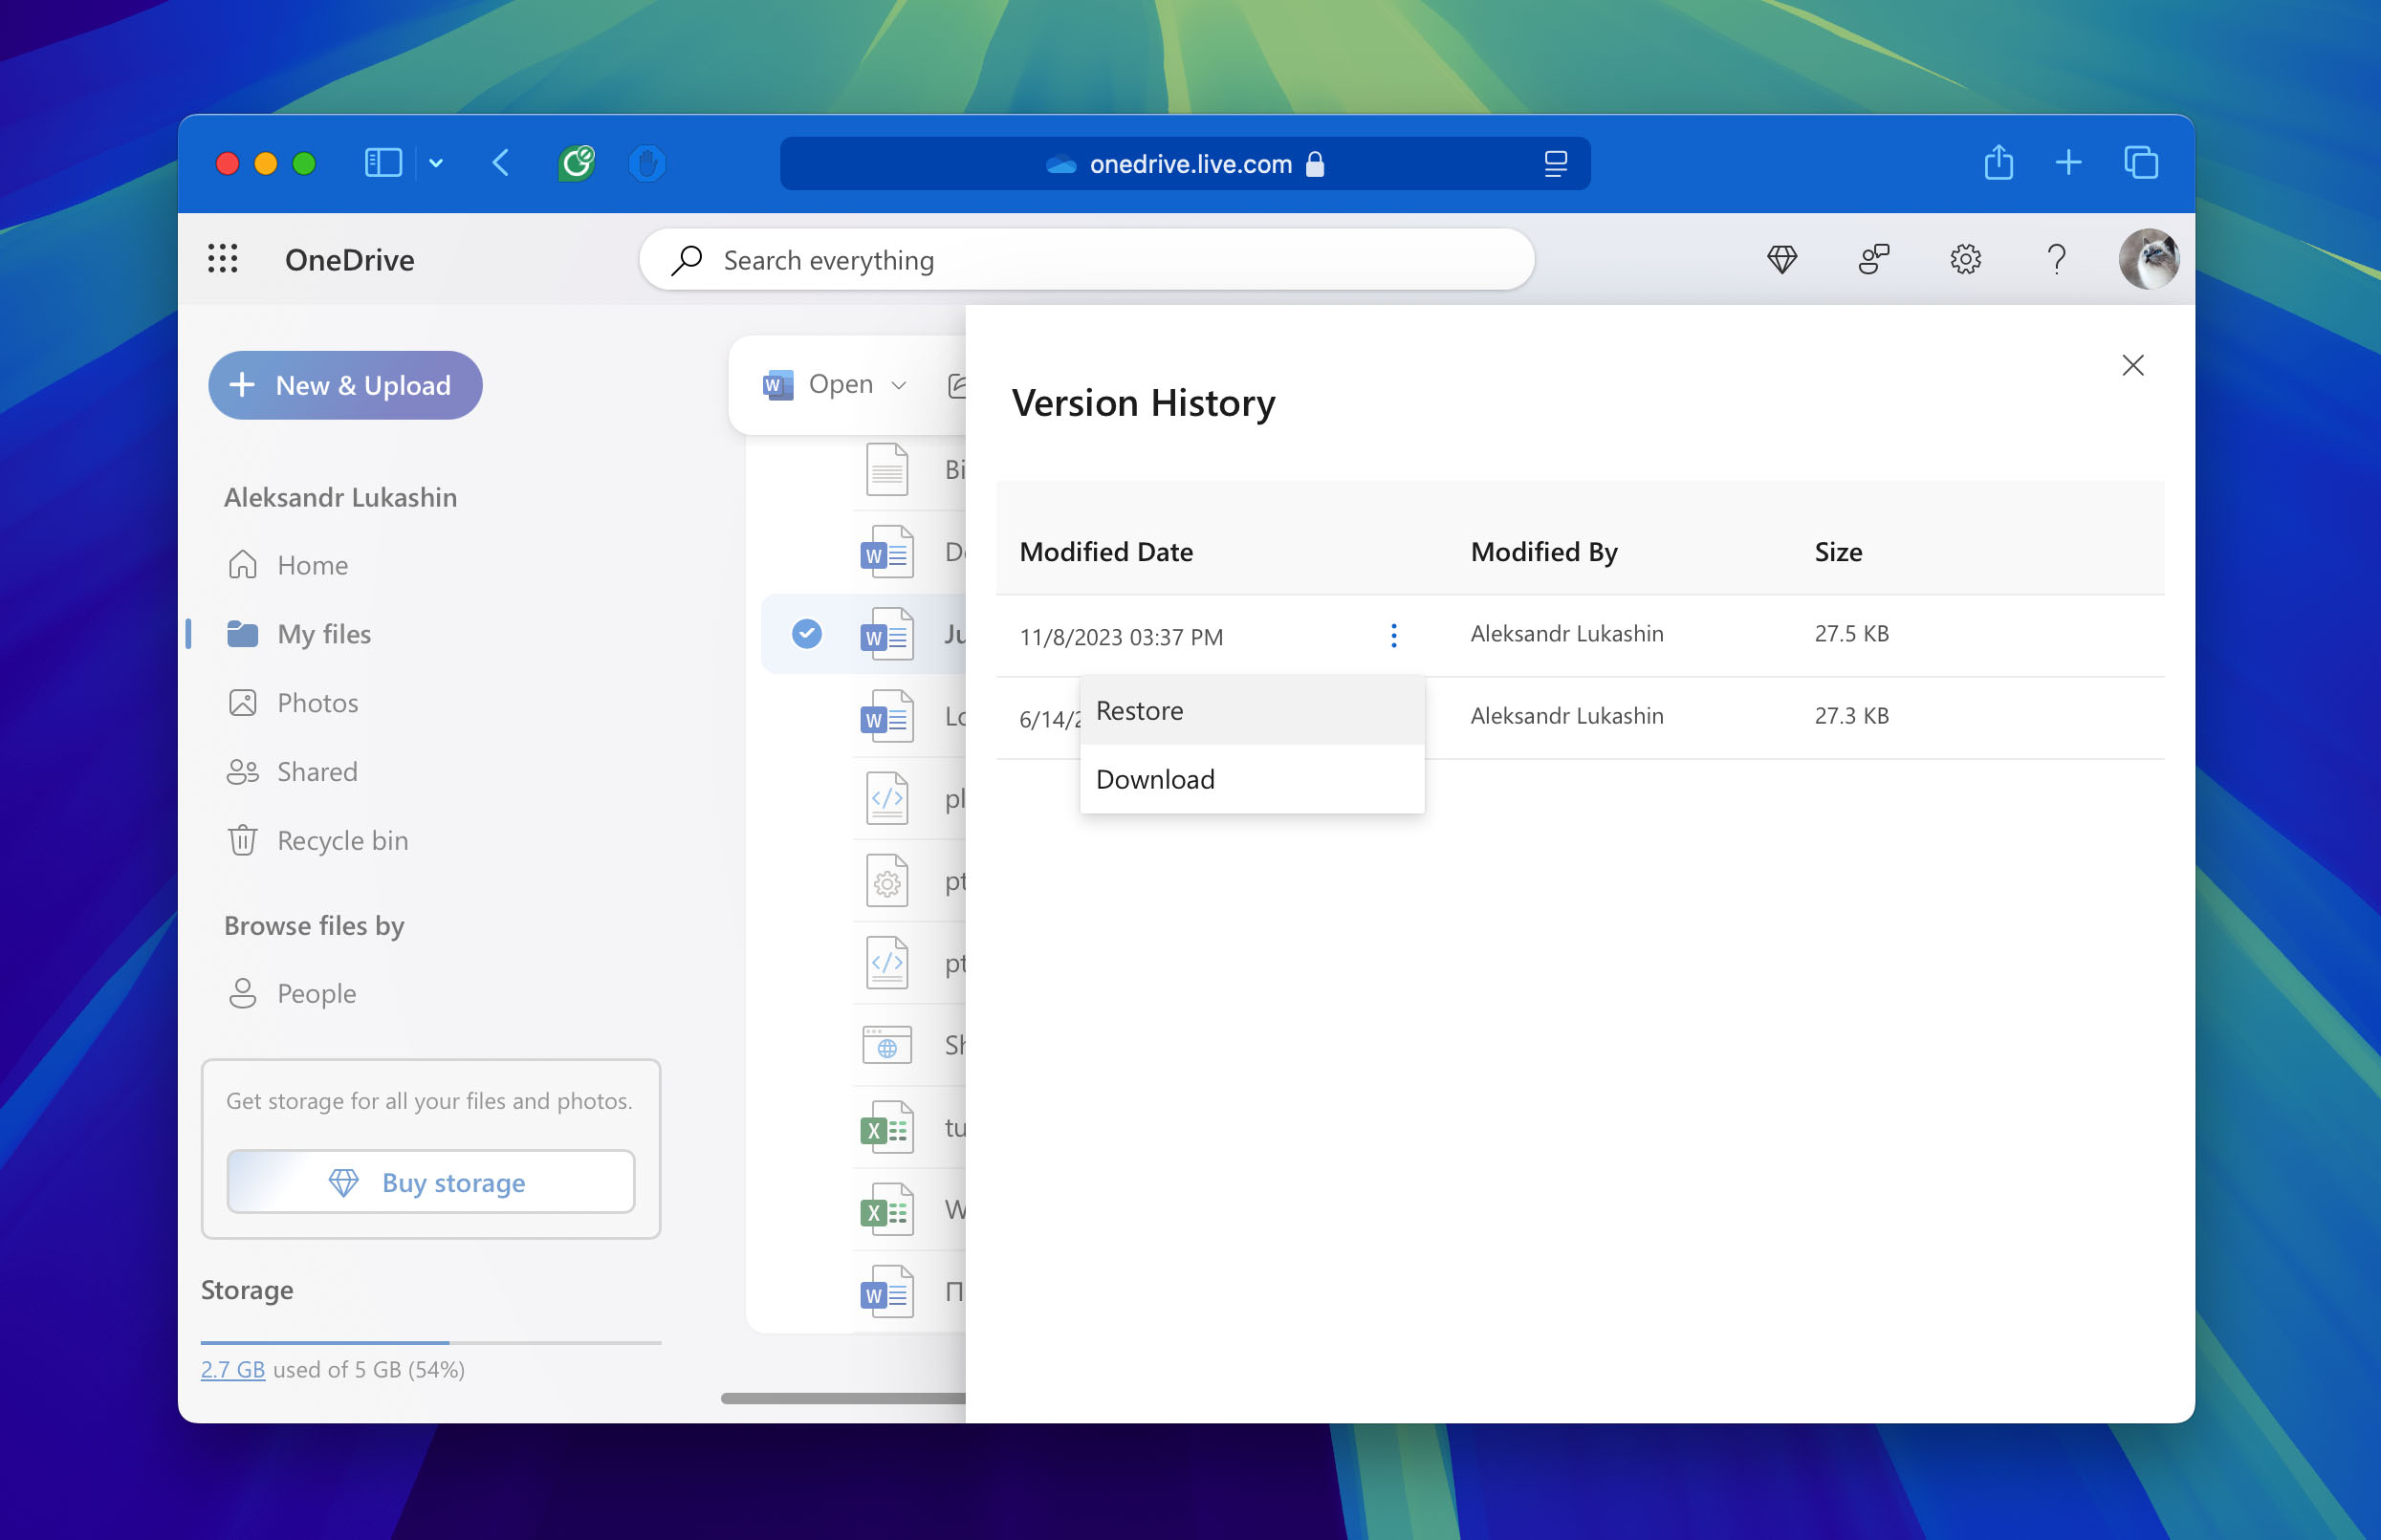
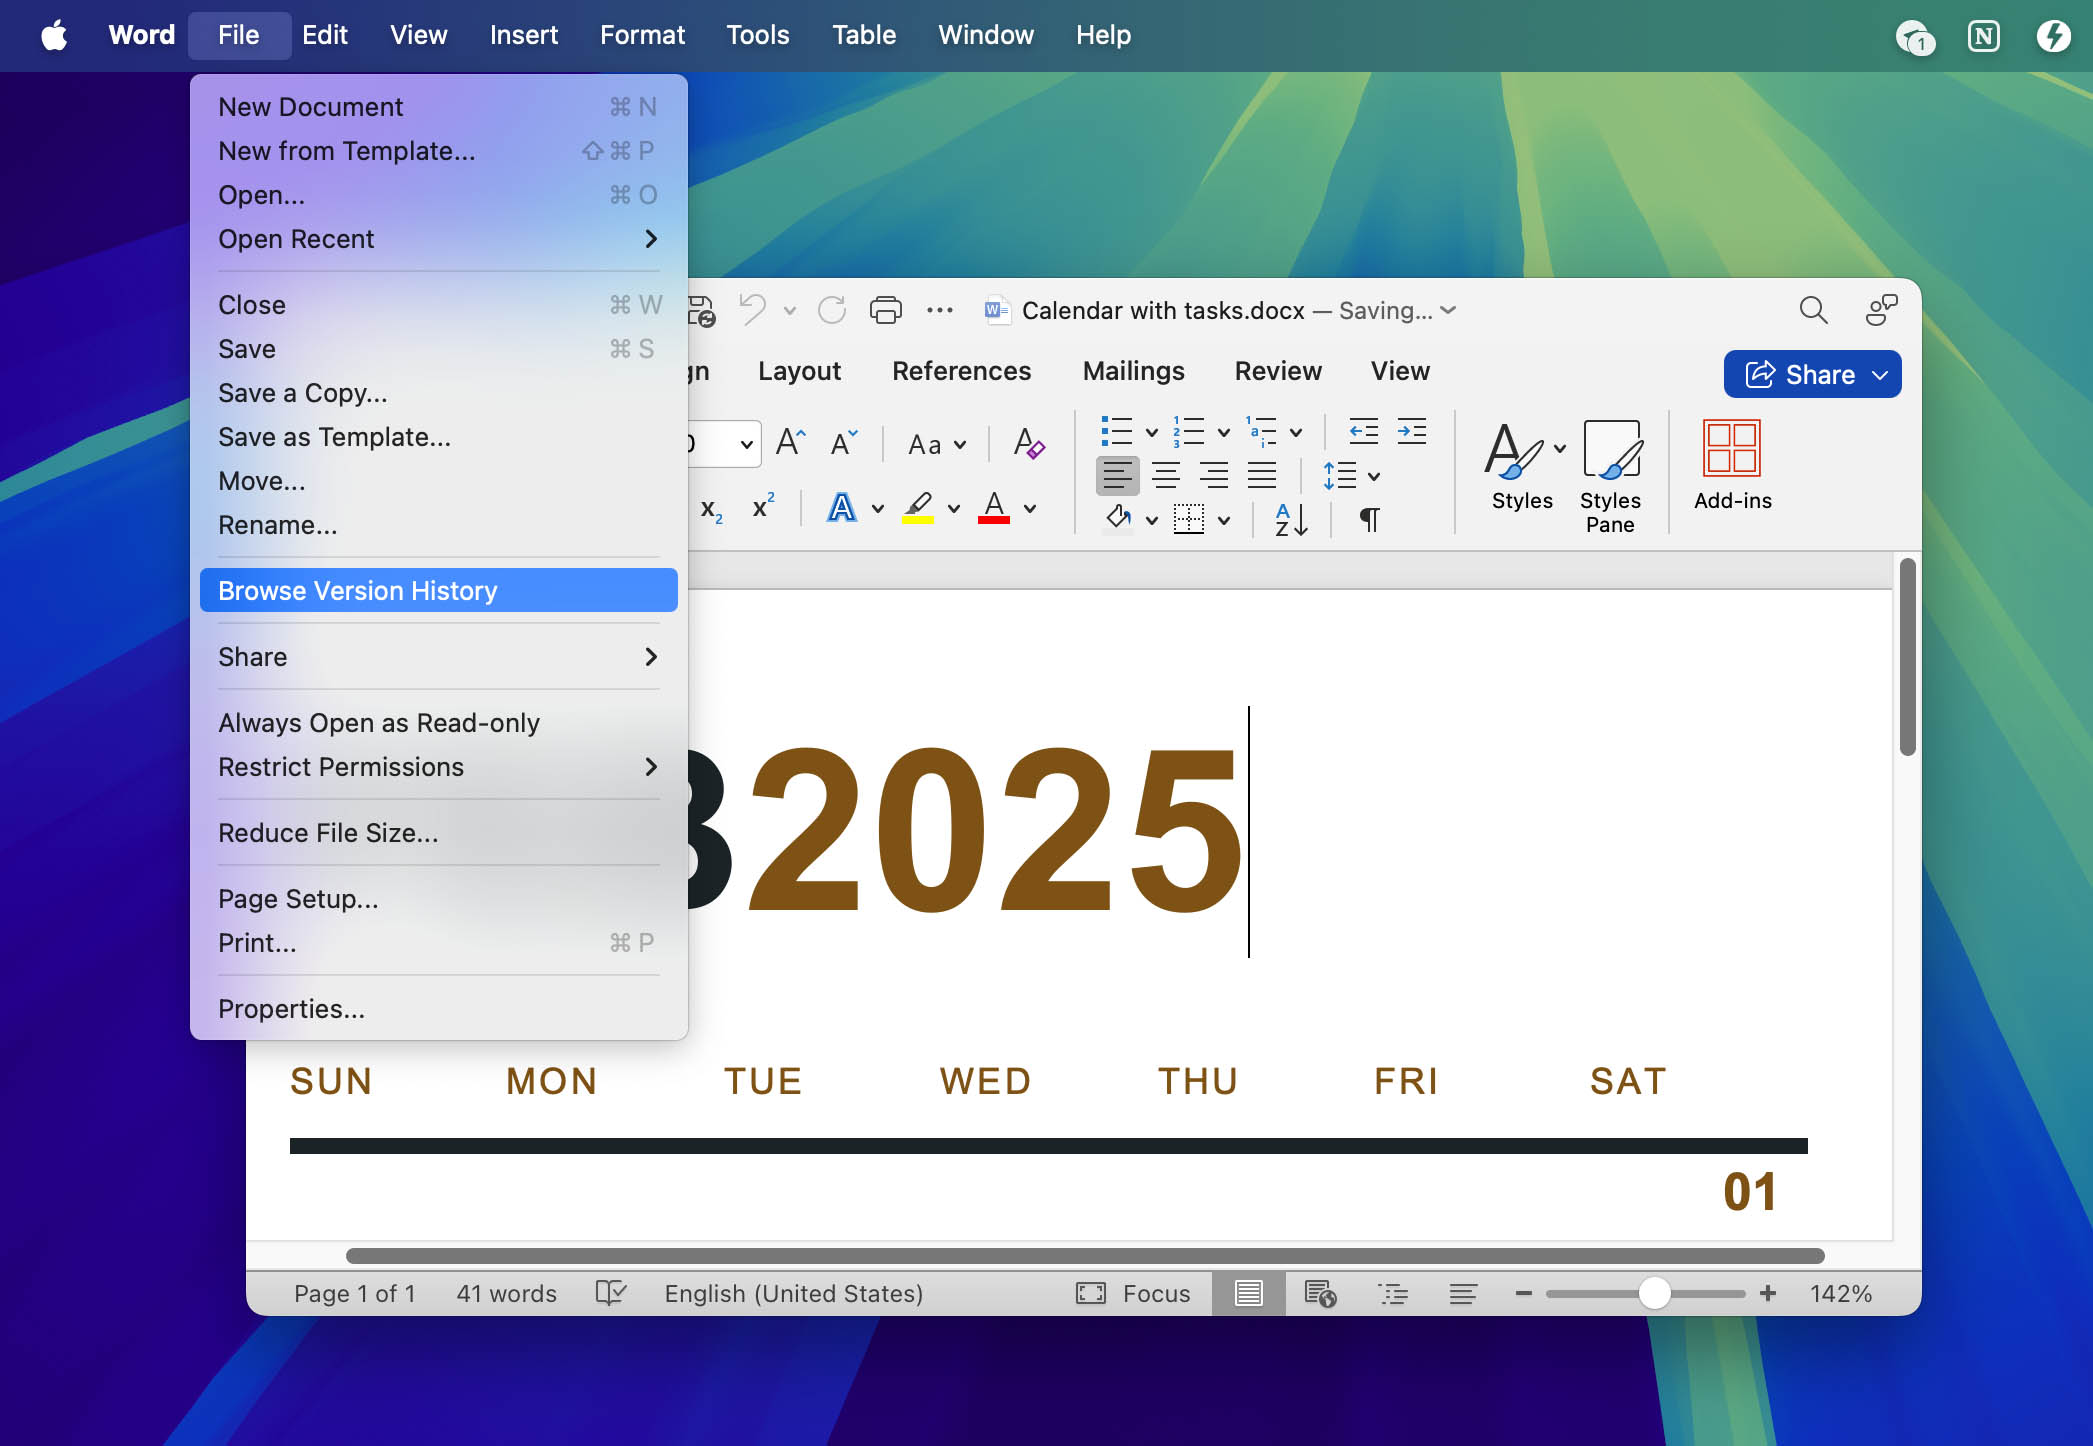
For Microsoft Office applications (Word, Excel, PowerPoint), Version History is available when your files are saved to OneDrive or SharePoint with a Microsoft 365 subscription:
- Open a file that has a previous version you want to recover.
- If you’re using Microsoft 365 for Mac, select the name of the document on the title bar of the application, then select the Browse Version History option.
- If you’re using Office 2016 or 2019 for Mac, select File > Browse Version History.
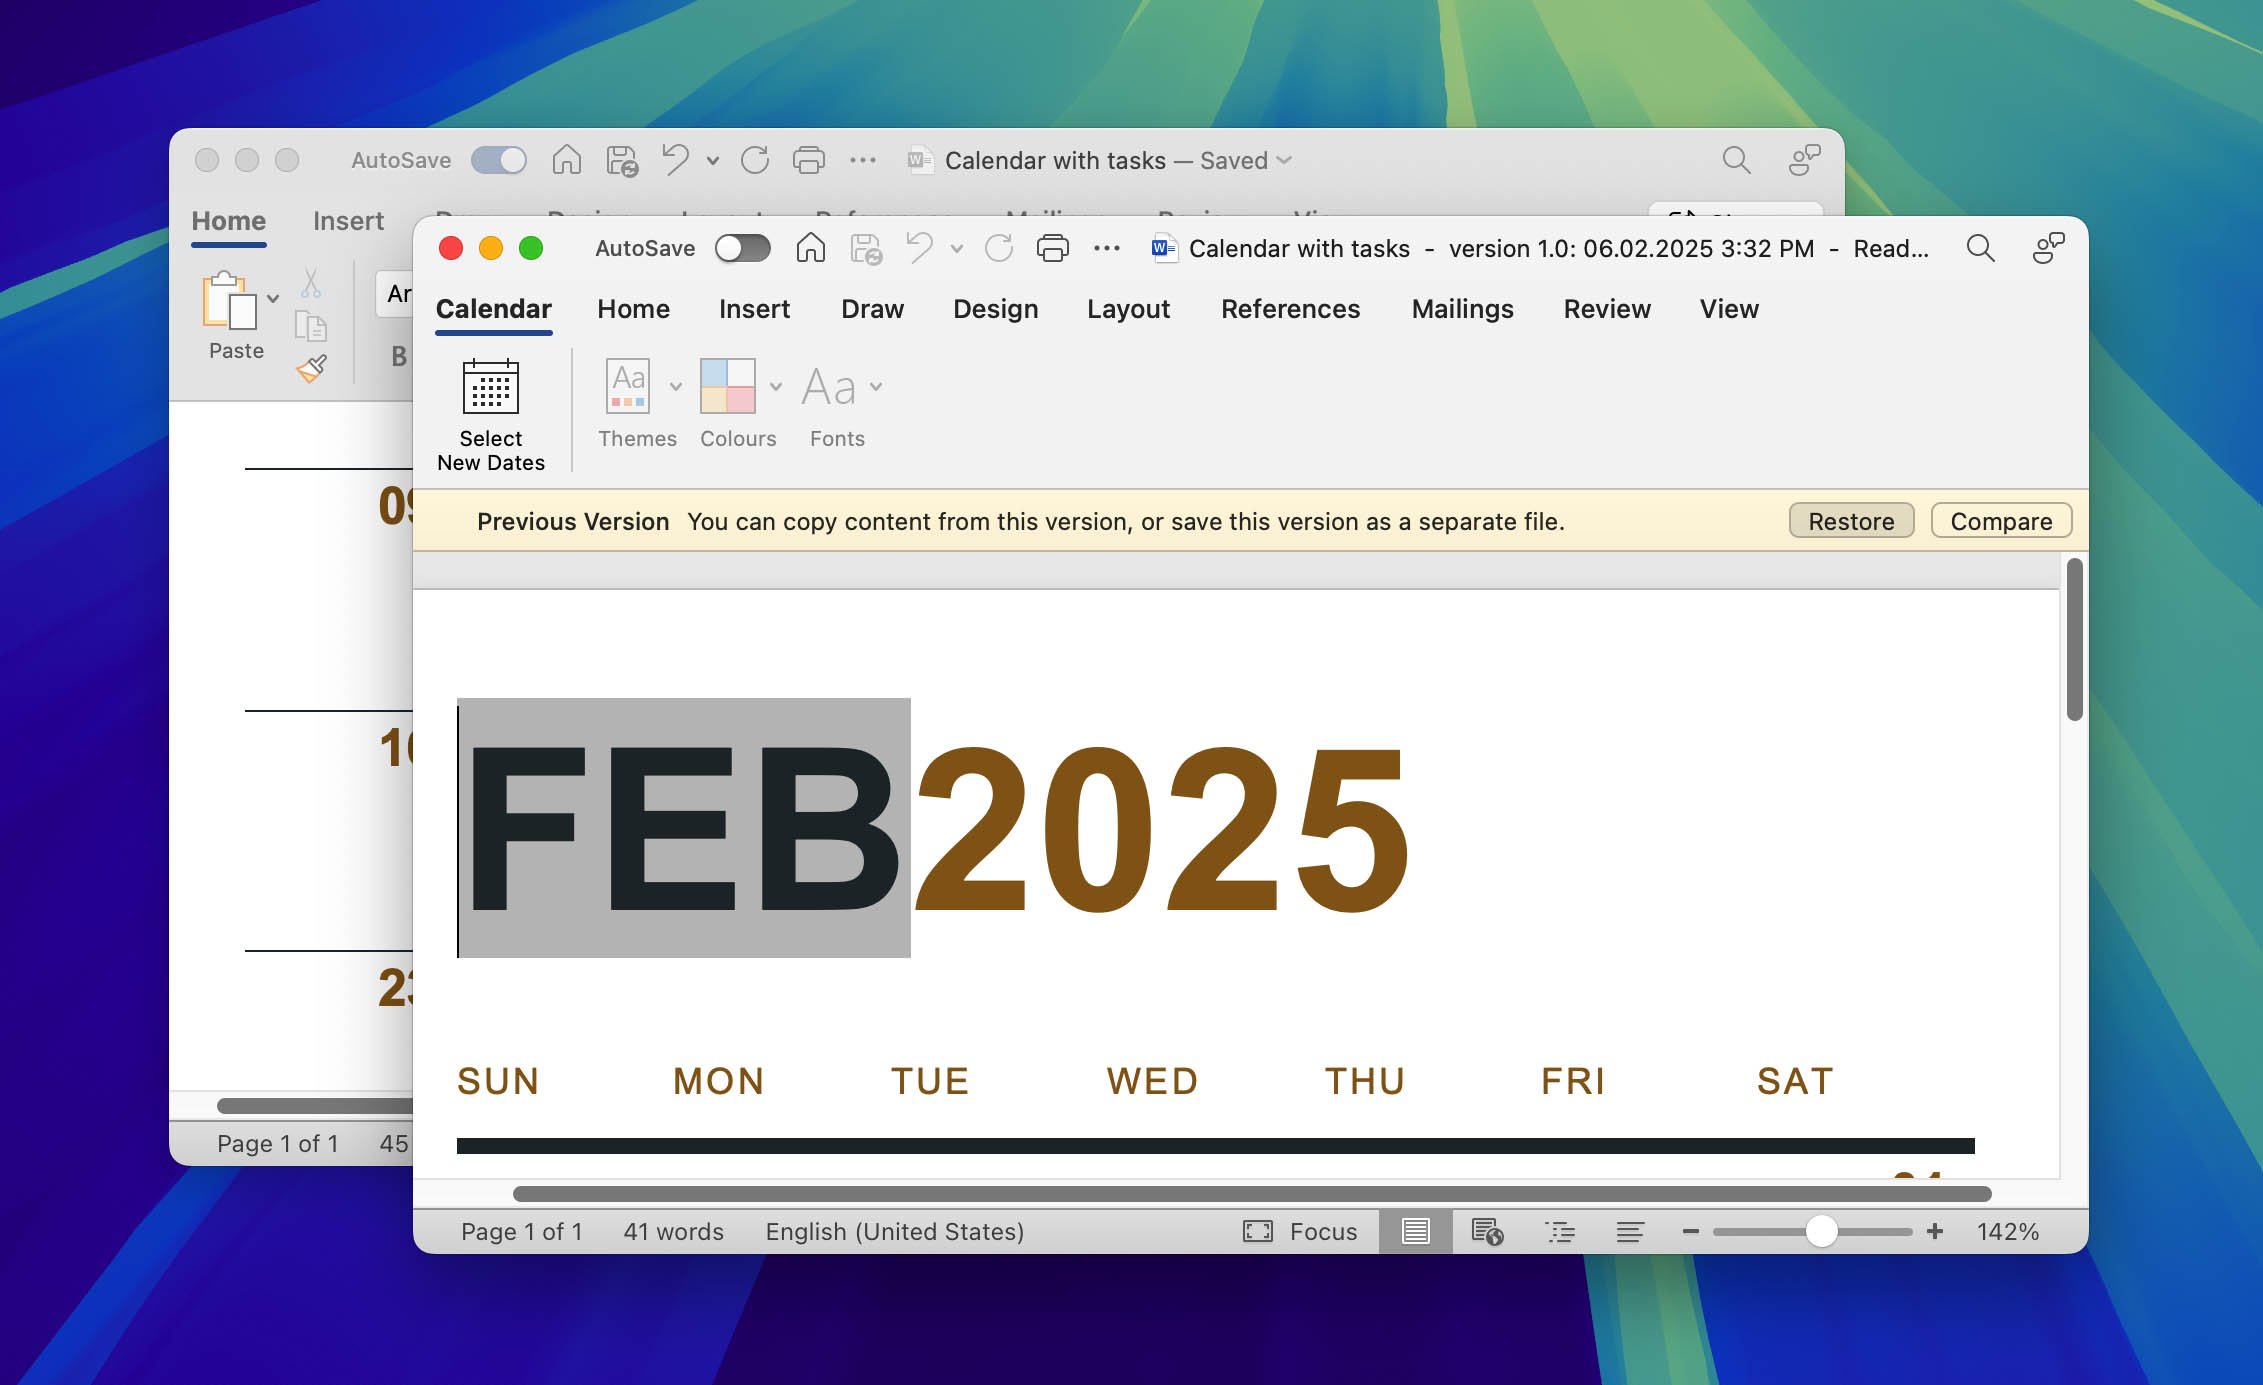
- Select a version and it will open in a new window. Now, save the file to a new name to recover an older version of the item.
Other applications may have the same type of functionality. It’s worth investigating as this is a simple method of recovering an overwritten file.
Conclusion
The most effective method of recovering overwritten files is with a backup. If you are not currently backing up your Mac regularly, perhaps now is the time to start. You can use the built-in Time Machine tool or choose another cloud-based or local backup solution. Whatever solution you select, make it a habit to back up your machine regularly to keep your valuable data safe. You never know when a backup might offer you the best chance of recovering from accidental data loss.
FAQ
The process for recovering overwritten files from an external drive is similar to recovering them from your Mac’s internal drive. First, stop using the drive immediately to prevent further data overwriting. Then you can either restore from a backup if you have one or use data recovery software to scan the drive.
If you don’t have any backup versions available through Time Machine, cloud storage services, or your application’s version history, data recovery software might still be able to find your original file. This works because when a file is overwritten, its data often remains physically present on the drive until that space is needed for new files.
When you have multiple files with the same name, the recovery method depends on where the original file was stored. If using Time Machine, you can browse through different backup dates to find the correct version. For cloud storage, look for version history or a “previous versions” feature. If using data recovery software, pay attention to the file’s creation and modification dates to identify the correct version.
While Terminal can’t directly recover overwritten files, it can help you access Time Machine backups and local snapshots using commands like tmutil. You can also use a command-line–based data recovery application like PhotoRec. However, for most users, it’s safer and more effective to use Time Machine’s graphical interface or data recovery software instead of Terminal commands and applications.
To recover overwritten files without a backup, you can use data recovery software:
- Download and install a reliable data recovery tool.
- Select the drive where the file was stored and start a scan.
- Select the overwritten files you would like to restore.
- Save the recovered files to a different drive to avoid overwriting.
When you replace a file on Mac, the original file isn’t moved to the Trash – instead, macOS updates its system references to point to the new file. The original file’s data typically remains on your drive until that space is needed for new files (unless the SSD TRIM command is triggered).
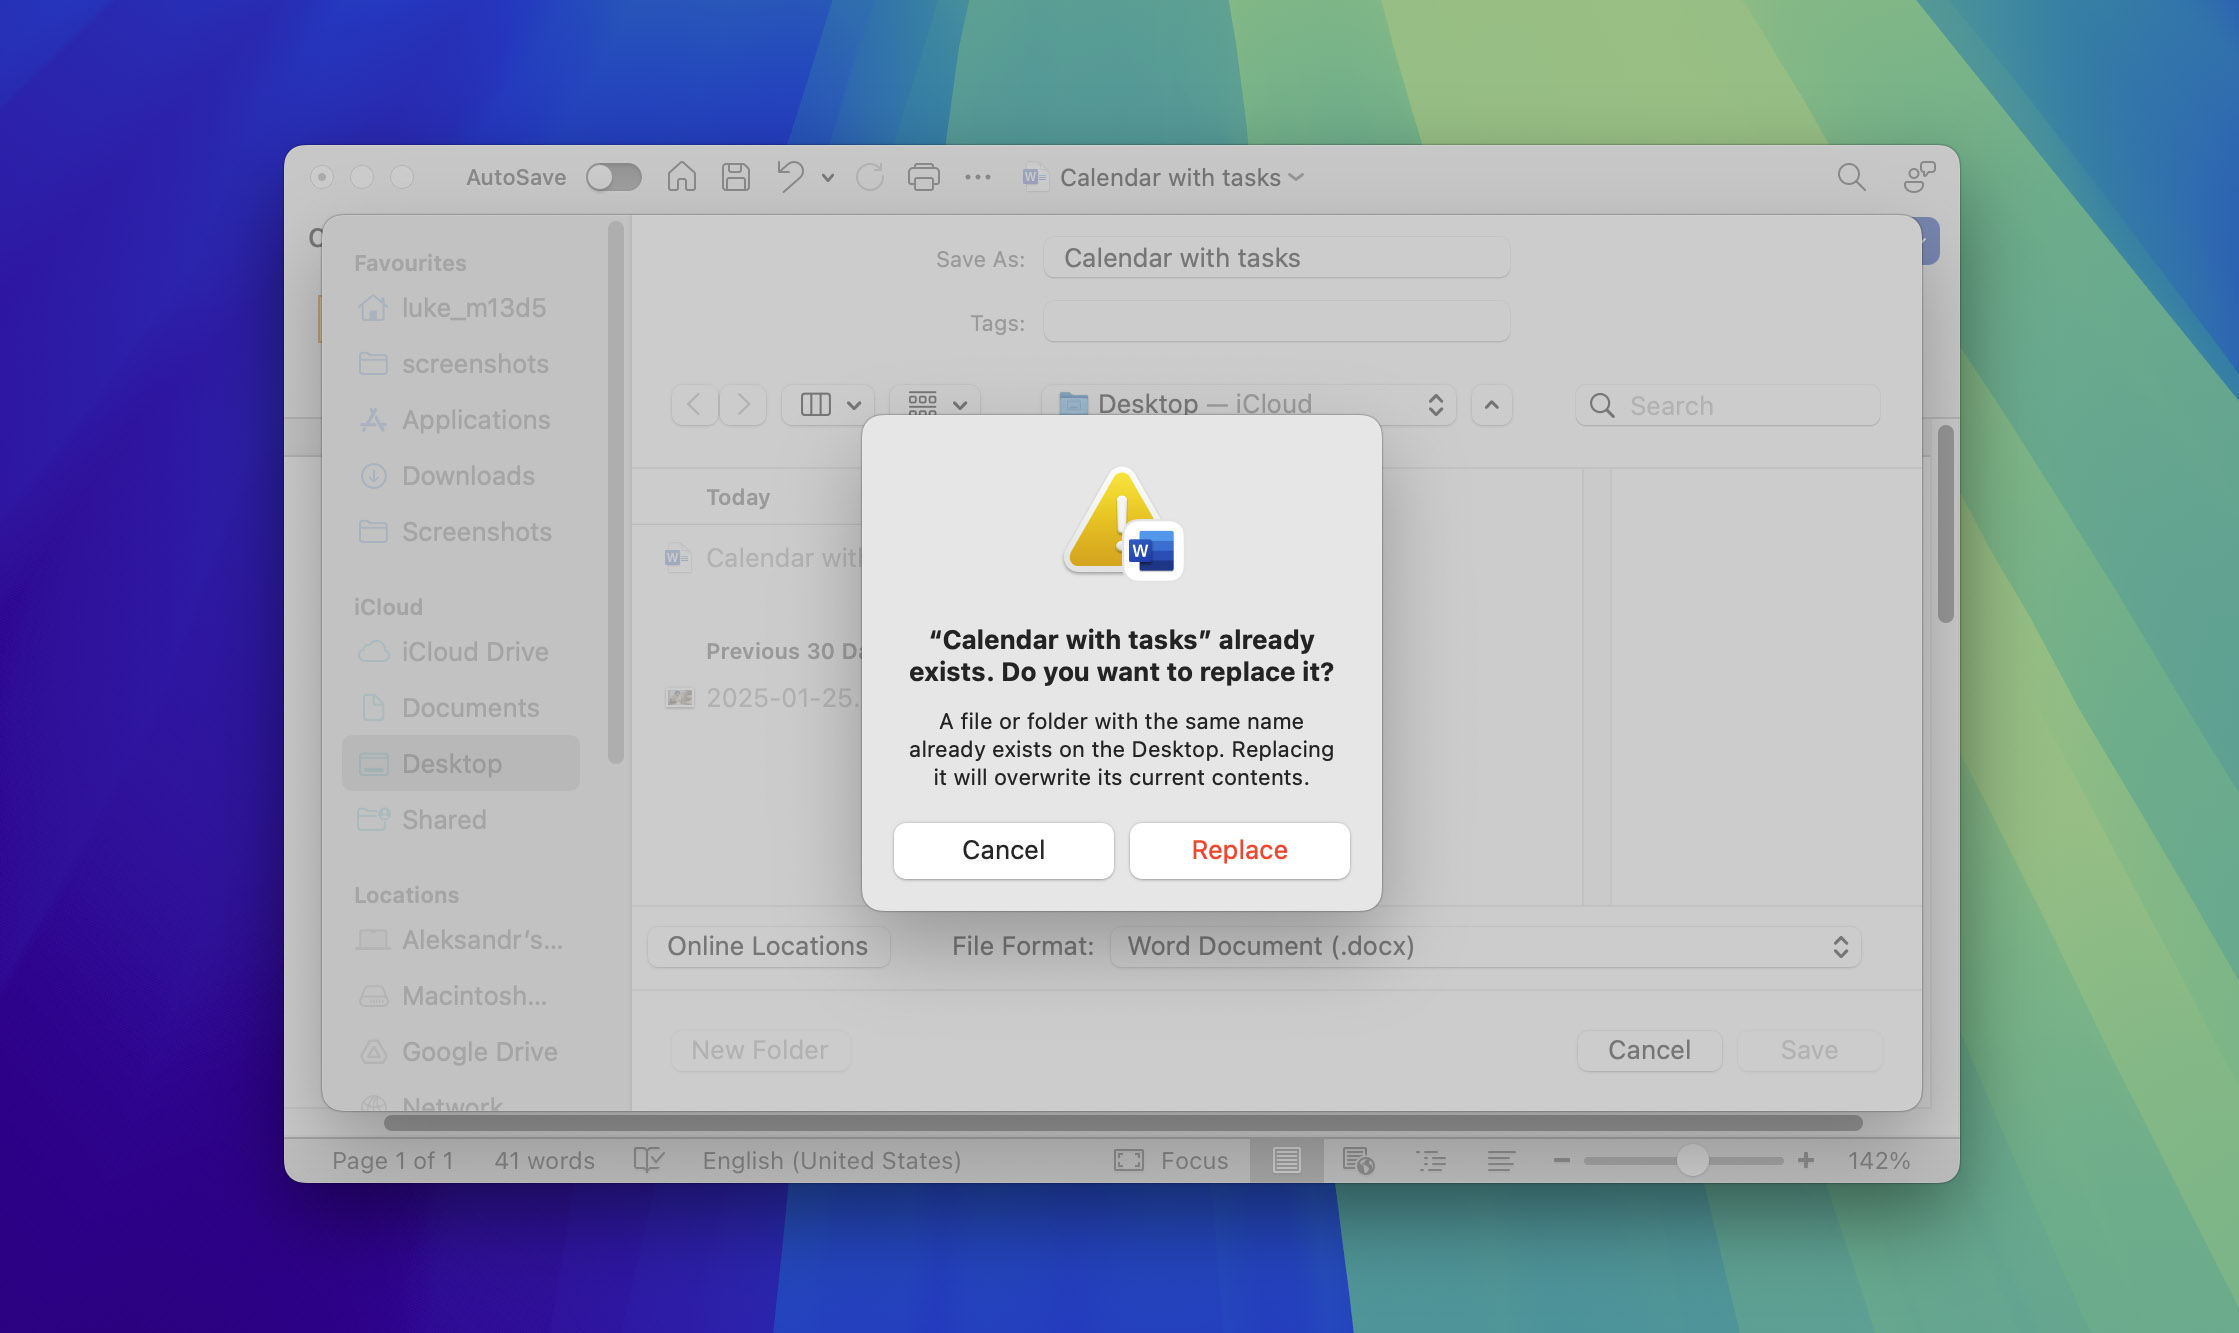
If your Word document is stored in OneDrive or SharePoint with a Microsoft 365 subscription, you can recover previous versions through the application’s built-in version history feature. Note that this functionality isn’t available for local files stored only on your Mac.
- Open the file that has a previous version you may want to recover.
- If you’re using Microsoft 365 for Mac, select the name of the document on the title bar of the application, then select the Browse Version History option.
- If you’re using Office 2016 or 2019 for Mac, select File > Browse Version History.
- Select a version and open it in a separate window. Save the file to a new name to recover the overwritten version of your document.
Open your Word document and choose File > Revert To > Browse All Versions. Using the timeline on the right, click through different versions to find the one you need. Preview each version so that you know it’s the correct one, then click Restore to revert your document to that version. This feature requires your document to be saved in OneDrive or SharePoint with a Microsoft 365 subscription. If you don’t have the necessary subscription, you can also try data recovery software.
To recover an overwritten folder on Mac, you’ll need to use a backup of your computer containing the folder you wish to restore. Follow these steps to recover an overwritten folder on Mac via Time Machine:
- Connect the drive containing the needed backup to your Mac.
- Click the Time Machine icon from the menu on the top of the screen. Choose Enter Time Machine.
- Use the arrows to navigate through the backup versions to locate the folder you want to recover.
- Click the Restore button.