This article is a work in progress and will be updated with new Android releases, Disk Drill updates, and based on your feedback.
The following instructions are only required if your Android device does not support USB Mass Storage Mode, and it cannot be enabled in Settings. This is true for most Android 5.0+ (Android M 6.x, Android N 7 among them) releases and may differ by manufacturers and even your mobile carrier.
If your Android smartphone or tablet does not provide direct storage/memory access, you should be ready to root it in order to be able to recover deleted Android data. Rooting an Android device might require some technical knowledge.
Read on to find instructions that will help you get your deleted Android data back.
Connecting your Android device via USB
Android data recovery will not run wirelessly, you need to have your device connected to your Mac with a USB cable. Depending on your device it can either be a Micro-USB cable, or USB Type-C, or something else. Latest devices will most probably run on USB Type-C. There’s no need to take your SD card out at this moment. However, if your data was deleted from the memory card rather than from the device’s internal memory, it might be a better idea to just run SD card data recovery with the help of a card reader.
Enabling USB debugging
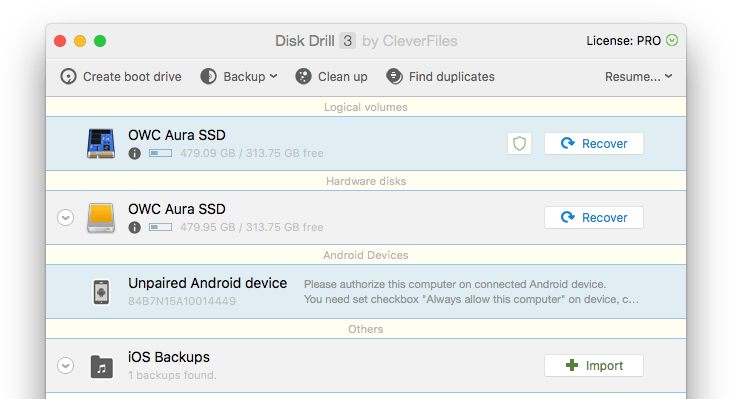
When Disk Drill detects an Android device, it may preliminary list it as an MTP device (Media Transfer Protocol). No worries, if you are getting a notification like that, you just need to go through the next several steps to get your device ready.
At this moment Disk Drill will instruct to enable USB debugging on your Android. To accomplish this, you need to turn Developer options on. To access Developer Settings on Android 4.2 or newer, go to Settings > About phone. Then tap Build number seven times rather quickly. You will be notified you are now in Developer Mode. Return to the previous screen, find Developer options at the bottom, go in. Enable the checkbox that reads “USB debugging”. At this moment you may need to reconnect your Android device to your Mac.
If for some reason this instruction did not work for your device, try googling for further hints specifically for your device model.

Authorizing your computer
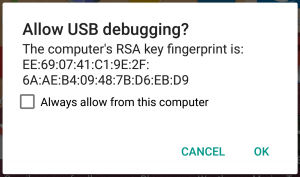
Once Disk Drill is sure you connected an Android device, it will send a request to access it. That’s when you will see it on the device’s screen. USB debugging needs to be allowed on per-device basis. It may look like this:

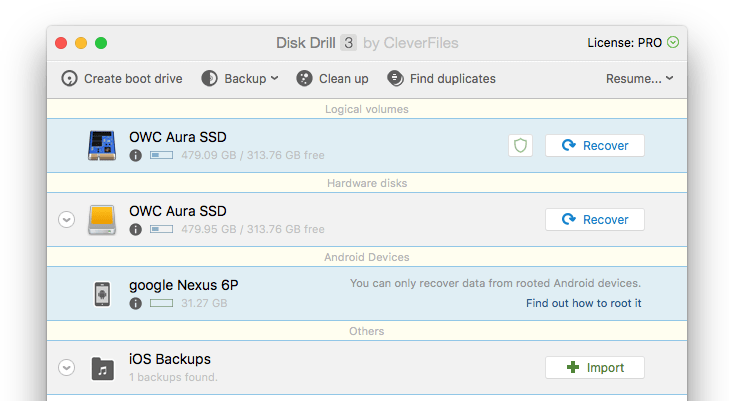
Make sure you approve this request from your Mac. This is the moment when Disk Drill will finally show your device with full info, additional memory cards, etc.
Rooting your Android device
Now that we have the device ready for actual data recovery, to gain direct memory access it needs to be rooted, meaning you will need to obtain root access (highest level) to your Android operating system. The decision to root your smartphone or tablet is not a basic step, unfortunately, and may void your warranty. Make sure you assess all the risks and are ready to take all the responsibility for this step.
There are usually multiple ways to root an Android available on the net. We recommend googling for the following keywords to find the best and most reliable instruction:
root Android YourDeviceModel
The most professional and trustworthy info can be obtained from XDA developers community; any major tech website like Engadget, The Verge, AndroidPolice, etc. are also fine as the source for working info. Some phones can be rooted with the apps that are available at the Play Store.
Once you gained root access on your device, you are ready to click the long-awaited “Recover” button to proceed with Android recovery.

Remember, we cannot be responsible for the outcome of rooting your device. If you decide to root it, you are acting completely at your own discretion. If you have any questions or need help with Android data recovery in Disk Drill, feel free to contact us.