The following set of instructions explain how you can enable data protection in Disk Drill to prevent any accidental data loss in the future.
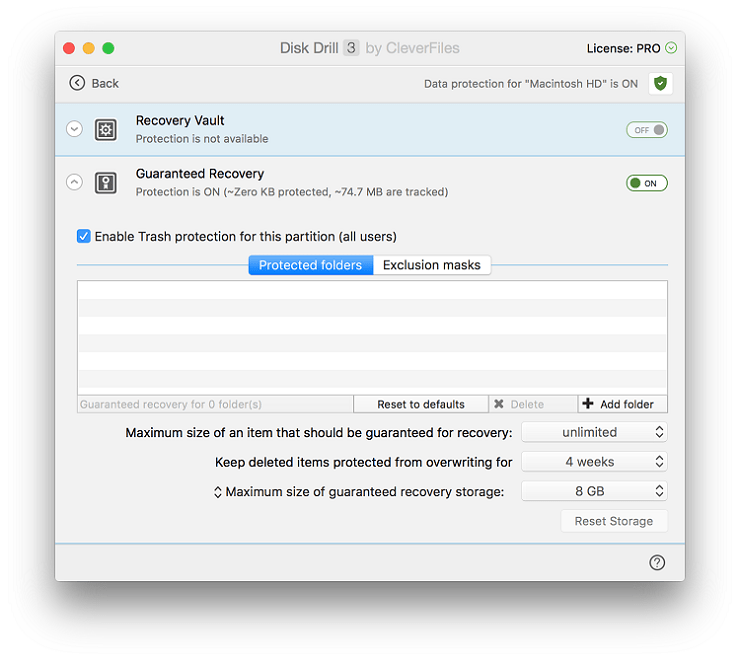
Disk Drill supports two different methods of data protection, which are Recovery Vault and Guaranteed Recovery. Recovery Vault and Guaranteed Recovery are two different ways to avoid future data loss.

Recovery Vault saves the metadata (filename, file location, etc.) of deleted files, making it much easier to identify and recover these files using Disk Drill. Guaranteed Recovery actually saves a complete copy of files sent to Trash (or any other specified folder) and therefore guarantees that they will be recovered in case of disk failure.
Guaranteed Recovery is only available in Mac Data Recovery for now.
Enabling either or both of these options will significantly improve your chances of recovering data. However, note that since Guaranteed Recovery ensures 100% recovery of data it is much more resource-intensive method than Recovery Vault.
Note that Recovery Vault can only be applied to FAT and HFS/HFS+ partitions with the write/read operations enabled. Neither read-only partitions nor disk images can be protected with this method.
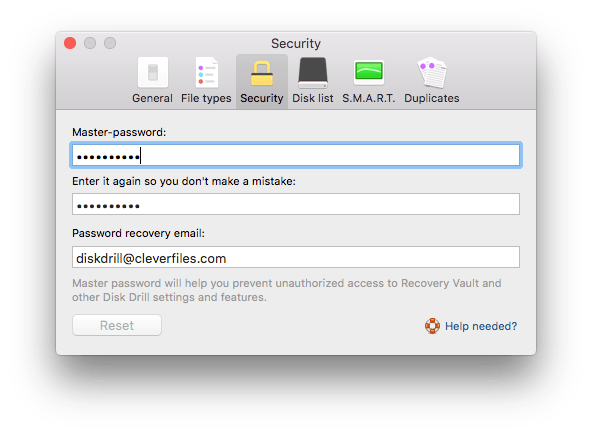
For security reasons, you can also set up a password for preventing unauthorized access to Recovery Vault, the email address for password recovery, and other Disk Drill settings and features by choosing Disk Drill > Preferences > Security tab:

To enable data protection, perform the following:
- (Optional) If you wish to protect an external drive, connect it to your Mac.
- Launch Disk Drill.
- On the main screen, you will see a list of the drives and devices available to be scanned. If the device you wish to scan is not shown, look on the bottom-left of the screen and click show them below to reveal any hidden items.
- Click the gear icon next to the drive for which you wish to enable data protection and choose Configure data protection.
- On the upper-right of the next screen, click the switch for Recovery Vault to turn it On and/or click the switch for Guaranteed Recovery to turn it On. Note: By default, Recovery Vault protects the files inside the /Users folder on your internal hard drive. Guaranteed Recovery monitors the Trash folder.
- Click Back in the main menu to return to the main Disk Drill screen.