What’s the correct way to uninstall all the components of Disk Drill?
– one of the common questions from our users.
Usually, a Mac user will just move an app to the Trash, and consider the job done. But Disk Drill is not your usual app. Disk Drill installs several low-core modules for effective data protection and recovery. So for this type of system-level software, dragging the app to the Trash is not enough.
The correct way to remove Disk Drill for macOS
The following guide describes the only proper way to remove Disk Drill from your computer. Not only is it the correct way, but it is also the easiest one to execute. Please be advised that we strongly suggest using this method to remove Disk Drill from your Mac.
Here is a quick and easy video tutorial that will guide you through the process of deleting Disk Drill from your Mac.
How to Remove Disk Drill From Your Mac
- Launch Disk Drill. Open Disk Drill from your Dock or by using Launchpad (usually accessed via the F4 key) and selecting Disk Drill.
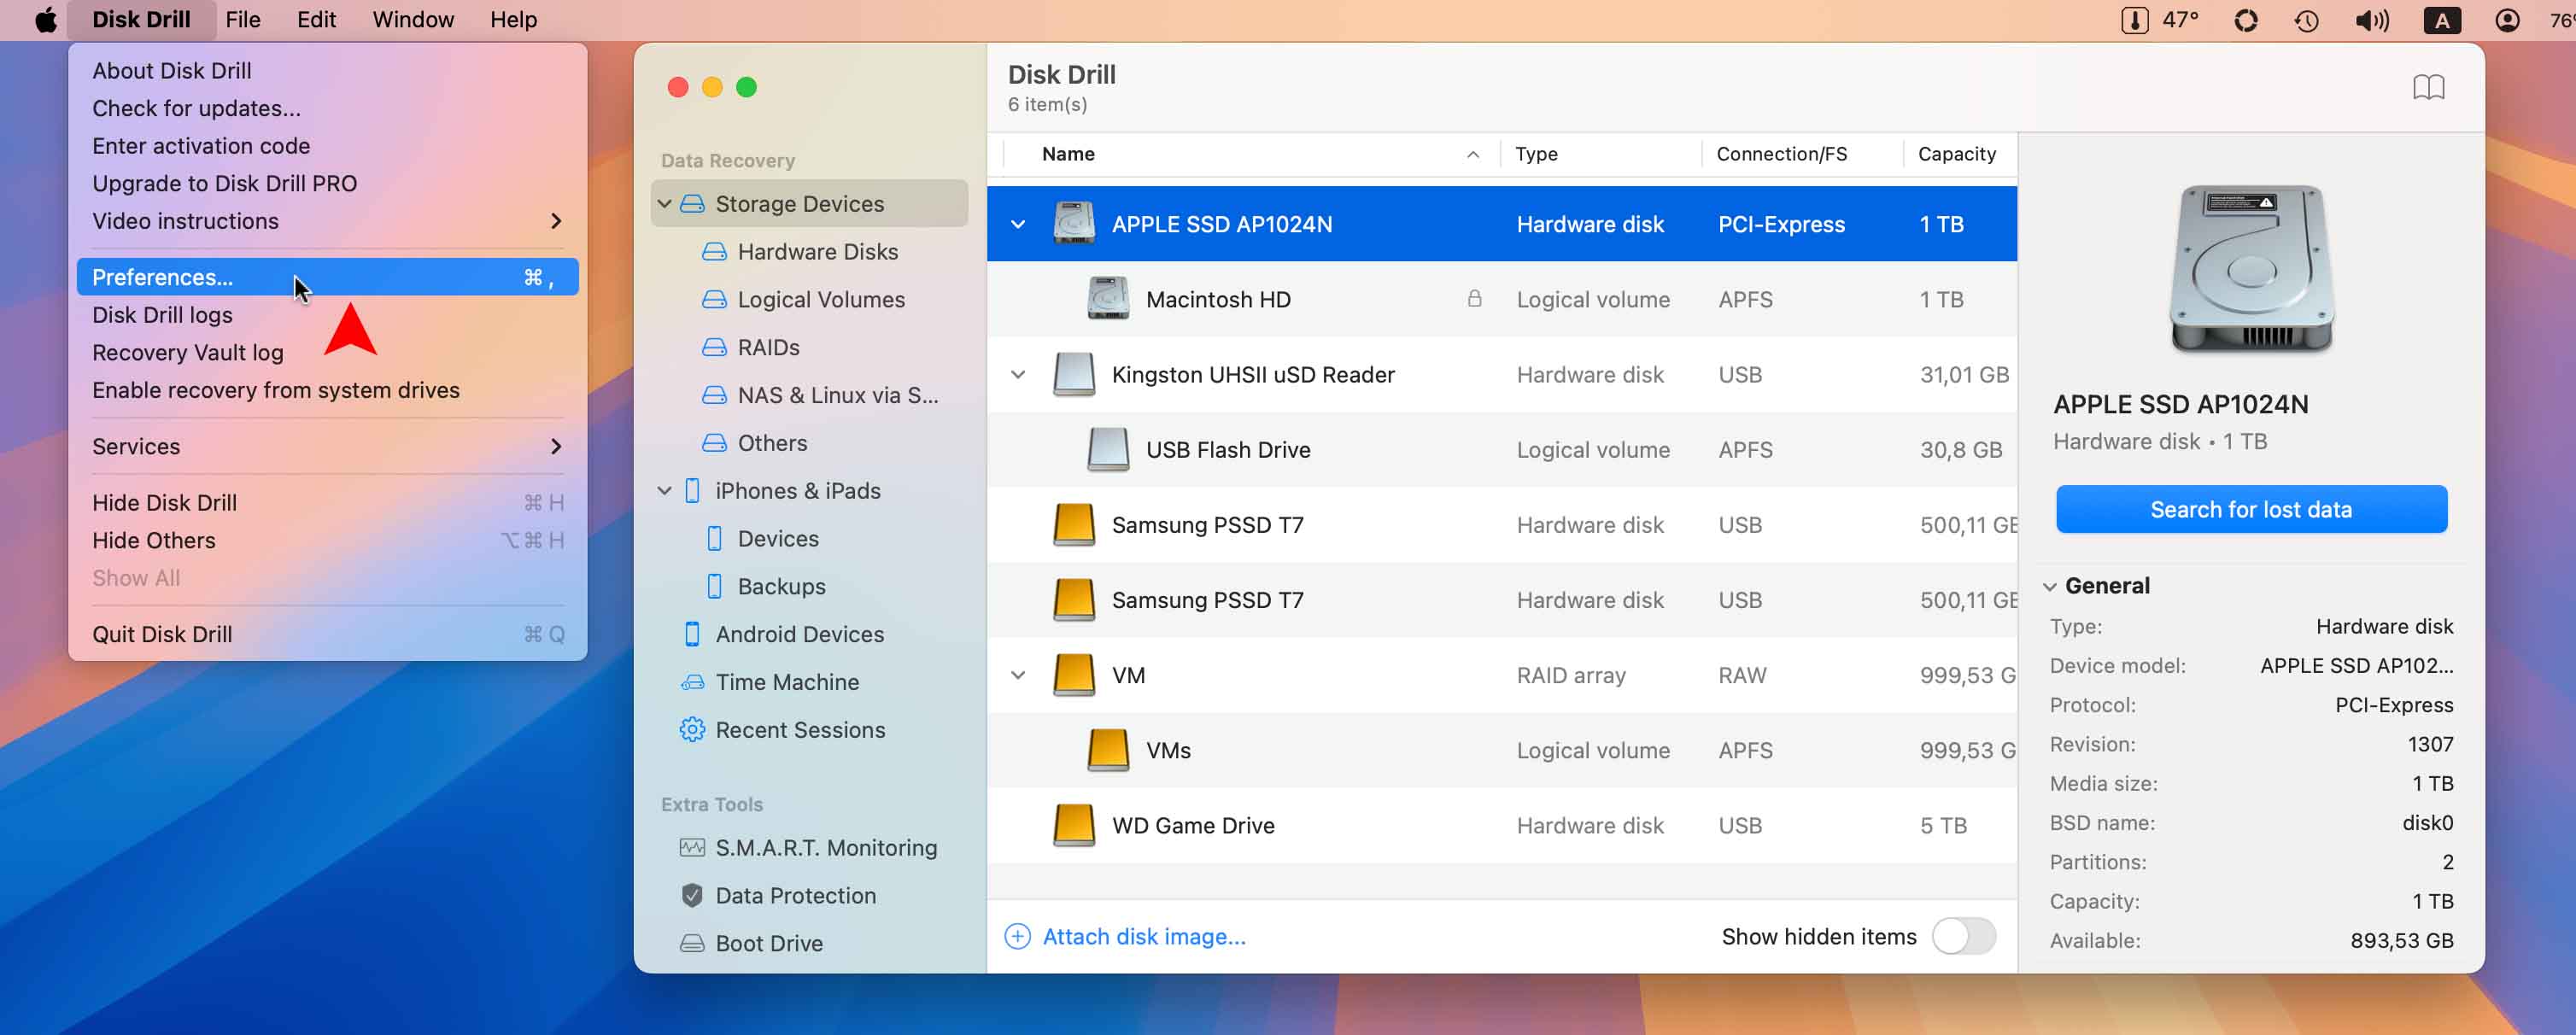
- Open Preferences. In the top menu bar, click Disk Drill → Preferences → General.

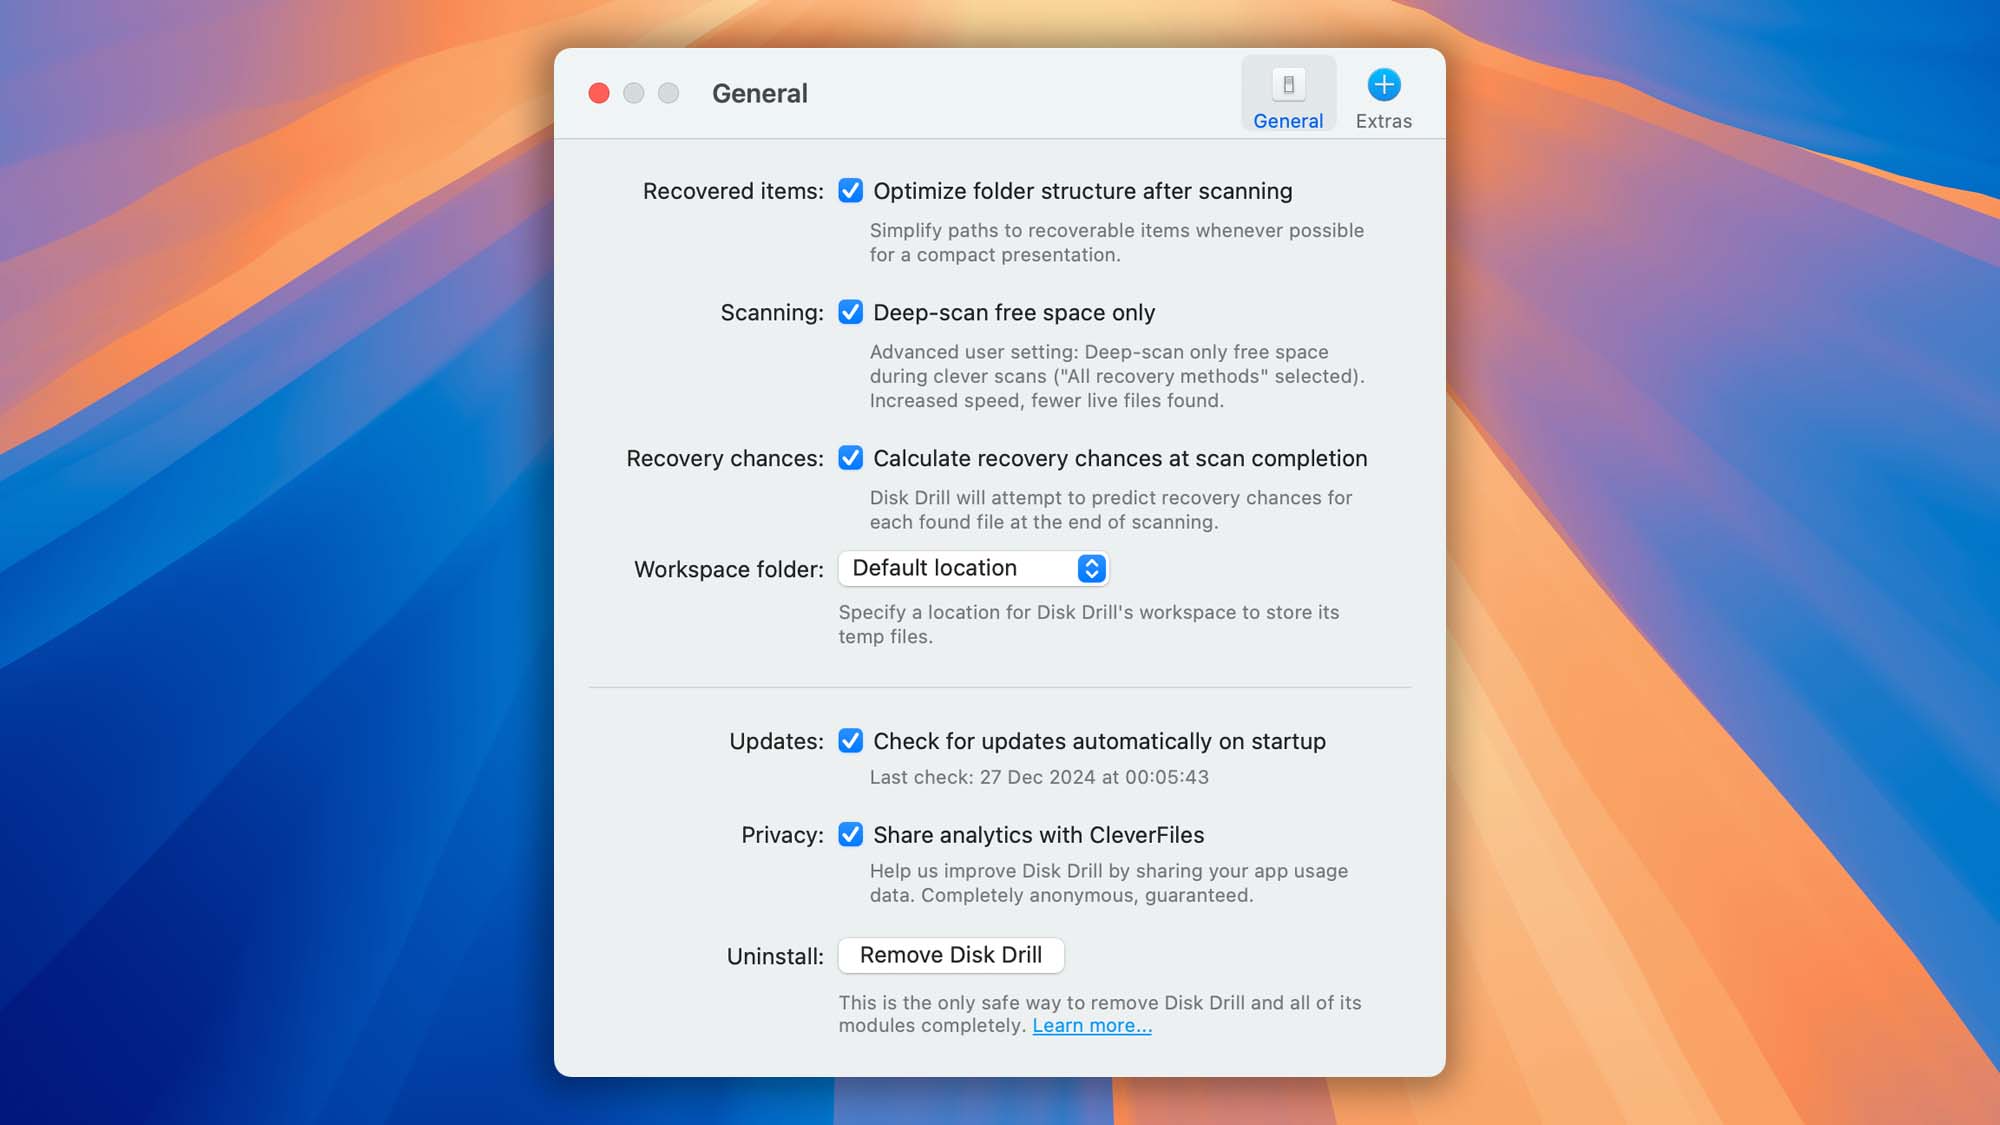
- Remove Disk Drill. Click the Remove Disk Drill button.

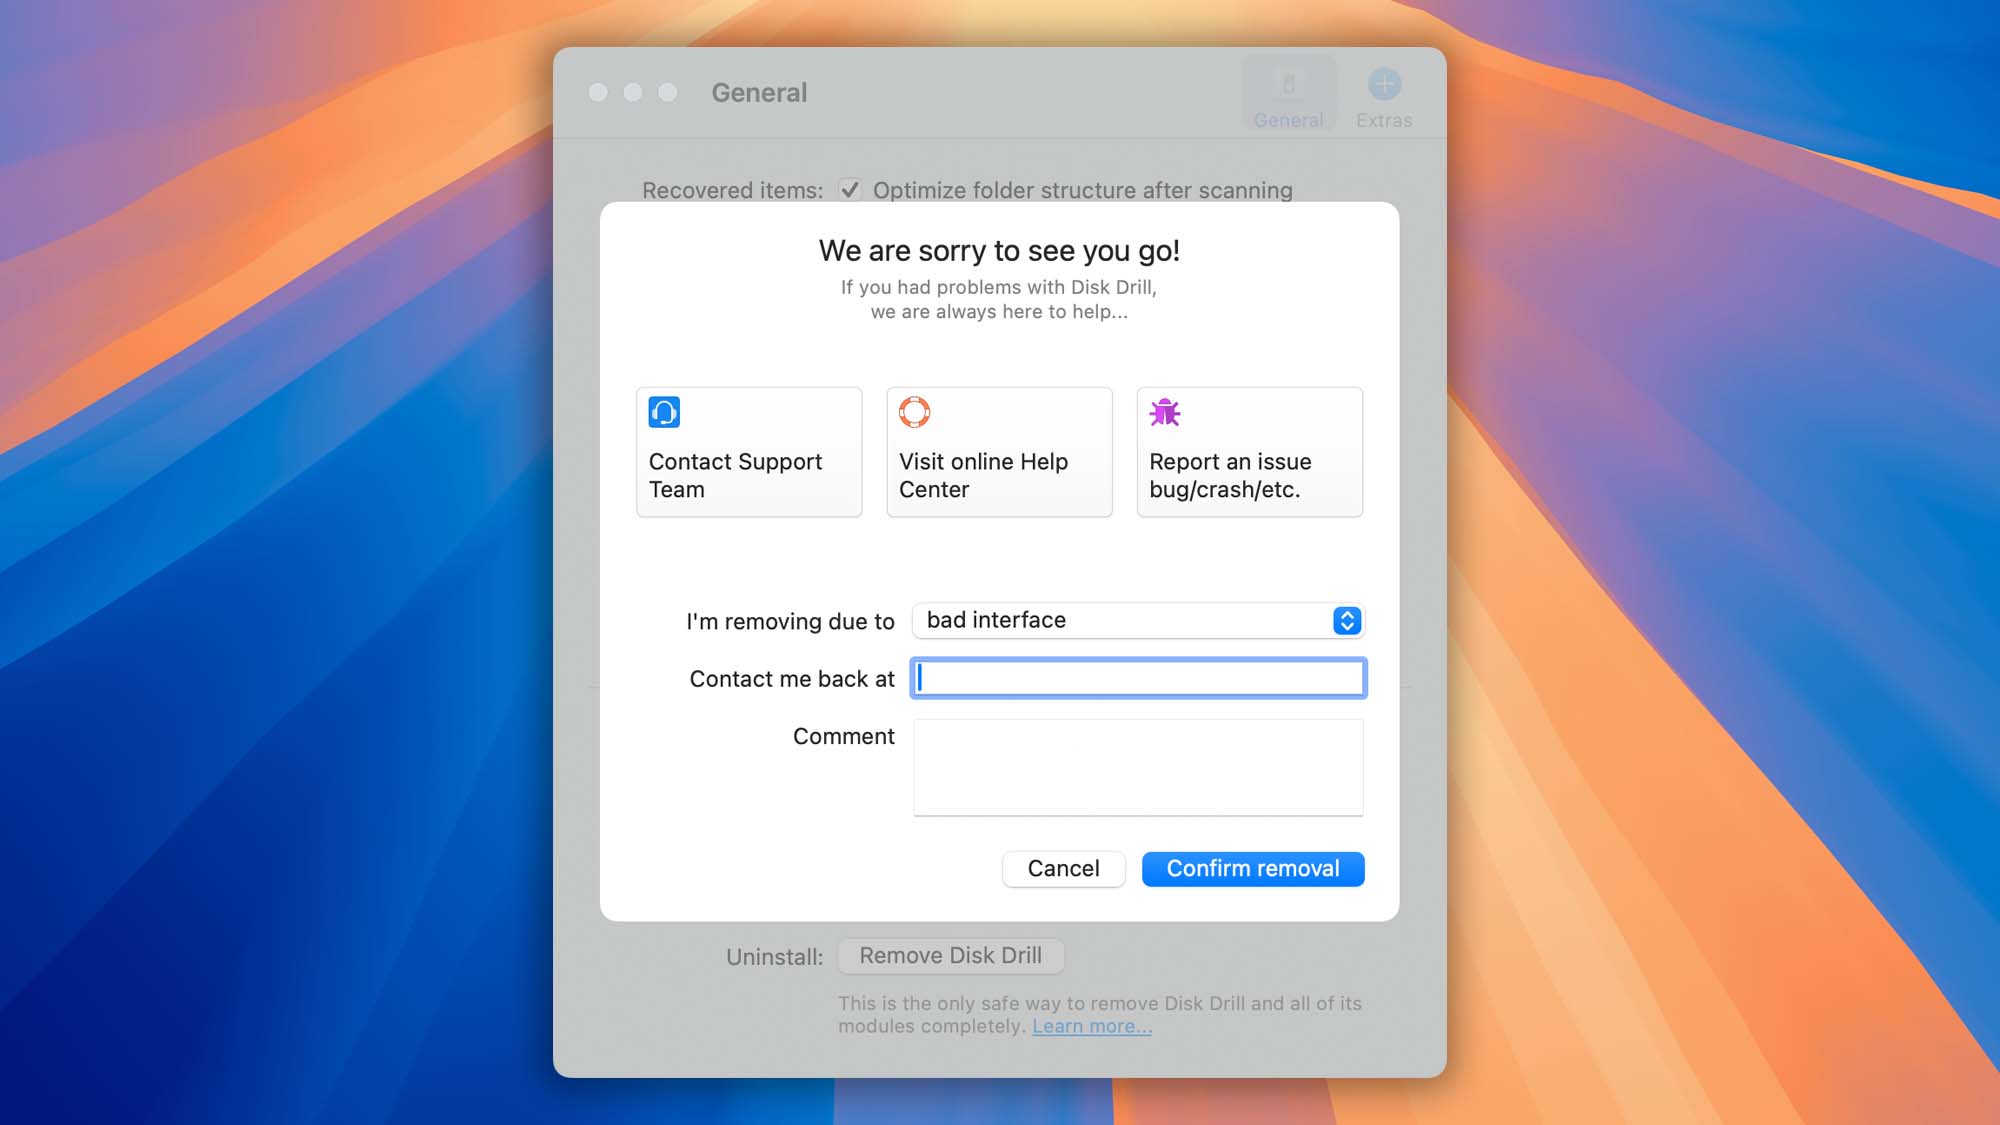
- Leave us a comment. If you’d like, you can provide feedback on why you’re uninstalling before clicking Confirm removal.

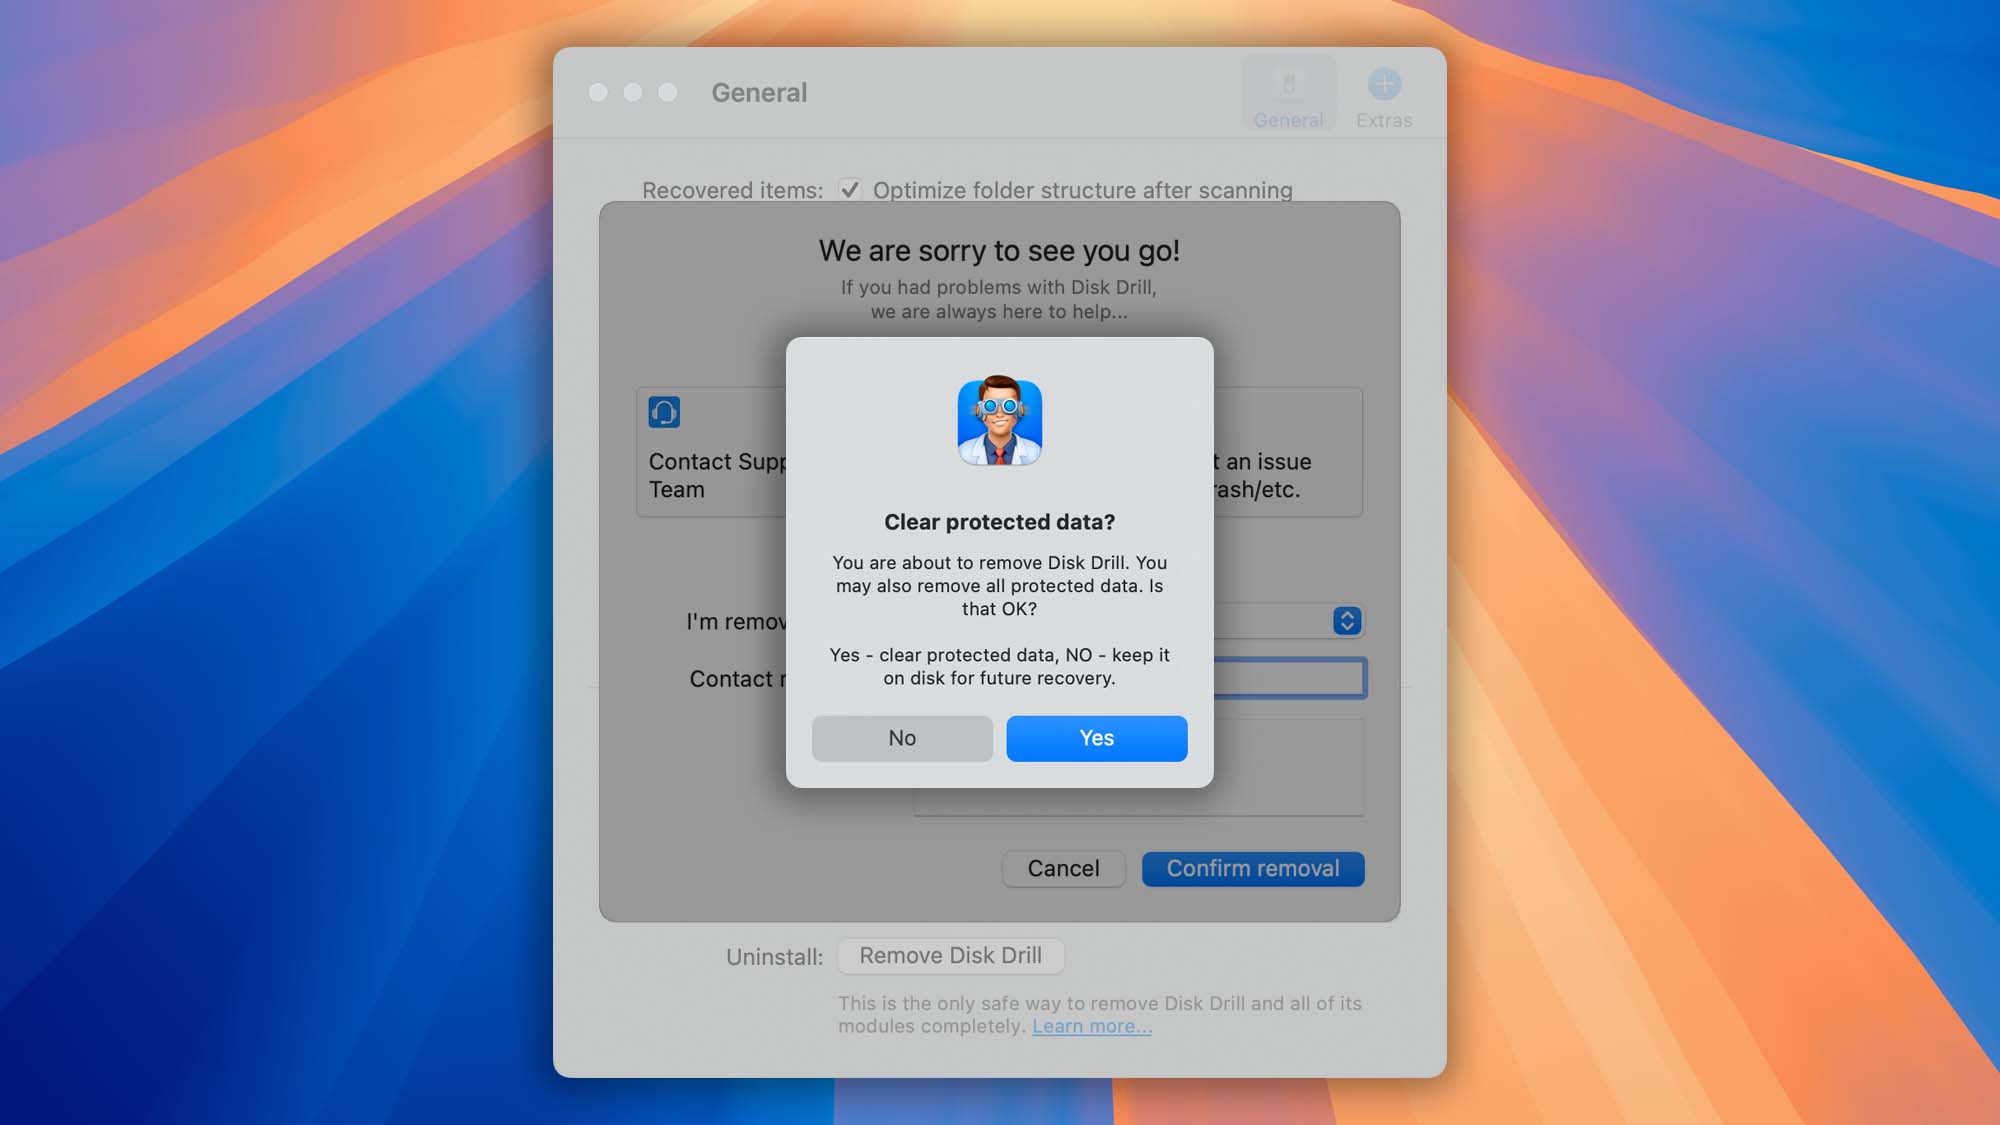
- Clear Data Protection Folder (Optional). If you previously enabled Data Protection, you’ll be prompted to clear the folder containing protected data. Click Yes if you want to completely and irrevocably remove all Disk Drill data from your drive.

That’s all there is to it. But we are already missing you, and hope you will give Disk Drill another try sometime.
Alternative Method for Uninstalling Disk Drill on macOS
If you can’t access Preferences for any reason, there is another way to manually remove Disk Drill’s components. However, we still recommend using the standard uninstallation process described earlier whenever possible.
Please use the following steps as an alternative method to delete Disk Drill:
- Download Disk Drill’s installer again
- Once downloaded, double-click on the DiskDrill.dmg file.
- Do NOT drag the Disk Drill app icon to your Applications folder right now.
- Launch Terminal (Applications/Utilities/Terminal.app)
- Execute the following command in the Terminal:
sudo /Volumes/DiskDrill/Disk\ Drill.app/Contents/Resources/uninstall - Done. Now Disk Drill is removed from your system.
Please note that uninstalling the Disk Drill app does not release an activation slot in your license. To reset your activations, please visit our Activation and Licensing Center. Feel free to reach out to us for help at any time.