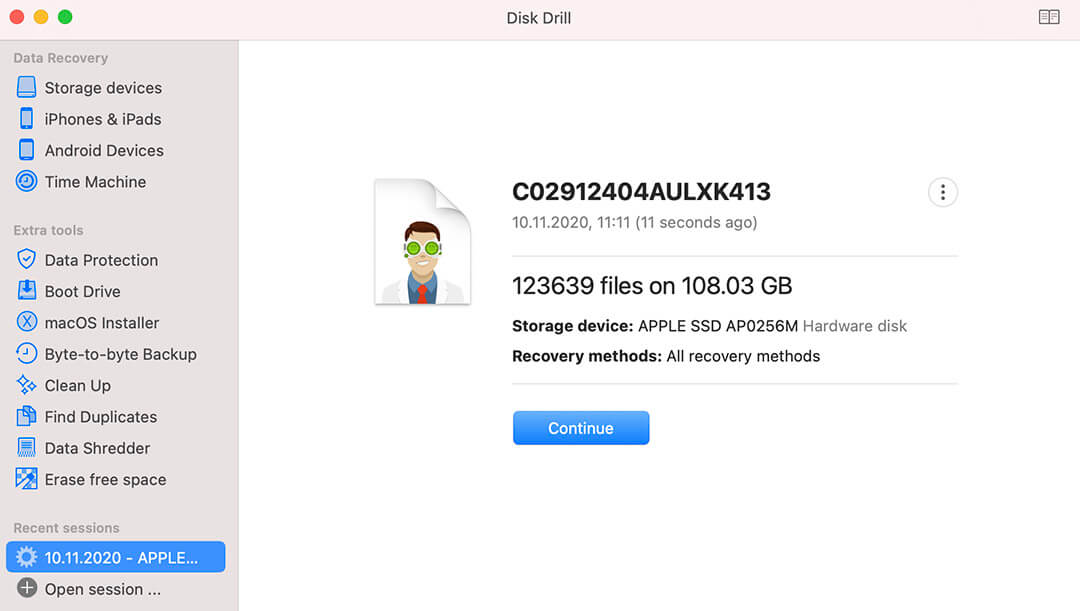
Disk Drill data recovery tool has a great feature that allows you to pause the scan at any moment and resume it later when it is convenient for you – recovery sessions.
Here’s a quick video that explains recovery sessions in Disk Drill for Mac:
Every time you run a scan for your lost data, Disk Drill creates a file with .ddscan extension in the specified workspace location, and uses it to store the recovery session progress. This file will allow you to load the scan and perform data recovery at any convenient time without having to re-scan the drive or device again.
These recovery sessions can be loaded into Disk Drill if you want to continue file retrieval from where you stopped. You can always review the results of your saved scan, but you will still need the original storage device to resume the actual recovery.

This saves you time by eliminating the need to re-scan your disk all over again, if for any reason you had to stop the initial process. It’s not recommended to resume saved sessions in case the data on the storage device could’ve been altered after the initial scan. In such cases, please consider starting a new scan. Also, the general recommendation is always to recover your data as soon as you can, try avoiding any unnecessary delays; we hope you won’t need to use the recovery sessions feature explained in this article.
Creating a recovery session file
Disk Drill saves recovery sessions in files that can be imported back in order to continue past scans from where you stopped. As mentioned above, the saved scans will have .ddscan extension when viewed in Finder.
Here’s how a recovery session can be saved for later:
- Open Disk Drill and start a new scan.
- Pause the scan using the “Pause” button at the top of the Disk Drill window.
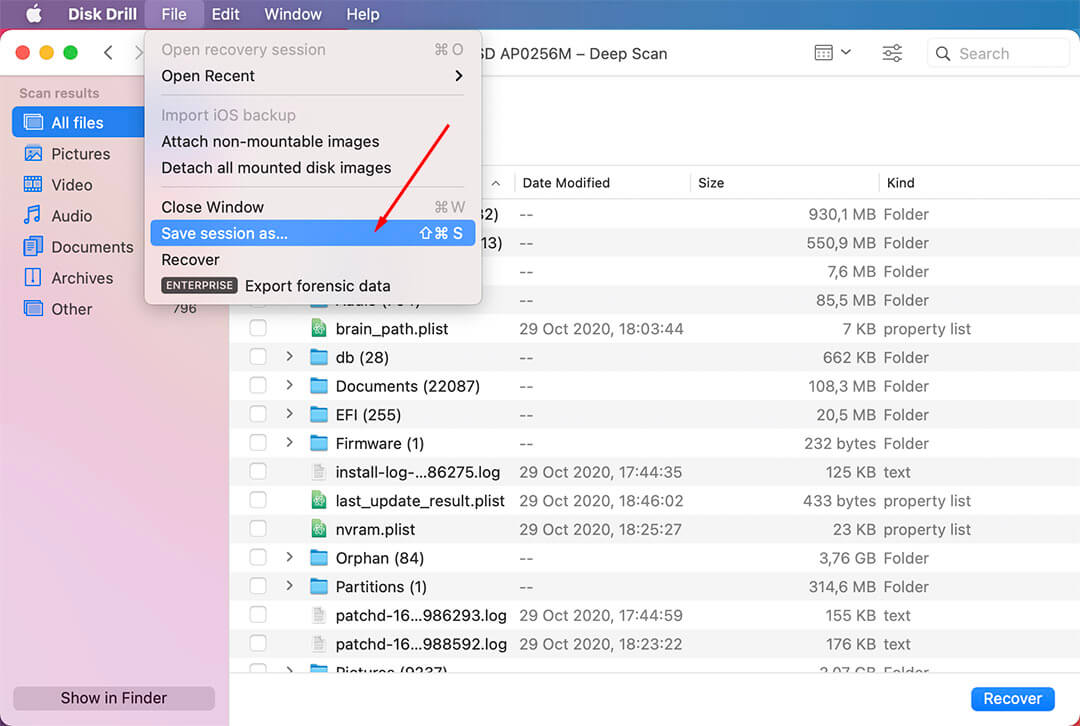
- Go to the “File” menu and select “Save session as…“. Alternatively, you can use the Shift+Command+S key combination.

- Select the desired destination. That is where your .ddscan file will be stored.
- Done! You have saved the session. It can now be loaded into Disk Drill and resumed at any time.
Resuming the latest scan
There’s no need to manually save your scan session, unless you have to. Disk Drill will automatically create a resumable one either after the scan, or during a scan, depending on its duration. Also, Disk Drill has a way to easily Resume a previous scan.
Here’s how:
- Open Disk Drill.
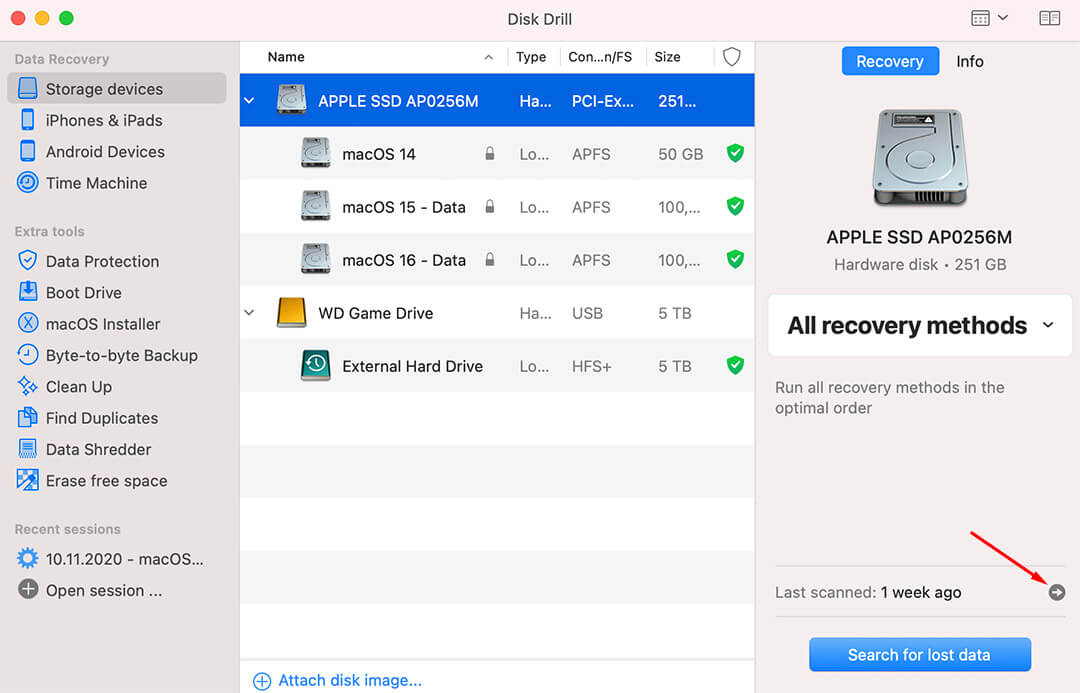
- Select the device you were scanning before.
- In the bottom-right corner, above the “Search for lost data” button, locate the text saying "Last scanned: x hours/minutes ago" and click it. It will load the last scan that was performed on the device.

- Now you can recover the data that was found by the scan, or press the “Play” button on the top of the page to resume it.

💡 There is the Recent Sessions section on the left side of the Disk Drill home screen. You can quickly resume any of the last several scans.
Loading saved scans into Disk Drill
If you have a saved session file, it is easy to load it into Disk Drill and continue the scan or recover the files based on the scan data. Here’s how:
- Open Disk Drill.
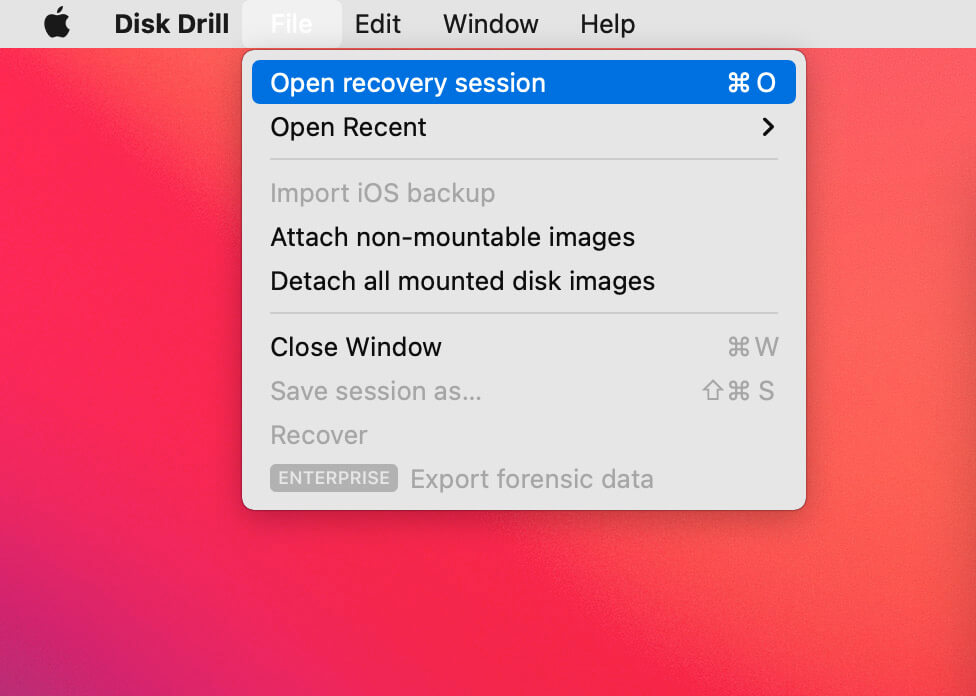
- Go to “File” menu and select “Open recovery session”. Or use the Command+O keyboard shortcut to do that.

- Select the .ddscan file in the pop-up file menu.
- Press the “Load” button after selecting the .ddscan file.
- Give Disk Drill a minute to load the data from the file.
- Press “Continue” to resume scanning.